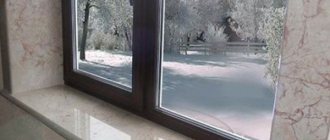
- Exterior window decoration: photo examples and step-by-step instructions
- External window decoration: functions and the need for finishing
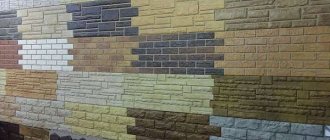
- How to finish external slopes on windows: materials and technologies
- Finishing windows outside the house using plaster
- External window trim with plastic
- External window trim with siding
- External window trim with plasterboard
- Finishing slopes with sandwich panels outside the window
- Finishing slopes outside windows with foam plastic
- External window trim with metal slopes
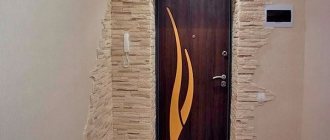
- Finishing window slopes with natural stone
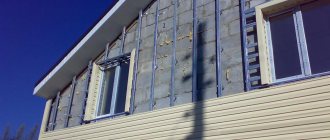
- How to insulate window slopes from the outside
- Finishing windows from the outside with plaster: step-by-step instructions for completing the work
- Finishing slopes with plaster: selection and preparation of plaster mixture
- Finishing slopes from the outside with polystyrene foam: step-by-step instructions for completing the work
- Window finishing with plasterboard or sandwich panels
- Basic rules and possible problems associated with improper finishing of external slopes
- Video: how to make external slopes from polystyrene foam
Exterior window decoration: photo examples and step-by-step instructions
To maintain a comfortable microclimate in the house, modern windows are needed. And the first thing you need to do after installing them is to properly finish the slopes. In this article we will look at options for finishing windows outside the house. What materials and technologies to use. In the text you will find step-by-step instructions and master classes on how to do it yourself, what problems may arise if the rules are not followed.
Exterior window decoration: photo examples and step-by-step instructions.
Finishing the windows from the outside is the last and necessary moment in the window installation procedure. At the final stage, it is necessary to hide the rough surface of the walls, fastenings, and polyurethane foam. You shouldn’t put off this important moment “for later.” Facing the slopes from the outside gives the window and entrance group visual appeal and completeness. It masks unsightly foam stripes and cracks formed during installation, and more importantly, it helps protect the structure on the street side from destruction. Preserves its original properties and ensures durability.
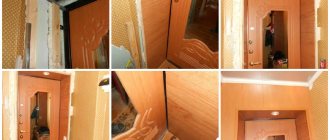
Do-it-yourself finishing of plastic windows outside in a wooden house, step-by-step instructions video photo
One of the important elements in decorating your home, be it a summer house or a cottage, is the exterior decoration of plastic windows. This article discusses the methods and features of finishing windows in wooden houses with your own hands.
Finishing plastic windows in a wooden house
Exterior methods and materials
Finishing windows in a wooden house with your own hands is a difficult task. But if you do everything right, the outside of your home will look just great. You can make the appearance of a plastic window perfect and noble with your own hands using:
- method of plastering slopes;
- sandwich panels;
- sheet plastic;
- a special type of plastic called “cellular”;
- natural or artificial type of ordinary stone;
- strip for plastic windows.
Plastic window in a wooden house
Advantages and disadvantages
When using plaster, you should remember that this method can be considered universal, but other things being equal, the procedure will have to be repeated about two or three times a year. In addition, plastic has insufficient adhesion properties to plaster.
External window decoration: functions and the need for finishing
In addition to the purely decorative component, external slopes perform the following tasks:
- provide additional insulation of walls and windows;
- protect the polyurethane foam layer from exposure to sunlight, moisture penetration and temperature changes. Moisture-saturated foam collapses when frozen and loses its heat-insulating and noise-insulating properties;
- prevent the appearance of condensation in frames and the formation of fungus;
- serve as additional protection from external noise.
Helpful advice! Do not delay performing this work for a long time. During this time, irreversible changes may occur in the structure, which will entail the need for repairs and even replacement of windows.
How to finish external slopes on windows: materials and technologies
A variety of materials are used to finish external slopes on windows. The most popular cladding:
- plaster;
- plastic;
- expanded polystyrene;
- metal;
- vinyl siding;
- drywall;
- natural stone;
- sandwich panels.
Each of these options has certain advantages and disadvantages. Therefore, before making a final decision, you need to get acquainted with their characteristics.
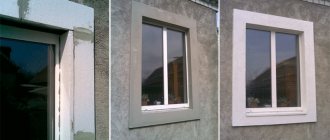
Finishing windows outside the house using plaster
Plastering slopes from the outside is the most economical way to finish slopes. For exterior work, special compositions for facades with thermal insulation additives are recommended.
Note! The solution must completely cover the mounting foam and reach the frame. In this case, the thickness of the layer cannot exceed 2 cm. Therefore, this material is suitable for relatively flat slopes. The resulting coating is carefully sanded and painted.
The material is applied to the prepared surface in several layers, each of which must be allowed to dry thoroughly.
The advantages of this type of finishing include:
- fire resistance and strength of the material;
- low cost of plaster mixtures and necessary tools;
- the ability to perform work independently.
Disadvantages of finishing slopes with plaster:
- the process takes a long time - 3-4 days;
- the coating gets dirty quickly and cracks may form;
- this type of finish has low thermal insulation properties;
- performance of work is associated with the formation of large amounts of dust and dirt.
Mounting options
The most common two methods of installing wooden slopes in a window opening are on polyurethane foam and on a frame made of timber. Let's take a closer look at both options.
On polyurethane foam
The method is relevant if work is carried out in a relatively flat opening, the side edges and top of which are plastered with cement mortar or evenly finished with other rough materials.
- A small layer of polyurethane foam is applied to the pre-prepared, cut-to-size elements of wooden slopes;
- For better adhesion, the surface of the opening is slightly moistened and wooden parts are glued to it with foam;
Water the opening with a spray bottle with plain water - The installation is carried out in such a way that the sidewalls support the upper part; if necessary, additional spacers are installed until the foam is completely polymerized.
During installation, it is important to ensure that the structural elements are symmetrical and straight. If any sagging or distortion occurs, they must be immediately corrected by adjustment.
On a frame made of bars
This option is suitable for openings with significant unevenness; in addition, fixation on a beam or rail allows for additional insulation of the structure.
- A mounting rail or galvanized profile is fixed in the opening (the bars must be installed in the same plane, maintaining the level);
- The space between the slats is filled with insulation corresponding to the thickness of the slats (expanded polystyrene, penoplex, mineral wool);
The easiest way is to insulate with mineral wool - Finishing (wood panels, plywood, lining, etc.) is attached to the frame.
The outer mounting block does not need to be attached if there is somewhere to nail it
Fixation to the frame is performed in one of the following ways:
- Liquid Nails . The process is similar to fastening with polyurethane foam, but the polymerization of liquid nails is much faster and less fastening material is required.
- Self-tapping screws with plugs. The wooden panels are screwed to the frame with ordinary self-tapping screws, the caps of which are recessed and closed with decorative plugs.
- Fasteners for lining. As a rule, special clamps are used. They are inserted into the groove of the lining, after which they are nailed with small nails. Such fasteners are completely invisible from the outside.
Similar fixation options can be used without a frame. In this case, space is saved significantly, but you need a smooth opening, and to fix it with self-tapping screws you will have to drill holes for the dowel (if the wall is stone). Fastening the lining to clamps is only possible on a pre-assembled frame.
External window trim with plastic
The use of sheet plastic allows finishing work to be carried out as quickly and accurately as possible. The panels have an aesthetic appearance, they are durable and practical.
They do not require additional finishing, since they are ideally combined with the material of the frames and form a harmonious and complete solution in tandem.
Advantages of PVC slopes:
- long service life;
- extensive color palette; low thermal conductivity;
- no condensation forms;
- resistance to moisture and mold formation.
Weaknesses of plastic:
- the need for replacement in case of damage - cannot be restored;
- low noise and heat insulating properties.
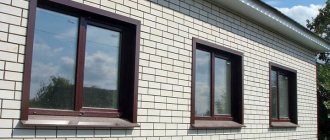
External window trim with siding
Vinyl siding is ideal for finishing exterior windows. It is presented in the form of hollow plastic panels that are attached to each other using special locking systems. The material allows you to quickly create an aesthetic coating that has a certain level of thermal insulation and soundproofing.
The slats do not require additional finishing or complex maintenance. As additional insulation, it is recommended to fill the space between the siding and the wall with mineral wool or foam, and decorate the joints with decorative corners.
Advantages of vinyl siding:
- DIY installation is possible;
- slopes are easily cleaned of dust and dirt;
- no fungal growths appear on the plastic;
- many color options;
- will last a long time if handled carefully.
Disadvantages of finishing slopes with siding:
- color change may occur with intense exposure to ultraviolet radiation;
- insufficient shock resistance.
"advantages" of wooden lining
The advantages of wooden lining are no less than those of plastic. These include:
- environmental cleanliness;
- a variety of textures, colors and sizes, which allows you to choose the material for any facade (see photo);
- strength;
- durability;
- ease of installation;
- resistance to low temperatures;
- practicality, etc.
At the same time, wooden lining, which is used to decorate the outside of windows in a wooden house, necessarily needs to be varnished. Only in this case it will not absorb water, and it will also be easier to clean from contaminants.
External window trim with plasterboard
Another inexpensive option is finishing with plasterboard. Typically this material is used for interior work due to insufficient moisture resistance. But it is also quite suitable for cladding external slopes if the windows overlook a glazed loggia, balcony or terrace. Moisture-resistant drywall is suitable for these purposes.
It allows you to quickly create a perfectly flat surface, which facilitates the process of applying plaster. Before installing the slabs, it is necessary to thoroughly treat the surface with an antibacterial compound.
Advantages of finishing with plasterboard:
- Affordable price of material;
- Easy installation;
- Light weight, which makes work easier;
- Good thermal insulation ability.
Disadvantages of finishing slopes with plasterboard:
- Low strength - even a not very strong blow can lead to the formation of potholes, dents and chips;
- Low moisture resistance.
Option three - lining
As one of the types of lumber, lining is well suited for finishing slopes in a wooden house, however, it is usually used in log houses, not being very compatible with log walls.
Advantages of lining: low cost (the price per square meter will cost 149–550 rubles, depending on the type of wood), ease of installation, quite attractive appearance. Disadvantages include the need for special treatment to protect the wood. In addition, lining slopes are significantly inferior in aesthetics to solid wooden ones; narrow boards cannot completely seal a wide opening; there will be joints that can separate over time. In terms of durability, plastic sandwich panels are preferable.
As a more decorative type of lining for finishing slopes, a block house can be used. This is a good choice for external slopes, if it was decided to sheathe the entire timber building with such an imitation of real logs.
Plastering the slopes of windows in a wooden house is an option that experts are against. Firstly, applying plaster involves using a wet solution, and such a proximity to wood is categorically undesirable. Secondly, log houses and timber houses shrink, so a plastered slope may simply crack over time, despite the presence of a frame.
In houses made of timber there are slopes made of plasterboard, the work with which we wrote in detail. In log houses, log houses, drywall is a much less frequent “guest”. Among the exotic options for finishing slopes in wooden buildings, one can highlight the use of panels made of bamboo or balsa wood.
Finishing slopes with sandwich panels outside the window
For facing slopes, three-layer plastic panels, 10 mm thick, with a “filling” of foamed or extruded polystyrene are used. They have low thermal conductivity and do not require additional finishing. The plastic used as outer layers is similar in color and appearance to the window profile.
The fixed panels must be protected from moisture with a plastic corner. This will not only preserve the integrity of the material and prevent it from delaminating, but will also give the structure a finished and aesthetic appearance.
Advantages of sandwich panels for window finishing:
- Long service life - around 25 years.
- Easy care.
- Fast and easy installation – in 1 day.
- Light weight.
- High moisture resistance.
- Resistant to ultraviolet radiation and high temperatures.
- Good soundproofing ability.
- High thermal insulation characteristics - additional insulation, for example, mineral wool, as is the case with conventional plastic panels, is not required.
- A wide selection of different colors, as well as surfaces imitating natural wood or stone.
Disadvantages of sandwich panels:
- with prolonged exposure to high temperatures, the color of the product may change;
- difficulties during transportation due to the impressive size of the panels.
Finishing methods
Inside the house, the material is chosen depending on the style of the room and interior decoration. In the bathroom and kitchen, plastic cladding or a surface lined with ceramics looks appropriate. These types are in harmony with the material of the tiled walls and PVC ceiling, so they look organic and resist the damp microclimate. The areas are easy to clean and free of grease (kitchen) and hard salts (bath).
For slopes of living rooms, plaster is used, and decorative putty is made. The surfaces are covered with wallpaper to match the color of the room, but snow-white slopes that are suitable for any style always look better. Wooden slopes are suitable for country style and finishing with natural materials.
The planes around the windows on the street side are often made of various types of siding, plastic, and modern lining. The materials meet the requirements of working in difficult weather conditions and retain their performance characteristics for a long time.
Plastic
The material is placed outside and inside on slopes when finishing windows in a wooden house. Practical PVC panels are characterized by long service life and affordable cost. The surface has a glossy or matte finish; the user has the right to choose the plastic color. Panels are produced with imitation of natural materials, for example, stone, different types of wood. A pattern of ceramics, brickwork, or fabric wicker is applied to the surface.
Plastic has qualitative properties:
- the simplicity of installation and processing technology allows you to sheathe the planes yourself;
- easy to clean with ordinary detergents;
- does not support the development of microorganisms;
- under normal conditions it does not emit components harmful to health.
PVC plates weigh little, so they do not increase the load on the walls. Plastic can withstand temperature fluctuations and heat from the sun, and due to its moisture resistance, it does not collapse in the cold. Due to the cellular structure, they additionally isolate the room from noise.
Wooden
They use various species; for expensive interiors they use elite boards of oak, beech, and cedar wood. As an inexpensive option, coniferous species of pine and spruce are taken. The average cost material is Siberian larch, which contains resin, which protects the material from moisture.
Positive qualities of wood in finishing slopes:
- environmentally friendly, does not contain or emit harmful substances when heated from the sun;
- does not fade over time;
- creates an atmosphere of warmth and comfort;
- compatible with many building materials.
Wood of any quality requires treatment with antiseptics, fire retardants, and stimulants so that it is not spoiled by bugs and the risk of fire of the finishing layer is reduced. The material is rarely painted; impregnations and varnishes are more often used to emphasize the original texture. Wooden slopes can last 2–3 decades without losing their original properties if installed and maintained correctly.
Plastering
Standard plaster contains cement and sand in a ratio of 1:3. This is an economical type of finishing around a window that performs well outside and inside the house. Thin layers sometimes freeze.
Plaster does not stick well to the wooden ends of walls, so be sure to stuff a metal mesh before adding the mortar, and add gypsum or alabaster to the mixture in a volume of 1/10 of the mass. Liquid glass is mixed into the composition to increase moisture resistance. The finished surfaces are puttied and coated with acrylic-based water-based paints.
Finishing slopes outside windows with foam plastic
Slopes covered with foam plastic will save heat in the house and protect from external noise. And it is not at all necessary to reinforce the slabs, cover them with several layers of plaster and paint them. Customers are offered modern material with a waterproof coating of marble chips and acrylic binders. This layer has sufficient strength and flexibility at the same time.
The coating does not crack or crumble. The material is produced in the form of ready-made thermal slopes - corner elements, 2 cm thick. Corners can be used for insulation in combination with thermal panels or separately. You can bend the slabs yourself to form corners using special devices for cutting polystyrene.
Foam slopes protect against:
- street noise and cold;
- dampness and mold;
- the need for frequent repairs - thermal slopes have rounded smooth corners, which will not cause chips.
The undoubted advantages of the material are the ease of its installation, the simplicity of calculating the number of elements required for finishing, and the original appearance of the window composition.
Note! Thermal corners with the addition of flexible clinker are perfect for decorating window and door openings of a private brick house.
Selection criteria for wooden slopes
If the time has come to choose a material for wooden slopes, you should pay attention to high-quality glued boards. This material retains its beneficial qualities for a long time. It is also worth recommending ordinary larch, since, in addition to its durability, it is relatively low in price.
Larch copes well with the onslaught of an unfavorable atmospheric environment, becoming stronger over the years. Slopes in a wooden house made of wood are an excellent stylistically balanced ensemble.
Slopes, as a rule, reach up to 3 meters in length and up to a meter in width. The thickness of wooden slopes varies from 12 to 15 cm.
For external wooden slopes, you should choose larch, as it is very durable and resistant to damage, both mechanical and biological. The need for external slope structures has often been questioned, but time has shown the feasibility of their use: under the influence of rain, wind and cold, the mounting foam that fills the joint space loses its performance qualities and begins to let in cold air and moisture over time, resulting in various biological damage wood
External window trim with metal slopes
Choosing metal as a finishing material for external window slopes is a reliable, aesthetic, and durable solution. This is a durable coating that is not afraid of either moisture or sudden temperature changes. Iron will perfectly protect against cold and noise, and thanks to a special anti-corrosion coating it will serve for many years.
The variety of shades offered will allow you to choose a harmonious frame for any window that will successfully fit into the facade of any color. Advantages of metal slopes:
- They have unsurpassed resistance to atmospheric precipitation.
- Serve as reliable protection against mechanical damage to walls.
- They are distinguished by their solidity and aesthetic appearance.
- They are quick and easy to install and do not require complex maintenance.
The only disadvantage of such structures is their relatively high cost. But during operation you will not have to regularly invest in their repairs.
No. 4. Plastic slopes, or PVC panels
Plastic panels allow you to complete the design of slopes literally in one day. There is no need to wait for the plaster or paint to dry. The main advantages, in addition to high speed of work, include:
- durability;
- hygiene. Plastic is easy to clean and does not grow mold;
- if the window frames are also plastic, then when the temperature changes, uniform expansion will occur, unnecessary stress will not be created, which means the slopes will last longer;
- aesthetic appearance.
By plastic panels we mean wall panels that have voids and stiffeners between the outer and inner layers of plastic. The thickness of the panels is about 1 cm, width - 25-37.5 cm, length - from 2.7 to 3 m. Such panels are softer than those equipped with an additional insulating layer (sandwich panels, more on them later), so attach them to slopes depths of more than 25 cm are not recommended - damage may occur. Under such panels it is recommended to use mineral wool or polyurethane foam as insulation. The joints must be covered with a decorative corner.
Most plastic panels are white. There are matte and glossy options. Matte products look nobler and calmer, and they don’t glare in the sun. You can find panels painted in other colors, as well as made to look like wood. Such options are appropriate if your frame is non-standard, i.e. not white.
The procedure for installing PVC panels is as follows:
- surface preparation, removal of excess polyurethane foam, cleaning of dust and dirt;
- treating slopes with a primer and antiseptic. When the surface has dried, you can proceed to the next steps;
- installation of an L-profile around the perimeter of the frame, the profile is fastened with self-tapping screws in increments of 20-25 cm;
- A wooden strip 10-12 cm wide and 10-12 mm thick is attached along the outer edge of the slope. Subsequently, a part of a special profile will be put on a wooden lath, the second part will be mounted on the panel, and then the two parts will be closed using a tongue-and-groove system. The joint between the panel and the slope can be closed with a corner mounted on self-tapping screws, but then their caps will be visible. Another option is installation with liquid nails;
- preparing panels of the required size;
- Mineral wool is attached to the wall using liquid nails, and the thickness of its layer near the frame will be maximum, and near the outer edge of the slope - minimum. Instead of mineral wool, polyurethane foam is often used, which is applied to the panel immediately before installing the panel, but this is a method for professionals, since it is very difficult to calculate the required amount of foam. Excess can disrupt the geometry of the panel, and the remaining foam is almost impossible to remove from the panel;
- in the corner between the side and top slope, a profile called the “internal corner” is fixed with liquid nails;
- the side slopes are snapped into the L‑profile; the profile can be attached to wooden slats with a stapler. Some experts even attach plastic panels to the cleaned surface of the slope using liquid nails;
- installation of the top panel in the grooves of the “internal corner” profiles;
- fixing a decorative corner;
- Now you can remove the protective film.
It is better not to decorate external slopes with plastic panels, since this material becomes too fragile at low temperatures, and in domestic conditions this means that everything will have to be redone the next season.
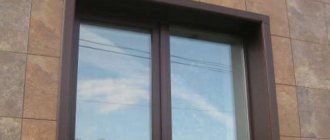
Finishing window slopes with natural stone
Finishing from natural stone is an impeccable, stylish and sophisticated appearance of the slopes, unsurpassed durability and guaranteed strength. The variety of materials offered - shell rock, sandstone, limestone, dolomite, wild stone - provides ample opportunities for implementing a wide variety of design ideas.
The stone retains its original impeccable appearance for many years. It is very easy to maintain and does not require additional investments.
Stone products are not afraid of:
- sudden temperature changes;
- exposure to directed sunlight;
- interactions with aggressive chemical compounds;
- mechanical influences.
The only disadvantage of this type of finishing is its high cost. But if you calculate the amount of time that a stone coating will last, its purchase will seem more than practical and cost-effective.
Material selection
Regardless of which window is installed, wooden or plastic, the slopes can be made of a solid board, a sheet of plywood, or assembled from a typesetting material, such as lining. When determining a suitable option, attention is paid to the required degree of thermal insulation, noise absorption, final cost and compliance with the overall design.
Ease of processing requires special attention when finishing yourself. For example, it is quite difficult to make a wide slope from a solid board yourself. To do this, you will need timber of the appropriate size, and if it is not available, you may have to glue wooden panels, which is quite problematic to do at home without special equipment. It is much easier to work with plywood and especially lining, and externally these materials sometimes look better than solid wood products.
An equally important point when choosing a slope material is the type of wood. If the frame and glazing sashes are made of wood, they try to finish the slopes from identical material. However, there are quite interesting design solutions using types of wood of different tone and texture in one block.
On the street side, the slopes must be sufficiently resistant to precipitation, seasonal temperature changes and ultraviolet radiation. Aesthetics and compliance with the overall design of the building are important. Conifers such as spruce or pine, when properly treated, retain their mechanical qualities and attractive appearance for decades. These materials are also available in most domestic regions, are easy to process and do not require complex maintenance during operation.
The best option is larch. This is a durable, moisture- and weather-resistant breed. Molds and other putrefactive formations do not appear in it, which significantly extends the service life of slopes and other products made from this material.
Slopes made of painted larch
Oak panels are not recommended for outdoor decoration, since oak does not tolerate exposure to ultraviolet radiation in combination with other atmospheric factors (cracking is possible over time). This material is used indoors without any restrictions, the main thing is compliance with the interior.
Prices for materials:
How to insulate window slopes from the outside
Insulation of slopes helps retain heat in the room and prevents an increase in humidity inside the room.
Let's consider possible insulation options that are advisable to use in this case:
- mineral wool – is moisture resistant, provides thermal insulation for the window and reliably protects against the penetration of external noise. The insulation must be fixed to a special mesh that is glued to the wall;
- polystyrene foam – has good heat and sound insulating properties, easy to install. You can purchase ready-made foam slopes. Mounted on metal profiles;
- expanded polystyrene - a waterproof cellular material with high thermal insulation properties;
- Sandwich panels are an option for finishing, endowed with heat-insulating properties - the middle layer is made of extruded polystyrene foam.
Finishing windows from the outside with plaster: step-by-step instructions for completing the work
External slopes should be plastered immediately after the polyurethane foam has hardened.
Important! It is necessary to completely exclude the possibility of environmental factors affecting its integrity.
Materials and tools for doing your own work
The speed and efficiency of work depends not only on the skill of the master, but also on the availability of all the necessary materials and tools. So prepare them ahead of time so you have them all on hand.
You will need:
- container for preparing plaster mixture;
- construction mixer or drill with a special attachment for mixing components;
- a set of spatulas of various widths. You will also need a corner option;
- Master OK;
- building level;
- square;
- wide brush with soft bristles;
- plaster grater;
- building mixture for facade work;
- putty for exterior use;
- decorative plaster;
- fiberglass reinforcing mesh;
- primer solution.
Finishing slopes with plaster: selection and preparation of plaster mixture
As the main material for plaster, you can use a regular sand-cement mixture. However, this composition is not durable and does not have “insulating” properties. Therefore, for such work, special facade plaster is better suited, preferably “warm”.
In addition to cement and gypsum, such materials contain reinforcing components, bulk insulation materials of natural origin and plasticizers.
Such mixtures have good waterproofing and soundproofing characteristics. Ready-made compositions have good adhesion. Due to its homogeneity and fine consistency, the solution adheres well to the surface. Of course, such a mixture is more expensive than concrete mortar, but not much of it is needed to design the slopes.
Helpful advice! If the material contains gypsum, careful adherence to the instructions for preparing the solution is a prerequisite for maintaining the characteristics of the material. In addition, gypsum hardens quickly, so it is better to mix the mixture in small portions.
Step-by-step process for plastering slopes with your own hands:
- We clear the slopes of old plaster. It is advisable to completely get rid of the remnants of the coating, in which cracks may subsequently appear.
- If the cleaned surface turns out to be too smooth, it is necessary to increase its adhesive characteristics using notches.
- Remove dust from the surface.
- We apply the first – starting layer of plaster and level it with the rule.
- It is recommended to apply several thin layers to the upper slope.
- We form a beautiful corner using an angle spatula.
- Glue the reinforcing mesh.
- Level the surface with putty and apply a primer.
- Apply the finishing layer of material and paint. You can use decorative plaster.
Finishing slopes from the outside with polystyrene foam: step-by-step instructions for completing the work
Finishing slopes with polystyrene foam allows you to simultaneously level and insulate the openings. For this, slabs with a thickness of 15-20 mm are used. When working with this material, it is necessary that the surface be as smooth as possible. Expanded polystyrene is not flexible, but, on the contrary, has increased rigidity and fragility. Therefore, on significant protrusions it may crack or even break. The advantage of this finishing method is that you don’t need to have deep construction knowledge to perform it and you can do the installation yourself. To carry out the work you will need:
- knife for cutting polystyrene foam boards;
- mixer for preparing tile adhesive;
- a set of different-sized spatulas;
- construction square, ruler;
- level; polystyrene foam 15-20 mm thick;
- tile adhesive suitable for outdoor use;
- plaster mesh;
- metal perforated corners.
Steps for finishing slopes outside a window with your own hands:
- We properly prepare the surface - clean it from dust and cement mortar residues, cover existing cracks and crevices with putty or cement.
- We cut out the parts of future slopes from foam plastic and connect them together with glue.
- Apply glue to the surface and fix the prepared parts. You should not save glue, as voids may form between the slopes and the polystyrene foam. It is better to remove excess composition with a rag. During the gluing process, check the correct installation using a level. After the glue has dried, you can further secure the material with dowels. It is better to drill holes in advance or a couple of hours after gluing the boards. The main thing is to prevent the foam from moving.
- Apply glue to the surface on which the window sill will be installed.
- The next stage is to apply a starting layer of putty, carefully covering all joints and cracks. We apply a sickle mesh.
- We install the perforated corners and apply a finishing layer of putty.
- After drying, the surface can be painted with facade paint. It should be applied in several layers.
Helpful advice! Before applying paint, cover the glass along the contour with strips of masking tape. This will protect the window from getting paint, and will save you from tedious scrubbing of splashes.
Window trim with polystyrene foam outside the house.
Window sills in a wooden house
Window finishing in a wooden house includes not only the installation of slopes, but also the installation of a window sill. Window sills are made from various materials, but it is most logical to install a PVC window sill for plastic windows or a wooden one for wooden frames. It is very important to remember that the window sill is installed first, only after that you can begin installing the slopes.
Installing a window sill in a wooden house is not particularly difficult; even a beginner can cope with it.
- First, the preparatory stage takes place - it is necessary to dismantle the old window sill, if there was one, thoroughly clean the surface, and prepare a new window sill of the required size.
- Thoroughly sand the surface of the window sill. Place it in the window opening.
- Place the window sill on nails previously driven into the bottom beam of the window frame.
- Level the window sill using wooden wedges. Finally tighten the screws.
- Fill all the gaps under the window sill with polyurethane foam, plaster the seams between the window sill and the slopes.
Window finishing with plasterboard or sandwich panels
The technique for finishing slopes with these materials is similar. The difference is that drywall requires finishing, while sandwich panels do not need it. Therefore, they are ready for use immediately after installation.
Window finishing scheme with sandwich panels.
To work you need:
- sandwich panels or sheets of plasterboard (moisture resistant);
- L-shaped profile - metal or plastic;
- glue;
- external perforated corner or F-shaped profile for decorating a protruding corner of slopes; construction knife - for cutting panels;
- level;
- screwdriver or drill;
- ruler;
- construction square;
- marker.
Finishing slopes with sandwich panels, instructions for doing the work yourself
- Clean the surface. We remove dust, fragments of crumbled plaster, and drops of mortar. We prime the surface and treat it with an antibacterial compound. You can use the product two in one. You must wait until the surface is completely dry.
- Starting profiles are fixed to the frame, into which plastic or plasterboard panels will subsequently be installed. The profile is installed around the entire perimeter of the window using self-tapping screws. Fasteners are installed in increments of 20-25 cm. Depending on the selected material, the required profile width is selected.
- A wooden batten is mounted along the outer corner of the slopes. Its width is 10-12 cm, thickness - 1-1.2 cm. This rail acts as a leveling bar onto which the outer profile is fixed. It will hide the distance between the wall and the finishing material, and will also hide the unsightly edge of the panel. The profile consists of two elements. One of them is attached to a wooden strip, the second - to the end of the slab. They are connected using a locking system - tongue and groove. In the case of drywall, you can install a regular corner.
- We install the insulation - mineral wool is fixed with glue in such a way that its thickness changes. We place thicker material closer to the frame, and thinner material along the outer border. If foam is used as insulation, apply it directly to the panel before installation. Here it is important not to “overdo it” with the amount of foam - there may be too much of it and then it will inflate. And if it gets on the outside, it will not be easy to remove. We fix the internal corner profile to the upper end of the side parts using sealant. It serves to connect horizontal and vertical panels. We install the side plates. We apply a layer of foam to the top horizontal panel, insert it into the grooves of the corner profiles and press well. We decorate the end of the top plate using an F-profile or a decorative corner.
- We fix the internal corner profile to the upper end of the side parts using sealant. It serves to connect horizontal and vertical panels.
- Installing the side plates.
- We apply a layer of foam to the top horizontal panel, insert it into the grooves of the corner profiles and press well.
- We decorate the end of the top plate using an F-profile or a decorative corner.
Here it is important not to “overdo” the amount of foam - there can be too much of it and then it will swell. And if it gets on the outside, it will not be easy to remove.
Finishing slopes with plasterboard panels instructions
Sheathing slopes with gypsum board slabs is even easier, since there are several options for fastening them:
- on the sheathing - with a sufficient width of the slope;
- to a special profile;
- directly to the wall - if the latter has a relatively flat surface.
Note! During installation, the screws are screwed directly through the slab. Their caps do not need to be masked, since the material will require finishing in any case. Layers of putty and paint will reliably hide the joints and fasteners.
If you plan to make “warm” slopes, mineral wool is laid according to the same principle as in the previous version. Foam can be introduced through holes that are drilled after the panels are installed. Drywall needs reinforcement, so at the puttying stage it is strengthened with a painting mesh.
Plastic trim
Let's start by identifying the advantages of plastic slopes:
- a huge variety of design ;
- this material does not allow moisture or air , which means the insulation is 100% protected;
- plastic is easy to clean with household liquid or gel detergents;
- The service life of this material is practically unlimited ;
- low price of the product, which does not greatly affect the construction budget, and when replacing or repairing it will not greatly affect the wallet of the owner of a wooden house;
- it is environmentally friendly material;
- good frost-resistant characteristics .
Plastic slopes for outdoor installation Source kak-peresadit.ru
Technology for installing plastic slopes
Let’s immediately make a reservation that the window opening in a wooden house is made quite accurate in terms of size. Because the more defects, differences and irregularities, the more difficult it is to install the window, and even more so to finish it. In addition, the gap is also a small opening in width.
The plastic slope includes: a panel, which is the main decorative element, a starting strip and decorative corners. First of all, a starting strip is installed and secured with wood screws to the wall of the house in the opening near the installed window frame. It is mounted in sections along the entire perimeter of the opening. The main thing is that the slats create one plane, that is, they are aligned exactly horizontally and vertically.
Now ready-made plastic slopes cut to the required dimensions are inserted into the groove of the starting strip. They can be attached to the surface of the opening with adhesive or polyurethane foam. Some craftsmen fasten the panels along the outer edge with self-tapping screws. And the opposite edge is held by the starting bar.
Plastic window with plastic slopes and a window sill in a wooden house Source vw-saratov.ru
Then they move on to installing decorative corners. In fact, they cover the end of the slope and part of the surface of the external wall of the house. That is, the joint between the plastic strip and the wall is closed. Pay attention when choosing a corner. It must be of a certain width in order to form a platband on the facade of a wooden house. But here, as they say, you won’t find a friend to suit your tastes and colors. Therefore, the designer must take this into account in the building design. And one moment. It concerns the method of attaching the corners. To do this, use a special silicone-based glue.
As for the window sill, it is chosen to match the color of the slopes. It also fits into the starting bar. But they attach it with sealant or mounting foam to the horizontal plane of the window opening. No screws or nails.
There are slopes on the market, which are a corner with shelves of different widths. The small one is the editing room. It is pressed against the window frame, where it is secured with self-tapping screws. The large one is the slope itself and covers the plane of the opening.
Basic rules and possible problems associated with improper finishing of external slopes
The main rule, the observance of which will allow you to avoid problems when operating plastic windows and doors, is timely finishing of external slopes.
Note! It is unacceptable to leave seams open for a long time. Under the influence of moisture and ultraviolet radiation, the foam crumbles, collapses and, as a result, loses its insulating properties.
There are a number of installation errors that can lead to undesirable consequences. The most common mistakes:
- excessive removal of polyurethane foam from the seam;
- too rigid fixation of panels to the profile;
- use of unsuitable materials for lining the opening.
What consequences might the above shortcomings entail?
Mistakes can cause foam destruction, wall shedding and, as a result, moisture penetration and fungus formation despite regular ventilation. Some problems may appear within a few days, while others may not become apparent until several months later.
It is impossible to determine the exact cause of their occurrence without violating the integrity of the slopes. But some signs that mistakes were made when finishing the opening can be determined by education:
- condensate;
- ice in winter;
- whistling and howling wind
External slopes for windows made of PVC profiles
Our citizens are accustomed to the fact that everything should be done by itself, and there is no need to go into deep details in every matter. But practice shows that this approach is fundamentally wrong. Let's take, for example, the question of finishing a plastic window after its installation that interests us.
What does the average consumer pay attention to after the installers have installed the window and the finishers have made the internal slopes? Usually, it depends on how the opening sash works, whether the plastic or glass is damaged, how smoothly and professionally the internal slopes are arranged.
In cases where these items meet the customer’s expectations, he happily signs the acceptance certificate for the finished product
Meanwhile, before making a full settlement with the installer, it wouldn’t be a bad idea to pay attention to the exterior finishing of the places where the window frame adjoins the façade of the building.
If mounting foam is visible between the structure of the window block and the window opening, this indicates a violation of the technology for arranging the junction points.
This means that such a window cannot be put into operation , otherwise not much time will pass, and the customer will again have to turn to specialists for help to eliminate this shortcoming.
And the disadvantage in the form of polyurethane foam that is not protected from atmospheric influences will manifest itself quite soon - internal slopes of plaster begin to freeze and even the appearance of drafts under slopes trimmed with PVC panels or any other piece material.