A little about slopes
Slopes are divided into external and internal and represent a part of the wall that is directly adjacent to the window block at a certain angle.
It is necessary to approach the finishing of those areas that are located indoors most carefully. Why is it necessary to install slopes of plastic windows? There are a number of functions that they directly perform:
- Creating external attractiveness and aesthetic completeness. Indeed, it is difficult to imagine how new windows will look if the adjacent surface is poorly finished.
- An additional source of heat and sound insulation. This means that the slopes allow you to protect the room from the penetration of cold and noise pollution.
- Protection of assembly seams from external influences, as well as preventing windows from fogging up.
Finishing slopes is a procedure that is not only decorative in nature, but also a protective function.
Thus, sealing window openings is carried out not only to restore damaged areas, but also to create a whole complex of additional protection.
Repair of window slopes
- Seal
External and internal slopes are the part of the wall that frames the window.
The appearance of window (and door) slopes is not only a matter of aesthetics, but also of home comfort. Properly repaired slopes should be combined with the appearance of the double-glazed window and the interior of the room as a whole. In addition, slopes are also a way to protect a double-glazed window from high humidity and reduce heat loss. Repair of slopes of plastic windows may be necessary both immediately after installing the windows and during their operation.
There are various options for repairing slopes for PVC windows.
Plastering
Plastering a slope involves applying several layers of plaster based on a solution of cement, sand and lime, with finishing painting. Flaws:
| duration of the process; |
| high thermal conductivity: such a coating is not capable of retaining heat. Due to a violation of the temperature regime, condensation will begin to collect in the double-glazed windows; |
| inability to withstand negative external influences: due to increased humidity and temperature changes, the plaster becomes covered with cracks. |
Plasterboard slopes
Plasterboard slopes are made of gypsum board, are quite easy to install, but also have a number of disadvantages:
| low strength; |
| ability to absorb moisture; |
| low thermal insulation properties. |
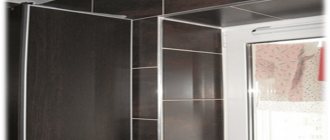
Plastic slopes
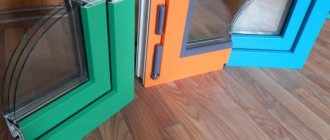
The most modern and reliable method is the installation of plastic slopes in the form of sandwich panels. The design of such a panel involves multi-layering. The slope has a layer of insulation inside, which reduces heat loss and avoids the formation of condensation in the glass unit. Such slopes are attached either directly to the mounting foam or to a special sheathing. Additionally, the joints between the window and the slope are filled with sealant, and the edge of the wall and the slope is covered with a plastic corner. This gives the window a finished look.
The main advantages of plastic slopes are:
| high thermal insulation properties; |
| vapor tightness: slopes do not absorb moisture; |
| sufficient strength and long service life; |
| attractive appearance: plastic does not turn yellow over time and is easy to clean; there is no need to paint the slopes additionally; |
| quick installation within a few hours. |
| Call us: +7 925 736-00-77 | or | Request a call back |
Cost of repairing window slopes
How much it will cost to repair slopes depends on the width of the wall, as well as the need to prepare the wall for installing PVC slopes (knocking down the old plaster layer or leveling the slab, cleaning the frame, replacing the mounting seam).
in Moscow offers its customers a wide range of services for installation, repair and preventive maintenance of plastic windows, fittings and slopes. Our specialists are professionals in their field who perform all work quickly and efficiently. This ensures a long service life of the windows, which is the key to warmth and comfort in your home.
Additional information about the cost of services can be found in the price list posted on the website.
Price for installation of slopes made of sandwich panels:
| Retail cost of slope panels (available only in specified sizes) | |||||||
| Slope length/depth, mm | 20cm | 25cm | 30cm | 40cm | 50cm | ||
| 150cm | 560 rub. | 720 rub. | 860 rub. | 1160 rub. | 1440 rub. | ||
| 200cm | 760 rub. | 960 rub. | 1160 rub. | 1540 rub. | 1920 rub. | ||
| 250cm | 480 rub. | 600 rub. | 720 rub. | 960 rub. | 1200 rub. | ||
| 300cm | 1160 rub. | 1440 rub. | 1520 rub. | 2060 rub. | 2880 rub. | ||
| Retail cost of F-profile/starter is 150 rubles/piece. (1 piece = 3000mm) | |||||||
| Cost of installation of slopes (cost of installations with panels) | |||||||
| Slope width | 5-15cm | 16-27cm | 28-34cm | 35-50cm | 51-60cm | over 60cm | |
| Cost per linear meter | 1000 rub. | 1150 rub. | 1280 rub. | 1500 rub. | 1610 rub. | Price negotiable. | |
When installing bay window slopes, 500 rubles per joint is added to the cost
* The cost of installing slopes includes knocking down slopes up to 3 cm with a slope depth of up to 27 cm, and dismantling plasterboard slopes.
** The cost of installing slopes includes the starting and F-profile.
*** When calculating bay window slopes, the length of the panels is considered with a margin of 15-30 cm.
| The cost of constructing slopes per m.p. | |||||||||
| Width of slopes/thickness of plaster layer | 5-27cm | 28-34cm | 35-50cm | 51-60cm | Over 60cm | ||||
| less than 3 cm | — | 400 rub | 500 rub | 600 rub | Price is negotiable | ||||
| 3-5 cm | 400 rub. | 500 rub. | 600 rub. | 700 rub. | Price is negotiable | ||||
* The price for folding is valid if the material of the slopes is not concrete (plaster, gypsum).
**For solid materials such as concrete/reinforced concrete, work is carried out to cut an opening. Price 2,500 rubles/hour of work. The minimum cost of work is 2,500 rubles.
*** When knocking down a slope more than 5 cm thick, the price of work is also calculated as 2,500 rubles per hour of work. The minimum cost of work is 2,500 rubles.
| The cost of reinstalling slopes, without replacing panels, with replacing F-corners | |||||||
| Slope width* | 5-15cm | 16-27cm | 28-30cm | ||||
| Cost per linear meter | 850 rub. | 920 rub. | 1000 rub. | ||||
* Reinstallation of slopes with a depth of 28-30 cm (with preservation of the panels) is carried out at the discretion of the master.
** Reinstallation of slopes (with preservation of panels) with a slope depth of more than 30 cm is not carried out. In this case, the replacement of slopes is calculated according to the price list for installing slopes with new material.
| Cost of installing customer slopes | |||||||
| Slope width | 5-15cm | 16-27cm | 28-34cm | 35-50cm | 51-60cm | Over 60cm | |
| Cost per linear meter | 800 rub. | 900 rub. | 1000 rub. | 1200 rub. | 1400 rub. | Price negotiable. | |
| Cost of installation of false shotguns | |||||||
| Slope width | 5-15cm | 16-27cm | 28-34cm | 35-50cm | 51-60cm | Over 60cm | |
| Cost per linear meter | 250 rub. | 400 rub. | 500 rub. | 650 rub. | 770 rub. | Price negotiable. | |
* The cost of installation includes polystyrene foam panels up to 50 mm thick and mounting foam.
** If necessary, mounting dowels for polystyrene foam.
Justification for installing false shotguns:
Based on experience, in similar houses (with municipal renovation) there is usually emptiness under the plasterboard slopes. Accordingly, there is blowing through both the installation seam of the window and through the wall insulation area. To eliminate blowing, it is necessary to install false shotguns, which serve as a barrier and additional insulation against blowing. In some cases this is not required; this will become clear only after dismantling the old slopes.
Various finishing options
Do-it-yourself finishing of plastic windows is carried out using different methods:
- Applying plaster with water-based paint.
- Installation of plastic panels. They harmonize well with the materials of the window blocks and are installed quickly.
- Use of gypsum boards. This technique is distinguished by the fact that it requires high-quality further finishing.
Plastering with dry mixtures
For the work, special plaster mixtures are used, which can be sold dry or already diluted. The plaster is diluted with water in the ratio indicated on the packaging so that the resulting mixture is not too liquid. Different manufacturers produce mixtures with different components in the composition. The plastering mixture should look like porridge.
For external areas where increased moisture concentration is inevitable, it is more rational to use a composition that contains a proportion of cement. Gypsum compositions are suitable for interior work: they are convenient to apply, they harden quickly, and the consumption does not exceed permissible standards.
Attention! Before you begin interior work, you need to purchase a special mixture in the store.
Plastering with tile adhesive
This material is suitable for exterior decoration. If high-quality tile adhesive is used for the work, such repairs will significantly increase the cost of materials compared to using classic cement with sand.
Finishing advantages:
- the surface does not absorb water droplets;
- does not deform even in severe frost;
- the material quickly sticks to any base;
- material consumption is as profitable as possible;
- high quality, durable material.
Attention! In order to complete all work quickly, it is important to use waterproof and frost-resistant tile mixtures for outdoor work. They need to be applied in a thin layer in several stages.
Finishing with plastic tape
PVC tape is often used when there are problems with waterproofing a room. In terms of characteristics and external features, it is more similar to the foam rubber that was previously glued to windows, but now updated.
- The plastic tape repels water and direct sunlight and is vapor-tight. The only drawback is its fragility: the tape loses its properties 6 years after installation.
- Installed in the free space between the wall and the profile to protect joints and seams foamed with mounting foam.
- If the entire seam is filled with foam, it needs to be cut out a few millimeters.
- Then rinse, wipe the joint, and let dry.
- A piece of a given length or slightly longer than required is cut from the tape.
- The tape should not be glued at an “angle”, otherwise it will be used irrationally.
- The tread liner is peeled off from the tape and glued to the area with maximum traction. It's best to use a profile.
Application of window sealant
Some materials are used even at the stage of installation of the window frame - polyurethane-based foam wedges the window and can fill all the wall voids that are hidden under the plaster layer or slopes made of PVC or metal. Some of them can be used several days before the onset of cold weather. The cracks are sealed at the window sill line and at the junction with the wall.
One material will not immediately solve the problem with noise and heat insulation. It is important to use several tubes in combination. They are suitable for indoor and outdoor use.
What material to choose for sealing slopes
Craftsmen recommend using sandwich panels as slopes. They can be found at any building materials store. Their advantages are appreciated by many window owners:
- They are respectable, similar to classic plastic windows.
- Thanks to the internal insulating ball, the material provides good sound and heat insulation.
In second place in popularity is a simple plaster mixture. This material is distinguished by its optimal heat retention properties, contributes to additional aesthetics, is durable and reliable in use.
Internal slope
When all the work outside is completed, the craftsmen move into the room and carry out similar work inside. Internal slopes perform the same function as external ones, but carry a higher decorative load, because without them the wall will look untidy. Therefore, all work is carried out carefully. If the choice of cladding for external finishing should be based on indicators of resistance to moisture, then this rule does not work when finishing internal slopes. Here materials that are contraindicated for the street can be used - for example, drywall.
External slope
To work you will need:
- foam layers (5 and 10 cm wide);
- reinforcing mesh;
- PVC corners with reinforcing elements;
- putty;
- dowels, umbrellas;
- waterproof paint;
- drill, screwdriver;
- garden knife.
First, the master must remove the old slopes, if any, freeing the surface around the glass unit by at least 10 cm in width.
What options are there?
Our company offers installation of window slopes on the external and internal sides of the wall . Both options serve to increase the service life of the window, protect the walls of the house from getting wet and freezing, prevent the development of microbial and mold colonies, and noise insulation of the home. They are one of the main factors in creating optimal air exchange in residential and industrial areas and preventing the entry of airborne dirt particles. The service life of the coating on the slopes should be no less than the window itself.
External slopes
External slopes are important for the tightness of the joining seam, increasing heat and sound insulation, protecting the wall of the house from moisture penetration and exposure to ultraviolet radiation, and increasing the service life of the entire window. The foam that comes out, which the builders used to fill the voids formed during work, tends to change in volume over time. Under the influence of climatic factors, it can burst, crack, allowing wind and precipitation to enter. We put insulating materials on top that are designed to compensate for such defects, turning the frozen primary joint seam into a sealed whole. The appearance of the house with completed window slopes also benefits from its neatness and cleanliness. We offer external slopes for a plastic window to be made of sandwich panels filled with a special vapor barrier sealing tape and having plastic on the surface. They can be painted a different color later.
Sandwich panels are to a certain extent similar to plastic ones, they are also durable in everyday life and easy to maintain. They are light and neat, aesthetically pleasing and compositionally match the metal-plastic window. However, in terms of thermal insulation parameters, sandwich panels significantly exceed single-layer plastic. Therefore, its demand is growing every day.
To perform work at height, our specialists have the appropriate professional training and equipment. The materials used are resistant to adverse weather conditions and have a long service life.
About internal slopes
On the inside , installation of slopes on windows is carried out for the following reasons:
- for a neat appearance;
- for ease of hygienic processing and washing;
- to protect walls from mold and fungal infections;
- to prevent the symptom of “crying windows” and the formation of ice;
- for flawless operation of window mechanisms;
- in order to level and isolate joints and assembly seams as much as possible.
With plastic windows slopes made of plasterboard or plastic attached along the entire window block, with the exception of will look functional . when it comes to plasterboard construction. They alternately attach the cut out parts of the slopes using special glue to the wall, and, as they dry, paint them with acrylic paints. Sometimes sanding, puttying, and priming are done before painting. Carrying out such work yourself, it is not always possible to maintain the accuracy of geometric calculations and ensure reliable insulation. When selecting material for the design of internal slopes, you need to take into account that their composition should not contain chemical components harmful to humans. After all, fumes will be constantly present in the room, causing illness.
Installing plastic slopes (sometimes called sheathing) requires a professional. We can offer to install window slopes on the side of the rooms also using wooden structures or using polystyrene foam. In this case, the significant thickness of the cladding enhances its protective properties and makes window insulation more reliable. When covering the windows of houses in harsh climates, to increase sealing, we suggest laying a foam plastic sheet before fixing the outer layer. This creates an additional layer of thermal insulation that prevents through freezing. Unfortunately, there are times when, when installing two- and three-chamber windows, owners forget to “strengthen” the slopes. In this case, the effect of multi-layer windows is reduced.
Types of materials for finishing slopes
Often plasterboard sheets and plastic panels are used to finish slopes. These materials are attached to a metal or special plastic profile. In some cases, slopes are finished with plaster and putty mixtures.
Drywall slopes
The choice of finishing slopes with plasterboard is due to the ease of installation and the possibility of using insulation with it. Installing drywall does not require special skills and does not create much pollution in the room during operation.
For finishing slopes, only moisture-resistant plasterboard sheets are used. This material can withstand high humidity well and will not be subject to destruction for a long time. Installed plasterboard panels are covered with several layers of primer and finishing putty. This is necessary to seal small irregularities, side cuts, and also protect the surface of the sheets from mechanical damage.
Slopes made of plastic panels
Window slopes are often finished with plastic panels. These can be ordinary panels for walls and ceilings or sandwich panels, consisting of two layers of plastic and foam insulation placed between them. The use of sandwich panels facilitates installation, since it does not require additional fittings and does not require the use of insulation.
How to seal the slopes?
Installing a double-glazed window usually leads to a violation of the integrity of the window opening. Therefore, slopes are the final stage of installation of window structures.
Slopes perform not only decorative functions. They protect structures from condensation and foam from degradation. Their restoration should not be delayed, but carried out immediately after the installation of the double-glazed window is completed.
There are three finishing options:
- drywall;
- plaster;
- plastic panels.
Each of these materials has its own advantages and disadvantages.
Drywall
This is an inexpensive and practical material that allows you to level even complex surfaces. Its disadvantages include low strength and fear of moisture. The latter property makes it impossible to use drywall for finishing external surfaces. But even when carrying out interior work, it is better to cover this material with a primer or other moisture-resistant materials.
There are several ways to install drywall sheets:
- on a wooden or metal sheathing;
- on the corners;
- using glue.
Today the most popular installation of plasterboard sheets on the corner. It allows you not only to give the opening an attractive appearance, but also additionally insulates the window. Drywall is covered with several layers of plaster, rubbed down and painted in the desired color.
Plaster
The traditional way to seal slopes is to cover them with plaster. It is cheap and simple, but at the same time quite labor-intensive and time-consuming.
For working with internal surfaces, both cement and gypsum mixtures are well suited; for external surfaces, it is necessary to use facade compositions or ordinary sand-cement plaster.
First you need to carefully prepare the surface: remove old plaster, dust, and excess foam. To increase adhesion, it is better to apply notches to the walls and coat them with a primer. The corners of the opening are reinforced with a perforated corner. It is advisable to cover the glass unit with film - this will protect it from contamination.
When sealing external slopes, it is advisable to use reinforcing mesh.
After leveling the plaster, it is primed and painted.
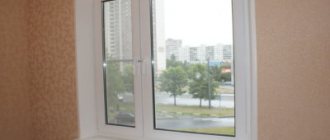
Plastic slopes
Slopes made of PVC panels are durable, practical and hygienic. It is quite possible to install them literally in a day - you do not need to wait for the layers of plaster to dry.
However, the appearance of these panels is unique - many believe that such material is only suitable for public spaces. Plastic looks fine in the kitchen, but for the bedroom or living room it is better to choose something else.
PVC panels are attached to the profile, covering the joints with special decorative corners. Mineral wool is placed in the empty space for insulation.
Plastic panels are rarely used for outdoor work, because this material tolerates sunlight and low temperatures very poorly.
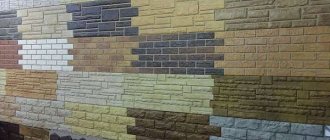
Decorative rock
Decorative stone made from gypsum and cement is used to finish slopes. Outwardly, it is no different from natural, but at the same time it is much lighter and cheaper than the latter.
Decorative stone is strong and can withstand high humidity and temperature changes. It can also be used to decorate external surfaces. The advantage of the material is its “rich” appearance and a wide variety of colors.
Finishing slopes with decorative stone is simple:
- The stone is placed on glue, which is applied using a comb or spatula.
- When working with a flat surface, you can do without preliminary preparation. If there are defects, then it is better to plaster the slopes.
- If there are seams between the stones, then you need to use crosses, as when laying tiles.
- When installing elements of arbitrary shape, they must be laid out on a horizontal surface in advance. To trim the stone, use a hacksaw or grinder.
To increase service life, the material can be coated with a protective compound.
Repair of window slopes: features of plastic products
During operation, the window opening is periodically exposed to various influences. It is as a result of such influences that the need arises to repair the slopes of plastic windows with your own hands. Fortunately, this task is not difficult and almost anyone can cope with it.
Below we will tell you what to do in the most common situations.
It is quite possible to restore a damaged slope
Possible problems
The finished window opening should look beautiful and retain heat well in the room. In principle, this is where its functions end. However, over time, the performance properties of the finish decrease, and sooner or later certain problems arise.
What could happen?
- The first and most common malfunction is mechanical damage to the slope surfaces. They can be very different, ranging from minor scratches to through holes.
- Next on the list are more extensive damage associated with deformation of drywall or plastic. In this case, the surface of the opening swells, and sometimes one edge of the sheathing panel even comes out of its fasteners.
- A separate group of problems is mold contamination of the slope. It is very unpleasant because it indicates problems with removing moisture from the assembly seam.
All these problems can and must be fought. Instructions for troubleshooting problems that arise are given below.
Recovery technology
Mechanical damage
Mechanical damage includes scratches, dents and cracks.
The repair method depends on the material from which the finish was made:
- Superficial damage to plastic slopes can be easily removed using special compounds. One of the best remedies is a gel called Cosmofen. Being, in fact, a glue for PVC, it perfectly removes microscopic scratches, and therefore is used by all sloping craftsmen.
- For drywall and plaster, chips of the putty layer are relevant. They are removed with the same material that was used to level the slope, however, after completion of the work, the painting will need to be done again.
Small dents can be filled with putty
To repair large dents on a plaster slope, it is best to use special plaster mixtures such as Rotband:
- We embroider the crack or depression from which a piece of finishing has fallen out so that there are no weakly fixed areas left along the edges.
- We fill the hole with plaster and level its surface.
- We putty the slope again and paint it using a roller or spray.
We repair holes in plasterboard sheathing as follows:
- We cut out a section of gypsum board along the perimeter of the hole so that we get a hole with smooth edges.
- We cut out a patch of the appropriate shape and size from a sheet of gypsum board.
- We glue the patch into the slope, then putty and paint the surface.
As for plastic panels, they will have to be replaced if damaged. This is one of the disadvantages of this finishing technology, since the price of PVC or sandwich is very significant.
Panel deformation
An equally common problem is the deformation of part of the sheathing due to changes in the dimensions of the opening (shrinkage) or an increase in humidity in the room. (See also the article How to install a plastic window sill: features.)
In this situation, the algorithm of actions will be as follows:
- Carefully make a cut along the perimeter of the deformed panel using a painting knife. This will allow us to maintain the finish on the remaining parts of the slope.
- We dismantle the damaged part as carefully as possible.
- If the reason for the deformation is a change in the dimensions of the opening, then we simply reduce the dimensions of the part by cutting it on one side. If the panel itself has become unusable (the plastic has heated up and bent, the drywall has swollen), we replace the element with a new one. The deformed panel must be replaced with a new one
- We glue the plasterboard strip with special glue. We insert the panel made of polyvinyl chloride or sandwich into place of the removed one, snapping it onto special starting profiles.
Please note! When replacing, you should check the safety and condition of the thermal insulation material, and also check the space behind the casing for the presence of condensation.
- Once the panel is returned to its place and secured, we begin restoring the finish.
Moisture and mold
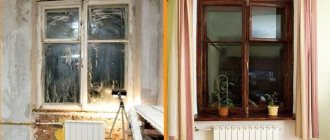
In houses made of brick, monolithic reinforced concrete or concrete blocks, slopes may freeze in winter. The dense material has a fairly high thermal conductivity, and cold bridges are formed in the wall in the area of the window openings, directed towards bypassing the window frame. When internal slopes cool to the dew point temperature, condensation falls on them. As a result, the plaster (or drywall) becomes damp, and over time the paint turns black from mold. Dealing with freezing of slopes is not easy. It is best to install new windows with wide frames, but this is associated with large financial costs. Therefore, they usually locally insulate the wall on the room side. For this purpose, insulation materials made of dense foamed plastics with closed cells (polypropylene foam, polystyrene foam, etc.), 10–30 mm thick, or special two-layer panels made of porous and hard plastic are suitable.
Plaster
The cheapest way. Requires certain skills to achieve a good result. To level the surface, you need to take a long time and carefully eliminate unevenness and apply the required amount of material. A professional master can handle this work faster.
The disadvantage of repairing slopes by plastering is the appearance of cracks. This occurs due to the use of low-quality material or violation of layer application technology. Changes in indoor humidity can also contribute to the appearance of cracks.
The thermal insulation qualities of plaster are inferior to plastic or drywall. But you can easily correct imperfections in the walls of openings, protrusions and other architectural errors using this pliable material. Often this repair method is used for internal slopes.
Order slope repair
Why us?
- All work is completed within a short time frame
- Urgent departure is carried out on the day the specialist is called
- We offer affordable and flexible prices, various payment methods
- All materials are obtained directly from suppliers
- All work is performed by highly qualified specialists with extensive practical experience
- We provide guarantees for all work performed and materials used
Not every company that installs windows undertakes the installation or repair of slopes. "Moscow Window Repair Company" specializes in such work. Our staff includes specialists with relevant qualifications. We work only with proven certified materials and have all the necessary inventory and equipment.
Fill out the form and get a 5% discount
Surface preparation
Before sealing the surface, it must be prepared for work. The process consists of several stages:
- All protruding or collapsing areas are knocked down. To do this, a hammer and chisel are used; they can do the work precisely without damaging adjacent areas.
Cleaning window slopes from unnecessary areasOn a note! Considering that the work involves the collapse of some pieces of cement or brick, it is advisable to prevent damage to the window and sill. To do this, they are covered with corrugated cardboard.
- A construction knife is used to cut off excess foam used to seal the windows. The main thing is to wait until it has completely gained volume and dries. This is done quite simply: use a blade to pierce the protruding part of the foam from above (parallel to the window) and, pressing slightly, make a single downward movement. If necessary, cut through the part that is glued to the wall.
Removing excess polyurethane foamAdvice! There is a film sticker on the plastic frame; it is removed only after all work has been completed.
- The surface is thoroughly cleaned from dust and dirt. It often happens that an old brick wall has loose bricks. They need to be placed on the solution and allowed to adhere.
If you plan to plaster the slopes, the area is first coated with a layer of primer. In other cases, it is advisable to use antiseptics.
Applying primer to window slopes
Plastering
Sealing slopes with plaster is the cheapest existing option. To work, you will need a dry finishing mixture (gypsum, alabaster), a small set of tools (bucket, spatulas, roller) and water-based paint.
This method has several disadvantages. Firstly, you will have to put in enough effort to get a flat surface. If you have little experience, this may require a lot of time, since you will need to carefully study the plastering technology and watch a lot of videos. Secondly, cracks may appear, which occurs for various reasons.
The technology for applying plaster is as follows:
- The dry mixture is diluted in the required amount of water. It must be taken into account that the work must be completed quickly enough so that the solution does not lose its properties.
- The composition is collected with a spatula and transferred to the surface. If the area has significant potholes, then they should be covered first. The fact is that a thick layer of plaster will not adhere well and will also cause cracking of the material.
- To achieve perfect evenness, use beacons or even wooden blocks.
- Check the sealed area for level.
Plastering window slopes
Advice! You can use a little trick that will help keep the surface unharmed. To do this, use a narrow spatula. The purpose of the event is to create a small depression between the window frame and the applied layer. The instrument is placed at an angle and quickly moved from top to bottom.
This option is suitable when the slopes on the windows have minimal damage. That is, it is only necessary to restore the damaged areas and, after removing the old paint, cover the surface with a new composition. Please note that painting is carried out after preliminary priming.
Painting of plastered slopes is carried out only after applying the primer twice and allowing it to dry completely.
Application of plasterboard sheets
How to seal slopes using gypsum boards? There are several methods, but the most acceptable is the one that involves installation on putty. The process is:
- The work area is well prepared. No voids should be allowed. The polyurethane foam is cut off in advance.
- Measure the surface. It is necessary to obtain the dimensions for height and width. Considering that the slopes consist of three parts, each is measured individually. Although it would be much better to install the top part, and then, taking into account the new dimensions, measure the side sections.
- The measurements are transferred to the drywall. The necessary fragments are cut out.
- Putty is applied to their reverse side. They do this pointwise, capturing the edges and center of the element.
- The fragment is pressed to the surface and a support is placed. In a day, adhesion should occur.
- Perforated corners are applied and a layer of putty is applied. If required, other decorative material (tiles, stone, wallpaper) is laid.
Slopes made of plasterboard are excellent when the walls are lined with gypsum plasterboard. In this case, they can be included in part of the frame being built.
How to repair window slopes with your own hands - step-by-step diagram
Step 1: Prepare the work area
Most likely, by this moment you can see pieces of foam (this is polyurethane foam) and the mounting plates are visible to the naked eye. But that’s okay – let’s get down to work with confidence. So, using a knife, we make something like hollows in the foam - about 1 centimeter in width and depth. Having made such indentations in the foam next to the window (you will have to apply this along the entire perimeter), you can later install the slope itself without any problems.
Step 2: Installing the slats for finishing the slopes
Next you will need a strip, screws, a wood saw and a regular tape measure. Using a tool, a construction tape is best suited here, we take measurements. Then we install the rail in its place and fix it using a hammer drill and self-tapping screws (four will be enough for a medium-sized window). Just don’t tighten the screws all the way at this stage. The rail itself should run clearly along the edge of your wall. After we have secured the first rail, we move on to those on the side. Now we measure the distance from the window sill to the already installed top rail, cut off the required piece and fix the next one - again we also do not completely screw it onto the screws. And so on until we reach the end.
Step 3: Level the slats
Now it’s the turn of the building level - with its help we set up all the slats. Now you understand why at the previous stage the screws should not have been screwed to the base. It is better to start working with the level from the top rail. Now you can tighten the screws all the way. Experts advise using pieces from the slats to line the resulting cracks. In this case, it is best to do this maneuver in close proximity to the screws - this will help avoid deformation of the rack. The next stage is to apply foam around the perimeter, which will allow the rail to avoid bending.
Plastic panels and working with them
The use of plastic panels is the fastest option, allowing you to improve the opening after installing window blocks within one day. Do-it-yourself slopes for plastic windows are installed in this order (without auxiliary profiles):
- The slopes are measured.
- The panels are cut to the required size.
- “Liquid nails” or putty are applied to the reverse side.
- The fragment is pressed to the surface.
- A sealant is applied between the frame and the panel.
- Plastic corners are glued to the outside.
Installation of plastic panels on window slopes
Indeed, this option allows you to close areas in a short time.
Of course, everyone chooses the method of repairing the slopes of plastic windows, which is used after installing the frames. The main thing is to strictly follow the technology.
How to properly seal slopes after installing plastic windows
Windows play one of the important roles in the house; the quality of living directly depends on them. And it’s not just about the supply of sunlight, they provide the necessary microclimate, access to fresh air, and serve as an outlet for unpleasant odors. Their appearance says a lot about the owners; thanks to their neatness and aesthetics, they can become a real decoration of the room. Therefore, it is very important to know how to seal slopes after installing plastic windows, so as not to disturb the harmony with the overall interior of the room.
Sealing slopes after installing windows
Finishing of external and internal slopes of plastic windows
The question of how to seal slopes after installing plastic windows is quite relevant, since not every company that installs windows deals with this type of work.
Sometimes craftsmen simply forget to do this, or additional work is performed for an additional fee.
It is not at all necessary to hire someone: in most cases, installing slopes yourself does not cause any difficulties.
Why are slopes needed on the outside?
Knowing how to seal slopes on windows, you can improve the technical performance of the window, get rid of drafts and cracks, and make the room quieter and warmer. To do this, you need to start with work on the outside of the facade.
Before starting work, you need to make sure that the polyurethane foam has already been applied and the structure is waterproofed. There are several ways to perform work, so there is a choice among materials.
Scheme of sealing using plaster
Sealing slopes after installing windows with plaster is one of the most popular methods, but it is also the most labor-intensive, as it requires sufficient skills and time. The positive aspects include the affordable price of such material and high-quality results.
If you have some experience, the work will take at least three days, and if you are taking on it for the first time, perhaps more, since some errors will have to be corrected.
The plaster is applied in three layers.
The first two must be made of a special heat-insulating composition, otherwise the window will be cold and release warm air into the atmosphere; the last layer is made of ordinary plaster.
Before applying the next layer, the previous one must dry completely, this takes about 24 hours: it is precisely because of this feature of the material that the work takes so much time.
You cannot apply a new layer earlier. After you complete the work, you need to wait until the last layer dries, sand it and paint it.
Paint will provide additional protection from moisture and other negative factors.
: Plastering window slopes with your own hands
Use of plastic elements
Sealing the slopes of plastic windows with your own hands will not cause difficulties and will not take much time if you use plastic elements.
They go well with window structures made of a similar material, are easy to install, do not take much time, and do not require specific skills when working.
The plastic will not need to be painted after installation, as the material can be purchased in any color. It is sold ready-made in construction stores.
The panel can be easily cut with a regular hand saw for metal or wood, so you can cut the part to the desired size. It is convenient to attach the panels with glue, and the joints are sealed with waterproof sealant. Plastic slopes are not afraid of moisture, temperature changes, and last quite a long time, although they are not aesthetically combined with all materials.
Working with internal structural elements
After the exterior work is completed, it is worth moving indoors and doing a similar finish there. Repair of slopes after installation of plastic windows is usually always required.
Internal slopes perform the same functions as external ones, but carry a much greater decorative load, since without their restoration the wall looks ugly.
That is why it is important to do the work carefully.
Advice: plastering for indoor work is not the best option, as it will not make the window warm enough, and the appearance of the window will not be flawless.
How to seal the slope inside the room?
If the choice of how to seal the slopes outside after installing plastic windows , then there is no need to worry about this indoors, so you can use those finishing options that are not applicable for the street: for example, plasterboard sheets.
Drywall is relatively quick and convenient to install, the sheet can be sawed into the desired shape, it is light in weight and has a perfectly smooth surface. The disadvantages of working with such material include the fact that it crumbles, you will have to clean, plaster and putty the joints, and paint the sheet itself, since initially its appearance is not attractive.
Features of sealing window openings
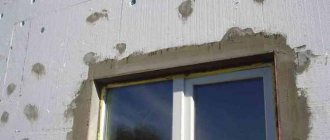
It is important that after installing the windows, sealing the slopes should be done not only inside the room, but also outside. External factors adversely affect the foam layer; it collapses and loses its ability to perform its functions. External work must be done first.
Before making slopes after installing plastic windows, you need to decide on the material. For external finishing, two types are used: plaster and plastic panels. The same materials are also used for interior work, plus indoors you can use: plasterboard, sandwich panels, wood, cork.
Material for sealing slopes
Whatever material is chosen, before sealing the slopes after installing plastic windows, their surface must be treated with a special antifungal compound.
The application of waterproofing material is mandatory. It is recommended to lay PSUL on the outside of the installation seam (that’s what pre-compressed sealing tape is called), and the thicker it is, the better (the best option is 40 mm).
What slopes can you make yourself?
The simplest and most affordable type of sealing the slopes of plastic windows with your own hands is plastic cladding. This can be either a solid sheet from which elements are cut to the required sizes, or plastic panels. The installation technology is simple and accessible to anyone, the only thing that needs to be taken into account: such repair of slopes after installing plastic windows will cost more than plaster or drywall, but the fashionable and presentable appearance is worth it.
Sandwich panels, which are two connected PVC sheets with a polyurethane layer separating them (performing a thermal insulation function), are distinguished by simple and similar installation to plastic. This is the most expensive of all existing materials, but it is strong and durable.
If you are interested in how to make slopes after installing plastic windows in the cheapest way, then you should immediately note that plastering is a complex and labor-intensive process that will take several days. In addition, it requires the involvement of specialists.
How to repair slopes using the plastering method, and what slopes provide
Well, firstly, it is the slopes that protect the seams from moisture. In addition, they provide good thermal insulation. Among the advantages is tidying up the overall appearance of the window.
We looked at one of the possible ways to put the slopes in order.
But today it is possible to choose from several types of finishing - plastering, installation of PVC sheets or drywall.
We offer you some tips to help you do everything right if you decide to do plastering:
- Repairing window slopes with your own hands will require your time, experience and knowledge. It is better to use the services of specialists.
- If you have new plastic windows at home, then before you start plastering, do not forget about thermal insulation - otherwise the windows will begin to “sweat” in winter.
- If during the process of dismantling the old surface, the edge of the slope being removed has crumbled, then you need to install metal corners.
- Plastering slopes should be carried out using beacons (and not “by eye”). Plaster beacons can be wooden or metal.
- It is better to deal with window slopes using the plastering process in the case of restoration or major repairs.
- If we are talking about cosmetic repairs, then it is better to use other materials. After all, when plastering and puttying, the coating around the window will definitely be damaged or dirty.
- The beacons should be located at the same distance from each other (along the entire perimeter of your window opening).
- The gypsum plaster solution can also be applied in a thick layer. How thick it will be depends on the surface you are working with.
- If you add sand (and you will definitely need it in the solution), it is better to sift it.
- All external slopes on windows can be treated with a cement mixture (you can also use façade starting putty with water-repellent additives).
- For the plastering process, you can use dry gypsum plaster (we are talking about indoor slopes).
- Each applied layer of plaster (and there should be several of them) requires good drying.
- After the mixture, the surface is puttied to make it smooth. Just keep in mind that you cannot apply putty in a thick layer. You can apply a new one only after priming the previous one.
- The finishing putty becomes lighter after drying.
- If you have reached this stage, then you need to go through the sanding machine. Sanding will correct all the unevenness.
The principle of installation of plastic slopes
Repair of slopes after installing new plastic windows begins with surface preparation:
- removing polyurethane foam residues;
- treating the opening with an antifungal solution;
- applying waterproofing.
A starting profile (U-shaped) is attached to the window frame along its perimeter with self-tapping screws. Along the outer side of the slopes, it is necessary to place a wooden strip, onto which F-shaped profiles for the slopes of plastic windows are then attached with staples using a construction stapler. It is very important to check the plane of the slats with a level; in case of deviations, alignment can be done using shims (you can buy them or use unused parts of the wooden slats).
Sealing plastic slopes with sealant
The further installation principle is to place plastic panels between the prepared profiles, starting from the top side of the opening. Initially, the side of the panel is inserted into the starting profile; sealant for slopes of plastic windows will help improve the fastening.
Before fixing the second side of the panel in the F-shaped profile, a layer of mineral wool is placed under the plastic. It performs the function of heat and sound insulation. For sandwich panels, this action is not performed, since they are already equipped with insulation.
Having figured out how to attach the upper slopes to plastic windows, proceed to installing the side panels. At the end of the work, it is recommended to cover the joints of the panels and the strip connecting them with the window sill with a thin layer of liquid plastic, carefully removing the excess.
Technology for sealing windows with plastic slopes
Since plastic slopes are very popular due to their simplicity and accessibility, let us consider in more detail the scope of work and the principle of installation of the structure.
The interior decoration of windows is most often done with plastic panels.
First, you need to remove the remaining foam from the working surface, treat the openings with an antifungal agent and apply a layer of waterproofing. Pay attention to the sealing of the window under the window sill: the free space must be carefully filled with foam to prevent future blowing .
The space under the window sill is carefully sealed with foam
The starting profile needs to be attached around the perimeter of the window frame, and the rail should be placed on the outside. This is an important installation part on which the profile fastenings for slopes are mounted. This can be done with the staples of a construction stapler. Be sure to check the thickness of the slats: if there are slight deviations, use a thin shim.
Next, the panels need to be placed between the prepared profiles. You need to start working on the upper side of the window frame, moving to the lower ones. First, the plastic is introduced into the starting profile and secured well, after which you can use a sealant.
Silicone sealant is used to seal joints
Before you start fixing the second side of the plastic, a layer of mineral wool is placed under it. This step will improve the sound and heat insulation function. Having successfully attached the slopes along the top of the window, you can install the side panels in a similar way. At the end of the work, the joints and the connection strip with the window sill are covered with a thin layer of liquid plastic, and the excess is carefully removed.
Even an inexperienced craftsman can seal windows after installation, since the methods are simple to perform and do not require high labor costs. Ready-made structures made of plastic or plaster will delight you with their neat appearance and reliability. It is only important to follow the technology and stock up on knowledge on how to properly and efficiently seal a window.
What you need to install plastic panels
The most expensive component for the slopes of plastic windows is the plastic itself (solid canvas or panels). In addition, you will need to purchase:
- U-shaped profile (it is the starting one);
- fastening elements (dowels, screws);
- F-shaped profile;
- isover (mineral wool);
- vapor barrier tape;
- antifungal solution;
- sealant;
- liquid plastic.
Installation of plastic slopes
For tools, make sure you have a construction stapler with staples, a screwdriver, a level, a folding meter and a simple pencil (for marking), and a hammer drill.
Why is it better to entrust the work to professionals?
There is an opinion that it is easiest to make slopes yourself using plaster. In fact, this is one of the most labor-intensive methods that requires special practical skills. To make it high quality, the master breaks the technology into stages. First, he covers the surface with a primer, then with two layers of plaster, separating them with a construction mesh, and then seals the cracks with silicone. Particularly meticulous work in the corners.
Slopes for plastic windows made of sandwich panels have a very high rate of heat and sound insulation. Inside the panels there is a special foam, the porosity of which allows you to achieve this effect. The price of the sandwich version of slopes is higher than, for example, PVC . In addition, their resistance to aggressive climatic conditions is negatively characterized. For installing slopes on plastic windows from the outside, it is better not to use this option. The installation of slopes made of plastic is most in demand today . They are easy to use, have good functional characteristics, are reliable, practical, and inexpensive. For home windows, you can choose the desired color and texture. recesses and form corners from sheet plastic. to order from professionals. We offer installation of slopes by qualified and experienced craftsmen who can sheathe quickly and efficiently. The stages of their work are as follows:
- taking measurements of each window;
- preventive cleaning of remains of previous work;
- installation and foaming of joints;
- debugging the operation of fittings.
By contacting our company, the customer can choose from the photo the suitable option for finishing the slopes and compare it with the approved price list. You will immediately notice that our prices In addition, we are ready to offer a wide range of consumables from a variety of manufacturers. For all of them we have quality certificates and permits for use in residential and public premises.
Finishing window slopes is a mandatory stage in the installation of window structures. In order for the windows to serve well and the slopes to stand without collapsing for many years, they must be done professionally. All details are important: from the consistency of mortars and adhesives to seam allowances. Only with proper installation the outer and inner window frames fulfill their function and make the microclimate in the room comfortable, physiological, and constant.
Painting slopes
Even with very careful dismantling of old windows, the slopes are damaged. All potholes, cracks and uneven surfaces must be repaired. To do this, use putty, gypsum or other materials based on sand and cement. Remnants of the mounting foam remain in the corners and at the joints; they are carefully cut off with a construction knife, trying not to damage the integrity of the mounting seam. A vapor barrier tape is glued over the cut foam. To prevent mold from appearing on the slopes, they are treated with an antifungal compound. For better adhesion, it is also recommended to coat the walls of the opening with a finishing primer.
The most difficult area for plastering is the upper slope. It is pre-strengthened with reinforcement. The mesh is attached to the slope with dowels, then plastered with perlite, vermiculite or perlite-gypsum mixture. The mixture for insulating and plastering slopes is best made using a construction mixer with an attachment, so it will turn out thick, viscous and homogeneous. First, a rough layer of putty is applied, then it is gradually leveled with a wide spatula.
2 hours after this work, small cracks and depressions may appear on the slopes. You can level them with a paint brush dipped in the same mixture, only with a thinner consistency. To form external corners, two construction tools are used - trowels. After the plaster has completely dried, the slopes are covered with paint in several layers, or acrylic sealant, which is an additional waterproofing. You can choose any paint color, but white is most often used; it makes the window opening lighter and more expressive.