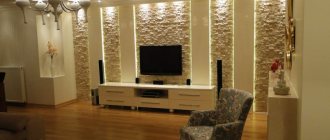
Some aspects of the work ahead
Leveling walls with plasterboard without a profile requires minimal time and effort, because there is no need to build structures. However, there are a few points to consider before getting started:
- Leveling the walls with plasterboard is carried out before laying the floor.
- The surface of the wall to which the sheets will be attached must withstand the load exerted by the facing layer. Ideally, you need to attach drywall to load-bearing surfaces that are not in contact with moisture and not subject to temperature changes; otherwise, moisture-resistant sheets that are green in color and marked with gypsum plasterboard are used.
- The use of this method is permissible only if the walls in the room have a curvature of no more than 4 cm.
- With the frameless method, it is impossible to create niches, additional shelves and partitions.
- Laying of communications and electrical wiring is carried out before the start of leveling with plasterboard; it is also better to cut holes for sockets in the sheets in advance.
Why drywall?
By leveling walls with plasterboard, you get a number of significant advantages:
- The composition of plasterboard sheets does not harm human health and the environment.
- Installation can be carried out even by a non-professional.
- The material is not subject to rotting.
- Drywall does not interfere with air circulation and has vapor permeability properties.
- After installation in the room, the sound insulation indicator improves.
- After installing plasterboard sheets, there are many options for further finishing.
- Drywall creates minimal load on load-bearing structures due to its low weight.
Types of gypsum boards
First of all, you need to choose the type of gypsum board that will be most suitable for the type of room.
There are four types of gypsum board sheets:
- standard (they have gray cardboard with blue markings, density - 800 kg/m3, thermal conductivity - 0.35 W/Mk, the most popular option, suitable for all types of dry and heated rooms);
- insulated (have two components - polystyrene foam + gypsum board sheet);
- moisture resistant (the cardboard is green and blue marked; the cardboard itself is impregnated, including antifungal, hydrophobic additives in the core material, suitable for finishing rooms with high levels of moisture)
- fire-resistant (pink or gray cardboard with red markings, density - 850 kg/m3, thermal conductivity - 0.22 W/Mk, covered with multi-layer fire-resistant impregnation, not exposed to fire for up to 30 minutes, sheet thickness 12.5 mm, They can also be used to equip home boiler rooms and industrial premises).
When choosing gypsum plasterboard sheets according to the thickness parameter, keep in mind that thicker sheets are applied to a flat wall surface, and thinner sheets are applied to a curved surface. On the table presented you can familiarize yourself with the optimal parameters and ratios of gypsum plasterboard sheets.
Ways to level walls
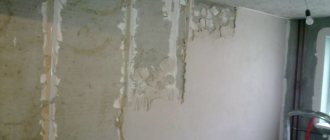
Curved walls are a typical phenomenon for both new-build apartments and secondary market housing.
There are several ways to solve this problem:
- leveling with plaster;
- leveling with sheets of drywall;
- leveling with plastic panels.
Let's focus on the second method - leveling the walls with plasterboard, since it is the easiest to work with and even an amateur in repair work can easily cope with it. Leveling the surface using gypsum plasterboard can be done in two ways: by placing the gypsum board with glue directly on the wall, or by screwing it onto the frame. The method of fastening drywall is not chosen based on personal preference, but is determined taking into account the degree of curvature.
How to perfectly level crooked walls with plasterboard
Is it possible to start finishing the premises without leveling the walls? Unlikely.
- Uneven surfaces will not allow high-quality wallpapering or fastening of floor and ceiling skirting boards without gaps.
- Crooked walls often become the reason for repeated repairs.
The best option to properly level the walls is to use drywall. This material is convenient and easy to install, but has its own characteristics that must be taken into account when carrying out repairs.
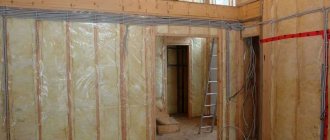
Frame method of leveling walls
Installation of a metal frame Answering Kirill's numerous questions, I told him the basic rules for installing a frame, why such sizes and materials were chosen.
The plasterboard sheet has a width of 1200 mm; special moisture and fire resistant sheets are half as narrow. When installing the frame, we maintained the pitch of the posts for fastening the gypsum boards at 600 mm; if you plan to glue heavy wallpaper, then 400 mm. The self-tapping screw is screwed in the center of the wide sheet and along the edges, at a distance of 10 mm from the end. A metal profile and wooden beams are used for the cladding. Each material has its own characteristics. Metal is stronger, more durable, faster to install, and cheaper. Wooden wood retains heat better and does not create cold bridges, but dampness causes the block to swell and become deformed. Wood is used for cladding walls and facades of log buildings, frame houses and internal insulation of external walls in high-rise apartments.
Drywall installation
Kirill and I started leveling the walls in the bathroom with plasterboard to match the tiles, following a step-by-step work plan.
- We marked the profile installation line around the perimeter where the dry plaster will be installed, taking into account the location of the pipes in order to hide them.
- We screwed the starting U-shaped profile to the floor along the line.
- We marked the location of the racks taking into account the pitch.
- We set the outermost posts on the wall level, then stretched the cords to align with them, and aligned the rest. At the location where the valves and pipes were installed, a frame was made for the door, taking into account the size of the tiles.
- We coated the back side of the drywall with primer for additional protection from moisture. We secured the sheets with self-tapping screws.
- We cut off the corners at the ends of the gypsum boards and filled the joints and fasteners with putty.
- We cleaned it, checked the flatness and coated all surfaces twice with primer.
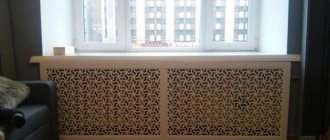
It's great that you don't have to sand the tiles. We simply went over it with coarse sandpaper, leaving marks in the horizontal direction. This will keep the tiles better on a vertical plane. The tiles were glued later, when everything had dried and a screed was made on the concrete floor. You can see how stylish this bathtub looks in the photo.
Finishing
The final finishing of the plasterboard surface is aimed at creating conditions for subsequent finishing of the walls. Without this, over time, defects may form in the material. The finishing actions depend on the further work plan:
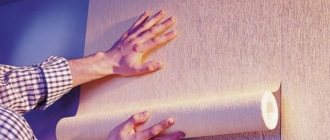
Preparing the wall for wallpapering. For subsequent wallpapering, a uniform layer of primer from special water-soluble mixtures is applied to the entire surface of the walls. Alkyd-type primers should not be used - under their action, the sheets tend to deform and create bubbles on the surface. It is clear that no finish will adhere well to such a surface. The primer, diluted in a container with water, should be applied from top to bottom, in a very thin layer up to 1-2 millimeters thick.
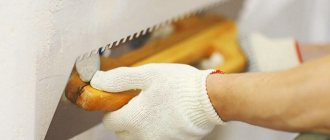
Preparing the wall for putty. For high-quality application of putty, the working surface must be additionally leveled after installing the drywall. To do this, the surface of the sheets is thoroughly rubbed with sandpaper, using a respirator. When using the frame installation method, you should additionally take care of the heads of the screws: they must be completely recessed in the material, however, not form “pits” in the surface.
Preparation for further painting. It is carried out in the same way as preparing for wallpapering: maximum smoothness of the surface is achieved by priming the entire area of the wall
It is especially important to carefully putty the seams formed as a result of the joint of drywall.
Preparation for tiling. In this case, finishing will consist, first of all, of filling the joints. It is convenient to place a self-adhesive mesh under the putty on the corners, on top of which the putty is applied and leveled.
https://youtube.com/watch?v=-yZN1quNY0A
Installation of gypsum boards
Drywall is used not only in repair, but also in decorative work.
It is used:
- in the manufacture and installation of decorative elements;
- installation of ceilings of any complexity and partitions;
- related finishing works.
Using gypsum board allows you to achieve a perfectly flat surface.
Drywall is used not only in repair, but also in decorative work
How to properly build a plasterboard wall
The room temperature must be maintained above 10°C. Before installation, drywall must be kept in the room being repaired for 2 - 3 days so that it accepts its air humidity and temperature. Which drywall is best to install depends on the climate in the room. In rooms with normal and dry temperature and humidity conditions, gypsum boards are installed.
For rooms with high humidity, GKLV.S is used. If the unevenness of the walls is more than 20 mm, pre-glue strips cut from plasterboard 100 mm wide with Perlfix glue and then glue plasterboard slabs onto them with Fugenfüller putty.
- maintains the desired microclimate in the room;
- environmental friendliness: drywall is completely harmless and does not have a detrimental effect on human health;
- high sound insulation;
- the possibility of subsequent finishing with painting, plastering, tiles, wallpaper and other materials;
- low cost of plasterboard - allows it to be used even in low-budget construction;
- the ability to create structures of any complexity, including round ones.
Drywall is often used to finish walls and ceilings. Installation of drywall is carried out before laying the final floor covering. In order for the walls and ceiling to support the drywall, they must be strong and not delaminate. Drywall cannot be glued to plaster. If the wall material is wood, it is permissible to choose fastening the gypsum boards with tar paper nails with large heads.
The nails are recessed, and the recessed areas are puttied. Glue is first applied to uneven walls. A comparative analysis of the price factor of using plasterboard or plaster to level walls showed that neither method has a significant advantage, except for the case when plasterboard with glue is used instead of plaster.
In the process of wall repair, both specialists and novice finishers are trying to figure out: what is better, plaster or drywall on the walls? Each technology option has its pros and cons. The final decision is influenced by the slightest nuances that you don’t pay attention to in everyday life. At the corners of the edges of this crossbar, cuts are made to the marked depth.
Only the front part of the profile is left intact, and the side shelves in the cut area are bent at a right angle - they must fit inside the frame. They are secured with pliers, a riveter or self-tapping screws. For example, to tidy up walls using plaster mortar and beacons, you need to have certain skills and dexterity that only come with practical experience.
And when working with drywall, it is enough to be diligent, careful and accurately follow all technological recommendations. The process will go faster if all the necessary materials, elements and consumables for installing the structure and tools for work are at hand. Very often, when a complete interior decoration of a room is carried out, it becomes necessary to level the walls. This situation is especially common in multi-storey buildings. The advantage of the first option is that there is no need to carefully prepare the surface, since all its shortcomings will be completely hidden. In addition, all communications and sound insulation can be hidden in the space between the gypsum board and the ceiling.
Additional information on the topic:
- How to properly install metal profiles under drywall
- Is it possible to glue wallpaper onto drywall without putty video tutorials
- Walls with a plasterboard ceiling: how to make a video
- Scheme of a two-level plasterboard ceiling with dimensions and radii
- Beautiful ceiling in the kitchen made of plasterboard photo 2021 modern ideas
Attaching drywall to the frame
To ensure that the process in question does not cause complications and difficulties even for a novice amateur builder, it is necessary to strictly follow the instructions. Each stage is very important, and if something goes wrong at the first stage, if some technology is broken, then the final result is unlikely to please the master.
How to make a drywall frame
First you will need to do some preparatory work - there’s no way around it.
First of all, the surface of the walls is cleaned of dirt and dust, and if there is an old coating or shingles that have come off the wall, then all this must be removed. It is not necessary to prime the walls before leveling them with drywall, but it is advisable
It is especially important to treat surfaces with antiseptic agents, and for an external wall this is generally a prerequisite for high-quality preparatory work
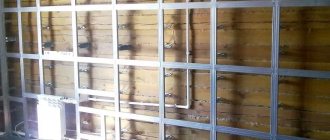
Installation of a frame under plasterboard is the first stage in the work of leveling walls with plasterboard sheets, and a very important one. It must be carried out according to certain rules:
- First of all, it is worth installing guide profiles on the ceiling and floor. To carry out this work, you need to mark the ceiling to install the profile, and then use a plumb line to determine the location of the profiles on the floor. After fixing the lower and upper profiles, you will get a kind of contour, which will be the basis for fastening all other profile elements.
Please note: if you plan to make a suspended ceiling of any complexity, then the next step will be the installation of ceiling profiles. This will not only simplify the further process of finishing the ceiling surface, but will also limit the area of wall alignment with plasterboard sheets
- Now you can “drive” the profile into the guides on the wall. Remember - the calculation of the number of profiles per sheet should be as follows: one profile is attached in the middle of the sheet, two - along the edges. The edge profiles should be positioned so that the cut of the plasterboard sheet falls in the middle of them - it turns out that two sheets are attached to one profile (edge).
- The profiles inserted into the guides must be secured with self-tapping screws, as well as with the help of “crabs” - special fasteners made of the same material as the profile itself.
Step-by-step instructions for leveling hangers with the frame method of installing drywall are presented in the video:
Video instructions for installing drywall on a frame with your own hands are presented below:
Cladding the frame with plasterboard
After checking the strength of the frame elements for the correctness and reliability of the fastenings, you can install the gypsum board.
The plates are attached with self-tapping screws in increments of 25 cm. To avoid bending the profile inward, screws are first screwed into the profile shelf near the back, and then at the opposite edge.
The sidewalls, if necessary, are cleaned and processed, then marked, taking into account the presence of technical holes.
Attention! The joints of the plasterboard sheets should take place on an intermediate post installed above the horizontal beam, and not on the guide.
The plates are attached with self-tapping screws in increments of 25 cm
The second method of fastening without a frame is using self-tapping screws
This type of wall cladding (without creating a frame) is more difficult to complete than the first option. However, it is considered more reliable. This method is used when finishing surfaces with large curvature.
The finishing process using self-tapping screws without assembling the frame:
- The sheet is applied to the surface. Make small holes for fasteners. They should be spaced evenly. There should be a total of ten (eight allowed) holes per sheet.
- Then the plasterboard is removed. Dowels are inserted into the holes made.
- On the next stage, thick foam rubber is glued to the drywall, ten centimeters away from the drilled hole.
- Then the sheet is attached to the wall with screws and washers.
- Drywall
is installed in a vertical position, which is checked using a level. Then screw in/unscrew the fasteners - self-tapping screws. - Work similarly with all subsequent sheets.
- Next, a hole is made near each screw (about seven millimeters in diameter). Polyurethane foam is pumped there.
https://youtube.com/watch?v=K4wkgQG3dtE
- Fix all sheets.
- After the foam has hardened, the screws are removed. The resulting holes are puttied.
- The seams are puttied and then sanded.
Keep in mind that before installation, drywall must rest for two days in the room in which it will be installed.
One of the most convenient options for wall repair is covering the floors (reinforced concrete and wood) with plasterboard. The material has a number of advantages and allows you to carry out work with a minimum amount of dirt and dust. In addition, with the help of gypsum boards you can not only level walls and ceilings, but also install partitions. This will allow you to make any layout in the room or divide the room into zones. How to properly install drywall on walls and what methods can be used? The next article is about this.
Creating a wireframe
If you have already dealt with creating a frame for plasterboard structures, then you should not have problems with this stage.
The procedure for constructing the frame is as follows.
- First you need to find out the zero plane from which the entire wall will be measured. Select the most protruding corner and drive a nail there so that it sticks out the length of the profile (4 cm). Now you need to take a plumb line, lean its cord against the edge of the nail so that the weight hangs above the floor without touching it. After waiting until the plumb line stops swinging, use a tape measure to measure the distance from the sinker to the wall and drive in another nail with the desired reach. Repeat the procedure on the other edge. You should end up with a square, which you need to mark by pulling the fishing line.
- A starting UD profile is installed along the perimeter of the new structure (on the floor, walls and ceiling). It is fixed with dowels directly into the concrete, so you will definitely need a hammer drill. The edges of the profile must extend outward in order to later insert jumpers into them.
- The main CD profiles are set within the resulting boundaries. The sheet of drywall will be fixed directly to the profiles, so they are installed with their edges facing the wall.
- The first profile is located at the very corner of the wall in a vertical position, and the next ones - in increments of 60 cm. The last profile is mounted in the same way as the first, even if the distance from the penultimate lintel is less than 60 cm.
- To impart rigidity to the structure, the transverse profiles are additionally secured to the wall with hangers. After fastening, the hangers are bent in a “P” shape and allow you to secure the profile to the required width. Be sure to check the evenness of the structure using a level. For convenience, first install the hangers, and then mount the transverse profiles.
Note! It is necessary to retreat 60 cm from the center of the profile. This distance allows you to attach a sheet of plasterboard 120 cm wide
along the edges and in the center.
If your walls are higher than the standard 250 cm height of plasterboard, then you need to cut and fasten strips of plasterboard on top. At the same time, add a series of horizontal jumpers at a height of 250 cm. They will allow you to secure the strips along the edge.
This video shows the process of covering walls with plasterboard on a frame made of profiles:
Build a house
Plastering is no longer used as often to level walls as before. Today, this method has been replaced by more progressive methods that involve the use of modern materials.
Everyone knows that with the help of drywall you can get perfectly smooth wall surfaces. But most often, a special frame is formed for this purpose, to which plasterboard sheets are attached. The process is quite labor-intensive, and at the same time, the usable area of the room is reduced to a certain extent. Therefore, many people are interested in the question of how to level walls with plasterboard without using a profile?
This method allows you to significantly save on materials for the frame and reduce the repair time. It should be remembered that drywall is a fragile material, so it is not recommended to use it to line walls in rooms where there is a risk of damage from impact.
To carry out the work you will need:
- Putty;
- Primer;
- Special adhesive for drywall;
- Reinforcing tape;
- Drill with mixer attachment;
- Brush.
The preparatory stage is mandatory, which involves preparing the wall surface.
To increase surface adhesion, the following operations must be carried out:
- First, you should completely clean the walls of previously pasted wallpaper or paint. To do this, you need to moisten the old wallpaper with a rag and remove it after half an hour without any problems. To remove the paint layer, use a sander.
- Next, all chips should be primed, and deep cracks should be filled with putty. The prepared wall surface should be allowed to dry for two days, after which two layers of primer should be applied to the entire wall.
Work on frameless leveling of walls with plasterboard begins with the preparation of the adhesive mixture. For this, a special powder composition for drywall is used, which is poured into a plastic container, where water is added in the amount recommended by the manufacturer. The mixture is whipped with a drill with a mixing attachment. The consistency of the adhesive mass should resemble thick sour cream and not flow down the wall
It is important to take into account that the prepared adhesive composition should be used within an hour, therefore there is no need to prepare it in large quantities
The resulting adhesive solution should be applied to the wall surface with a brush using continuous strokes in increments of approximately 40 cm. If the wall is wavy, then its verticality can be adjusted by the thickness of the glue strokes. Pre-cut to size sheets of plasterboard are applied to surfaces coated with adhesive. Next, you should firmly but carefully press the sheet to the surface of the wall using a building level and move it along the surface, tracking the verticality of the installation. If there are doubts that it will be possible to level the surface in this way, it is better to use beacons.
It is important to know! Before the glue hardens, all errors can be eliminated. To level the surface along the length of the wall, you need to stick a sheet of drywall on different sides, and stretch a thread between them, which will serve as a level for gluing the next sheets in a row
To level the surface along the length of the wall, you need to stick a sheet of drywall on different sides, and stretch a thread between them, which will serve as a level for gluing the next sheets in a row.
After gluing the plasterboard sheets, it is necessary to fill the joints with adhesive and glue reinforcing tape to them, pressing it into the solution. This will prevent cracks from occurring during operation.
At this point, the process of leveling the walls is considered complete and you can begin finishing work. For this you can use any modern materials.
Preparing the wall for leveling gypsum boards
Leveling walls using drywall begins with preliminary preparation of the walls of the room.
First of all, you will need to remove everything that does not hold well - old wallpaper, crumbling plaster, lime, etc. After this, it is advisable to treat the surface with an antifungal agent.
If there are cracks or crevices on the starting surface, they must be sealed with plaster. Otherwise, they can cause damage to drywall and significantly shorten its service life.
The prepared work surface must be absolutely dry during installation, regardless of the fastening method.
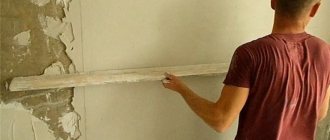
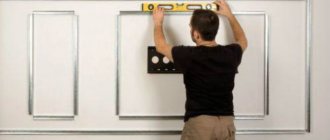
Before leveling the wall, appropriate markings are applied to it so that all its lines are parallel to each other. Apply it using a level. Marking will significantly simplify and speed up the process of attaching sheets to the wall.
Method of leveling a wall by gluing plasterboard
If you don’t want to lose space and not devote such an impressive space to creating a frame, you can use another method of leveling gypsum board walls, namely gluing them to the wall. To do this, it is advisable to even out the main irregularities on the wall in the form of bumps and holes. After this, you can begin the process itself.
The wall should be primed before work. Sheets are cut out in advance for laying along the entire wall. It should be taken into account that it is necessary to leave gaps under the ceiling and above the floor of approximately 50 mm, so that the glue on which the gypsum boards will be held will dry out better.
Drill holes along the entire wall for dowels. The screws are screwed into them so that the caps form an even plane. This is necessary for the correct placement of the sheets, otherwise it will not be possible to level the surfaces of the sheets and fit everything under one flat wall.
The glue solution is prepared using special dry mixtures with the addition of water. The result should be a solution with a consistency similar to a paste. It dries quickly, so you need to dilute it immediately before installation. The surface of the sheet is thoroughly cleaned of dust for better adhesion to the glue. Glue is applied to the back surface of the sheets in piles and longitudinal stripes along the edges of the sheet and along its center line. It is best when the piles are located at a distance of 20-30 cm from each other. You cannot level them into one uniform layer, as this will result in a large consumption of the solution, and it will not be possible to properly attach it over the entire area to the wall.
Having attached the sheet to the wall, you should press it evenly against the heads of the screws. If necessary, use a rubber hammer. To avoid punching holes, you can apply a wooden board or beam to the sheet and then hit it with a hammer.
When finishing the walls with plasterboard is completed, you need to wait the time necessary for the adhesive to dry. You can find out the drying time from the instructions included with the glue. Only after this can you begin further work. The seams between the sheets are sealed with mesh and covered with starting putty to the general level of the sheets. As mentioned above, finishing putty for the entire surface should be used only when necessary.
As a result, no matter which method is chosen, the result is a perfectly flat and smooth surface without the special labor and costs associated with plastering. The option with gluing sheets is also suitable if it is necessary to partially repair walls with plasterboard or form a slope on a window or an arch. The latter option is possible due to the fact that when drywall is perforated and slightly wetted, it can take any shape.
***
2012-2020 Question-Remont.ru
Display all materials with the tag:
Go to section:
How to properly attach a drywall profile to curved walls: step-by-step instructions
When installing metal profiles, you must adhere to a certain sequence.
Step one - install the guide profile frame
- Using pendulums or a level, the minimum distance from the wall is determined.
- A marking is drawn on the ceiling and holes are drilled along its line at a distance of 50 cm from each other.
- Plastic dowels are installed and temporary screws are screwed into them.
- Threads with small weights are tied to the heads of the screws and lowered down.
- In places where the loads come into contact with the floor, holes are drilled and dowels are installed.
- The guides on the floor and ceiling are secured with dowel nails.
- Vertical guides are installed along the edges of horizontal profiles to adjacent walls.
Step two - attach the hangers
- Using a laser or regular level, markings are drawn from top to bottom in the places where the profiles are attached.
The distance between the lines should be exactly 60 cm. This will allow you to join sheets of plasterboard with a width of 120 or 60 cm in the middle of each profile.
- Points for holes are marked along the lines in increments of 20 or 30 cm.
- Holes for hangers are drilled using a hammer drill. The diameter of the drill used is from 6 to 8 mm.
- Plastic dowels are inserted into the prepared holes. To quickly install hangers, it is advisable to use a screwdriver.
- The hangers are bent along the width of the profile.
Step three - installation of the frame
- The vertical parts of the structure are cut with metal scissors.
- The ends of the profiles are attached to the guides on the floor and ceiling using short “bug” self-tapping screws.
- Before installation, the profiles must be checked for bends or twists. Defective products cannot be installed due to possible damage to the integrity of the structure.
Tip - flat areas of unsuitable profiles can be used for cutting horizontal jumpers.
- It is advisable to start installation from the ceiling. The protruding parts of the pendants are bent or trimmed.
- To improve strength, horizontal jumpers are mounted between the vertical profiles. The distance between them should not exceed 60 cm. Ideally, you should get a design with square or rectangular cells.
- To fasten the profiles to each other, petals are cut out at the ends of the jumpers. The parts of the structure are connected with short “bug” self-tapping screws with a press washer.
How to fix drywall sheets
The width of a standard gypsum board for walls is 120 cm. Height is 250 cm.
To properly fasten sheets to a metal frame, the following requirements must be met:
- When joining the gypsum boards, the edges should be exactly in the middle of the profile.
- The drywall is secured with metal self-tapping screws in increments of 20 cm. The distance of the holes from the edge of the gypsum board is at least 1 cm.
- For quick and smooth fastening of gypsum boards, a screwdriver is used.
- If the height of the wall exceeds the size of a standard gypsum board, the sheets are attached staggered - alternately from the floor or from the ceiling.
- In spaces not covered by entire sheets, additional horizontal jumpers are installed.
- The pieces of drywall needed for final installation are cut using a utility knife or wood saw.
How to seal seams and holes from self-tapping screws
- GCR along the seams must be treated with a primer. Its drying time is a day.
- Using adhesive for fiberglass, serpyanka is applied to the seams.
- To fill the joints, use plastic finishing putty. The composition of the material must be suitable for this type of work.
- The proportion of water per kilogram of dry mixture is indicated on the packaging. Mix the composition using a construction mixer at low or medium speed of the hammer drill.
- The prepared mixture is applied to the seams with a medium-sized spatula.
- The putty should easily penetrate through the cells of the serpyanka, filling the seams.
- After drying, the serpyanka will serve as a reinforcing base and will not allow the putty to break or crumble.
- Holes from self-tapping screws that were not closed when processing the seams are sealed with a narrow spatula.
- The putty is sanded manually using a fine-mesh mesh or fine-grained sandpaper.
Sheet cutting
Before proceeding directly to leveling with plasterboard without a frame with your own hands, it is necessary to correctly cut the sheets. Their standard height is 2.5 meters, but the ceiling in the room can be higher. Then you will need additional pieces, which we recommend preparing in advance.
Drywall is cut according to the marks made with a pencil or marker. Using a construction knife, make an incision, then bend the sheet and carefully break it, making a similar cut on the reverse side.
If during your work you need to make shaped inserts from drywall, use a jigsaw for these purposes.
When to level drywall
In order not to remove the layer of paint and putty, carry out the following work:
- Apply primer "Beton-Contact"
Why this one? Because the peculiarity of this coating is the ability to improve the adhesive properties of smooth, dense surfaces (for example, monolithic concrete), and also makes the coating durable and reliable.
- Apply plaster mortar (start), beacons
A beacon is a special profile made of PVC, steel or aluminum. It is fixed vertically every meter. To keep everything level, use a building level. The more often you attach beacons, the better the result will be. After this, apply the plaster solution to a thickness that exceeds the height of the lighthouse by 3 cm, and then level the surface. Rotband plaster from the manufacturer Knauf, as well as ROTGIPS, are perfect. When the surface is dry, sand it thoroughly.
- Apply putty
Thanks to its use, you can perfectly level plasterboard walls, get rid of cracks and small defects, and also prepare the surface for the final application of finish (a type of putty) for final leveling.
When the surface is dry, sand it with a fine to medium abrasive.
The second layer, which is applied to level the drywall, is made with finishing putty. When it dries, sand the surface with fine abrasive.
Please note that before use, be sure to read the instructions for use.
- Apply deep action primers
This will prevent the coating from exposure to moisture, improve adhesion to paint and glue, and even out the moisture absorption of the wall. Should be applied with a brush or roller.
We recommend using cladding materials from the same manufacturer to achieve the best effect. And now you can do the final finishing - paint, wallpaper, tile, apply textured plaster.
Frame method of attaching gypsum boards to the wall
When the unevenness significantly exceeds 4 cm, leveling the walls with plasterboard without a profile does not make sense - there is a risk that the gypsum board will float, and the structure itself will be fragile. The frame method of attaching drywall to the wall is more expensive than the frameless method.
But it has a number of advantages:
- will allow you to even out even hopeless moments;
- under the frame you can easily hide tubes, wires and other communications;
- durability of the structure.
The use of frames eats up the space of the room, at least 4 cm on each side. This is especially noticeable in small apartments, where every centimeter counts. But, if you still had to level the plasterboard with the frame, it is possible to additionally insulate and enhance the sound insulation of the room by laying sheets of plasterboard on the reverse side with thermal and sound materials.
With the frame method, the profile is screwed in vertical strips at a distance of 60 cm from each other; the profile begins to be screwed from one corner and ends in the opposite, regardless of how many centimeters are left. At the stage of installing the profile, the level of the structure is also set.
If the ceilings in the room are higher than the length of the plasterboard sheet - 250 cm, then additional strips of plasterboard will need to be cut and secured at the top. To fix them along the entire perimeter, it is necessary to add a series of horizontal jumpers along the height of the sheet, at the site of the planned joint.
Drywall is screwed with special hardened 35 mm screws onto the installed structure in a checkerboard pattern to give it greater stability. The screws are screwed in so that the cap sinks slightly. The recommended fastening step is 15-25 cm.
Finishing
Each gypsum board has a strip on its edge, which is located below the level of the product. It facilitates subsequent processing of material joints. For this purpose, also use a special self-adhesive mesh. A layer of starting putty should be applied on top of it. In this way, the recess can be equalized with the general level. In the future, the processing of drywall is determined by the type of finish chosen:
- if you plan to cover surfaces with tiles, as well as other dense and non-transparent material, the joints should be carefully covered with putty;
- If you want to paint or wallpaper the base, you should apply a millimeter layer of finishing putty to the entire plasterboard surface.
Final sealing of joints Finishing of the entire surface
Next, the wall surface will need to be thoroughly sanded and primed. And only then can the walls be covered with finishing, and the repair itself will be completed.
When to use gypsum plasterboard
This material is used in the following cases:
- Applying plaster is clearly impractical due to the large slope of the walls and the increased consumption of materials.
- The apartment must be thermally and/or sound insulated.
- There are too many communications in the rooms that need to be hidden: heating pipes, plumbing communications, air conditioning or ventilation.
In addition to eliminating irregularities, gypsum boards are used to solve other problems that arise during repairs:
- using plasterboard walls you can form right angles;
- there is no need to cut channels for wiring and hollow out places for sockets - they are easily mounted in gypsum plasterboards;
- it is necessary to create niches for furniture, household appliances, recesses for lamps, shelves or room decoration;
- you need to divide a large room with gypsum plasterboard partitions into functional zones.
Frameless method
Surfaces with curvature can also be leveled using gypsum plasterboard without constructing a frame of profiles. But in this case, much will depend on the degree of deviation of the base from the vertical:
- if it is less than 4 mm, you can mount the gypsum board on the wall, having previously lubricated it on the back side with a Fugenfüller-type adhesive;
- if the differences are less than 20 mm, the drywall is glued to the surface with a more resistant composition. For example, "Perlfix";
- if the deviation is more than 40 mm, you will have to make a backing from longitudinal plasterboard scraps and fix them to the wall with hardware. Then the gypsum boards are fixed on the substrate, having previously coated them with Fugenfüller glue.
Applying glue to drywall when leveling walls Frameless method of installing drywall
You must decide for yourself which method you should choose.
Features and Methods
A sheet of drywall consists of pressed gypsum sandwiched between two sheets of paper. Installation is simple. The main thing is to create a high-quality frame. It will allow you to do the job without defects.
In order for the result to last for a long time, it is necessary to properly process the frame material. Wooden guides must be well dried and solid. Metal - coated with anti-corrosion agents.
For small defects on the walls, you can actually do without a frame; just use glue.
Advantages and disadvantages
Positive traits:
- Compared to other leveling options, plasterboard wins in ease of installation.
- The surface of the sheets does not require additional leveling. After installation, you can immediately proceed to finishing work.
- The pricing policy is in the average segment.
- Possibility to attach to any material.
- The absence of dirt during installation allows you to carry out work after finishing the flooring.
- A good solution is to lay insulation or communications in the niche between the wall and the sheet.
- The material is pliable to fulfill any fantasies.
Flaws:
- The main feature is fragility. Easily breaks.
- Not designed for heavy loads. Hanging furniture will not hold up.
- The main walls should not allow moisture to pass through.
- Cannot be installed in a damp area.
Scope of application
Drywall can be laid in any residential premises. If there is a need to level the walls in the toilet room or bathroom, then a moisture-resistant option should be used to prevent deformation.
fire-resistant material in the kitchen . It is also good because you can glue tiles onto it.
In country log houses, plasterboard sheets are the optimal covering. Experts advise using the material when leveling the walls of houses made of clay, bricks, and aerated concrete. The irregularities of such buildings are easily straightened out.
Tools and materials
The worker will need: a mallet, a metal profile, a primer, a plasterboard sheet, a gypsum plaster mixture, a spatula, screws, usually a trowel.
Advantages of the frame method
For any curvature of the wall, the result will be ideal if the frame is designed correctly. It consists of vertical guides intersected by horizontal slats. The resulting rectangle is covered with plasterboard. The result is a perfect, smooth new wall.
- This design straightens steep curves and collapsed walls.
- The sheets are firmly screwed to the frame, and in turn it is “tightly” attached in three directions: the ceiling, the walls, and the floor.
- There is practically no reduction in living space. In a good situation, no whiter than five centimeters.
- There is little waste with frame fastening.
- Insulation, sound insulation.
- There is no need to prepare for repairs.
- Communications are hidden.
Advantages of finishing without a frame
The following adhesive substances are used in the work:
- Putty.
- Gypsum glue.
- Polyurethane foam.
- The plaster is dry.
Advantages of the method:
- Cheap option.
- Saving living space.
- Short lead times.
- May not be performed by professionals.
Disadvantages and ways to solve them:
- Impossibility of hanging furniture. The problem is solved using specialized anchors.
- Weak wall. It is reinforced with sheathing in two rows.
- Mold may appear if not used correctly. It is necessary to properly treat the outer wall from the inside.