Home/Leisure and recreation/How to correctly adjust the pattern on the wallpaper? 5 proven ways to reduce the selection of wallpaper when adjusting the pattern
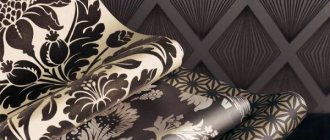
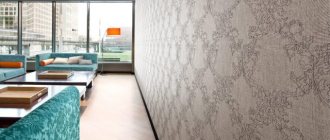
If we compare wallpapers that have a small pattern with those that have large or complex patterns, then the first of them are much easier to adjust.
But what to do with the second ones? It is necessary to carefully select each piece of wallpaper so that you can admire the whole picture on the wall, and not blurry frames.
That is why, in this article we will tell you about several ways on how you can reduce the amount of cut wallpaper when adjusting it to the pattern you want.
What is rapport
Rapport (pattern step) is the repetition of an image on one strip of wallpaper. Information about it is usually contained on the roll label.
There are two types of rapport:
- in height – repeating the pattern along the entire length of the wallpaper sheet;
- side – duplicating the pattern along the width of the strip.
The first type of repeat (the height of the repeating pattern) will be involved in the calculations, which is why it is mentioned below.
Knowing the ratio of the height of the repeat and the height of the room, you can easily calculate how much will have to be cut from each strip so that the pattern matches.
General recommendations for cutting wallpaper
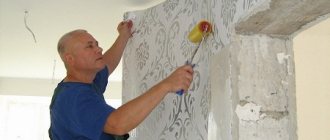
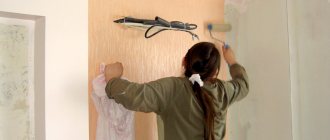
It is best to cut wallpaper on a film with a thickness of at least 80 microns, then immediately apply glue to the strips of wallpaper. Wallpaper with a selection of patterns is cut according to the pattern, and not according to a tape measure. You need to roll them out face up, put two rolls next to each other, combine the pattern, find the most noticeable point (which you definitely can’t confuse with anything else) and cut along it. Before cutting the strips, you should cut the roll at this point to match the pattern. After cutting the strips, turn them face down to apply glue.
First you need to count the required number of whole stripes. How to do this is described on the page How to count wallpaper. Next you need to find out the height of the ceiling. To do this, measure the height in all corners of the room. Typically, the height in different corners differs by 1 - 5 cm. Let's say there are four corners in a room with a height of 263, 264, 266 and 267 cm. The maximum size is needed (for this example - 267 cm).
It remains to determine how long to cut the strips; to do this, you need to look at the wallpaper label. Different wallpapers are cut differently, each type of wallpaper is indicated by its own icon: wallpaper - wallpaper without selecting a pattern; — wallpaper with pattern selection without offset; — wallpaper with a selection of patterns with an offset.
Drawing without offset
When gluing wallpaper, the image on which does not need to be shifted, proceed as follows:
- Using the calculations made, we cut the roll into strips, the length of which is a multiple of the repeat step and slightly exceeds the height of the room.
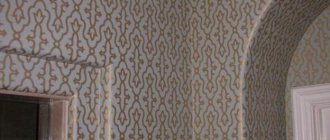
- Wallpaper with a large pattern must be pasted taking into account rapport. All stripes must start with the same pattern; to do this, you need to select canvases so that the pattern matches. If you use strips from the second roll to combine, there will be much less scraps.
- Thin wallpaper is glued with an overlap. You need to start work from a wall close to the window, otherwise overlaps will be noticeable.
- The first strip should be placed from the drawn vertical line near the corner (plumb line).
- After the opposite wall is pasted to the corner, we return to the first vertical line, which served as our starting point, and continue to glue wallpaper from it.
USEFUL INFORMATION: Inexpensive and original solutions for decorative wall decoration
Using wallpaper in corners
The difficulty is in the process of adjusting the pattern in the outer and outer corners. Distortions are immediately noticeable here. If you do this, the design of the room will be significantly spoiled. The following rules will help prevent shortcomings and errors:
- Do not touch the joining elements located in the outer and outer corners.
- Mask the inconsistencies from the top of the corner.
- Before work, make special markings along which you will glue the edges of each strip. Trim the second piece along the edge.
Glue the corners overlapping, without smearing the edges of the strips. The adjustment will not be noticeable if you remove the excess with a knife and then re-glue it with a stronger adhesive.
Marking the wall and placing a large picture
Often when gluing wallpaper you have to deal with walls and ceilings that have a slope. The marking method will depend on the degree of curvature of the corners. First you need to measure the height of the room in each of them.
- If there is a slight slope, you need to use a plumb line or a laser level to mark the walls in order to maintain a strict vertical line.
- If the difference is more than 6–8 cm, it is recommended to stick the wallpaper with a pattern perpendicular to the ceiling, without focusing on a plumb line. In such a situation, stripes that are perfectly aligned vertically will appear overwhelmed due to the visual effect created by the sloping surface.
Important! Wallpaper with vertical stripes is glued strictly plumb, regardless of the degree of curvature of the ceiling surface.
- If the ceiling is uneven, wallpaper with a large pattern should be glued in such a way that for the first time the volumetric element of the image is located as far as possible from the top of the wall. Otherwise, the curvature of the surface will be immediately noticeable.
Even with correctly done markings, the pattern of the last strip may not coincide with the first due to the curvature of the surfaces. Therefore, when deciding where to start gluing material with a pronounced image, it is better to choose the most inconspicuous place in the room.
Calculation with drawing adjustment
Wallpaper with complex or large patterns requires adjustment, so the calculation will be different. The length of the strip must exceed the height of the room and be a multiple of the repeat (pattern step).
Let's analyze the calculation procedure for the same room (perimeter - 18 m, ceiling height - 2.5 m). Roll width – 53 cm, length – 10 m, repeat – 38 cm.
- The strip length is calculated as follows. Divide the height of the room by the rapport value (2.5: 0.38 = 6.6). Round the resulting number up to the nearest whole number. In our case it will be 7. We multiply the image pitch value by the resulting number (0.38 × 7 = 2.66 m). Now we divide the length of the roll by the existing result (10: 2.66 = 3.8). Round to the nearest whole number, but downwards. It turns out that the roll is enough for 3 cuts, the rest is forced losses.
- Next, we calculate the number of tubes. First, we find the number of strips; to do this, we divide the perimeter by the width of the roll, as in the first case (18: 0.53 = 34, rounded). Now we divide the resulting value by the number of stripes in the tube (34: 3 = 12, rounded). Our room will require 12 rolls.
USEFUL INFORMATION: The process of leveling walls using beacons with your own hands step by step: how to place beacons
As you can see, the difference between the number of wallpapers with a pattern without matching and an image that requires adjustment is as much as 3 tubes.
Features of gluing wallpaper with a pattern
Working with printed wallpaper has its own nuances. Knowing these features will help you avoid mistakes, such as pattern inconsistencies.
- When purchasing material, it is taken into account that the amount of waste will increase due to the need to combine the pattern. Therefore, you need to take rolls with a reserve. Knowing the repeat pitch, you can calculate the required number of tubes most accurately.
Advice. To significantly reduce the share of waste, it is recommended to cut pieces from different rolls when selecting a pattern.
- For perfect alignment of the image, be sure to leave allowances of several centimeters at both ends of the strip.
- During gluing, special attention is paid to the joints.
USEFUL INFORMATION: Types of putty for walls: materials for interior work
We combine
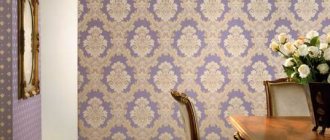
Quite often in construction stores, and even in markets, you can find promotions and discounts on certain wallpapers. Thus, if you harmoniously select another roll by color, texture and similar pattern, then the room can be covered with two types of wallpaper.
The end result will look very impressive and beautiful, will please your eyes and surprise your new and old friends every time they come to visit you.
However, in reality everything is not so simple and combining wallpaper correctly is not so simple. First of all, you need to adhere to the most important rule, namely, maintain the same distance between the elements of the drawings that are repeated.
That's the whole point. That the less distance you use, the more costs and the amount of wallpaper you will spend on the wall.
Don’t forget that the design will need to be adjusted, and otherwise you will be left with a large number of small, cut pieces that you probably won’t be able to use in the future and will most likely simply throw in the trash. But this is all money!
AllaAuthor of the article
Did you like the article?
Share with your friends:
Preparing the wall surface
Preliminary work before gluing wallpaper with a pattern does not differ from standard preparation. The algorithm looks like this:
- Clean the surface from old coatings. How to do it correctly, read here.
- Apply a coat of primer.
- Putty the surface (if there are chips, cracks, or uneven surfaces).
- Let the walls dry.
- Clean with sandpaper or sanding mesh.
- Prime again.
How to prepare drywall for wallpapering is written in detail here.