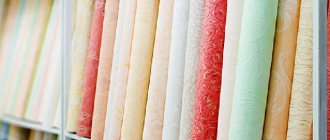
Textile wallpaper really has a luxurious look and adds status and value. But unlike its competitors, this material requires special skills for gluing. After all, their top layer consists of fabric. Naturally, this fact affects the price of the material, since both silk and cotton can be used in its creation.
Attention! This wallpaper can be glued in virtually any room. The only exceptions will be bathrooms, kitchens, bath rooms, etc.
If they are properly glued and the external microclimate conditions are comfortable for the material, they can remain in excellent condition for about 10 years.
Surface preparation
The preparation of the surface for gluing textile wallpaper should be carried out more carefully, since the walls must be perfectly clean and dry. Otherwise, the appearance of the pasted textile wallpaper may be spoiled.
Removing old paint
First of all, old wallpaper, paint, and fiberglass should be removed from the surface. If the wall had an enamel coating, then it needs to be roughened using trisodium phosphate. After this, the wall surface should be washed with clean water.
Leveling the surface
All defects present on the surface must be removed. Then the walls must be puttied, primed (use a deep penetration primer) and given time to dry.
After this, so that the textile wallpaper does not sag after drying, it is necessary to apply oil-based emulsion paint to the walls in one layer.
Important! Make sure that the surface on which the wallpaper will be glued does not differ from it in tone. You can use a waste paper lining as a backing.
Please note that the substrate should be glued horizontally. Otherwise, the joints of the substrate will be visible through the wallpaper.
Preparation of tools and materials
Before gluing textile wallpaper
, additionally prepare:
- gypsum putty;
- a primer that penetrates deeply into the surface;
- oil emulsion paint that matches the tone of the selected wallpaper;
- roulette;
- a simple pencil;
- sharp scissors;
- glue for fabric wallpaper (high quality, without dyes);
- a tray for it;
- short-hair roller for applying adhesive composition;
- rubber roller;
- plastic spatula;
- foam sponge;
- strips of wax paper 2 mm thick;
- construction knife.
Gluing technology
When gluing textile wallpaper, first of all, you should remember that the room temperature should be from +18 to +25 degrees, and air humidity - 40%. The humidity on the surface itself should be 8%.
Cutting wallpaper and marking the wall
First you need to check that the color, pattern, pile direction and lot number are the same on all rolls.
Such wallpaper should be cut in the same way as regular paper wallpaper: measure the height of the wall, add 5 cm to the allowance and cut off strips of the appropriate length, adjusting according to the pattern.
Important! When cutting wallpaper, use sharp scissors!
After this, make markings on the wall.
Important! Make markings on the surface of the walls and strips of wallpaper exclusively with a simple pencil, otherwise stains will remain on the wallpaper.
When you have marked the wall and cut off all the strips of wallpaper, you should write on each strip the number according to which it will be pasted. After this, apply the wallpaper to the wall to check the pattern.
Applying glue
Before applying glue, decide on the underside of your wallpaper.
Important! Since textile wallpaper requires a more scrupulous attitude, a special glue should be used for gluing it, which is of high quality and lacks dyes. You can use vinyl glue, which has a low water content. And, most importantly, do not thin the glue.
Next, use a short-haired roller to coat the back side of the wallpaper with glue. Pay special attention to the edges of the strips and to ensure that the glue does not end up on the front side.
Important! After coating the canvases, you need to give the glue time to absorb into the wallpaper. At the same time, fold the strip of wallpaper with the coated sides inward (one side by ⅔ of the length, and the other by ⅓). Then roll the strips into rolls and leave for 5-10 minutes.
Do not bend the wallpaper, otherwise folds will form on it, which will subsequently be visible on the walls. And remember that the canvas should be spread strictly in one layer so that the material does not swell.
Important! If you use textile wallpaper with a non-woven backing, then the glue is applied directly to the wall. This way your wallpaper will not deform after drying and will remain clean.
How to stick
Start gluing wallpaper from the corner and do not forget to observe the direction and coincidence of the pattern. To facilitate this process, markings can be applied to the wall surface.
Important! Textile wallpaper should only be glued end-to-end.
To stick the first canvas on the wall you need to: make an allowance of 2.5-3 cm on the ceiling, press the center of the strip of wallpaper with a rubber roller, and then smooth it along the sides to remove air and unevenness. In this case, it is necessary to smooth it smoothly and without pressing hard on the wallpaper. You should not smooth out textile wallpaper with your hands or a rag.
If glue gets on the front side of the wallpaper during the process, clean it with a damp sponge. In this case, all movements must be carried out strictly vertically. The allowance that remains near the baseboard must be cut off with a sharp knife.
Subsequent strips of wallpaper are glued in the same way as the first.
Drying
For textile wallpaper to dry completely, it will take at least 24-48 hours (the exact time will be indicated on the glue packaging). There should be no drafts in the room during drying, and a constant temperature should be maintained.
Types of fabric wallpaper
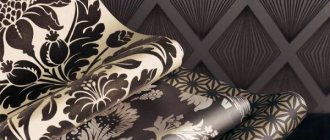
Textile wallpaper consists of 2 layers: the front surface and the base. The front surface is made of fabric: linen, viscose, felt, jute, silk, velor, cotton or composite materials. The basis is:
- Paper is an environmentally friendly option, but under the influence of glue, the paper gets wet and may shrink in the future.
- Non-woven - a base made of cellulose and chemical fibers. It is easier to glue such fabrics - they do not swell under the influence of glue and do not shrink.
- Synthetic - foam base. It provides good heat and sound insulation properties, but difficulties may arise when gluing such material.
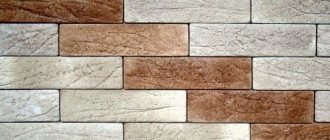
The width of textile fabrics for wall decoration is selected depending on the tasks. Narrow stripes (50 cm wide) are optimal for creating a decorative panel, highlighting the composition of a room, or gluing one fragment. Wide stripes (up to 3.1 m wide) allow you to create a feeling of limitless fabric surface in the room.
Caring for textile wallpaper
Textile wallpaper should be taken care of very carefully. To remove dry dirt and dust from them, use a vacuum cleaner or a soft brush.
If any stains appear on the surface of the wallpaper, use a damp piece of cloth or a sponge moistened with warm water to remove them. You can also use a less concentrated soap solution or detergent.
Important! Dirt must be removed without strong friction using a slightly damp sponge or cloth. After this, blot the cleaned area with a dry cloth.
We think that after reading this article you will easily cope with gluing this kind of wallpaper. But, if you still have questions, you can watch the following video.
Working with glue
The work begins by laying the wallpaper face down.
- Next, the back side of the wallpaper is coated with glue using a short-haired roller. The work requires special attention; the glue should not get on the side with the pattern;
- The glue is applied in one layer. The main thing to pay attention to is the fact that the glue is not diluted with water;
- the sheets cannot be bent, otherwise these lines will subsequently be displayed on the outside of the wallpaper;
- After applying the glue, the wallpaper needs time for it to be thoroughly absorbed. This process takes up to 10 minutes;
- You only need to glue end-to-end;
- During gluing, the wallpaper should be smoothed, but in no case should you use your hands or rags for these purposes. A rubber roller will do;
- If glue gets on the drawing, it must be cleaned immediately. To do this, use a slightly damp sponge, which must be clean. Movements are strictly horizontal.
After the work has been done, you need to give it time to dry; you shouldn’t measure it yourself. All detailed information will be indicated on the back of the glue package. In general, this will take about two days. The temperature in the room should correspond to what it was when gluing, namely 18-25 degrees. Naturally, drafts are unacceptable.
You can watch how to glue non-standard canvases in the following video:
Advantages and disadvantages of textile wallpaper
Before purchasing wallpaper, it is recommended to weigh the pros and cons. After all, the result depends on your choice. Incorrectly selected wall finishes may peel off or tear. As a result, the repairs will have to start all over again.
Flaws:
- As a result of incorrect factory production, vertical displacement of the pattern is observed in the rolls. The width of the image merge is different for each manufacturer. Usually this is 1.5–2.5 cm per linear meter of material.
- When purchasing textile wallpaper, the width of the roll may not match the parameters specified in the catalog.
- Excessive moisture or adhesive may cause the fabric material to become deformed.
- For textile wallpaper, use only highly specialized glue. Otherwise, the material may dry out on the wall surface, forming air pockets.
- They require special care.
Advantages:
- Fabric-based facing material dries much faster than other analogues.
- There is no need to soak it with paste before fixing it to the wall. In this case, the wallpaper will still stick quite firmly.
- Lining made from natural fabrics allows air to pass through better
- With skillful drying, the material does not peel off or deform.
How to glue fabric wallpaper on a paper base
Let's look at perhaps the most difficult type of textile wallpaper from the point of view of gluing - this is fabric wallpaper on a paper basis.
Fabric wallpaper is afraid of moisture, and therefore cannot be washed. Here the first difficulty in gluing the canvas immediately arises: excess glue that protrudes along the edges can stain the wallpaper and then it will be damaged. The second significant difficulty concerns the base of the wallpaper, in this case it is paper. The paper base can expand under the influence of the adhesive and then shrink.
Taking into account these features of the fabric material, let's proceed:
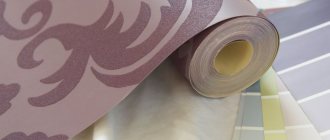
We take special glue for fabric (textile) wallpaper and prepare it, strictly following the included instructions. Depending on the type of wallpaper, the glue is applied: to the canvas, or to the canvas and to the wall (for paper-based wallpaper).
We cut the wallpaper into sheets of length equal to the height of your wall with a small allowance. Next, using a roller, apply glue to the inside of the canvas in an even thin layer, while leaving the edges of the canvas (about 1 cm) without glue to avoid it getting on the front part. In order to avoid uneven discoloration of the canvas, we moisten the remaining dry edges with water using an ordinary sprayer.
After waiting a couple of minutes, the prepared fabric can be glued to the wall. Smooth out using a plastic spatula or roller. When working with a spatula, hand movements should be up or down (lateral movements can damage the texture of the wallpaper). We cut off the excess fabric (top and bottom) using a wide spatula and a sharp knife.
Next, peel off the dry edge from the wall by about 5cm. and now apply glue to the wall. Apply the glue in a thin layer. Gently smooth the canvas and move on to the second.
We apply a similarly prepared second canvas (with edges moistened only with water) to the wall with an overlap (1-2mm) over the adjacent canvas. We catch the picture, and then we move the canvas from the first piece of wallpaper. All other steps are the same as when pasting the first fabric sheet.
>How to properly apply textile wallpaper
Super Vinyl
Consider the popular composition "Bristol Super Vinyl". It is sold in small packages of 150 g and in standard packages of 300 g. Prepare the surface of the walls in the same way as for the PUFAS glue discussed above.
Related article: How to paint foam products inside and outside the house
Preparing the glue
Look at the instructions for how much water is required per package and pour it into a plastic or any other bucket. The water should be a little warm. Approximately 25 °C. The manufacturer also recommends (there is a table) the ratio of glue for a certain type of fabric, in our case textile. Dilute in this proportion.
Adhesive composition from an English manufacturer
Now take a large spoon. Create a water cycle in the bucket and, stepping back slightly from the edge, add the powder little by little. Stir continuously for about 30 seconds. Let 15 min. stand and mix thoroughly again. Our composition is ready for use.
Applying the composition
Cut the strip to the desired size. On the inside, brush from the center towards the edges to spread the glue evenly. Do not forget that the edges must be carefully processed so that they do not peel off.
Now fold the edges towards the middle of the glued side. It is required to be end-to-end. The canvas is soaked for at least 5, maximum 10 minutes. This is what the manufacturer advises. There are instructions on how to apply the stripes.
A little history
The custom of decorating the interior with wallpaper dates back to ancient times. Initially, wallpaper was made from expensive fabrics with complex patterns and was affordable only to noble people. The fabric used to decorate the walls was quite dense and was attached to the walls using special staples. With the invention of paper, paper wallpaper also appeared.
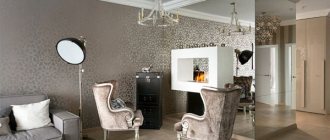
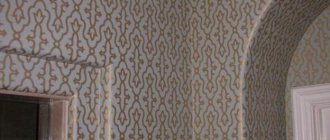
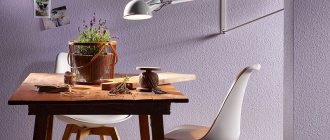
When applied correctly, you get this attractive interior
But not everyone could afford such a decorative element, since the design was applied to the paper panels first by hand, and somewhat later using screen printing. With the development of the modern paper industry, paper wallpapers began to be used everywhere, being a simple and convenient way to decorate walls.
Confirming the common assertion that everything new is well-forgotten old, fabric-based wallpapers have recently become in great demand.
The surface of textile wallpaper can be made from materials such as:
- silk;
- cotton;
- linen;
- artificial acetate or viscose fibers.
Wall decoration with textile wallpaper is great for living rooms, bedrooms, and children's rooms. It is not recommended to use such wallpaper in kitchens and other rooms where there is increased dampness.
How to stick
Fabric wallpaper should always be applied from a corner, observing the direction of the pattern on the surface. In order not to get confused in this process, the walls are covered with markings. It is important that each canvas is glued only end-to-end. There are no other options for this species.
Before fixing the first part, a gap of 3–4 cm is left. The base is pressed against the wall surface only with the help of a rubber roller. Movements should be smooth and slow. Gradually work your way down to remove excess air.
Gluing textile fabrics with reverse
Such wallpapers are marked with a special icon with parallel arrows pointing in different directions. If you see this symbol, it means that these textile fabrics need to be glued end-to-end to each other. You should first prepare the wallpaper for gluing. To do this, they are cut into pieces of the required length. You should make a mark on each of them so that you can then use it to guide you on how to properly glue the canvas.
The first canvas should be glued so that the arrow drawn on the icon is directed upward, while the second one should be glued with the arrow pointing down. The next canvas is again arrow up, etc. The result will be that the right and left edges will be aligned correctly.
In reverse wallpaper, the color on the right edge is, in some cases, slightly lighter or, conversely, darker than the left. This difference is almost unnoticeable until the wallpaper is hung. This nuance will be visible visually if reverse textile products are glued as usual, i.e. all canvases are in the same direction. A sharp transition from the light to the dark edge will be noticeable. Typically, these wallpapers do not have a pattern, so they do not need to be strictly combined. The technique for gluing some other canvases with reverse may well not be the same as described above. Therefore, carefully read the instructions attached to the wallpaper roll.
Stage two: let's start wallpapering
Important warning! First of all, carefully study the instructions that come with the purchased wallpaper. Typically, manufacturers describe in great detail all the nuances of using their products. If the manufacturer's recommendations are not followed, it will be impossible to make a claim against the seller if defects are found, both in the wallpaper itself and in the event of an unsatisfactory result after gluing it.
- Check whether the quantity of wallpaper purchased corresponds to the footage of the room.
- Make sure that all rolls have the same article number and color shades.
- Prepare glue that matches the brand of your wallpaper. Make sure that the glue does not contain lumps or foreign matter. If necessary, strain it through a colander.
- Cut the panels with scissors to the desired length, adding 1-2 cm to fit the pattern.
- Apply an even layer of glue to the underside of the cut panels using a wide brush or roller. Be sure to ensure that there are no dry areas left. We pay special attention to the edges of the sheets.
- We fold the sheets in pairs with the coated surfaces facing each other for better impregnation of the panels with glue. Let stand for about 5 minutes.
- Before gluing the first sheet, draw a straight vertical line on the wall using a plumb line and a long piece of wood.
- We apply the sheet to the wall and smooth it with careful movements from top to bottom. To smooth, use a clean, soft cloth, as... Using a roller can damage the fabric surface.
- We glue the next panel end-to-end with the previous one, aligning the sheets according to the picture.
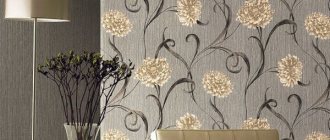
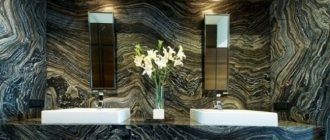
Seamless technology will make the interior of rooms more attractive
Avoid bending the cut panels, otherwise the resulting folds will spoil the appearance of the finished surface. Do not allow glue to get on the front side of the wallpaper. If this happens, remove excess glue with a soft sponge or white cloth.
How to care for surfaces covered with textile wallpaper
Unless otherwise indicated on the wallpaper packaging, it is perfectly acceptable to clean the walls regularly (1-2 times a month) using a vacuum cleaner. If necessary, fabric wallpaper can be washed with a warm detergent solution, avoiding excessive wetting of the surface. It is enough to wipe the walls with a damp soft cloth.
You should know! Wallpaper made of fabric adds unique charm, comfort and sophistication to the room, has a noise-absorbing effect and, according to experts, can last about 10 years with proper care.
If you want to maintain the attractive appearance of a room covered with textile wallpaper, you should not neglect the advice of professionals. If your wallpaper came with care instructions, be sure to save them and follow the manufacturer's recommendations.
Useful video instructions:
>How to glue textile wallpaper
Semin Sem Murale
Ready-made universal composition for textile fabrics and other coatings. You can buy it in a bucket of 1, 5, 10 or 20 kg. It is transparent, without lumps, milky white, like jelly. Does not stain the surface. Does not show through on textiles. Perfectly impregnates wallpaper base.
Apply it with a brush or roller to the canvas. It slides easily along the wall and you can freely adjust strip to strip end-to-end. There is a minimum of 5, maximum of 10 minutes for this. The composition will not drip or leak, which is nice.
The glue is packaged ready-made in small buckets
Attaches strips to concrete, any blocks with a smooth surface, if there is a finishing primer and the surface is flat. The wallpaper will dry for at least 12 and up to 24 hours.
Related article: Washing tiles after grouting
Stored in original packaging for 6 months. Place the powder in a place where it will not be exposed to extreme heat or cold. +5-35 °C is the optimal temperature for storage.
When using, consider the following conditions:
- The room temperature is minimum +10 °C, maximum +35 °C.
- The manufacturer writes the rules on the label. How to optimally stick them. Follow the recommendations.
- If you finish and there is any mixture left, close the bucket tightly.
- If you need to paste over plastic, then SEM-SOL XXL is more suitable.
Best primers:
- If the wall surface is loose, highly absorbent, and recently renovated, then DURCIFOND is needed.
- If there is often high humidity in the room, then ANTI-HUMIDITE is required.