The popularity of plasterboard ceilings is explained by proven installation technology and versatility. They are appropriate in any room and are suitable for various types of finishing - from whitewashing to laying tiles. The properties of drywall and installation features require compliance with certain rules when carrying out finishing work, wallpaper is no exception. Let us consider in detail the process of finishing gypsum board ceilings with roll materials.
What wallpaper is best to glue on drywall?
From a technology point of view, the choice of wallpaper for a plasterboard ceiling is not limited in any way and depends only on the taste, preferences and financial capabilities of the home owner.
The criteria for choosing wallpaper are as follows:
- appearance;
- price;
- lifetime;
- practicality;
- application area;
- Convenience when gluing ceilings of complex configurations.
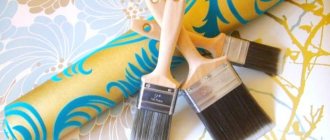
Manufacturers offer a huge variety of wallpaper from different materials. Let's consider the most popular:
- Paper wallpaper . They are attractive due to their low price, variety of designs and color palette. They do not interfere with air exchange and are easy to finish surfaces of any shape. This wallpaper cannot be called practical, the service life of the material does not exceed five years, then the bright colors fade, the canvas rubs around switches, sockets and on external corners, warps and tears due to uneven settlement of buildings, swells in places and becomes moldy in rooms with high humidity.
- Non-woven wallpaper . They are easy to stick to the ceiling, they do not stretch when smoothed, joining the sheets and matching the pattern is much easier than in cases with other materials. Plain wallpaper is glued to a plasterboard ceiling for painting; if desired, it can be easily “refreshed” with a different color and differs from paper in its elasticity and durability.
- Vinyl products . Pleases with decorativeness, wear resistance and water-repellent properties. Washable varieties of this wallpaper are suitable for use in the toilet, bathroom and kitchen. Some can be cleaned with a brush and detergents without fear of spoiling the appearance. They are stronger than paper, have a textured surface, under which it is easy to hide ceiling defects. Such wallpapers are more expensive than paper ones, although there are budget options with modest performance characteristics.
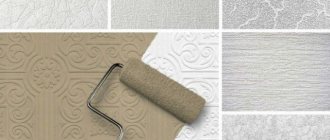
- Glass wallpaper . They are strong and durable, mask surface imperfections, are easy to paint and are moisture resistant. The choice of textures and color shades is small. They weigh from 100 grams per square meter. m, so the plasterboard base is prepared for finishing with glass wallpaper more carefully.
- Liquid wallpaper . Win with original texture. Using different colors and their combinations, beautiful panels are created on the ceilings. If desired, this type of finishing material is soaked, removed from the wall and reused.
- Natural wallpaper . They create coziness and a special atmosphere in the room, depending on the material from which they are made. Their properties differ: for example, if cork or bamboo coating is easy to clean and is not afraid of water, then it is not so easy to remove even dust from wallpaper made from natural stone chips. Caring for them requires the use of special means and considerable costs. And the cost of wallpaper made from natural materials is an order of magnitude higher than others, and therefore they have not become as widespread as others.
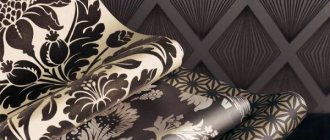
- Photo wallpaper . Possessing good performance characteristics and relatively low prices, they become a convenient design element both in the elite category of housing and in modestly decorated premises. To make textile photo wallpapers, linen or silk threads or velor fibers are used. For wet rooms, it is better to use products made of polyvinyl chloride: a water-repellent surface and suitable dimensions (maximum 2x3 m) help solve the problem of finishing ceilings in the bathroom and kitchen. But the most popular today are 3D photo wallpapers. The variety of designs for this type of material on sale makes it easy to find the right design solution.
If you paste over the ceiling without preliminary putty, the wallpaper should not be too thin or light, since the non-uniform color surface of the ceiling will be visible right through, and removing paper wallpaper during the next repair will become a difficult procedure that will be impossible to perform without special solutions and tools. In such cases, it is better to glue non-woven wallpaper before painting.
It’s still not possible to completely avoid the puttying stage, since the joints between the sheets, the internal corners around the perimeter of the ceiling and the screw caps must be puttied, regardless of the choice of wallpaper.
Sometimes, even with proper installation of gypsum boards and careful sealing of joints, unexpected consequences are possible, since the sheets on the ceiling experience much greater loads than on the walls. Therefore, in buildings subject to seasonal precipitation or constant vibration (for example, near railway tracks), the entire surface of the ceiling plasterboard must be puttied. In this case, wallpaper for problematic ceilings is selected with a pronounced relief structure or pattern, on a dense, opaque base.
If the surface is being prepared for thin paper or non-woven wallpaper with soft light shades, continuous putty cannot be avoided.
Preparatory work
Any repair and construction process begins with preparatory work. When wallpapering a ceiling, it consists of:
- from preparing the surface to be glued;
- ceiling markings;
- preparing glue;
- wallpaper cutting.
Surface preparation
On the ceiling, trellises can be glued to several types of materials. The main condition is that the surface has a smooth and even appearance, without flaking remnants of previous types of finishing.
Concrete
How to glue wallpaper on a concrete ceiling? To do this, it is first necessary to carry out a set of preparatory work.
- The old finishing is removed: wallpaper, paint, whitewash. How to do this quickly and correctly, with minimal effort and money, can be found in the article “How to prepare walls for wallpapering?”
Attention: when covering walls with wallpaper, in many cases it is allowed to apply it over old paint or wallpaper. In the case of the ceiling, it is better not to take risks - here the forces of gravity act on the trellises in a completely different way than on the wall.
- The ceiling surface is cleaned of the remnants of the previous finish, dust, dirt, soot and grease - washed with a soapy solution using a brush. Visible greasy stains can be removed with gasoline, acetone or turpentine.
- Gaps, cracks and visible joints between floor slabs are sealed. This technological process is discussed in detail in the work “How to prepare a ceiling for painting with water-based paint?”.
- Concrete floors are primed.
If the ceiling has significant unevenness that putty will not hide, it is necessary to either abandon the idea of wallpaper at the top of the room and order a suspended ceiling, or carry out leveling work using dry plaster (plasterboard).
Drywall
Preparation of gypsum boards for wallpaper depends on whether the pasting is carried out on newly installed material or after the old finish. If the ceiling surface was leveled in front of the wallpaper, then the order of work is as follows:
- seams between gypsum plasterboard sheets and marks from self-tapping screws are sealed with a putty solution, which is applied twice. The second layer must be applied to the serpyanka;
- after the putty has dried at the joints and recesses from the screws, the entire surface of the sheets is puttied (if you skip this operation, in the future it will be very difficult to remove the wallpaper from the ceiling - they will pull the gypsum board cardboard along with them);
- The ceiling surface is primed.
There are no big differences between how to glue wallpaper on a plasterboard ceiling and on a wall made of the same material. Therefore, if there are gypsum plasterboard sheets on the ceiling, the portal’s editors recommend looking at the work “How to glue wallpaper onto drywall?”
Plywood and OSB
Ceilings made of plywood or OSB are rare, only in private homes. Their preparation for pasting is simple. OSB is puttied twice and then primed. The plywood does not need to be puttyed, but only the seams can be sealed and then primed.
Ceiling markings
Those who have glued wallpaper at least once in their life know very well that for the initial strip it is necessary to make a vertical mark on the wall along which the edge of the wallpaper sheet will go. The same operation is needed for the ceiling.
It is best to draw a line using a chop cord. To do this, the cord on opposite sides of the ceiling is pressed against it at the marked points, and then pulled vertically down in the middle and released.
Chop cord.
If you hit a hard surface, some of the coloring matter will remain on it. The line is ready. If there is no cord, you can make it yourself by smearing regular twine with chalk or drawing a line with a pencil (the marker may leave a mark that will subsequently show through the tapestry).
Everything here is simple and clear. But regarding the issue of starting pasting, i.e. where the line for the first strip will go, there are two points of view:
1. Some experts advise starting from the wall and gluing wallpaper parallel to the flow of light from the window. In this case, the starting line is drawn along the wall at a distance of the width of the tube minus 1.5 cm (this is how much the wallpaper sheet should extend onto the side wall). In the future, the boundaries of the stripes are not indicated - the previous strip serves as a guide;
2. The latter recommend starting to work from the center of the ceiling. Here the order of operations is as follows:
- is the center of the room. To do this, threads, twine or fishing line connect the corners of the room. The place where they intersect will be the center of the room;
- Marks are placed from the center point at a distance of 1/2 the width of the roll, with the expectation that the wallpaper sheet will run perpendicular to the window;
- the distance from each wall to the nearest mark is measured;
- the obtained measurement results are transferred to opposite ends of the ceiling;
- The marked points are connected by a line using a paint cord or pencil.
Preparation of glue
The durability of wallpaper on the ceiling depends not only on the brand of glue chosen, but also on its preparation. Typically, recommendations for diluting the dry adhesive mass are printed on the packaging. Let's remember the main points:
- Pure water is poured into a sufficiently large container in the amount indicated on the packaging;
- the water is stirred mechanically (screwdriver or drill with a mixing attachment) or manually until a funnel is formed;
- the dry mixture is slowly poured into the water near the edge of the container;
- after the entire pack is in the water, the composition is mixed for about 10 minutes;
- after stirring, the prepared glue is left for 8-15 minutes to swell (a more precise time is indicated on the packaging);
- After ripening, the adhesive mass is mixed again for 5-10 minutes.
However, in some cases there are nuances about which there is no information on the packaging material. If you have any doubts, we recommend that you look at the work “How to choose wallpaper glue?”.
Wallpaper cutting
Preparing sheets of wallpaper for gluing does not seem to be a complicated operation. Experts generally advise cutting pure non-woven wallpaper on the ceiling after gluing it. This simple technique allows you to glue ceiling wallpaper alone.
The rest should be cut with an overlap of 3-5 cm on each side, which eliminates errors in length. After gluing the wallpaper, the excess is cut off using a wide spatula and a construction knife. If there is a pattern or design, they are first combined, and then the sheets are cut to the required size.
Wallpaper cutting.
Selection of glue and preparation of materials
The basis of any wallpaper glue is starch, which is carefully cleaned of harmful impurities and antiseptic and antifungal substances are added. For each type of wallpaper, a special composition is produced. Manufacturers of rolled products, in addition to the material from which the product is made, indicate on the packaging the recommended type of glue.
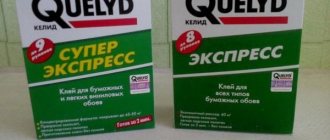
The most famous manufacturers:
- Axton;
- Quelyd;
- Pufas;
- Metylan;
- and others.
For gluing vinyl wallpaper, which is noticeably heavier than paper, manufacturers add methylcellulose to starch in various proportions: the denser the wallpaper, the greater the percentage of the additive. For the heaviest vinyl products, mixtures of starch ether, PVA dispersion, biocides and other additives that improve the properties of the adhesive are used.
It is not recommended to use a different type of mixture for massive canvases, even if this promises significant savings.
Calculation of the number of rolls
When preparing a plasterboard ceiling for gluing, first of all, calculate how much wallpaper will be needed. To do this, measure the length of the wall along the window to determine the required number of strips. Let's say it was 5 meters. If the width of the roll of the selected type of wallpaper is 106 cm, to cover the ceiling you will need: 500 : 106 = 4.7 pieces, this is 4 full and one incomplete strip of wallpaper, rounded up - you get 5 canvases.
Next, we measure the perpendicular wall to determine the required length of cuts. Let it be 4.3 meters. We add a margin for adjustment - 10 cm, the result is 4.4 m. If the length of the roll of the selected wallpaper is 10.05 m, in one roll there will be: 1005: 440 = 2.28 pcs., - 2 whole strips of the required size, and a short piece, which is not taken into account. In total, from one factory roll we get 2 strips of the required length. This is how the calculation is performed if the wallpaper does not contain repeating graphic fragments.
When adjusting an image is required, the size of the “rapport” is taken into account - this is the name for the step size of the pattern, which the manufacturer indicates in the product passport.
For example, it is 25 cm (this means that in order to combine the pattern, the adjacent strip, with the most “inconvenient” cutting of the roll, will need to be moved by 25 cm). Then we add repeat to the cut length of 4.4 m calculated above: 4.4 + 0.25 = 4.65 m. We also divide the length of the roll by the result obtained: 1005: 465 = 2.16 pcs. That is, the result of the calculations for this example remained the same - 2 stripes.
Next, we divide the number of required cuts by the number of whole strips in the roll, as a result we have: 5: 2 = 2.5 rolls. We round up and get the desired result: to wallpaper the entire ceiling, you need to buy 3 rolls.
Preparing glue and preparing tools
The scheme for preparing wallpaper glue, as well as the consumption (how much wallpaper in square meters or rolls is enough), can be found from the instructions on the packaging. Experience shows that glue prepared exactly according to the recipe is runny. To obtain the desired consistency, dissolve 10% more dry glue in the same amount of water, or proportionally reduce the volume of liquid per package.
Additionally, we are preparing tools according to the list:
- level, large ruler, tape measure, pencil and square for marking stripes and ceilings;
- an even wide spatula, a stationery knife and sharp scissors for trimming wallpaper;
- tray and roller for applying glue;
- stepladder or scaffold;
- wallpaper spatula.
Features of choosing ceiling wallpaper
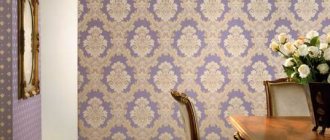
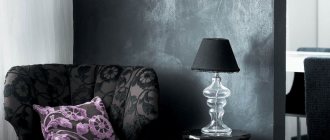
A competent approach to carrying out repair work involves studying the technical features of the varieties of ceiling wallpaper. Photos of wallpaper on the ceiling will give you a clear idea of how different textures look. When choosing, be sure to take into account the overall design style of the room, as well as the color scheme of the room.
Experts recommend choosing a glossy texture and light-colored wallpaper for the ceiling for rooms with limited space. This will help visually enlarge the room. Thick wallpaper with a deep relief pattern will help hide small flaws in the ceiling surface.
When choosing, it is useful to read the information from the manufacturer located on the label of each roll. It contains the characteristics of the material, its composition, as well as recommendations for working with the material.
- It is necessary to calculate the amount of material in order to immediately purchase wallpaper from one batch. The calculations must include a small margin for adjusting the pattern.
- Paper wallpaper is appropriate for a living room, nursery or bedroom. For the kitchen, hallway, bathroom or bathroom, it is recommended to choose moisture-resistant wallpaper.
- The width of the wallpaper for the ceiling is important. It should be understood that it is more convenient to stick a standard canvas with a width of 50 or 55 cm.
- When choosing glue, it is important to take into account the manufacturer’s recommendations. For each type of finishing material, it is necessary to use a specially designed adhesive composition.
Features of surface preparation
Preparing a plasterboard ceiling for wallpapering is carried out in the following sequence:
- primer;
- putty;
- grinding;
- re-priming;
- painting that evens out the overall tone of the ceiling.
Primer
First, the surface is carefully treated, without gaps, with a primer, which improves the adhesion of the base and protects the cardboard, including moisture-resistant cardboard, from mold and mildew. For this, an acrylic (for example, Ceresit, Eunice, Artisan, etc.) or latex (Axton, Tekc, Luja, etc.) primer is used. It is sold in finished and concentrated form, used according to the instructions on the package.
Apply evenly with a wide brush or soft roller. First, corners and hard-to-reach places are treated with a small brush.
It is important not to let the cardboard get too wet to avoid delamination.
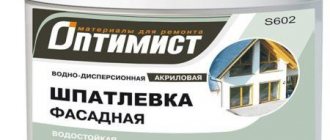
putty
Puttying of joints between gypsum boards begins with reinforcement. Serpyanka or perforated paper is used for this purpose. The choice of material depends on the shape of the gypsum board edge. Serpyanka is used only where it is guaranteed to be covered with putty. To seal joints, special gypsum mixtures are used, for example “Knauf Fugenfüller”, “Volma”, etc.
To fill the cracks at the joints, use starting putty. It has coarser fractions and is less susceptible to shrinkage. For subsequent operations - finishing, which consists of very fine fractions and after grinding forms a smooth surface.
Applying the next layer of putty before the previous one has dried is unacceptable, as this is fraught with cracking during shrinkage. The screw caps are also sealed. If they look above the plane of the sheet, carefully, so as not to break through the cardboard, slightly (1-2 mm) recess them and continue working.
If it is necessary to strengthen or level the surface of the ceiling, continuous putty is applied. To do this, we buy small (up to 10 cm) and large (40-60 cm) spatulas. Defects are often found on old tools: deep scratches, unevenness, wear of the working surface and others; to detect them, just look at the end of the spatula at an acute angle. With such a tool it will not be possible to achieve a smooth and even surface.
Next we proceed to puttying:
- Prepare the putty according to the instructions on the package. To do this you will need a bucket, a drill and a mixer attachment. Mix until thick sour cream forms, at low speed. If you don’t have a power tool, a small spatula will do. There are also ready-to-use products, we definitely check the expiration date!
- We apply the resulting mixture with a small spatula onto a large one, distributing it along the entire length of the working plane.
- Then we apply the putty to the ceiling, holding the spatula at an angle of 45º to the surface. Rub evenly in the direction from the dry (unputtyed) area to the wet one. We monitor the thickness of the layer, which is regulated by changing the angle of the spatula and the applied force.
- To eliminate clearly visible defects in the ceiling, for example, unevenness, due to gross errors when installing drywall, we use starting gypsum putty. The application thickness should not exceed 3 mm. A layer of finishing putty no thicker than 1 mm is applied on top.
- The horizontality of the exposed surface is controlled by a level, and the state of the plane is controlled by a plaster rule, a perfectly flat wooden or metal lath. The longer such a tool, the smoother the ceiling will be.
Grinding
Minor plane defects are eliminated with a spatula and an abrasive mesh. For this stage of work, we purchase a gauze respirator, since the process is very dusty. We begin sanding only after the putty has completely dried, that is, after 24 hours.
First, we treat the surface with a coarse abrasive, removing noticeable irregularities, making sure that we do not accidentally tear off too much, which often happens in the absence of experience. Then we finish it with fine-grained sandpaper, as a result the surface turns out even, smooth and uniform.
Re-priming
Repeated priming is no less important than the primary one - each layer of finishing must have good adhesion to the adjacent one. This removes gypsum dust after sanding, and the putty areas and the cardboard layer of the ceiling are further strengthened. In addition, a well-primed surface will not absorb glue so quickly, which will provide time for leveling and smoothing the wallpaper, and in the future will facilitate the process of removing it during repeated repairs.
Apply primer to the entire surface two more times. Don't forget to pause for each layer to dry completely.
Coloring
Painting the entire ceiling is used if necessary:
- even out the overall color so that the darker areas of the unputtyed surface of the plasterboard do not show through the thin wallpaper (paint with white water-based emulsion);
- give uniqueness to the color scheme of liquid wallpaper by contrasting coloring of the plasterboard base;
- protect cardboard and putty from excessive wetting when applying or removing liquid wallpaper; some craftsmen believe that treating with a primer is sufficient for this.
Removing old wallpaper
If it is necessary to replace old wallpaper on a plasterboard ceiling, moisten its surface with warm water. For this it is better to use a spray bottle. When the adhesive layer is saturated with moisture and becomes limp, carefully prying up the edge of the sheet, peel it off, helping with a spatula if necessary. We do this carefully so as not to damage the surface of the drywall.
If the old coating does not come off, we use a special liquid, for example, Metylan. 500 ml of this product is enough to remove wallpaper from 200-220 square meters. m of surface. The solution is diluted with warm water, applied to the wall and after 10-15 minutes you can begin removing the wallpaper.
If even after this the strips are difficult to remove, we treat the ceiling with a special perforating roller. Tools of this kind come in different designs, but the result of their use is the same - small holes in the wallpaper sheet with an intact plasterboard base. We moisten the perforated areas with a special agent - now its penetration into the adhesive layer will be deeper. After the time indicated on the package, remove the old sheets manually or using a spatula.
How to glue wallpaper alone without outside help - effective ways
The whitewash should be washed off with warm water, the water-based coating should be removed with a spatula. It is recommended to repair potholes and cracks, otherwise these defects will show through the wallpaper. If the ceiling has already been covered with wallpaper, then you need to completely get rid of it and wash off the remnants of the old glue with warm water.
Drywall is one of the modern and popular materials for interior decoration. With it you can perfectly level the walls and ceiling, but it does not look very aesthetically pleasing, so it needs decorative finishing.
You can cover the drywall with wallpaper by filling the joints between the sheets.
When covering a surface with wallpaper, careful preparation is required. An attempt to apply wallpaper over whitewash leads to disastrous results. They will not hold up on whitewash, the canvases will not adhere firmly to the ceiling, since the whitewash will mix with the glue and the wallpaper will simply fall off. Even if you have hung the wallpaper very accurately, the dark surface of the drywall and the white seams between the sheets may be visible through it.
Therefore, the surface of the plasterboard ceiling must first be covered with putty. Before gluing the canvases, the putty surface is primed to prevent the appearance of fungus and mold. The joints between the wallpaper strips and the plasterboard sheets should not coincide, otherwise the plasterboard seams will protrude through the paper. Experts recommend puttingtying the entire surface of the plasterboard sheet, since without this procedure the rolls can stick tightly to the plasterboard sheathing.
They are difficult to remove, being removed along with the plaster layer. Also, wallpaper sticks to drywall very quickly, so any flaws will be difficult to correct.
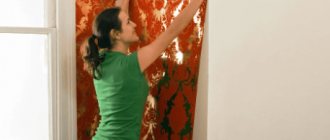
Gluing technology
How to glue wallpaper to the ceiling with your own hands:
Step 1 . We cut the strips to lengths in accordance with the calculations obtained above, having first checked with a tape measure that the dimensions of the ceiling at the edges and in the middle are the same; if not, we take into account the difference.
Step 2 . Apply glue to the back side of the first strip, fold it in half and let it sit for a while according to the instructions on the roll. An exception is non-woven-based products; in this case, glue is applied only to drywall, and the cut sheets are left dry.
Step 3 . We mark the ceiling under the first strip of wallpaper from the corner with a small margin and apply glue to this area.
Step 4 . Gradually moving from one wall to another, we glue it to the ceiling, overlapping the frieze so that we get a small (1-3 cm) strip for trimming. At the same time, we straighten the resulting folds and carefully remove air bubbles with a spatula, moving from the middle to the edges. If necessary, partially peel off the sheet, straighten it, and re-glue it.
Step 5 . We cut using a wide spatula and a knife (in inconvenient places - with scissors) and remove excess strips of wallpaper. We also use trimming to avoid obstacles: boxes, pipes, corners, protrusions, etc.
Step 6 . Carefully, so as not to damage the surface of the wallpaper, use a damp sponge to remove any glue drips from the glued sheet and frieze.
We continue from steps 2 to 6 until the work is completed. We leave the room closed for two days while the glue dries.
If you have the necessary tools and correctly perform the operations described above, the procedure for wallpapering a plasterboard ceiling is not very difficult, even taking into account the preparatory work. For those who are not confident in their abilities, it is better to invite specialists at least to the putty stage.
Pasting a plasterboard arch
Let's consider another question: how to hang wallpaper on a plasterboard arch? In this case, you need to use either single-color wallpaper without a pattern, or a variety of wallpapers.
After all, it is almost impossible to combine the pattern of the paintings on the concave plane of the arch with the wall surface. Wallpaper without a pattern solves this problem immediately .
As for diverse wallpapers, everything will depend on the design of the room. By the way, the concave surface of the arch can be painted or finished with another material, as shown in the photo below.
Painted plasterboard arch
So:
- The end plane of the arch is pasted over in exactly the same way as the wall. All nuances are fully respected here. The only thing that needs to be done is to cut the strips to the shape and size of the arched bend.
- The canvases laid and pasted on the wall should be left with a small allowance, approximately 5 cm.
Scheme for sticking canvases on the arch
- The allowance should be trimmed in small strips to the edge of the arch.
- Now each element is smeared with glue and pressed against the inner concave plane of the arch.
- Next, a strip is cut out with a width equal to the width of the arched opening.
- It is glued onto a concave plane.
PVC corners will hide unsightly joints
- To hide the edges and joints, you need to use decorative corners made of plastic. They bend easily and take the shape of an arch. They can be attached with wallpaper glue or PVA.