A plasterboard ceiling has many advantages; more specifically:
- it hides the uneven surfaces of the main ceiling and communications laid along it;
- it allows you to create both a flat surface and fancy design designs;
- with its help you can create original lighting solutions in a room by dividing individual zones and highlighting the central part with the help of traditional chandeliers.
How to putty a plasterboard ceiling
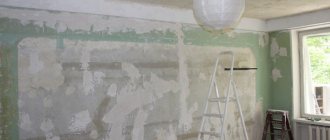
However, in order for the plasterboard ceiling to look its best, it is necessary that high-quality correct preparation, leveling or puttying be carried out. Leveling the ceiling can be done with your own hands, but you need to prepare for the fact that the work will be difficult and will require your full concentration. The peculiarity of a plasterboard ceiling is that any unevenness will simply catch your eye when the lighting is on.
Puttying a plasterboard ceiling before painting is necessary:
- for sealing seams between sheets;
- to reduce paint consumption;
- to improve the adhesion characteristics of the surface.
So, how to properly putty a plasterboard ceiling? This is what we will discuss in today’s article.
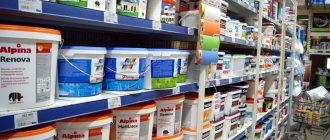
Prices for putty
putty
Plasterboard ceiling design
What tools and materials are needed?
To putty the ceiling you will need:
- a container in which we will mix the putty;
- drill with mixer;
- brush-brush;
- 2 spatulas - wide (up to 40-50 cm) and narrow;
- corner spatula;
- painting knife;
- grinding float;
- carrying lamp for identifying irregularities;
- a stepladder or sawhorse on which we will work.
The choice of materials depends on the master, but you will definitely need:
- serpyanka;
- primer;
- putty;
- finishing putty.
Tools for puttying plasterboard ceilings
Important nuances
When the ceiling in the house is already covered with plasterboard and you need to putty the coating, you need to remember the following nuances:
- You need to select high-quality putty, because this directly determines how complete and durable the repair will be. And when it comes to the ceiling, special attention should be paid to the quality factor of the materials preparing for painting;
- It is worth considering in which room the renovation will be done. If this is a room with a high level of humidity in the air, for example, in the kitchen, bathroom, then you should buy waterproof putty;
- It is important not to miss a single microcrack or seam. Only a perfectly flat surface will look aesthetically pleasing and beautiful.
It is important to want to create a cozy and harmonious atmosphere in which high-quality repairs will be done in the best possible way.
Choice of putty
If there is nothing complicated with the tools, then the choice of putty for the ceiling should be taken seriously. Each master works with the putty to which he is accustomed or which suits him best in price. Puttying the ceiling is a mandatory procedure before painting, because despite the smooth surface of the gypsum board sheet itself, it is necessary to hide the fastening points with self-tapping screws and the seams between the sheets.
The modern building materials market offers 2 types of putty mixture: ready-to-use in buckets and dry, which needs to be prepared. Liquid putty mixture is undoubtedly very convenient for work, especially for non-specialists, but it is more expensive.
Putty mixture from Sheetrock
If you decide to putty drywall yourself and have no budget restrictions, this is the best option. If you have experience with puttying drywall (for example, walls), you will also not have problems with thinning and working with dry putty.
In the store you can find 3 types of putty.
- Leveling - for rough work, sealing cracks, chips, screws, seams. Depending on the manufacturer, it can be applied in a layer of up to 5 mm.
- Finishing is a composition that is applied at the very end of leveling and is sanded. This is a fine-grained putty, which is recommended to be applied in a layer of no more than 1 mm.
- Universal putty , which is intended for any type of finishing work.
Based on their composition, putties are divided into:
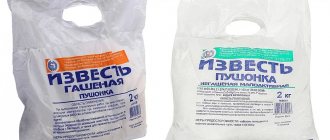
- gypsum , not subject to shrinkage, but not moisture resistant;
- cement , moisture resistant, but which may crack when dry; this is the most suitable material for treating ceilings in wet rooms (kitchens, bathrooms);
- polymer ones - have a lot of advantages, but are more expensive than those described above.
Let us repeat once again: choosing a putty is a matter of budget and experience.
Prices for finishing putty
finishing putty
Knauf gypsum putty for gypsum fiber sheets
DIY drywall putty
So, it is absolutely necessary to putty the drywall before painting, preferably before wallpapering (at least in one layer) and seal only the screws and seams under the tiles. After the gypsum board sheets are fixed to the frame, it is time to prepare the drywall for finishing. Let's consider the case with a full cycle - for painting. In this case, the drywall must be puttied in at least two layers.
For other types of finishing that are less demanding on surface quality, we simply remove unnecessary steps. The order of work is as follows: One thing - it’s better to grind in a respirator and safety glasses. Gloves will be a good idea. The dust is very fine and penetrates literally everywhere. After the seams and corners are sanded, the surface is primed again.
Moreover, all of it, since dust has also settled on the untreated areas, and it worsens adhesion. The Knauf company, one of the leaders in the production of drywall, allows the entire surface of the sheets not to be puttied under tiles and wallpaper. Only joints, corners and screws.
No one uses putty for laying tiles, but yes, for wallpaper. And all because wallpaper pasted without pre-treatment sometimes comes off along with the cardboard and sometimes even down to the plaster. So the second time, putty is simply inevitable.
A few words about which putty is best to use for gypsum board. Any one will do - gypsum or polymer based (latex). Polymer putties are usually finishing - they provide a very thin layer and a smooth surface. There are both starting and finishing plaster ones. Difference in particle size.
You can use any, as long as the quality is good. To putty drywall, you will need a simple tool, some of which are found in almost every home, and the rest can be purchased at any hardware store. But it is important that the instrument is of high quality and clean. For example, it is better not to even take into account old spatulas with dried, non-removable mortar residues - they will only cause harm.
However, the finish will fit perfectly onto the plasterboard surface only if it is properly prepared. The most difficult process is preparation for painting, since this decorative finish is not able to hide even small surface imperfections. It is somewhat easier to putty a wall under decorative plaster, especially if it has a certain relief.
The easiest way, according to experts, is to putty plasterboard under the wallpaper.
Putty consumption
When calculating the putty consumption, you need to take into account the nature of the surface. If the room is semicircular or has rounded walls, partitions, supports, etc., that is, there are quite a lot of seams between sheets of drywall, then the consumption should be large. In this case, the consumption of dry putty on cement should be calculated using the formula: 1.1 x 1 sq. m. Gypsum putty will be sufficient in a 1:1 ratio. You will need even less glue-based putty: 0.5 kilograms per 1 square meter.
To calculate, you will need to measure the surface area of the ceiling. Immediately estimate how many layers of putty you will put, taking into account the level of your skill.
Calculation of plasterboard ceiling area
Preparation of putty
The finished putty does not require any preparation. You just need to open the container, scoop the material onto a spatula and get to work right away. To take a break, simply cover the bucket with a tight lid.
Things are different with dry putty, since it will have to be prepared. You need to prepare dry putty in parts so that it does not set while you work. Cooking instructions are written on the packaging. A third of the water is poured into the cooking container. One person mixes the composition with a mixer, and the second gradually pours in the putty until the consistency of thick sour cream is obtained. Then the composition should be left to set for 5 minutes, and then mixed at low speed for 1 minute.
Prices for gypsum putty
gypsum putty
Preparing putty for the ceiling
After preparation, the material must not be stirred or diluted with water, so as not to destroy the molecular bonds. After thickening, the residue will have to be thrown away: thickened putty, improperly diluted with water, will leave lumps and grooves on the surface. The solution should be prepared for approximately 2 hours of work - this is its lifespan. Please note that it is much more difficult to putty the ceiling than the walls, because your hands get tired faster in the position on top.
How to putty a ceiling?
The answer to this question, as well as detailed step-by-step instructions, can be found in this article! Also read about how to level a ceiling with your own hands.
Plasterboard ceiling plastering technology
Work is carried out only on moisture-resistant gypsum board sheets installed on a metal frame. All other materials will quickly absorb moisture, which will lead to a loss of strength and quality characteristics. If the sheets are attached to a wooden beam, only the plasterboard ceiling is puttyed and the heads of the hardware are sealed.
Tools for work
When figuring out how to plaster a plasterboard ceiling, first check the availability of all the tools:
- container for mixing the composition;
- drill with attachment;
- wide spatula with a side of up to 300 mm;
- brush or roller;
- trowel mesh with a fine mesh or sandpaper fraction No. 140-180.
Preparation of plaster
The composition has a large grain, so it is always applied in a thicker layer. Like putty, there is ready-made and dry plaster. Ready-made formulations do not need to be diluted with water, but dry ones require preliminary mixing strictly according to the instructions. When ready, the mixture should look like thick sour cream. First, all the plaster is mixed, and you need to mix for no more than 10 minutes, then let it sit for setting and mix well again for about 3-5 minutes, after which the composition is ready for use.
Plaster application technology
The work algorithm is as follows:
- The prepared base with recessed heads of hardware, sealed seams and fastener installation areas should be sanded and primed. Allow the surface to dry thoroughly.
- Apply the first layer of the mixture, smoothing out all rough defects. Plaster is applied up to 6-8 mm thick.
As soon as the first layer has dried, sand it with sandpaper or a machine. It is better to take finer grains. Now the second layer
Plastering plasterboard ceilings is applied in the direction opposite to the first layer - this is very important. The thickness is no more than 5-6 mm (if it is not a textured mixture).
All that remains is to let the ceiling dry, sand the entire surface with fine-grain sandpaper or a sander. The surface is ready for decoration.
Preparing the ceiling for puttying
Step 1. Before starting puttying work, you need to prepare the drywall. First you should check the screws to ensure they are not sticking out above the surface. The self-tapping screw must be recessed into the gypsum board by 1 mm. If it is recessed more, it needs to be twisted onto a longer self-tapping screw. If it is not screwed in enough, you should tighten it carefully, without squeezing it.
Step 2. Next, check that there is no peeling cardboard sticking out over the entire surface. If the paper has come off somewhere, it needs to be torn off.
Step 3. Priming is necessary to improve adhesion so that the paint does not crumble later. You should buy a special primer designed for processing gypsum boards: the most popular is acrylic primer. Alkyd primer is not recommended for this type of work, as it may swell during the work. You need to work with a brush or roller, paying special attention to priming the seams.
Primer prices
primer for walls
Preparing a plasterboard ceiling
Step 4. Next, you should wait until it dries completely (usually no more than three hours) and begin processing the seams.
1 - Cut out damaged areas, 2 - Embroidered seam, 3 - Factory hem
Tools
- What tools do they use?
Here is a complete list of what may be needed at different stages of finishing:
| Image | Description |
| Stationery knife for cutting seams. |
| Narrow (10-12 cm) spatula. We have to fill the seams with them. |
| Wide (25-35 cm) spatula for finishing the ceiling plane. |
| Corner spatula for smoothing internal and external corners. |
| A container for mixing putty with a volume of at least 5 liters. |
| Construction mixer or drill with a whisk for mixing plaster. |
| Wide brush or roller for priming the ceiling. |
Seam processing
Processing of seams is necessary so that as much putty material as possible can fit inside the voids. Otherwise, after a couple of years of use, the seam may crack.
Table. Processing seams on a plasterboard ceiling.
| Steps, no. | Necessary actions |
| Step 1 | The seams are being unstitched. The chamfer from the sheet is cut with a painting knife at an angle of 40-45 degrees. The recess between the sheets can go up to 1 cm deep. The chamfer can be removed before installing the sheets on the frame or already in the process of processing the ceiling - a matter of skill and convenience. You can find gypsum board sheets with already prepared edges on sale. They cost a little more. |
| Step 2 | If you have a self-adhesive serpyanka, you can immediately glue it on top of the seam. If the serpyanka is ordinary, you should first apply the solution and glue the serpyanka onto it, running a spatula over it so that it goes deeper into the solution. In any case, you need to apply another layer of putty on top, level the layer with a spatula and remove the excess. Thus, the tape should be inside the putty layer. The seams should now be completely dry. When dry, the seams should be flush with the surface of the gypsum board sheet. |
| Step 3 | At the same time, the fastening points should be leveled with self-tapping screws. There is no need for tape here, just coat it with putty, level it to the level of the plasterboard and wait until it dries completely. |
Primer coating
Before you putty the drywall, prime the surface. Any primer is applied to a dry, clean base. Therefore, we first remove dirt from the surface and remove dust (you can use a vacuum cleaner or a slightly damp cloth). After this, prepare the soil according to the instructions (sometimes you need to dilute it with water, sometimes you just need to stir it), pour it into a container and apply it with a brush or roller.
Applying a primer: choose a method convenient for you
Drywall primer is available for dry and wet areas. For the bathroom and kitchen, choose soil for wet rooms; for the rest, you can use any soil. When choosing soil, pay attention to the presence of antibacterial components. They prevent the development of mold and fungi. This is especially true for the kitchen and bathroom.
| Name | Consumption | Purpose | Drying time | Additional properties | Price |
| Penetrating primer Optimum (10 l) | 6-8 sq.m/l | For priming brick, concrete, plasterboard in dry rooms. | 30-40 min | 600 rub for 10 kg | |
| GLIMS Grunt (10 l) | 5 sq.m/l | For rooms with normal and high humidity | 30 minutes | Anti-fungal and anti-mold additives | 600 rubles for 10 l |
| Tex Universal acrylate primer | 5-14 sq.m/l | For priming porous surfaces, including plasterboard and putty surfaces | 30-40 min | For dry rooms and rooms with high humidity | 650 rubles for 10 l |
| Internal primer Prospector 10l | 5-10 sq.m/l | For priming porous surfaces, including plasterboard and putty surfaces | 60 min | Anti-fungal and anti-mold additives | 350-400 rubles per 10 l |
| Feidal Tiefgrund LF 10 l | 10 sq.m./l | For highly absorbent surfaces, including drywall | quick-drying | For indoor and outdoor use, frost-resistant | 850 rub for 10 l |
Usually, for priming drywall, it is enough to apply the composition in one layer, but in the kitchen or bathroom you can use two: to guarantee the result. After the soil has dried (the time indicated in the instructions), you can proceed to the next stage.
Corner processing
If the plasterboard ceiling is multi-level, you cannot do without processing the corners. The principle of operation is the same as with processing seams, but instead of serpyanka you can use metal corners. On sale you can find metal corners with serpyanka, specially designed for processing the corners of plasterboard surfaces.
To prevent the metal corners from protruding too much from the surface of the sheet, some craftsmen make a cut along their length and remove the top layer of cardboard. The cut is also pre-primed. The metal corner is then pressed into the sheet so that the perforation is filled with putty, and is also puttied. To work with corners, you must use a special corner spatula.
Processing plasterboard corners
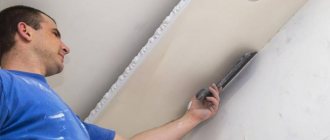
How to putty a plasterboard ceiling?
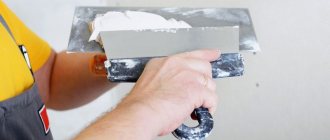
Step 1. Apply putty to a wide spatula with a falcon and begin puttying with a wide movement of the hand. It is necessary to apply as thin a layer as possible, stretching the mixture over the sheet so that the layer thickness does not exceed 1-2 mm. The putty will be applied in 2-3 layers, so at the first stage there is no need to pay attention to the scratches left by the spatula.
Plasterboard ceiling putty
Step 2. The entire surface of the ceiling is processed in the same way. Then we wait a day until the material dries completely. Completely dried putty will be white, undried areas will be gray.
Step 3. Remove large grooves with a grater and sandpaper. All puttying work must be carried out in a respirator to avoid inhaling dust. At the end, we prime the first layer of putty again with a roller and wait for it to dry completely.
Step 4. The second layer of putty is also applied. When applying it, you need to ensure that there are as few scratches as possible. If the layer is applied evenly, then a third layer is not required. After the second layer has dried, the surface is sanded with sandpaper.
Step 5. Lastly, a fine-grained finishing putty is applied. The principle of application is the same, but the evenness of the application should be controlled with a portable lamp directed at an angle to the ceiling surface. This way, all the irregularities on the ceiling are better identified.
Drywall prices
drywall
How to putty a plasterboard ceiling
First, the finishing putty is applied, dries, then the excess is sanded off. If depressions are visible somewhere on the surface, another layer is applied. For sanding, it is better to use zero-grit sandpaper.
Sanding the ceiling after puttying
Step 6. Finally, apply another coat of primer. You can prime the last time immediately before painting the ceiling.
After this, all work can be considered completed. You need to especially carefully smooth the surface under glossy paint, because matte paint can hide minor irregularities. Such thorough smoothing of the surface is not required if you decide to cover the ceiling with decorative plaster or wallpaper (this type of finishing is also found in some interiors).
When should you plaster the ceiling?
At first glance, it seems, why plaster the ceiling if it is much easier to putty it? But in fact, in some cases it is necessary to use plastering. The plaster is applied in a thick layer and hides significant defects in the base. A thin putty layer allows you to level out only minor defects, eliminate chips and cracks, and close seams and recesses from self-tapping screws.
Important! Thanks to the larger grains in the composition, the plaster is applied in a layer 20 mm thick, thanks to which even significant unevenness on the ceiling can be smoothed out.
Another case when plastering cannot be avoided even if there is a flat base is finishing with decorative plaster. When using such a finishing coating, you simply cannot do without preliminary plastering, because the starting solution provides better adhesion to the layer of decorative plaster, because it is made on the basis of the same components as the decorative finish. Mixtures with different compositions do not adhere well to each other. Because of this, the decorative coating will not last long.