Paint can bring new life to an interior, and if you're tired of your desk, you don't have to get rid of it and start from scratch; a few coats of paint can easily transform it into a beautiful new piece of furniture. Or if you found an old table at a flea market or garage sale, you can create the table of your dreams simply by painting it yourself.
Transforming an old table with cracks and faded paint is much easier than you think. All you need is one free day and attention to detail. If you do everything according to the instructions and carefully, you will have a piece of furniture that will decorate your kitchen, dining room or other room.
Painting a table with your own hands - where to start?
If you're not sure what color to paint your table, we'll tell you. White tables with bright chairs look good in kitchens, while brighter colors can really make a delightful accent. Think about what kind of atmosphere you want to create and then choose a color that will help you achieve that look. Some shades include yellow, red, turquoise and navy blue.
Required Tools
To paint the product you will need:
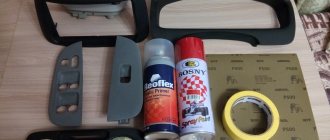
- Sprayer, roller, brushes;
- A container for paint and varnish composition;
- Latex gloves;
- Eye protection glasses and mask (if spraying is planned);
- Rubber spatula;
- Tools for disassembling furniture (screwdriver, hammer drill, etc.)
This is the main set of materials. If desired, you can purchase a finishing varnish.
Interesting to know!
Dipped furniture is a popular home design trend that works well with kitchen tables and chairs. To try it out, paint the bottom half of your table legs. Or try the opposite: paint most of the table, but let the wood show through on the bottom half of the legs. A dipped look is a great way to introduce strong color. If you want to get really creative, consider using chalk paint on the top of your table. Children, for example, will draw while you prepare their breakfast, and adults will also have the pleasure of writing messages or reminders.
How to treat and impregnate wooden furniture
In addition to staining, there is another way to treat wood furniture - impregnation. It will protect the tree from the effects of negative factors. There are oil impregnation, antiseptic impregnation, varnish impregnation and others.
Impregnation with linseed oil is an affordable and effective way to protect against rot and insects, dirt and plaque. Oil treatment preserves the structure and texture of the wood and gives the coating a soft shine.
Oil is better than varnish, since the varnished surface is susceptible to cracks and scratches. However, impregnation with oil takes longer than with varnish.
Drying can be accelerated by replacing the oil with drying oil. This is boiled oil, which contains metal oxides.
For bath furniture, impregnation and painting are required. This will save the wood from rot, mold and pests. The Bath Furniture company manufactures and sells furniture for baths and gardens. In the catalog you will find a large selection of tables and chairs, benches and benches, cooperage products and accessories.
We work without intermediaries and produce linden furniture ourselves. This is an excellent raw material that retains heat, withstands temperature changes and is resistant to moisture. Linden is easy to process and color.
Coating with varnish, acrylic paint or oil will protect linden products from rotting and insects, increase service life, and give an aesthetic and finished look.
How to paint a table correctly?
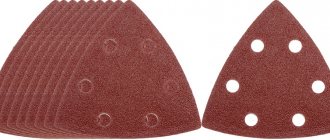
To paint your table, you want to first prepare the surface by sanding it. After you finish sanding, you need to coat the table with primer. If you're repainting a really old table, try to find a primer that blocks wood stains. For added protection, add two coats of primer to the top of the table. Let it dry for a day and then use a medium sanding wedge to smooth out any rough areas.
When it's time to paint, be sure to choose water-based enamel paint Kitchen counters take a lot of loads, and you'll need paint that can handle plates, cups, and all sorts of other items.
Paint several layers and make sure each one is completely dry. Once you've finished painting, apply a coat of water-based polyurethane or furniture wax to protect your table, then enjoy your newly refinished piece of furniture.
Painting with oil paint will take longer to dry. Open windows if you are painting indoors. You won't be able to wash the brush in the sink like you can with latex paint, so you'll need either solvent or a disposable brush to paint the table. The only downside to oil paint is that you usually can't mix colors, so you have to choose from what's available.
Painting a kitchen or dining table is not much more difficult than painting any other piece of furniture. But if you don't know what you're doing, it can turn into a big problem. Before you start painting, remember that the main goal of repainting is to make the surface durable. Kitchen tables take more wear and tear than your dresser or bookshelf. And who wants to spend hours painting only to see the paint peeling off a week later?
- If you don't take the time to sand everything down, including the beautiful table legs, you'll end up with peeling paint, an uneven surface, and possibly stains underneath your new paint.
- Before applying paint, you must apply at least one coat of shellac-based primer. Shellac is used when you coat painted wood with paint. This helps maintain color and prevents future yellowing. Make sure you use a water-based primer for latex and an oil-based primer for oil-based paint.
- A thick layer of paint tends to chip more often than several thin layers. Take your time. We recommend using a paint sprayer rather than a brush due to its ability to easily spread thin layers.
Decoration
If you want to diversify your interior and add a touch of soulfulness and homely warmth, table painting is a great way to decorate your table and combine business with pleasure. Designers offer many different creative options for decoupage and decoration, with the help of which old wooden objects will become a real pride for their owner. One of the simplest and most common techniques is painting through tulle. This technique will allow you to transform the appearance of the table with your own hands at minimal cost. All you need for the job is white and blue paint, sandpaper and tulle with a beautiful pattern.
Manufacturing technology
- Using sandpaper, you need to sand the wooden surface, removing the previous coating. You should then wipe the table with a dry cloth before painting it.
- Use acrylic interior paint to paint the table white, applying 2 layers. After each coating, it is recommended to allow an interval until the product is completely dry before painting the product again.
- The tulle will serve as a stencil, so the damp fabric should be laid on the table, carefully straightening the edges so that there are no folds or folds. Next, you need to paint the tulle tabletop with blue acrylic spray paint.
- After drying, the tulle is removed and the product is varnished.
You can learn more about how to paint a table and decorate the product from the photo instructions, and also watch an instructional video on the Internet about how to paint a table with your own hands.
Even a non-professional can provide new life to old interior items. A little creativity and imagination - and the result will exceed all expectations, and the table will please the eye for a long time.
Video: do-it-yourself restoration of a lacquered tabletop.
Source: prokuhni.info
Is primer required?
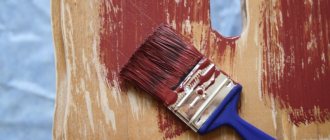
Prime the table using roll/brush primer. Roll-on/brush-on formulas are best for high-traffic surfaces as they tend to be thicker and more durable than spray-on formulas. Apply 1 coat of primer using a mini foam roller or medium brush. Allow this coat to dry before applying a second coat.
Primer helps the paint adhere to the wood and hides any stains or discoloration. Between layers, wrap the roller or brush in a plastic bag and place it in the refrigerator. This will keep the paint wet and save cleaning time between coats.
Be sure to fill any cracks or holes in the table with good wood filler. Be sure to follow the instructions and let the filler dry to the point where you can sand it well.
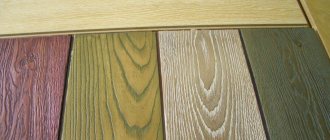
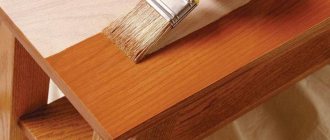
Tips for choosing varnish color
For beginning craftsmen, a very important question is what shade to choose varnish for a wooden table. The customer must also put an end to this issue. You can not disturb the natural texture of the wood or cover it in the color of cherry or walnut. But you don’t always get the result you expect. To prevent this, you should familiarize yourself with some features:
- Colorless varnish will not always preserve the original appearance of wood. Most often it gives the wooden surface a yellowish appearance. Therefore, if it is necessary to maintain the original shade, it is better to use polyurethane materials. They eliminate the appearance of yellowness.
- When visiting branded stores, sellers will provide a large assortment of colors to choose from. To get the color that you prefer, it is better to take a color that is 2-3 tones lighter. After all, the desired gloss on a wooden surface is formed only after applying 5 or 6 layers. With each subsequent layer, the shade will become darker.
- In the case when 2-3 layers are applied and the result is the desired surface color, but the required gloss is achieved, then this problem can be solved with the help of colorless varnish.
- Varnishing should begin only after high-quality sanding has been completed.
Which paint to choose?
- Enamel based paints are known for being hard, durable, corrosion resistant and easy to clean.
- Latex-based paints are also easy to clean and look nice, but they don't hide damage and aren't durable.
- The oil paints we discussed above have a strong, unpleasant odor and are absorbed into the wood as they cure, making them extremely durable and easy to clean.
Portal about construction
The choice of furniture in modern furniture stores is quite wide, as is the material from which it is made. But products made from natural wood have not lost their attractiveness. For example, a kitchen set made of solid wood. Such a product will be 2-3 times cheaper if you order it from a craftsman. You can try to assemble it yourself, even better. That parts for such furniture are also widely available in stores. But, we will talk about what kind of varnish to cover a wooden table so that the furniture is protected from all kinds of damage and is pleasing to the eye.
Good paint is the key
Let's remember that properly preparing the surface for painting is only half the battle. A lot depends on the paint. Your requirements will be satisfied, first of all, by enamel, which creates durable coatings with high mechanical resistance. It is easy to get scratches and damage when using the table. For example, Dulux Rapidry . This is a universal, quick-drying acrylic enamel with a mild odor. A table painted with it will also be resistant to high temperatures and will not turn yellow or fade.
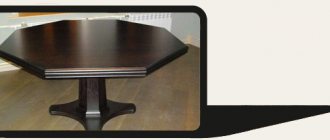
Black, green or red? Don't throw away your old wooden table - just paint it, preferably an attractive, surprising color.
Why does wood need painting?
Everyone knows that natural wood is a fairly strong and durable material. It is used not only in the production of furniture, utensils, household goods and interior items, but also in construction. Under the influence of external environments, wood, one way or another, deteriorates over the years:
- swells or, conversely, oversaturates;
- rots when exposed to moisture;
- fades, fades or darkens;
- warps and deforms;
- is attacked by wood borers;
- wears out, gets chipped.
To avoid this for longer, the wood is protected and strengthened with various impregnations and decorative coatings. In some homes where wooden products are properly cared for, cabinet furniture lasts for more than one generation.
You can protect wood to increase its service life with various impregnations, decorative coatings or paints
So, you have a wooden table in your apartment that has been serving faithfully for many years. You want to extend its life by painting it yourself. It's time to find out what and how to do it better.
