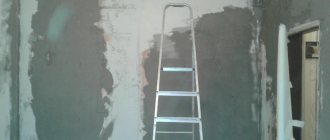
The kitchen renovation is in full swing: the ceiling is ready, the window has been replaced, and the floor has been done. It's time to start decorating the walls. They can be finished in different ways: covered with modern wallpaper, tiled, plastered with a special compound, or simply painted. In recent years, painting walls in the kitchen has become incredibly popular, as they say, simple, cheap and beautiful. However, it must be borne in mind that kitchen walls are a place that gets dirty easily and quickly, because the process of cooking is never complete without flying splashes of fat, the release of soot and steam formation. Consequently, they need to be coated with special paints, which could later be easily cleaned of unwanted dirt deposits, and this should be done without compromising the aesthetic appearance of the surface. Let's figure out what distinguishes the process of painting kitchen walls from similar work in other rooms.
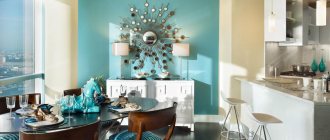
The accent wall in the kitchen is painted turquoise.
The main difference lies, of course, in the choice of coloring composition, which has special requirements. Paint for such work must have increased durability, because it will have to be in unstable temperature and microclimatic conditions, be exposed to steam and condensation, be subjected to frequent washing, and sometimes even harsh cleaning. The cost of such high-strength paint will, for obvious reasons, be higher than that of “residential” compositions, but this is not a reason to abandon your idea of kitchen decor.
Types of paints used for kitchen walls
The most commonly used paints are water-based and water-based paints. In turn, they are divided into silicone, acrylic, mineral and silicate. Their composition mainly consists of water, color pigments and polymers. Acrylic and silicone are most suitable for kitchens.
Oily
One of the most famous and long-standing representatives of what can be used to paint walls in the kitchen. It is produced on the basis of drying oil with the addition of pigment materials and fillers that promote viscosity and strength.
It’s easy to create a bright interior, the main thing is to choose a color you like
When choosing this type of paint, you should take into account that it does not allow air to pass through, contains volatile solvents, is difficult to remove, and at the same time, another type of paint composition cannot be applied to its surface. Alkyd paints are also not recommended for use in the kitchen due to their strong unpleasant odor.
Water-based
In order to make the design interesting, the wall in the kitchen is covered with water-based paint, also known as water-dispersion paint. It fits well on the surface, gives the wall a beautiful appearance, and has a greater variety of colors than oil paint.
It is also important that it does not emit toxic fumes, which makes it safe for use in kitchens
The only negative is that it is not resistant to water and exhibits the ability to be washed off little by little under its influence. This leads to dulling of the surface.
Carefully! Choosing this type of coloring composition may not be economically viable due to the need for frequent touch-ups
Acrylic
To paint the wall, you can use paint based on acrylic or latex. The surface covered with it can be washed as much as you like; it is absolutely not afraid of water and various household detergents. It has excellent vapor permeability, condensation does not form under it, and it lasts much longer. A big plus is the ability to hide microcracks if their size is less than 1mm, it lies flat. Used on almost all types of surfaces.
Modern manufacturers produce various types of them:
- acrylic (based on acrylic resins);
- latex (with rubber in the composition);
- latex (with an acrylate binder).
Rubber forms an elastic film after drying, which makes the coating durable and stable. The addition of an acrylate binder improves all technical characteristics of the paint and significantly increases the service life, including color fastness. Moreover, it is the most expensive of all existing coloring compositions.
Acrylic paint - bright interior and easy care
Wall painting technology
Wall painting can be:
- simple;
- improved;
- High Quality.
Painting walls with a textured roller.
For simple staining, perform 5 steps:
- clean the surface;
- level it;
- remove existing deficiencies;
- prime;
- apply the coloring composition.
Improved coloring includes 8 stages:
- cleaning;
- leveling walls;
- removal of defects;
- primer;
- puttying areas with roughness;
- sanding putty areas;
- re-priming;
- painting.
In the case of high-quality painting, 2 puttying of the wall surface is added, followed by sanding and applying an additional (third) layer of primer before painting.
The paint often has a thick consistency; before use, add a little water to it and mix thoroughly. The optimal temperature for painting is +5…+20°C. At a higher level, the paint dries quickly; a roll may appear on the surface, which will be visible after drying. DIY wall painting technology:
- pour a little paint into the tray;
- dip a short-pile roller into it, then roll it out (to soak) over the paper;
- They begin to paint from top to bottom.
After applying the layer, wait until it dries, then apply a second layer and, if necessary, a third.
Acrylic paint is the best choice for your kitchen.
Home > Architecture and Design > Acrylic paint is the best choice for your kitchen.
When it comes to kitchen renovations, many questions arise about wall decoration. It is known that the kitchen is one of the most “unfavorable” places in terms of service life. Constant temperature changes (due to the operating stove), high humidity, various odors... If you decide to paint the walls of the kitchen, then, unlike tiles or wall panels, paint is the most cost-effective option. The range of paint and varnish products is amazing in its diversity. I would like to talk about working with acrylic paint, as I myself have used its advantages. Waterproof acrylic paint is suitable for use on any surface: brick, concrete, plaster, drywall, plaster, structural wallpaper and fiberglass. It penetrates deeply into the material (therefore it is especially good on “porous” surfaces) and does not peel off. When choosing acrylic paint for the kitchen, pay attention to such properties (you can read about them on the packaging) such as: fire and explosion safety, light resistance, environmentally friendly components, resistance to mechanical action and tolerance to wet cleaning. In some types of acrylic paint, specialized silicone, antibacterial and non-stick additives are used to obtain unique performance properties of the paint for specialized applications (for example, in the kitchen). The surface painted with this paint is silky-matte and “breathable.”
Before painting, you need to pay great attention to preparing the walls. Carefully remove the remnants of the previous coatings (for this it is convenient to use special attachments on a drill), be sure to check all the corners - they must be exactly 90 degrees, otherwise the kitchen furniture will not stand up straight
To level the walls, use a special putty for wet rooms (I used latex). Don’t skimp – the smoother the walls, the more impressive the paint will look. After the putty has completely dried, prime the walls. This will help the paint lie flat and prevent mold or mildew from forming on the walls. Before starting work, mix the paint thoroughly until a homogeneous mass is obtained; if it thickens, it can be diluted with water, but the volume of water should not exceed 5% of the total volume of paint. You can paint the kitchen walls with a roller or brush. (the roller is very convenient, as it allows you to apply the paint in an even layer without streaks, covers a large area, and the paint, due to its thickness, does not run off). Drying time is 2 hours, after which you can apply a second layer. Acrylic paint acquires all the properties declared by the manufacturers within 7 days. I hope you will be satisfied with the result and the kitchen will become one of the most comfortable places in your apartment!
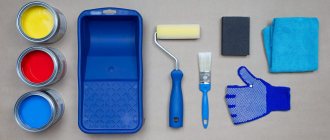
What tools to use
First, let's figure out how to paint the kitchen. To do this you need the following tools:
- Brushes;
- Painting film;
- Wide and narrow paper tape;
- Narrow and wide spatula;
- The scrapers are triangular and have a cutout for a roller;
- Plastic bucket;
- Tray or grid corresponding to the roller;
- Rollers (large, small, narrow);
- Bar for mixing paint;
- Sandpaper, mesh and pen, tool for sanding walls;
- Silicone gun:
- Drill with mixer for putty.
- Level (to check the evenness of the walls)
Painting tools
The width of the rollers should be from 20 to 32 cm, the length of the pile should be from 8 to 12 mm. A foam roller is not for you. For hard-to-reach areas you need a radiator roller.
You need two brushes. One is 50 cm wide, the other is 35 cm. For large areas you need a 75 cm brush. For water-based paints we take nylon brushes, for alkyd ones - with natural bristles. You will also need a curved battery brush.
You can check the paint color on a piece of paper
To choose a paint, try coating the paper first, wait until it dries, and judge the color. The paint composition and putty must be from the same company. This determines how quickly the wall dries, how resistant it will be to mechanical damage, and its appearance.
Advantages and disadvantages of acrylic paints
Acrylic painting materials are highly attractive and come in a variety of shades.
If you are interested in the best way to paint the walls in the kitchen, you must definitely pay attention to acrylic paint. Such compositions perfectly combine the advantages of polymer paints and water-based analogues:
- Durability. When applied to the wall, such paints do not fade for a long time.
- Attractive appearance. Such compositions are distinguished by a variety of colors and the possibility of application in a thin, even layer.
- You can carry out wet cleaning.
- High wear resistance.
Types of water-based paint
Due to additives, water-based paint can be divided into several categories. It all depends on what material is added to the composition. There are several types of paint that are ideal for kitchen walls:
- acrylic;
- latex;
- alkyd;
- silicone.
Acrylic-based paint is relatively cheap, but is not particularly popular among craftsmen. The thing is that the composition is quite elastic and durable. Using acrylic paint you can create a velvety matte surface. The walls will withstand wet cleaning without any problems.
Latex products are more expensive and of higher quality. Due to the latex content, they are resistant to adverse kitchen conditions. After application, a durable thin film is formed that protects the wall from moisture and abrasion. The paint is washable, but slightly inferior to acrylic in vapor permeability.
Alkyd compositions are not very popular, but they are also suitable for kitchen walls. They are highly wear-resistant, resistant to sudden temperature changes, tolerate moisture well, and have a rich color. In addition, anyone can apply the composition, and the mixture consumption is small. But there is a big disadvantage of the paint - it is based on a solvent, so it cannot be called environmentally friendly. And the fire safety of the material is poor.
And finally, a silicone-based composition. We can say that all the positive qualities from other paints were taken and assigned to this particular type. The paint is washable, wear-resistant, dries quickly, etc. There are no disadvantages
Unless you take into account its price. She's the tallest
Although the stingy, as they say, pays twice, or even three times. Therefore, you should not skimp on the quality of material for the kitchen. But still, what kind of paint to choose is entirely up to you.
Advice! If you doubt the quality of the material, you can conduct some experiment. Apply the composition to the surface and place it in water for 24 hours.
When the sample looks perfect, without damage or defects, the paint repels water and washes well. If the material has peeled off, become blistered, or washed away, it should not be used.
Types of washable paints
As we have already found out, the covering of the kitchen walls must be moisture resistant. Since the kitchen requires constant cleanliness, the walls should be easy to clean without compromising the appearance of the coating. It must be environmentally friendly and free of harmful components that can harm health.
Water-based and water-dispersion paints meet all these requirements. The cheapest ones have PVA glue as one of their main components. Their disadvantage is low moisture resistance. The same paints, but with the addition of acrylic components, have significantly better characteristics in terms of water resistance and abrasion. Therefore, they can be recommended for high-quality kitchen renovations.
Latex and silicone based paints have even better performance. They have high wear resistance and withstand repeated washing well. Tinting (giving the required color) can be done in two ways: manually or using a computer system for selecting the desired shade. This gives a wide scope for imagination when developing the design of a kitchen space.
Perhaps the only significant drawback of latex and silicone-based coatings is their fairly high price. But, if you are a supporter of durable and high-quality coating that can withstand repeated wet cleaning, you won’t find a better option.
What should the wall paint be?
The paint that is planned to be used for the kitchen deserves special attention.
It is important that she:
- contained a wide variety of colors and easily represented not only the main tones, but also their various shades;
- cover the surface tightly, neatly, evenly;
- was resistant to moisture and household detergents and did not wash off;
- did not change under the influence of ultraviolet radiation (for example: white - did not turn yellow, and colored - did not fade);
- was not accompanied by a toxic odor when dyeing;
- was durable;
- made the surface beautiful and gave its notes a special appeal.
Choosing wall color in the kitchen
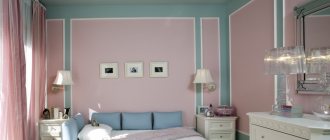
When choosing the color of the walls in the kitchen, you must take into account that it determines the style of the room as a whole. A well-chosen color scheme can visually increase the area of the room.
The color of the kitchen walls should be harmoniously combined with the color of the furniture in the kitchen. But the color of the furniture and the color of the walls should not match, in which case they will merge and the kitchen will look monotonous. To get a more saturated shade, the surface needs to be painted in several (about 2-3) layers.
It is also worth considering that matte paint will look darker on the wall than in the package, while glossy paint will look brighter. But do not forget that after drying the final color will fade a little.
It is known that different colors have a certain effect on the physical and psychological state of a person, as well as on the perception of the interior as a whole.
For example.
- The color yellow is associated with the sun. It will create a cozy atmosphere and promote a healthy appetite;
- Orange color stimulates the appetite in the best way, but its abundance in the kitchen interior can be irritating.
- Red color promotes excellent appetite, but can cause a state of discomfort.
- White color is neutral. It will create the feeling of a sterile room, so it is better to use it in combination with others.
- Blue color is not associated with food and suppresses appetite, so it is rarely used in kitchen interiors.
- Cold tones of green, purple, gray colors reduce appetite. These color schemes are recommended for those who want to lose weight.
- Olive color will fit perfectly into the interior of any kitchen; it creates a feeling of coziness and comfort.
When creating an interior using painting, you can divide the kitchen into functional zones by using different colors.
You don't always have to paint your kitchen walls the same color. You can use masking tape to paint stripes, checkered patterns, and various other geometric shapes in different colors. You can also create a decorative pattern using stencils. A wealth of imagination will help with this.
Combined coloring: color selection
For a harmonious combination of two colors, it is enough to have a color wheel in front of your eyes. If you add imagination to this circle, you can get the perfect color ensemble and interesting effects. In modern design, three methods of mixing colors are used: black and white, gray and beige shades, two cool pastel colors. A very popular approach is when several close shades or related colors are used.
If the latter option is chosen for painting in two colors, then it is necessary to select shades that are similar in saturation, color temperature and other characteristics. If you use peach color rather than orange, then green will not work; it is best to choose olive.
To make a perfectly even border, the joints are decorated with polyurethane moldings, paper borders or wooden slats.
If the selection of colors was carried out not according to catalogs, but according to intuition and imagination, it is worth ordering tinting with a significant reserve. If such a unique paint suddenly runs out by accident and you have to create a new batch, you won’t always be able to get the right color exactly. It is important to have backup supplies if mixing will be done yourself.
Related article: Light green color and its combinations (+42 photos)
On video: using color in the interior
Types of coating
It is recommended to use compounds intended for interior work. When choosing materials for painting walls in the kitchen, preference should be given to moisture-resistant types. The most commonly used are water-dispersion, latex and alkyd compositions; epoxy and polyurethane options are allowed.
Due to the high price of high-quality paint, a choice is often made in favor of cheap types. Such a decision may negatively affect the quality and timing of repairs. You can save on preparing and finishing the walls and do the work yourself, but it’s still worth purchasing paint from reliable manufacturers.
Water-based
The paint is produced with the addition of mineral particles, polymers and tinting particles. After application, it dries quickly, leaving a thin polymer film of mineral components. Main advantages:
- easy and uniform application to the prepared surface;
- absence of a sharp chemical odor during drying (painting can be carried out even in an unventilated room);
- quick drying;
- with proper application and proper operation there is no risk of peeling;
- environmental safety (the compositions do not contain toxic components that cause allergies and other disorders);
- prostate in care (it is possible to clean dirt from the surface even with a dry cloth);
- increased resistance to alkalis.
The advantage of water-based paint is that high-density compounds fill cracks and cracks, masking them.
You can only work with water-based emulsion at room temperature, because at 0°C it thickens and freezes.
Alkyd
Alkyd paint for walls in the kitchen will look aesthetically pleasing and attractive. After drying, a beautiful glossy surface will be created that will not lose its shine during long-term use.
The advantage of the compositions is that they are not afraid of contact with any cleaning agents. Due to their durability, alkyd paints are used to treat walls and floors. The main component of the coating is resin, the production of which uses soybean, linseed or tall oil.
Advantages of alkyd paints:
- rich and bright colors that will not fade over time;
- high wear resistance;
- long service life;
- easy to clean.
Minus: surfaces coated with these compounds do not “breathe”.
Epoxy
For painting kitchen walls, epoxy compounds are the most preferable, but compared to other finishing materials, they are expensive, which is why most people refuse to use them.
Epoxy paints are characterized by increased resistance to moisture, which is the most important criterion when it comes to using the composition in the kitchen. The base is epoxy resin. The compositions have the following advantages:
- long service life;
- the composition adheres tightly to any surface, including concrete and plastic;
- the coating is not afraid of water, contact with chemicals and mechanical stress;
- the film created on the surface easily tolerates loads;
- to achieve an even and dense color, it is enough to apply the composition in one layer;
- high resistance to gases, alkalis and acids.
Weaknesses of the epoxy composition:
- increased susceptibility to ultraviolet rays;
- with strong heating, the coating may turn yellow;
- long drying (about 24 hours);
- unpleasant odor, so the room must be constantly ventilated during operation;
- The composition is applied only at temperatures above +15°C.
Acrylic
The most important advantage of the compositions is the wide range of colors. The binder component is an aqueous suspension of synthetic resins. The composition contains polymers, methyl, ethyl and acrylic. The demand for acrylic paints for walls in the kitchen is due to the following advantages:
- Versatility. The material is used for processing any surfaces (plywood, brick, concrete).
- Environmental friendliness;
- Quick drying (a thin layer dries completely in 2-3 hours).
- Wide choice of colors;
- Dirt will not accumulate on walls treated with acrylic, so cleaning will only have to be done as needed.
The main disadvantage of acrylic paint is its high cost and a large number of fakes.
The paint does not tolerate contact with aggressive chemicals.
Painting tools
Kitchen wall paint is applied to the surface using the simplest tools:
- wide brush (about 10 cm),
- narrow brush for corners and joints,
- paint roller,
- paint tray,
- telescopic handle for roller,
- ladder,
- masking tape,
- latex gloves.
Instead of a roller, you can use a spray gun.
If the choice fell on oil or alkyd paint, then it is necessary to provide respiratory protection during work.
The furniture is taken out of the room or covered with plastic film, the floor is covered with newspapers, the ceiling is covered with masking tape around the perimeter, the baseboards are treated in the same way, or they are temporarily dismantled.
Preparing the room before painting
Materials are being calculated. In this case, information on the consumption of paints and varnishes provided by the manufacturer and the surface area of the walls or floor are taken into account. Brushes, rollers, and spray guns are used for painting. The choice is made taking into account the type of paintwork
Pay attention to the quality of the surface when choosing a tool. If there are no surface defects and a roller is chosen as the tool, then the length of the pile should be no more than 12 mm
Determine the most suitable color scheme. At this stage, the style direction of the design and the type of finished surface are taken into account: plaster, wallpaper that can be painted, decorative brick, etc. Often a complex paint and varnish application scheme is chosen (a combination of paint of different colors, a combination of textures).
The kitchen area must be cleared of interior items. Large furniture is protected with plastic film. Work is carried out in a ventilated area. Preparation includes the following steps:
- removal of old coating (if necessary);
- leveling the surface using plaster;
- grinding is performed to remove residual mortar;
- padding.
Tool:
- spatulas of different widths;
- brushes;
- rollers;
- construction mixer for preparing mixtures;
- sandpaper;
- Sander;
- grater.
Preparatory work
The surface of the walls must be prepared for painting. The complexity of this process depends on the initial state of the coating. It occurs in several stages.
- Cleansing. Sometimes it’s enough just to wash the walls with soap or powder, but often they need serious restoration. Then you will have to scrape off the swollen and cracked old coating using a spatula or scraper, removing everything that does not adhere well. To remove an old layer of oil paint that is difficult to clean, you can use a drill with an attachment in the form of a metal brush or a crown, as well as a hair dryer or a special chemical composition (removal). The cleaned wall must be treated with a vacuum cleaner.
- Next comes the putty. For walls with large potholes and cracks, a rough material is used (starting putty), and only after it has dried and treated with coarse sandpaper is a soft and plastic finishing putty applied. The surface is polished with fine-grain sandpaper. The wall is again cleaned of dust.
- Priming the walls is the key to the durability of the coating. It provides strong adhesion of the paint to the surface. Considering the conditions of high humidity in the kitchen, it is recommended to choose a primer with an antiseptic in its composition; This is a good way to protect the room from the growth of harmful bacteria and fungi.
Painting walls in the kitchen and its benefits
beige walls in the kitchen interior
The paint is great for the design of modern kitchen interiors. With its help, a magnificent, uniform and smooth surface is created, which acquires a beautiful gradation in the light rays. The main advantages of kitchen paints are:
- Water resistance. This is the main parameter for compositions planned for use in harsh kitchen conditions.
- Possibility of tinting.
- Environmentally friendly.
- Easy to apply.
- No irritating odor.
- Fire safety.
- Breathability. This condition also applies to mandatory indicators. Pathogenic microorganisms will never settle under layers of such paint.
- High-quality adhesion. The paint should adhere well to the surface, not crack or peel.
- Almost instant drying.
- Durability.
- Correct price compared to the cost of other finishing works and materials.
Preparatory stage
This is a very important stage. To get started, you can look at photos of painting walls in our article. After all, the main thing in this matter is the quality of the work performed.
You need to consider the technology you will be using.
First you need to remove the old wallpaper, or paint, if any. Remove rust and lime from the surface.
Types and methods of painting the kitchen
The paint must be brought into the room a day before the process. Don’t forget to pre-glue the cornices, switches, baseboards, and window slopes with mounting tape. Furniture with floors and doors must be covered with construction film
It is very important not to take any breaks while painting. Painting a wall in one step
It is better to paint starting from the window
- It all starts with painting all the internal and external corners, starting from the window side.
- We paint corners, baseboards, radiators and other surfaces that a roller cannot handle. It is better to choose heat-resistant paint for batteries, and varnish for skirting boards.
- To ensure that the surface is painted evenly, roller the board or paint mesh before the procedure to remove excess paint.
Don't forget to take out the furniture and cover everything with foil.
- The paint is applied in two layers. For the first one, dilute it slightly, for the second there is no such need. It is better to start painting the walls from the window side.
- Visually outline a section of the wall about two meters wide. Paint for a roller is poured into a tray, for brushes - into a tall bucket. Using a brush 50 cm wide, paint the contours of the square in one layer, preferably from top to bottom. Don't forget to paint the corners. Next we work with a roller. It is soaked and rolled on the surface of the pallet to remove excess paint. The technique you use with a roller depends on what kind of paint you have.
If it is water-based, then the procedure is as follows:
- We paint the selected square with W-shaped movements starting from the ceiling and to the baseboard;
- We do not press the roller very hard and try not to rotate it;
- We paint the square with leisurely up and down movements, distributing the paint evenly.
You can also apply one layer horizontally, the second vertically. This is a “cellular application technique.
We use alkyds a little differently:
The first layer is applied with quick strokes; The second - with the W-shaped movements already familiar to us; It is important to apply the next layer after the first has had time to dry.
There are several rules for successful painting:
- First, the pressure on the roller or brush should be light rather than strong;
- Secondly, immediately after painting, remove the masking tape;
- It's better to start with the window.
If you are painting with your own hands for the first time, then start from the area where the furniture will stand. She will definitely hide your mistakes from prying eyes. It is better to paint slopes with corners with a smaller brush.
Also read about this! What color to paint the kitchen - recommended colors
Coloring
First of all, use a brush to paint corners, joints, and the surface around sockets and switches. It is believed that it is better to apply the entire first layer with a brush, but this takes too much time.
Pour paint into the tray and saturate the roller with it, squeeze out excess liquid on a ribbed surface or edge and begin painting.
Starting from the top, make alternate vertical and horizontal strokes. When the first layer has dried, you can apply the second. The consumption of material and time will be significantly reduced.
The actual process of painting walls usually takes no more than a day, so you can update your kitchen interior in this way quite often if you wish.
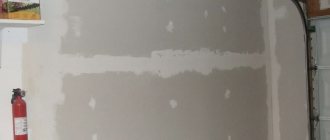
Surface preparation
washable paints should be selected for kitchen walls
The walls must be prepared for painting, and the better this stage of work is completed, the better the final result will be. So what needs to be done and in what order?
- The kitchen walls should be cleaned of dirt. You need to be especially careful when dealing with traces of fat. The old finish is removed, along with the crumbling plaster.
- Browse the space that opens. There should be no signs of mold or mildew. If there are any, then these areas are cleaned mechanically to a clean surface, and then covered with an antibacterial composition. The resulting potholes are filled with gypsum or, less commonly, cement mixtures.
- Painting the walls in the kitchen will be ideal if the layers lie on a completely smooth surface. Such a surface can be achieved using acrylic putty. Spread it evenly over the wall, let it dry and sand it well.
- To improve adhesion to the paint, the puttied wall is treated with a primer and left to stand for the time recommended in the instructions. Now the wall is completely ready for finishing work.
Options for painting kitchen walls - photos
Not long ago, a third trend appeared - painting the walls in the kitchen in two colors. Companion colors are selected. These can be shades of the same color - dark and light, or they can be contrasting or combined. If you want to choose different colors, use the designer color combination tables.
Either way, the most popular trend is to paint one wall a different color. This allows you to clearly define accents. In the kitchen, this is usually the wall next to which the dining table stands, but not necessarily.
Gray as a background color and bright green as an accent wall
Contrasting colors - green and lilac in one kitchen
Walls can be painted the same color, but different shades
One kitchen wall is painted a different color
Striped walls in the kitchen
Another option is to apply stripes of a different color. More often, the stripes are vertical, which helps to visually “raise” the ceiling. They are usually of different widths, located at different distances from each other, but this is far from canon. There are different options. Several are shown in the picture below.
Options for painting walls in two colors
If you don’t want variegation, you can play with the texture of the colors. The combination of stripes of glossy and matte paint of the same color gives a very interesting effect. It's like a combination of velvet and satin. It looks very interesting.
A combination of matte and glossy stripes, but with rich color the effect is more impressive
Stripes of colors that combine with each other
Horizontal stripes of the same width
The combination of white and orange is not so bright
Again stripes of companion flowers
Striped accent wall
Different shades of the same color - an interesting solution
If the stripes are narrow, first paint the walls in the dominant color. After drying, stick on strips of masking tape, which will serve as boundaries when painting in a different color. After the second shade completely covers the first, the tape is removed, clear boundaries are obtained without a “transition”.
Ornaments and stencils
So that painting the walls in the kitchen is not boring, you can enliven it with a pattern or ornament. Drawing is more difficult to handle - you need professional skills, and applying ornaments to walls can be easier than you think. Using stencils this is not difficult at all. You can make them yourself from thick paper covered with tape (to make it easier to cut and not tear), or you can buy ready-made ones, cut out on thick plastic film.
Stencils are an easier way to decorate kitchen walls
A suitable stencil is fixed to the wall. The easiest way to do this is with masking tape. The paint is applied using a regular sponge (you can use a kitchen sponge). Take a little paint on a sponge and distribute it evenly over the entire surface (a plastic plate is suitable as a palette). With this “tool” we paint the wall in the slots. Since there is only a small amount of paint, it dries quickly.
Decorative painting of kitchen walls using stencils
If you want to get a two-color ornament, cover the parts that you will paint in a different color with tape (also masking tape). Apply the pattern in one color, wait until the paint dries. Cover these parts with tape and add the missing part in a different color.
To obtain a two-color pattern, cover some of the slits with tape
You can choose a suitable pattern for the kitchen in the catalog of sites selling ready-made stencils. There are a lot of them in different styles. You'll definitely find the one you like best.