Painting small parts at home can be done in several ways. Powder paint is considered one of the best materials for processing metal products, but its use requires special conditions. The most difficult of them is drying at high temperatures. It is for these purposes that a polymerization chamber is created, and if equipped with your own hands, the cost price will be much cheaper than purchased equipment.
Set of tools
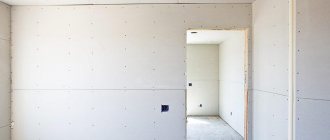
In order to build this device in a garage, you should prepare the following tools:
- welding machine (preferably semi-automatic);
- Bulgarian;
- roulette;
- level;
- metal scissors;
- tools for working with electrical wiring (pliers, etc.).
A chamber for polymerization of powder paint can be made according to the described principle and without a welding machine. All connecting work can be done using rivets or self-tapping screws - it all depends on the availability of the tool and the ability to use it correctly.
Completeness
- Camera body - 1 pc.
- Heating block - 1-8 pcs.
- Control panel - 1 pc.
- Electrical cabinet - 1-4 pcs.
- Temperature sensor - 1-8 pcs.
- Set of electrical cables - 1 set.
- Fan motor - 1-8 pcs.
- Electric air damper drive - 1-8 pcs.
- Fan motor rotation sensor - 1-8 pcs.
- Plastic electrical boxes - 1 set.
- External ventilation system – 1 set.
The reflow chamber is protected by utility model patents No. 43548, 44026, invention patents No. 2274811, 2278907, certificate of conformity No. ROSS RU.AB87.H01282.
Violation of exclusive rights to a patent is punishable by law.
You can read more about liability for violation of the rights of patent holders here. © High Technologies LLC [email protected] +7 +7 +7
Materials for work
To make a simple powder paint polymerization chamber, you need to stock up on the following materials:
- profile pipe (edge size from 25 to 35 millimeters);
- sheet metal (preferably galvanized);
- hinges and latch for camera doors;
- insulation (basalt slabs with a layer thickness of 100 millimeters are recommended);
- heating elements;
- cochlear type fan;
- temperature and electrical appliances control unit;
- cable with a cross-section corresponding to the load in the circuit.
The amount of materials should be calculated in advance according to the drawing made; for example, for painting small parts such as car wheels, a cabinet measuring 1000×1000×2000 mm will be sufficient. The polymerization chamber can be made more voluminous, but it should be remembered that it will not be so easy to heat it to the required temperature.
What does the camera look like?
It is a prefabricated structure, similar to a single module. It has a number of technical characteristics:
- high level of thermal insulation, the outer part of the chamber warms up to no more than +40 °C, although the temperature inside can be more than +200 °C;
- inside the device there are several powerful heating elements that provide rapid heating of the air with minimal energy consumption;
- The heating elements are closed in the inside of the box with heat-reflecting screens, which further accelerates the heating of the air inside and prevents overheating of the heating elements;
- on the top of such a chamber there is always a fan, as well as an air vent, which ensure normal air circulation inside the device;
- All internal mechanisms of the structure are designed so well that its heat loss is minimal and efficiency is high.
Frame making
Manufacturing begins with the assembly of the frame, for which, according to the drawing made, a profile pipe is cut to size. The frame is assembled either using a welding machine or bolted together. The walls and doors of the cabinet must be made so that they have a cavity inside. This void will eventually be filled with insulation.
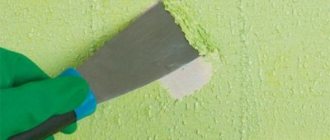
The manufactured frame can be painted with heat-resistant paint, having previously treated the metal to remove rust and other traces of corrosion. Since the camera is being made for home use, this step can be skipped, especially since the frame will be hidden under the covering sheets.
Calculation of the required cable length
To prevent ground freezing, the floor heating system for freezer chambers
must maintain a temperature between +3 and +5 °C. Taking this into account, the required heating power and cable length are calculated. They must fully compensate for heat losses through the floor covering.
To determine the power of the system and the length of the cable, you will need the air temperature in the room, the thickness and thermal conductivity of all layers of the floor structure, including insulation.
The first step is to determine the total heat flow: N = S • ΔT/R (W),
where S is the heating area, sq.m., ΔT is the temperature difference between the temperature in the chamber and the required ground temperature, °C, R is the thermal resistance chamber floor and insulation, sq.m. • °C/W.
Total thermal resistance is calculated using the formula:
R = 1/α + δb/λb + δiz/λis,
where α is the heat transfer coefficient from the air in the chamber to the concrete floor, 8.7 W/sq.m. • °C; δb – concrete thickness above the insulation layer, m; λb – thermal conductivity coefficient of reinforced concrete, W/sq.m. • °C; δiz – insulation thickness, m; λiz – thermal conductivity coefficient of insulation, W/sq.m • °C.
After calculation, the heat flow value is increased by 10-20% to ensure a margin.
The power of the floor heating system in freezers Qsp is, as a rule, 15-20 W/sq.m. As an example, we can take a refrigeration room for freezing dumplings and semi-finished products with an area of S = 100 sq.m. with an internal temperature of -30 °C. Then the section power should be equal to: P = S • Qsp = 100 • 15 = 1500 W.
If we take MNT sections from a two-core cable with their linear power Pl = 30 W/m, then for the above example the following wire length L will be required:
L = P/Pl = 1500/30 = 50 m.
In the case of using NSKT sections with a linear power of 30 W/m will require the same length of heating cable.
Wall and door finishing
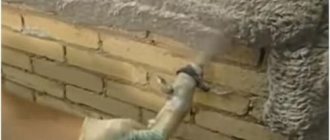
Next, you should sew up the inside of the cabinet walls - for this, sheet metal is used, which is pre-cut in accordance with the dimensions of the chamber. Sheathing material can be fastened using a welding machine or self-tapping screws. In the second case, you should ensure that the sheets fit tightly to the profile pipe and there are no large gaps.
Then the wall cavity is filled with insulation. If basalt slabs are used, they are carefully cut and secured to the inner lining. The insulation should be laid as tightly as possible, without leaving empty spaces.
After the basalt has been laid, the outer part of the walls of the future polymerization chamber can be sewn up. This is done in the same way as on the inside. After this, you can attach the hinges for the doors to the cabinet, and also install a latch or other device to lock them tightly. Brackets are attached to the ceiling of the chamber for hanging painted parts. They can be made from corners or from the same profile that was used to assemble the frame.
Characteristics
| Light source | UV LED λ 385 nm |
| LED element power | 16 Watt |
| Camera size | Ø180xH200 mm |
| Maximum weight of models on turntable | 1.5kg |
| Illumination time | 1-60 minutes |
| Dimensions | 255×255x352 mm |
| Weight | 4 kg |
| Compatible materials | Photopolymer resins |
| Power adapter | 24V 2.5A |
Placement of heating elements
Heating elements are installed on the side walls. All selected devices are evenly distributed on two sides of the chamber from the top to the floor. After this, all elements are connected to each other by wires according to a pre-drawn electrical diagram. If the garage has a three-phase power cable, then it is advisable to assemble the heating elements based on this.
Next, the common power cables of the heating elements are routed out through the walls. When everything is ready, you can cover the heating elements with protective covers, which are made of the same sheet metal as the walls. The casings are made so that there are technological openings at the top and bottom for passing air, which will be pumped by a fan.
Why do refrigerators need floor heating?
Due to the constant low temperature, the foundation and floor structure freeze even if high-quality thermal insulation is installed. If you do not cut off the flows of cold going down, they will reach the ground. It always contains moisture, which freezes when exposed to cold. Since ice is larger in volume than water, freezing leads to swelling of the soil, and this is dangerous due to the complete destruction of the foundation or floor of the freezer.
. As a result, the entire structure may become unusable.
Fan installation
The snail-type fan is assembled into a structure with two air shafts. In this case, the intake part should be approximately one and a half times larger in cross-section than the discharge part. The fan itself is attached to the cabinet in such a way that its winding and wires are outside the polymerization chamber.
Air shafts are installed inside so that the forced air passes through the protective casings of the heating elements, exits from below, and again rises upward through the parts suspended for drying. This will ensure optimal temperature distribution throughout the chamber and uniform polymerization of the entire applied paint layer.
Device and control
A 16-watt ultraviolet diode is installed on top, the radiation wavelength varies from 370 to 405 nm, the declared life of the diode is 10,000 hours of operation, on the bottom there is a rotary table that can withstand weight up to 1.5 kg, all surfaces inside are absolutely mirror and glossy, for all-round distribution of UV - radiation.
Lighting parameters are controlled on a small panel with a display and diodes. Use the Mode button to switch between three main options:
- Power – illumination power, from 1 to 3, adjusts the illumination wavelength - 370, 385 and 405 nm;
- Time – exposure time in minutes, from 1 to 60;
- Power+Time - when both diodes are on, the operation of the turntable is regulated, number 1 - the table will rotate during illumination, 0 - accordingly, it will not.
Having decided on the necessary settings, press the Start button and the device begins counting down the specified time, and the diode labeled Curing is activated. At the end of the process, a short beep will sound. If you open the door in advance, the process pauses and the diode turns off, so you won’t be able to catch the device working directly from the inside.
XYZPrinting Curing Chamber Review
Hi all! Top 3D Shop is with you and today we present to your attention a polymerization chamber from the XYZPrinting
.
What is a polymerizer
It is no secret that models printed from photopolymers using SLA and DLP technologies must be additionally exposed - exposed to ultraviolet radiation immediately after printing, in order to achieve complete polymerization. For example, standard Formlabs resins require curing for at least half an hour.
In industrial machines, the issue is resolved - as an option for the printer, you can purchase a special camera for final processing of models. But manufacturers of personal SLA and DLP printers do not offer the user ready-made solutions in this narrow issue, but only give recommendations on the correct illumination and hint at the purchase of nail lamps.
Formlabs stood out a little against this background - they offer several instructions for manually assembling the camera, with milling the box, examples of painting and a list of all the necessary electronics, but the cost of such a project and the time spent at a certain stage can become uncomfortable.
An example of the most budget-friendly camera option for UV illumination
The XYZPrinting company has long established itself as a manufacturer of budget solutions in 3D scanning and FDM printing, so the announcement of their Nobel 1.0 SLA printer at CES 2015 was a pleasant surprise for the market - the budget target did not change, but the machine had quite decent characteristics, and already in December 2016, the successor to this model was presented - 1.0A, in which the accuracy of laser positioning, printing speed and some other parameters were improved, while the printing area is 128x128x200mm, and the printer is still one of the most affordable solutions on the SLA market -equipment.
Simultaneously with the announcement of this model, a special chamber for polymerization of prints was presented, which we tested in the operating mode of the service department, when printing and processing of polymer models occurs almost daily. This device has proven to us its convenience and necessity.
XYZPrinting polymerization chamber
The polymerizer has a pleasant design and is made in the corporate colors of the professional line of XYZ equipment - black and red. Supplied in a small box with a dense foam frame. The kit is minimalistic - device, instructions and power cable with unit.
The chamber's internal space is 180mm in diameter and 200mm in height, which is larger than the chamber sizes of many SLA and DLP printers, respectively - all printed models will fit in one go, even with supports.
Device and control
A 16-watt ultraviolet diode is installed on top, the radiation wavelength varies from 370 to 405 nm, the declared life of the diode is 10,000 hours of operation, on the bottom there is a rotary table that can withstand weight up to 1.5 kg, all surfaces inside are absolutely mirror and glossy, for all-round distribution of UV - radiation.
Lighting parameters are controlled on a small panel with a display and diodes. Use the Mode button to switch between three main options:
- Power – illumination power, from 1 to 3, adjusts the illumination wavelength - 370, 385 and 405 nm;
- Time – exposure time in minutes, from 1 to 60;
- Power+Time - when both diodes are on, the operation of the turntable is regulated, number 1 - the table will rotate during illumination, 0 - accordingly, it will not.
Having decided on the necessary settings, press the Start button and the device begins counting down the specified time, and the diode labeled Curing is activated. At the end of the process, a short beep will sound. If you open the door in advance, the process pauses and the diode turns off, so you won’t be able to catch the device working directly from the inside.
Operating modes
A fair question may arise: what are the considerations for choosing the illumination power and time? This depends solely on the recommendations of the manufacturer of the photopolymers you are printing with. For example, XYZPrinting themselves, for polymers of their own production, recommend setting the power to 3 and the time to 10 minutes.
Formlabs for Clear, Black, Grey, White, Flexible polymers recommend 60 minutes of exposure at a power of 405 nm, for Castable and Durable 120 minutes, for Tough 30 minutes, respectively, this is the third mode in the Power section, but for High Temp you need 60 minutes of exposure with the radiation wavelength is 365 nm, in this case you need to set the Power mode to number 1.
We tested the camera for a week, and it proved to be an easy-to-use tool. The advantages over DIY solutions are obvious - this is a final product with a nice design, a turntable and a spacious chamber. The device is compact, allowing the processing of polymers with different requirements for the length of UV radiation. The device will become an indispensable assistant both for companies that print using SLA and DLP technologies on stream, and for ordinary users who want a simple and universal solution for illuminating polymer models. The cost of the device is 29,900 rubles.
Characteristics
Special offer
Polymerizer
the Formlabs
Form2 3D printer
In this regard, we have prepared a special offer:
Want more interesting news from the world of 3D technology?
Subscribe to us on social media. networks:
Youtube
Top 3D Shop - Your expert in the 3D equipment market