So, you have already decided on the choice of tiles for the bathroom and its layout. Now is the time to think about its reliable fixation.
For these purposes, a special masonry-adhesive composition is used. Properly selected adhesive will secure the tiles and save you from repeated repairs. When choosing, you need to focus on its characteristics:
- Layer thickness. Thick-layer mixtures are suitable for leveling concrete walls.
- Use in a “warm floor” system. Neglecting this point may result in repeated repairs. Glue that is not intended for this purpose will quickly collapse under the influence of heating.
- Complete hardening time. Quick-hardening adhesive will prevent the tiles from slipping and ensure high installation speed. Its use is relevant in bathrooms.
- Water resistant. This can be used in rooms with high humidity, for example, you can use it to line a shower room.
- Elasticity. Makes it possible to do the job neatly, leaving gaps of the same size.
Reasons for tiles peeling off
Before gluing ceramic tiles to wood or concrete, you need to find out what not to do. You often have to deal with the problem of peeling cladding elements not after 5 or 10 years, but much earlier. Let's consider the main reasons for this phenomenon:
- Tile.
For wall cladding, it is important to choose tiles based on weight, since not every base, regardless of the properties of the masonry mixture, can handle, for example, porcelain stoneware. Yes, and the glue here must be chosen correctly.
For a floor, the determining indicator is mechanical strength. That is, thin tiles from budget collections here will definitely quickly crack. Because of this, both the adhesive composition and the base are destroyed, since moisture and abrasive particles penetrate well into the cracks.
- Glue.
Most often, the problem arises due to the wrong choice of modern liquid nails. Errors here relate to peel strength, adhesion to working substrates, and resistance to operating conditions. The same must be taken into account when deciding on any type of masonry material and grout.
Specialized adhesive for heavy and large tiles Source uralmegaprom.ru
- Base.
For any rigid cladding, it is important that the base is motionless, “healthy”, clean, level, with high adhesion to the selected adhesive. The presence of bare metal elements, oily stains, loose and peeling areas, and changes in the humidity situation towards excess are unacceptable here. The old decorative coating must be removed, which will prevent it from peeling off under load from the new finish.
Another point that is often missed is the degree of water absorption. If water leaves the glue too quickly, then quality work will not work due to disruption of the hardening process of the masonry mortar.
If you properly prepare the base, select a suitable cladding and use it to glue the tiles to the wall, then there is a high probability of obtaining the expected result. But this does not guarantee quality, since the low level of skill of the tiler can ruin everything. For example, the mortar is incorrectly prepared or overdried, the masonry is made with voids inside and crookedly, the grout is unevenly distributed with thin layers or gaps.
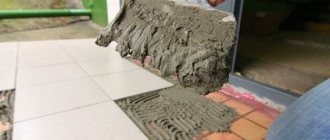
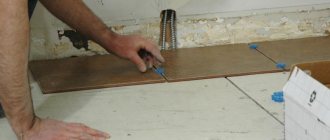
Violation of technology for gluing floor tiles Source sprb.by
It is important to treat every moment with responsibility and attention. Then the coating will serve for a long time without deformation or peeling.
See also: Catalog of companies that specialize in finishing materials and related work
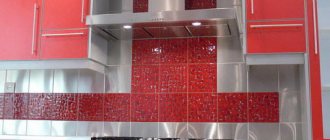
Tiles have fallen off in the kitchen: how to glue them
The most likely option for destruction of tiles in the kitchen is an incorrectly selected primer mixture, or the absence of this step at all before installing the tiles.
The most common mistake in the priming process is the use of concentrated latex, which subsequently forms a rubbery film that prevents reliable adhesion of the material.
An excellent solution when gluing tiles is to use glue from Ceresit
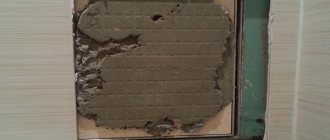
Before proceeding with the installation of the fallen part, the entire surface must be inspected for chips or cracks, and also tapped with a rubber hammer for the presence of voids. If more than 20% of the surface needs restoration, then dismantling the entire coating is inevitable, since destruction will most likely continue.
Article on the topic: Art Nouveau style in the interior
The following finishing works will continue in the following sequence:
- On the surface where the base is exposed, the mineralite is removed. All parts are removed to a solid surface.
- Using coarse sandpaper or a cobbler's knife, you need to remove the old grout. The surface must be cleaned of glue residues to a perfectly flat surface. Then it can be primed.
- If you have a supply of old cladding material, use it or purchase new one. In cases where it is not possible to purchase new slabs, you can use those that have fallen off, the most important thing is to clean it of old glue residues.
- Laying ceramics is carried out from bottom to top. To maintain gaps, experts recommend using fixing crosses. Glue is applied to the back side of the material. The thickness should be slightly greater than on the boundary slabs.
- The tile is pressed against the base; any adhesive that protrudes beyond the edges must be removed immediately.
The process is not long, but the life of the tiles, as well as the integrity of the entire coating, depends on its quality.
Masonry materials
On the market of building materials for facing work, manufacturers offer a wide range of ready-made compositions and mixtures with various properties. Let's look at what tiles can be glued to during major or local repairs. Based on consistency, they are divided into dry, liquid and paste-like products. The latter can only be used for tiles with a smooth back surface and a flat base. It is important to choose the rest taking into account the maximum permissible layer. Exceeding the nominal limit will result in low solids quality and poor fixation of any tile.
Let's look at how you can glue loose ceramic tiles to the wall:
- Tile adhesive . Specialized glue is available for sale in varying quantities. If there are residues after large-scale work, it is important to pay attention to the condition of the product and expiration dates. A faulty composition can rarely be used even for a short-term solution to problems.
Sample of dry tile adhesive Source keramicheskaya-plitka.ru
Preparing the wall for tiles.
Laying tiles on walls is the most optimal and effective way of tiling in bathrooms and kitchens. In this case, surface preparation depends on its type and condition.
Preparation of concrete walls.
Before facing, concrete walls must be cleaned of dust or dirt and leveled.
To do this, you can prepare a traditional cement-sand mixture in proportions 1:3. In this case, a metal plaster mesh is pre-filled onto the wall.
It is much easier to use ready-made plaster. It can be start and finish. The starting one is required for height differences of more than 30 mm. For lower values, only finishing plaster can be used.
plaster on concrete
If the concrete surface is smooth, but has flaws in the form of potholes or cracks, they are repaired with putty.
At the next stage, the wall must be primed. This is done using a roller. The primer increases the adhesion of tile adhesive to the wall and prevents the appearance of fungus.
Preparation of plastered walls.
Before tiling, areas with old peeling coating should be removed from plastered walls.
Most often it crumbles with light hammer blows. Additionally, you can use a chisel or hammer drill. Next, the surface is cleaned and repaired.
To do this, prepare a mixture of slaked lime, sand and alabaster in a ratio of 2:5:1. In this case, alabaster is added last before the start of work. The mixture sets quickly, so it must be prepared in small portions.
It is applied with a wide spatula to a pre-moistened surface, then leveled and rubbed.
Individual cracks can be repaired with alabaster mortar.
At the last stage, the wall is primed.
Preparing a plasterboard wall.
Drywall makes facing work as easy as possible.
It forms an almost perfectly flat surface. However, preparing a wall for tiles has several features.
Joint seams between sheets of drywall must be puttied. The mixtures used for this can be of three types: gypsum, cement and polymer.
- Gypsum is not suitable for rooms with high humidity.
- Cement is prone to cracking.
- Polymer ones are universal, but have a high price.
Before sealing, the joining seams are covered with reinforcing synthetic tape, otherwise called a construction bandage. For easy attachment, one side has a sticky surface.
sealing drywall seams
After puttying the seams, the entire surface of the drywall is primed.
For concrete, plaster and plasterboard walls, a deep penetration primer is used for absorbent surfaces.
deep penetration soil
Preparing a wall with old tiles.
You can only leave old tiles on the wall if they are firmly in place.
The main task is to ensure strong adhesion of the two tile layers. This can be achieved in two ways: making the wall surface rough to improve adhesion or using a special primer.
- The first option is quite labor-intensive. To complete this you will need a grinder. With its help, the top glossy layer of tiles is removed from an area of approximately 60% or notches are applied at a distance of 1-2 cm from each other.
2. Using a primer greatly simplifies the preparation for laying tiles. Concrete contact is used for this purpose. It is intended for use on non-absorbent surfaces. Apply with a roller or brush. Average consumption – 350 ml/m2.
Preparing a wooden wall.
Wood is not intended for tiling, so preparing a wall for tiles in a bathroom or other room is quite difficult.
First, wooden blocks having a width and height of 20-25 and 30-40 mm, respectively, are attached to it at a distance of at least 40 cm from each other.
Then the entire surface is treated with an antiseptic. After this, a rolled waterproofing material, such as roofing felt, is sewn between the bars.
Then a metal mesh with cells of 10-15 mm is nailed to the bars. Cement mortar with the addition of asbestos is applied to it.
mesh for plaster
After this, the surface is covered with a layer of plaster of at least 15 mm and primed.
Preparing a painted wall.
The main difficulty in preparing a painted wall is the need to remove old paint. This can be done in two ways:
- If most of it peels off easily, then the paint is removed with a spatula.
removing paint with a spatula
Next, to improve adhesion, the wall is treated with concrete contact;
- The second option involves completely removing the old paint. To do this, use a special liquid or an industrial hair dryer.
effects of paint remover
After this, the wall is treated with a deep penetration primer for absorbent surfaces.
Thus, walls made of different materials require a different approach to prepare the wall surface for laying tiles. At the same time, a competent sequence of actions determines the strength of the future coating.
Procedure
Before gluing the fallen tiles to the floor or wall, the facing material and the base must be properly prepared. The process begins with the removal of old masonry mortar. A grinder, a hammer with a chisel, a scraper, and a cord brush may come in handy here.
Often an additional layer of tile adhesive is used to compensate for unevenness on the surface. That is, after removing the remaining unsuitable solution, you need to level the working area. There should be no protrusions or depressions here.
After the site has dried, according to the technology, priming is performed before gluing the fallen tiles. The composition is selected in accordance with the operating conditions and condition of the wall. That is, you can use strengthening, dust-removing, impregnating or moisture-resistant soil with antiseptic additives. Some samples according to the instructions are applied in 2-3 layers.
Primer to increase adhesion Source enzo.ru
Next you can glue the tiles. Adjustment of the position of products is carried out using crosses or improvised means. After the masonry composition has completely dried, the joints are grouted with the material intended for this purpose. There are no alternative options here. The main thing is that the seam should be as deep as the thickness of the tile and filled without gaps.
How to glue tiles without making mistakes
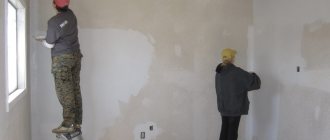
We won’t make long introductions on the topic of tiles - the best option for finishing many rooms; it’s better, as they say, to get out of the way - let’s immediately figure out how to glue tiles in a variety of situations.
Basic Tools
Regular sticking
For the standard process you will need the following tools:
- Drill with attachment – mixer
- Notched trowel
- Rubber spatula
- Glue container
- Grout container
- Rubber hammer (optional)
- Tile cutter, glass cutter or whatever you have on hand
- Level
- Construction meter
- Crosses for styling
Before deciding how to glue the tiles, you need to carefully prepare the work area. The first step will be to clean and even level the surface, if necessary (using tile adhesive, you can correct unevenness on the wall up to 5 mm; we do not recommend taking a larger gap, since the tile may simply fall off due to too much mortar) .
Next, we cover the surface with a primer, since this process will significantly increase the adhesion of the mortar on the tile to the wall, and then it will be possible to glue the tile literally for centuries. However, you can skip this stage, but do not forget the saying - the miser pays twice, and that is why, if you do not want to return to repairs from time to time, it is better to do everything right right away.
Briefly about the main thing
The reasons for tiles peeling off from the base can be not only long-term use, but also the wrong choice of materials and violation of masonry technology.
For gluing facing materials, there are specialized compositions that are made in the form of a paste or powder.
In addition to tile adhesive, liquid nails, sealants, thick oil paint or bitumen mastic can be used for short-term repairs of individual areas.
Before gluing the tiles, it is important to properly prepare the removed cladding and base.
The preparatory stage includes removing the old masonry composition, leveling the base, and priming.
After the glue has dried, you can begin to completely fill the joints with specialized grout to a depth equal to the thickness of the tile.
Ratings 0
Laying process
The accuracy of installation and gluing of the first tile determines how accurately the rest will be laid. It is necessary to control the laying level.
Before gluing the tiles, be sure to apply a primer to the wall with a brush or roller. It is not advisable to use a sprayer; the primer must be rubbed into the surface to ensure good adhesion to the wall.
It is advisable to glue the tiles before the primer is completely dry - then the tile adhesive will adhere to it better. The most effective is double priming - the first layer fills the pores in the concrete or putty and prevents the tile adhesive from drying quickly. Concrete quickly absorbs moisture, which can cause cracking and peeling of the adhesive layer. It is recommended to apply the primer a second time no more than an hour before gluing the tiles, so during the work process, apply the primer as you lay the rows, allowing it to dry.
The gaps between the tiles are established using plastic crosses.
Tile adhesive must be mixed in warm water, preferably using an electric tool. The consistency should be such that the solution is held on a vertical surface without slipping. Different manufacturers use different combinations of components, so carefully read the instructions for use.
Apply the adhesive solution to the tile so that it can be moved, setting a gap. To do this, scratch a layer 5 - 6 mm thick with a notched trowel; thicker ones should be applied in the form of bumps. This ensures the mobility of the tiles during installation and a more dense shrinkage of the adhesive.
Ready-made (dispersion) tile adhesive
Ready-made tile adhesives are very popular in Europe. Ready-made tile adhesive is a dispersion of water-based polymers. Such glues harden due to the evaporation of water from the mixture. Ready-made tile adhesive is a dispersion paste that has a number of advantages over cement-based tile adhesives. Firstly, it is impossible to prepare ready-made tile adhesive incorrectly. It is already ready for use! And, secondly, the finished glue can be used on objects with no access to water.
Dispersion tile adhesives are usually white in color and can be used on any stable mineral substrate, as well as on deformable ones such as drywall. And due to the absence of sand in the composition, such adhesives can be applied in a very thin layer, which is often required when laying mosaics. One of the disadvantages of ready-made adhesives is the fear of frost, which means such adhesives can only be used indoors.
Also, not all ready-made adhesives can be used in damp rooms, for example, in the bathroom. For wet rooms, ready-made adhesives “Litoacryl Plus” or “Drauf + Sitzt Wasserdicht” are suitable. Ready-made adhesives are very elastic, so dispersion tile adhesive can be used to glue any cladding - glass mosaic, porcelain tiles, natural stone (impervious to prolonged contact with moisture), earthenware and porcelain tiles, and others.
Since there is no need to prepare ready-made tile adhesives, the room will remain clean. This is very important if the work is carried out in a room where people live at the time. In general, ready-made adhesives are the optimal solution for domestic construction. The principle of applying ready-made tile adhesives is no different from working with cement adhesives. You will also need a notched trowel, and the thickness of the layer will depend on the format of the tile.
The marking of ready-made adhesives is the same as that of cement ones with one difference - instead of the letter “C”, ready-made adhesives are marked with the letter “D”, which means “Dispersion”. For example, D2TE adhesive is a dispersive reinforced tile adhesive with extended open time and no tile slippage.
Reactive (waterless) tile adhesive
Reactive tile adhesive is a tile adhesive that gains strength when its ingredients (measured in the required proportions) are mixed and does not require water to prepare. Since reactive adhesives are “waterless,” any tile can be glued to such adhesives, including natural stone that is susceptible to moisture.
Reactive tile adhesives harden through a reaction that is initiated when the adhesive components are mixed. This is why such adhesives are called “reactive”, and not because of the speed of hardening. Although, the strength gain of reactive adhesives occurs faster than that of cementitious compositions.
The most common reactive tile adhesives are:
- Polyurethane tile adhesive.
- Epoxy tile adhesive.
- Epoxy-polyurethane adhesive.
Polyurethane tile adhesive is the most flexible type of tile adhesive. Polyurethane adhesive retains elasticity under any operating conditions of the cladding. Polyurethane tile adhesive can be used to lay tiles on almost any building base - on metal, on plywood, on various wooden bases, on plastic, on waterproofing, and so on (except for bitumen bases). Polyurethane adhesive is popular among craftsmen who lay tiles in swimming pools, on facades, as well as for gluing natural marble and heavy stone slabs.
Some of the most popular polyurethane adhesives are Superflex Eco and Keralastic T.
Epoxy reactive tile adhesive is a two-component acid-resistant (acid-resistant) tile adhesive that is popular for laying tiles in manufacturing, healthcare and food service establishments - places where strong chemicals may be used. Our assortment includes epoxy adhesives for tiles “Sikadur 31cf”, “Epoxy Eco”, and also epoxy grouts “Litochrom Starlike”, “Kerapoxy”, “Epoxystuk X90” and similar can be used as epoxy adhesive.
Epoxy-polyurethane adhesive for gluing tiles is something between epoxy and polyurethane adhesives. The properties and scope of application of such tile adhesives are similar to polyurethane adhesives, but have greater strength. An example of epoxy-polyurethane glue is Litoelastic glue.
To prepare reactive tile adhesive, you need to mix components “A”, “B” and, if available, component “C”. Mix thoroughly, bring to a homogeneous mass and immediately begin working.
Polyurethane adhesives can be used as a waterproofing coating. To do this, the surface is first puttied with a thin layer of glue, and after this layer has dried, glue is applied to this surface and the tiles are laid.
Working time with reactive adhesives is generally significantly shorter than with cementitious and ready-made tile adhesives. Therefore, we recommend mixing the components of reactive adhesive in parts, in the proportions recommended by the manufacturer. These proportions can always be found on the product packaging.
You can recognize reactive adhesives by the marking with the letter “R”, which can be deciphered as “Reaction” - reaction, according to EN 12004. For example, an adhesive with the designation R2T is a reactive adhesive with zero tile slipping.