The feeling of comfort in a home depends primarily on cleanliness, ambient temperature, fresh air and light level. And if the first can be ensured by regular cleaning, then other factors depend on the design features of the building and its technical development. Moreover, the issue of heat occupies the main place. Why? Because a comfortable temperature gives a person the opportunity to relax and feel freedom.
The modern market offers us many options for heating a home, from traditional radiators to innovative air systems. They all promise to create equally wonderful living conditions, sometimes at a fairly competitive price. But if we think deeper, is it possible for such different heat transfer technologies as infrared radiation and hydronic heating to produce the same effect? Of course not, the sensations will be completely different. To achieve a truly high degree of comfort, you need to take into account many different nuances.
History of the idea
Has anyone noticed that even at a high temperature in the room, if there is a draft across the floor, it is still cold. Or intuitively you don’t want to touch the ice walls. Maybe that’s why all houses with wooden interiors feel unusually cozy. The point, of course, is not the material, it’s just that the wood is warm to the touch, and the body feels it. Having noticed such points, the designers developed a heating system “warm walls for the house” and “warm floor”.
The idea, of course, is not new, and in all old houses that had stoves, rough heating technology was used - a heated wall passing through the rooms of the building. This was possible by creating a complex chimney system with many channels inside this wall. Later, in the 60s, they developed a project for the construction of multi-storey panel houses from concrete elements with channels inside. It was supposed to release coolant in the form of hot air through them (and there were actually operating objects).
The project was not widely adopted due to the complexity of installing the panels, which had to be precisely aligned and the joints between them well sealed. But the principle itself became the founder of modern technologies for organizing warm walls.
Water heating in the wall
Installation of heating into the wall consists of connecting and securing collectors interconnected by pipes. To implement such a project, multilayer pipes made of plastic or copper can be used. Copper in-wall heating pipes are not used very often due to their relatively high price.
The pipe is permanently installed in the inner layer of the wall; it is laid vertically, horizontally or wavy. The temperature of the water in the pipes should be less than 50 degrees Celsius, since stronger thermal radiation can negatively affect the well-being of people in the room. The optimal water temperature range is 30-45 degrees Celsius. The thermal energy that can pass through a wall with water heating is about 200-280 W/m².
A water warm wall has an advantage over an electric one, since it is cheaper to operate, and in addition, the heating system can be converted into a cooling system. When there is cold water in the pipes in the summer, the surface will give off a pleasant coolness to the room, which will lower the air temperature.
After laying the pipes, the surface is covered with plaster or sheets of plasterboard, and then finished according to your preferences. It should be taken into account that water pipes have a relatively large cross-section, which will affect the thickness of the dividing partition and to some extent reduce the area of the room. An interesting proposal is prefabricated plasterboard panels designed for installing pipes in them. This solution is made in the form of two slabs, between which the heating system is already built.
Advantages and disadvantages of the “warm walls” system in comparison with the “warm floor” system:
- The temperature distribution in the case of warm walls is more even in height; in the case of floor heating, the temperature decreases with increasing height above the floor level;
- Most of the heat is transferred by radiation - 90%, and 10% by convection. In the case of heated floors, these proportions are: 70% - radiation, convection - 30%;
- there is no problem of thermal resistance of the floor covering, for example, the phenomenon of drying out of a wooden floor;
- the wall surface temperature can be up to 35 °C, so you can get higher thermal efficiency per 1 m²; for a room temperature of 20 ° C the thermal efficiency is 140-160 W/m², and in the case of underfloor heating this value is usually 80 W/m² (increasing only in wall areas to 120 W/m²);
- In wall heating it is also possible to use a higher water supply temperature than in a heated floor system, even up to 55 °C, while the water temperature in underfloor heating rarely reaches 45 °C;
- in a warm wall system, the thickness of the plaster coating is less (about 1.5 cm) than the concrete layer for heated floors (about 4.5 cm). As a result, heating the wall has less thermal inertia, which makes it easier to control the temperature in the room;
- Wall heating can be successfully used in summer to cool rooms.
Disadvantages of a water wall heating system:
- Often in a heated room we have too small a wall surface as the only heat source, taking into account that it is most advisable to heat the outer wall as a “cold barrier”. Its surface is usually small due to the presence of windows and balcony doors. Therefore, sometimes we have to install heating pipes in internal partitions (but they can be covered by tall cabinets), or we are forced to supplement the system with underfloor heating or another heater, for example, a fireplace.
- When mounting home decor and electronics (such as pictures and TVs) on the wall, make sure that the mounting hardware will not damage the pipes.
- External walls must satisfy the condition that the heat transfer coefficient U ≤ 0.4 W/m². This condition is met in standard walls in new buildings, but in the case of old buildings it is necessary to insulate the wall.
Wall heating as a heating element
The device of modern wall heating is somewhat different from its prototype. Thus, hollow structural elements for the passage of hot air are no longer made. And you can heat almost any surface by installing coolant channels. Such channels include polypropylene pipes for circulating hot water and special heating wires powered by electricity.
Another feature is the creation of a thermal insulation layer that does not allow heat to pass out if the external wall is heated. The very essence of the project is to create a thermal barrier between the interior and the street. Plus, the large area of the heated surface ensures rapid heating of the air.
When and where is warm wall heating used?
When there is no free space in the room, due to which heating with warm floors will be ineffective (in bathrooms, garages, swimming pools, workshops... so they say, but I would doubt about workshops and garages - and what master does not dream of full-wall shelving ?! Again, judging by myself, perhaps you have different preferences).
When there is little furniture and equipment along the walls in a room (offices, corridors, auditoriums, bedrooms, halls, recreation areas, etc.).
Where there is high floor humidity (bathrooms, laundries, swimming pools, sinks), then a warm floor will not be effective for heating, since a lot of its energy will be spent on evaporating water from the surface.
By the way, nothing prevents you from making a combined heating system from warm walls and warm floors so that they complement each other if the power of one system is insufficient. For example, the power of a warm floor is not enough - we make warm walls under the windows (not radiators):
Or warm walls + radiators: the warm wall works most of the time, and the radiators are turned on only to quickly warm up the room or during extreme frosts. Another option is to combine all three water heating systems: warm walls + warm floors + radiators. This is if the walls are brick, not insulated, and there are large heat losses through them (to be honest, it’s not clear why install so many systems and then pay for their work, when you can invest once in insulating the house? But everyone goes crazy about to your own).
Positive and negative aspects of the system
The “warm walls” system is deservedly considered one of the most effective because:
- Creates an excellent thermal effect at a lower coolant temperature than traditional convection systems. This is due to the large area of the thermal panel.
- Causes pleasant tactile sensations.
- It does not dry out the air, since it does not have open oxygen-burning elements.
- Distributes heat more evenly in space because it immediately heats a large volume of air.
- Does not cause positive ionization of air, like any metal heating element. This prevents the accumulation of dust and pathogenic bacteria.
- Requires less powerful circulation pumps, which saves energy.
- Easy to install. Does not require the use of welding or metal-cutting tools.
The inconvenience of such heating is that warm walls should not be covered with furniture. It is not advisable to drill them, because it is difficult to determine where the channel may pass. If a system violation occurs, this can result in serious repairs.
Material requirements
To properly implement a heating system, you must adhere to several recommendations. When choosing a system, you should remember the following points:
- the system consists entirely of pipes, so the price of the material affects the total cost of the work;
- since the pipeline is located under the plaster, it must be reliable and durable;
- the pipe should bend well and be easy to install;
- When checking for leaks, pipes must withstand a pressure of 3 to 6 bar;
- Use a high-quality plaster mixture so that the surface is free of voids, withstands deformation and is resistant to vibrations.
Where is this type of heating applicable?
The “warm walls” system is designed in such a way that it can be technically feasible in any room. It is easy to install on any wall, of course, not after major repairs and finishing. The question is, will this type of heating be effective in a particular room? There are a number of preferences here:
- Ideal spaces are those where there is a minimum of equipment and furniture blocking the wall plane: classrooms, office spaces, bedrooms and corridors.
- Places with high humidity: saunas, laundries, baths, showers. This heating promotes good drying.
- Areas that are difficult to equip with other heating systems: garages, warehouses, hangars, bathrooms, swimming pools, workshops.
- As an additional type of heating to the existing one, but the power of which is not enough for full heating.
- In vestibules to create a thermal barrier.
How to effectively insulate a cold wall?
Most often, freezing of walls is associated with typical mistakes of Soviet, and even modern Russian housing construction. Corner apartments are not insulated enough, and between the two outer walls there is a huge gap through which heat is drawn out from the radiators. Thus, comfortable corner apartments with bright rooms turn into glaciers in the winter, and the rest of the time they suffer from excessive humidity and mold.
Internal insulation helps to warm the walls, but it significantly reduces the area of the room. The higher the thermal conductivity of the insulation, the thicker it is and, therefore, the more space it takes up. In addition, the insulation allows warm air vapor to pass through, which then accumulates at the boundary between it and the outer wall. Moisture and fungus appear there. As a result, we get warm but wet walls.
Insulation from the outside is more effective, but in city apartments such operations are difficult and extremely expensive, and the insulation on the walls of a private house must be covered with siding, which is also problematic.
What types of coolant are used
Two types of coolant are typically used:
- Liquid. Ordinary water, which, as in any water heating, circulates in pipes under a certain pressure.
- Electrical cable. It works on the principle of a warm floor.
Warm water walls gradually heat the surface and, importantly, are environmentally friendly. But it is not always possible to install such a system in multi-storey buildings, or rather, to obtain permission for this. After all, a violation of the tightness of the channels and leakage of liquid can lead to the destruction of not only the internal covering of the room, but also the structure of the building.
Warm electric walls are more expensive to install and 20% less economical than water ones. Partially operating costs are reduced by using thermostats, but with large lengths of wire this is not particularly noticeable. Heating based on electricity does not destroy the structure of the box, but it is not so harmless to humans. Each wire creates electromagnetic radiation, which can adversely affect health.
When included in a project
Wall-mounted heating can be taken into account in the house construction project itself. In this case, the pipeline can be filled with concrete. To do this, after installing the heating network, the formwork is placed and covered with pouring.
Built-in “warm walls” can serve not only to heat the room, but also to cool it. To do this, you simply need to run cooled water through the pipeline. This type of cooling is much preferable to conventional air conditioners - after all, the room is cooled naturally in the complete absence of drafts.
Water heating, closed in the wall, can be used to heat two adjacent rooms. In this case, the interior partitions should be made of heat-conducting material - brick or concrete. To do this, in-wall heating pipes without a thermal insulation layer are attached to the interior walls.
Thus, the walls will simultaneously heat both rooms. This will compactly solve the problem of heating several rooms. And in combination with a “warm floor” system, such heating will be most effective.
Materials for organizing warm walls
Warm wall - heating, which is a complex multi-layer system. Basically, it is placed on external load-bearing elements to create a barrier and reduce heat loss from the building. The correct pie looks like this:
- External wall insulation. Provides protection for the frame from freezing.
- Building structure wall.
- Internal insulation. Prevents the penetration of coolant energy into the unusable area of the load-bearing wall.
- A system of channels with coolant and fasteners.
- The outer layer covering the system. It can be made of plaster or drywall. This is a useful heated plane, the heat from which is transferred to the room.
Internal insulation of warm walls is installed only if there is external wall insulation. Otherwise, the wall left without heating will freeze, become damp, and fungus will appear. All fastening elements of the system are made from materials that are not subject to oxidation, such as stainless screws and plastic clips. Coolant channels are installed from polypropylene pipes or electrical wire in a plastic braid. The layer of plaster is fixed on a special mesh. Plaster can be cement, gypsum or lime mortar based.
Electric heating system in the walls
Although this system is more expensive to operate than a water system, it is often used. This is dictated primarily by the small size of electrical cables and, therefore, the ability to avoid excessive thickening of the walls. Other advantages are the speed and ease of cable installation, as well as easy control of the resulting heating system.
However, such a system has many disadvantages. This is, first of all, an increase in electricity bills, which are now quite expensive. It should also be noted that the system is dangerous, since the electrical cable can burn out when the heat flow from the walls is blocked, for example, by a large furniture set located close to the wall. It is also worth considering the electromagnetic field that arises in this case, which can adversely affect our mood.
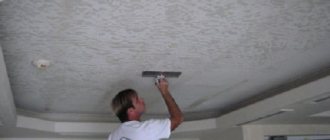
Electric wall heating is created from two-core wires connected on one side, or from single-core wires connected on both sides. The wires are laid in loops of a certain wavelength. After installing the system, the walls are covered with plasterboard slabs and finished in any way - for painting, for wallpaper, or for laying ceramic tiles.
Installation of warm walls
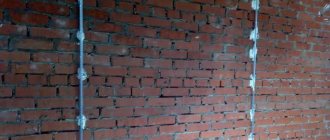
There are rules for organizing water-type wall heating:
- It is better to place the pipes in a horizontal direction. It is easier to ventilate such a circuit if a plug suddenly forms.
- The pipes are laid according to the snake principle, with hot water supplied from the bottom and return from the upper end. This is dictated by the law of physics, because hot air rises, gradually warming the entire room.
- The horizontal line spacing is increased towards the ceiling to save materials. It makes no sense to intensively heat the space in the upper layers - a person simply will not feel this heat, and the energy consumption will be noticeable.
- It is advisable to install de-aeration devices at the top point of each circuit.
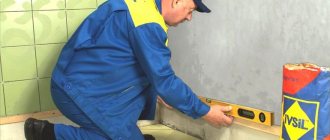
- If the pipe is covered with plaster, then the latter is applied in two stages using reinforcing mesh - metal for the first layer and fiberglass for the finish. In this way, the possibility of cracking of the wall due to temperature changes during heating and cooling is eliminated.
- When installing systems on a stone base: brick, concrete, cinder block; Internal insulation is used only if external insulation is available. Under no circumstances should the wall freeze, otherwise such heating will do more harm than good.
- All fastening elements are fixed to the load-bearing wall, and not to the insulation.
- To heat thin interior walls, there is no need to put thermal insulation under the pipe; the surface will be heated on both sides.
- If the pipe is covered with plasterboard (dry installation), then it is necessary to install heat reflectors under it, and keep the thickness of the air layer to a minimum. Otherwise, the heated air inside will rise upward, and you will get “warm ceilings”; the walls will not warm up well. This nuance must be taken into account.
When installing a “warm wall” system, it is necessary to carefully work out the installation diagram. To do this, right on the spot, you can draw the location of the heating pipes and their connection points to the main line. It is important to remember that the longer the horizontal section in the coil, the more likely it is that air will appear in it. Therefore, it is more expedient to divide a long section into several smaller ones, and the entire system into as many circuits as possible, in each of which a circulation pump is installed. All supply pipes are covered with thermal insulation so as not to lose useful power.
How to lay infrared thermal film on the ceiling
The ideal solution is metal profile systems. It is optimal to use plasterboard, as well as reinforced plastic and Armstrong-type ceilings. Also, as practice shows, suspended ceilings are compatible with infrared heated floors.
The film is attached to the ceiling sequentially, starting with fixation at one edge and gradually unwinding the roll and securing it in a place where there are no electrically conductive elements.
How can you cover IR film on top?
Installation on the wall and ceiling has one common difficulty. It is necessary to ensure the fire safety of the system and reduce possible heat loss. Therefore, you should be extremely careful when choosing finishing materials.
Warm floor on the wall
A rather convenient method of heating walls is using electrical “warm floor” systems. They are produced in three versions: electrical cable on the base, cable in coils and film material of infrared radiation.
Installing warm electric walls over water ones has a number of advantages. System:
- Not susceptible to air locks.
- Has a small thickness. Therefore, a thin layer of plaster is sufficient to hide it in the wall.
- The cable on a mesh base is easy to install to the load-bearing surface, and there is no need to use additional reinforcing material for the plaster mortar.
- For installation, lighter and cheaper fasteners are used.
- The insulation of the current-carrying heating cable is made of a material that can compress and expand under the influence of temperature. This, in turn, reduces the mechanical load when the element heats up and expands.
- It is structurally simpler, since it directly converts electricity into heat, without requiring additional equipment in the form of a boiler and pumps.
Although it is convenient to apply a heated floor to a wall, it is expensive and cannot be installed near plumbing elements. For greater efficiency, it requires a lining of thermal insulating foil material.
Calculation
When considering heating installed in the walls of a private house, special attention is paid to the issue of the temperature range of the external walls of the building. If insulating layers are installed outside the house, the freezing point of the wall will move towards the insulation. Therefore, enclosing structures can be made of non-frost-resistant materials. The disadvantages of this method include an increase in energy costs - after all, heating will affect not only the internal walls, but also the enclosing structures.
You can place the insulation on the side of the room. In this case, the freezing point will shift inward. Therefore, the walls need to be insulated with frost-resistant material - otherwise they may freeze through and condensation will appear on them. The same problems arise when installing warm walls without the use of insulation.
Erroneous estimates of wall thickness and miscalculations in design can lead to significant heat loss.
Maintenance
All heating systems require monitoring and maintenance. Warm water walls differ from conventional water heating due to their large volume of liquid content. As a rule, the water in standard radiators is rarely changed, but they are located only in a few places in the room. A system of warm wall channels penetrates large areas. Considering the latest discoveries of scientists in the field of energy, radiation from dirty water can depress biological organisms, weakening their immunity. Therefore, it is advisable to change the water in the system every season.
During operation, automatic ventilation devices must be checked periodically. They may leak. It is also necessary to monitor the pressure in the system and control the return temperature. If it does not warm up enough, turn on the highest speed on the circulation pump, expelling air pockets. It is advisable to do the same during prolonged power outages.
Wet and dry installation systems
The most commonly used technical solutions for installing wall heating can be divided into two methods:
- “wet” method (coating heating pipes with a layer of plaster);
- “dry” method (with plasterboard coating).
"Wet" method
This method is used to install pipes in external walls. The pipes are laid in a meander, preferably horizontally, with a pipe distance of 15, 20 or 25 cm. This solution allows for the most efficient heating and the use of minimal pipe bending radii.
In cases where the distance between the pipes is from 5 to 10 cm, they should be arranged in a double meander.
It is also possible to lay the pipes in a meandering vertical shape or even in a snail shape, but such solutions can cause operational problems in the form of air pockets.
The most commonly used for warm walls are multilayer pipes X-PE / Al / PE-X and pipes made of polyethylene PE-X or PE-RT with a diameter of 14 mm; the length of the coil with the approach to the distributor should not exceed 80 m.
The distance from the pipe to adjacent walls, window and door openings, floor and ceiling must be at least 10 cm. The distance between the mounting profiles must be no more than 50 cm.
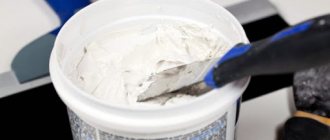
The wet installation system most often uses gypsum plaster with low thermal expansion, which is characterized by high thermal conductivity and temperature resistance. Plaster is applied in layers. The first layer should cover the heating elements and have a thickness of about 20 mm. Then a plastic or fiberglass mesh with cells of at least 7 x 7 mm is pressed into the plaster. The mesh should be wrapped onto the adjacent wall. The canvas is then covered with another layer of plaster having a thickness of 10-15 mm. The total plaster layer including pipes is about 40 mm.
A complete wet wall heating system is shown in the figure.
"Dry" method
The simplest option for installing a “warm walls” heating system is the dry method, when pipes are mounted between plasterboard wall profiles. In addition, you can lay heating pipes on the slopes of the attic roof. This method causes certain difficulties in implementation - for example, the need to cut grooves in the profile for installation to ensure the passage of vertical pipes. In addition, when calculating, one should take into account the low thermal conductivity of such a wall, since there is a layer of air between the pipes and the drywall plate.
Water heated floor: pros and cons of arrangement and operation
- Economical – heating living spaces with warm liquid is more profitable and economical than using electric heated floors.
- Safe operation - no potential burns or electric shocks.
- Long service life - more than 25 years without various types of repairs.
- The air in a heated room is not subject to drying out; it has comfortable humidity.
- Does not take up useful space in the room.
- Possibility of combination with other types of heating.
Minuses:
- This type of heating cannot be installed on flights of stairs.
- Difficulties when installing in multi-apartment high-rise buildings - the difficulty of obtaining permission to carry out installation work, as well as water hammer, which can disable the system with subsequent flooding of the neighbors below.
- The installation cost is higher than installing an electric heated floor.
How to make your home warm - simple solutions and simple execution
If the house is well insulated, then it is comfortable. The cold outside has little effect on the microclimate of the living space. The temperature in cold weather is maintained at the request of the users, for example, +25 degrees, without significant stress on the part of the users and the heating system they control.
The less resistance the structures provide to the movement of thermal energy, the more of it goes outside, the more power is required from the heating system itself, the more heat-generating material is destroyed.
As the temperature difference increases, the amount of energy lost increases significantly. It’s not the same thing at all to maintain +18 degrees C and +25 degrees C in the bedroom or kitchen.
Why pay more? Both for heating power and for burned fuel? It is enough to insulate it once, and the savings will be significant. Taking into account current prices for cheap heat insulators and energy, insulation should pay for itself in several years.
Insulating a home is a key issue in creating comfort
If the house is cold, then keep it at +20 degrees in winter. – the task is more complex, and it is feasible, if at all the heating power allows, which should be 2 - 3 times greater than usual, for a building with minimal heat loss.
There are also such buildings with an area of about 100 square meters. same as +18 degrees. It’s difficult to catch up with 20-kilowatt heating—the residents are freezing. In such a house you need to wait out the winter, you need to survive the summer.
Life makes you think about insulating your home. Two questions are resolved:
- saving several hundred USD during the heating season (heat loss in the house can be reduced by 2-3 times).
- creating comfortable living conditions for the family.
How to make thermal insulation measures more profitable
- You can insulate your house to the maximum - take comprehensive thermal insulation measures, with a thermal break layer thickness no less than recommended for economic feasibility in the standards for a given climate zone, and then get 100% of the possible savings on heating.
- But you can, of course, spend 80% of the required amount, saving on the thickness of the insulation by making it 2 times thinner than required, but then the savings on heating will decrease by 2 times, as the insulation was not supplied.
- But you can spend 30 - 40% by using cheap thin layers of insulation, some natural materials, and then redo the insulation of the house after 1 - 5 years...
What do the standards recommend?
Nowadays, regulations require that a house be insulated in such a way that its structures achieve a certain resistance to heat transfer. An economically viable set of measures within a maximum of 12 years is feasible.
A certain thickness of insulation must be adopted, and other measures must be taken - ventilation, placing windows on the right side, using energy-reflecting materials...
Proper home insulation will pay off. Where insulation was not provided, it will not pay off, because the cost of the work is approximately the same, but powerful heating is still needed.
You can save on insulating a house only by doing it yourself, and not on the quality and quantity of insulating materials.
Simple steps for thermal insulation of structures
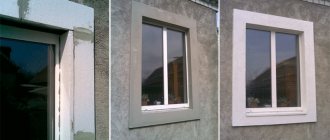
You can only know how to insulate a house by examining it... Windows and doors are replaced first of all, as structural elements, which then need to be finished. And also as creating additional air exchange (drafts), and as the “coldest” enclosing structures.
If the windows and doors are replaced with new insulated ones, double or triple, without drafts, with seams sealed around their perimeter, etc. then that's half the battle.
But if you don’t have the means, you can also insulate old windows and doors. Read how this is done HERE.
In the attic
We pull all the junk out of the attic and clean the base. We install a solid, high-quality vapor barrier, which will prevent the insulation from being replenished with vaporous moisture.
We fill in 30 cm of hay treated with carbide and lime. We cover the top with burlap, put boards, plywood, boards so that you can walk, to service the attic. This is an easy option for small homes.
More durable, more thorough - put a 20 cm layer of mineral wool between the logs with a counter-lattice, with a ventilation gap above the insulation and ensuring its ventilation.
(HERE and below, for example, the thicknesses and names of thermal insulation materials suitable for the “temperate climate of the middle zone” are given)
Under the floor
We tear down the wooden floor. At the bottom of the wooden logs under the floor we fasten the boards and panels spaced apart so that there are gaps for ventilation.
We pour insulation onto this flooring - the same lime-straw with a thickness of at least 20 cm. But it is better, of course, to put durable mineral wool again. Rodents will not live in it, and it will be ventilated by underground ventilation.
An important condition is that there is no dampness under the floor, otherwise the insulation will acquire more moisture and lose its properties. Therefore, it may be necessary to first lay a layer of roofing material on the ground.
We put continuous waterproofing on top of the mineral wool and the logs - we separate the houses from the harmful effects of this insulation.. We hammer the floor into place.
We take care of the foundation
We are thinking about the question of whether the walls are damp due to the flow of water from the foundation. If they are damp, then we do drilling, impregnation, and waterproofing with penetrating compounds above the base. This is a serious issue for older buildings.
We tear off the foundation to a depth of at least 50 cm. We cover it with a layer of waterproofing - coating bitumen, on which we glue 5 cm extruded polystyrene foam.
We install expanded polystyrene at a height of at least 50 cm from the ground to ensure protection of the walls and base from splashes and snow. We backfill with sand. We build a blind area with a width no less than the freezing depth in the given area, and lay a horizontal thermal break at the bottom of the trench - the same extruded polystyrene foam 5 cm thick. We get both insulation of the foundation and protection from frost heaving.
This action, associated with a very large amount of work and costs, will not pay off in terms of energy savings. But its main purpose is different - to increase the stability of the foundation, protect it from harmful factors, increase the service life, and therefore the entire house. And in this sense, the indicated measures for thermal insulation on heaving soils are appropriate.
Silent walls
If you want peace and quiet, but your cheerful neighbors throw parties every day, or you want to install a home theater in the living room, and there is a children's room in the next room, then you simply need soundproofing of the walls. In principle, the materials and technologies used for sound insulation are very similar to thermal insulation, but there are some differences. When soundproofing walls and partitions, a combination of materials of different densities is used. For example, mineral and glass wool are used as low-density materials, and not plasterboard sheets are attached to the frame as facing panels, but gypsum fiber sheets with a higher density. There are other, including specialized, soundproofing and sound-absorbing materials, but their significant drawback is their very high price.
Do not forget that with both heat and sound insulation you will have to sacrifice the area of the apartment, since the thickness of the walls will increase by at least 6 cm.
Everything that has been said about sound insulation is true in relation to any of the partitions, which will now be discussed.
Types of partitions
Partitions made of plasterboard and gypsum fiber sheets
I have already looked at it, I will only add that they are very convenient for creating curved surfaces, various niches, columns, arches, etc. An important point is that they are quickly installed and do not require plastering. Inside such partitions it is convenient to place electrical, telephone and Internet wiring, and antenna cables.
The disadvantage of such partitions is the inability to attach heavy objects to a single-layer partition.
But there are several solution options - using two sheets of cladding on each side, laying wooden beams in the metal U-shaped posts of the partition frame, as well as attaching plywood to the frame before installing plasterboard sheets.
Brick partition.
The most traditional. It is best to use ceramic, solid or hollow bricks for partitions in an apartment. Solid brick is good for constructing partitions on which something heavy will be hung (for example, a sliding two-section oak door). It is also easy to arrange niches, arches, etc. in such a wall.
The disadvantage of brick partitions is the mandatory plastering of the surface before final finishing and the longer construction time compared to other technologies.
Partition made of gas silicate and foam concrete blocks.
Such partitions are erected much faster than brick ones, but plastering of the surface is also necessary.
Partition made of tongue-and-groove gypsum boards.
This is a very convenient material; walls made from it can be erected very quickly, do not require plastering and are ready for final finishing.
Unfortunately, expanded clay, foam concrete blocks and tongue-and-groove slabs have some limitations in terms of design, but, as practice shows, such problems are quite rare.
All of the above types of partitions are non-flammable and have good soundproofing properties.
How to make a wall smooth
It is important to keep in mind that tongue-and-groove boards and drywall do not require plastering. But we plaster and putty brick, expanded clay and foam concrete partitions.
In my opinion, it is better to use gypsum plaster.
It is, of course, more expensive than a conventional cement-sand mixture, but it has undoubted advantages over it: it is much more convenient to work with, dries faster, has better adhesion and allows you to achieve smoother surfaces, which will subsequently save on expensive putty.
Don't forget that putty for painting is more expensive than putty for wallpaper.
When puttingty for painting, it is advisable to apply finishing putty to the walls with a very fine filler fraction: 0.1 mm is the maximum, or better yet, even less. Gypsum plaster mixtures and putties are presented on our market under the brands KNAUF, VETONIT, CONSOLIT, UNIS, STARATELI, BOLARS.
Now that we have straight and smooth walls, the most crucial moment has come - what type of finish to choose. There are quite a lot of options here, and it is impossible to talk in detail about each within the framework of this article, but it is worth listing: wallpapering, wallpapering for painting, painting with simple, multi-colored and immiscible multi-color paint, decorative painting, Venetian plaster, facing panels made of various materials, decorative stone (for the last two types of finishing, wall putty is not required) and so on. The choice in this case is yours. From my own experience I can say that the most important thing here is the overall clear concept of the entire project and the quality of its implementation.
Conclusion: some tips
If you don’t really trust the builders and are afraid that they use cheaper materials than those specified in the estimate, then it’s worth visiting the apartment several times during the process of building walls. It is very difficult to distinguish, for example, a more expensive and high-quality tongue-and-groove slab of a well-known brand from a cheaper “no name” slab (it’s not worth talking about brick, expanded clay and foam concrete). But it’s quite possible to see what workers use to plaster and putty your walls. The difference in price for these materials from different manufacturers is quite significant.
When soundproofing walls, it is very important that an elastic tape is glued between the frame for gypsum fiber sheets and the floor, ceiling and walls. If this is not done, then your wall will be an excellent resonator for impact noise transmitted through the ceilings.
The outer corner of a wall or partition must be covered with a special plaster corner to avoid damage.
Many people are concerned about the practicality of this or that wall covering - the ability to easily clean it from dirt, durability and ease of repair. Obviously, durable and smooth coatings (as opposed to fragile and textured ones) are the most practical. When repairing this or that damage, the greatest problems may arise with the restoration of surface texture and decorative painting.
And one last thing, I’ll add just in case: upon completion of the renovation, be sure to save one roll of each type of wallpaper used.
The need for insulation
In the bathroom, you can place electric heating mats directly under the tiles.
To make external warm water walls with your own hands, you need to insulate them. Thermal insulation is installed on the outside. Although this will lead to excessive energy consumption for heating the walls, the dew point will be shifted into the insulation, and condensation will not settle. We have already talked about how to insulate walls from the outside in one of the articles. Depending on the insulation method (wet or ventilated facade), materials are selected:
- Styrofoam;
- mineral wool;
- polyurethane foam;
- ecowool;
- penoizol and so on.
You also need to correctly calculate the thickness of the insulation. For the Moscow region, the thermal insulation layer should be 8-10 cm. In extreme cases, if external insulation is not possible, thermal insulation can be laid from the inside. To do this, it is convenient to use warm wall panels with aluminum inserts, which, after laying out the contour, are covered with plasterboard.
One type of foundation is an insulated Swedish slab. The technology is quite complex; there are many installation nuances.
Many people do not understand whether it is necessary to insulate the basement of a house. In principle, this is not necessary, but it’s impossible without waterproofing. Details here.
“Warm walls” system: installation, features and disadvantages
The feeling of comfort in a home depends primarily on cleanliness, ambient temperature, fresh air and light level.
And if the first can be ensured by regular cleaning, then other factors depend on the design features of the building and its technical development. Moreover, the issue of heat occupies the main place. Why? Because a comfortable temperature gives a person the opportunity to relax and feel freedom. The modern market offers us many options for heating a home, from traditional radiators to innovative air systems. They all promise to create equally wonderful living conditions, sometimes at a fairly competitive price. But if we think deeper, is it possible for such different heat transfer technologies as infrared radiation and hydronic heating to produce the same effect? Of course not, the sensations will be completely different. To achieve a truly high degree of comfort, you need to take into account many different nuances.