What kind of screws are used when installing gypsum boards?
To fasten drywall to the frame, screws of different lengths are used:
- 25 mm – when installing plasterboard in one layer;
- 35 mm – with two layers of sheathing.
The type of screws is selected based on the frame material:
- the cladding is attached to the profile with metal screws;
- to the beam - on wood.
It is easy to distinguish them: hardware intended for working with metal have more frequent threads.
You should not use one type of screws instead of another: this will certainly affect the strength of the fastening.
The design of the fastener ensures convenience and quality of work:
- Hardware is protected from corrosion by a special coating that gives it a black color.
- The pointed spiral of the thread ensures easy penetration of the self-tapping screw into the metal profile and reliably holds it there in the future.
- The conical head is recessed into the material and does not interfere with subsequent finishing.
- The deep cross-shaped slot on it allows you to screw in a self-tapping screw with a regular screwdriver or screwdriver.
When using a screwdriver, you need to act carefully: there is a high risk of sinking the screw too deep and damaging the material. A special attachment for drywall will make the work easier: due to its design, it limits the depth of screwing in the hardware.
Professionals use screwdrivers with automatic feeding of screws. They make the process of installing drywall sheets much easier and faster. But the cost of such a tool is high, so there is no point in purchasing it for a single repair.
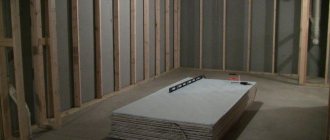
Ceiling installation technology using the Tigi Knauf system
When installing ceilings of this type, you should adhere to certain rules that will allow you to complete the work without flaws and errors. These requirements take a lot from the standard ones, but there are also some peculiarities.
Features of using Tigi Knauf systems when installing ceilings:
- It is not necessary to prepare the surface for installation.
- The Tigi Knauf system is mounted on a finished ceiling. Drywall is pre-installed on it.
- Tigs are installed on a frame made of wood, metal or a base already covered with materials.
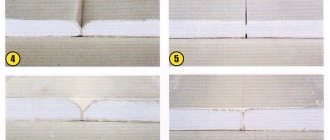
- Cut the material carefully. using tools appropriate for these purposes. A chamfer is created on the outside, which is subsequently puttied.
- The drywall is positioned so that the seams are staggered. The spacing for fastening the seams of the material corresponds to 60 cm. This allows you to avoid cross-shaped joints, which are prohibited when working with the profile.
- Gaps 0.5-0.7 cm wide are left between the pieces of material. This approach to fixation makes it possible to reduce the influence of mechanical load on the sheets, which provides protection against chips and cracks.
- The sheathing is fixed using self-tapping screws. They are located in increments of 200-300 mm. This indicator depends on the total load of the structure. It is allowed to use mechanical, pneumatic, and electric tools.
Recommendations for location and screwing
Before calculating how many self-tapping screws will be needed for a structure, it is logical to familiarize yourself with the norms and rules for their placement. The following nuances are taken into account:
- The distance between adjacent screws must be more than 10 cm, otherwise the plaster of the sheet will begin to crumble when screwed in.
- When leveling walls or installing partitions, a step of 25–35 cm is taken between the fastening points. It is reduced to 15–20 cm if in the future it is planned to cover the surface with heavy material, such as ceramic tiles.
- More hardware is used for the ceiling sheathing, since they are attached more often: the step is 15–20 cm. The rule works here: the thicker and heavier the drywall, the smaller the distance between the attachment points.
- When installing in two layers, the first one is attached less frequently - every 45–60 cm. The screws that secure the second layer are 10 cm longer. When screwed in, they additionally secure the first one. This reduces the consumption of hardware and eliminates unnecessary costs.
- The number of required attachment points increases when constructing curved structures. Here the pitch between the screws is chosen so as to fix the desired surface shape.
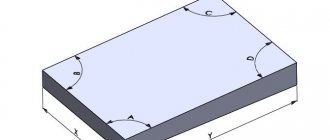
Calculation of the number of screws
It is produced according to the frame diagram drawn up. It is clear that the number and dimensions of the guides, as well as the jumpers between them, will be individual for each case. General recommendations are as follows:
- For walls, the distance between the guides is 40 or 60 cm. This step allows you to place the joints of the sheets on the surface of the profile.
- The number of horizontal jumpers depends on the dimensions of the room (one sheet of drywall is often not enough in height), as well as on the requirements for structural rigidity (mandatory when constructing partitions, but can be neglected when leveling walls).
- For ceiling structures, frames are constructed in the form of cells with dimensions of 40 × 40, 40 × 60 or 60 × 60 cm. This structure ensures a minimum of trimmings and joining of elements on the profile.
Having drawn a plan of the frame, you can calculate how many hardware will be needed to cover it with gypsum boards. For example, to install one standard sheet to a frame on a wall with a distance between posts of 40 cm, you will need:
- 11 self-tapping screws for each rack (the sheet is positioned vertically, its length is 2,500 mm, the fastening pitch is 25 mm).
- For 4 racks – 44 screws.
- Plus 6 - for fastening to the upper and lower horizontal jumpers (three for each - just place one self-tapping screw between adjacent vertical posts).
- In total, 50 pieces will be needed per sheet.
The number of screws for fixing individual fragments is calculated in the same way, after which all the results are summed up.
Technology for working with Knauf plasterboard: basic principles
Important to remember. Separately, it is worth talking about the installation of all the specified gypsum board partitions using the Knauf Tigi technology; this method involves the arrangement of sheets of different layers overlapping each other. Or take a running start, as they also say. That is, the joints of sheets at different levels should not intersect. The instructions for constructing partitions using this technology indicate that the joints of slabs of different levels should be at a distance of at least half a meter from each other. This applies to both vertical and horizontal joints. By following this rule, you will greatly increase the strength of the finished structure.
When choosing Knauf, you get not individual elements, but ready-made engineering systems.
The use of Knauf plasterboard systems implies a complete closed-cycle operation in which all materials and components are used only from this manufacturer. This approach is useful in many ways. The fact is that Knauf does not just produce various elements, this company supplies ready-made engineering systems in which everything is thought out.
Each small part individually, in its place, forms the overall monolithic result. Here is what is needed to work using this technology:
- Profiles. At Knauf, the supporting and guide profiles are made in such a way that when installing one to the other, no distortions, distortions or other anomalies occur. The finished frame, built from the specified material, is always smooth, strong and reliable.
- Filler or insulator. It is recommended to use only mineral wool from the specified manufacturer to fill the space between the walls. It does not spread fire, does not rot, and does not support organic life forms, which means that mice will not grow in such walls. In addition, such wool is made to fit the width of the inter-wall space and does not require additional processing.
- The plasterboard itself from this manufacturer, which meets all European quality standards, in combination with the other elements of this construction kit, is capable of providing many years of high-quality service.
- Rough and finishing compounds for grouting and sealing, created taking into account the composition of cardboard and gypsum filler of this particular brand, successfully complement plasterboard from this manufacturer, exhibiting excellent adhesion properties to its surface. Thus, the finished wall with rough finishing already looks complete.
- Insulating tape of the required width for a specific profile, as well as all hardware for work, should also be selected from the products of the specified brand. After all, the quality of these elements is checked and certified, and also tested by many years of use. Do not doubt the quality of the finished wall by saving on fasteners. After all, it is on it that all these components are held.
As can be understood from the above, the Knauf technology for walls and partitions made of plasterboard is a reliable and calculated engineering system, which is purchased in parts, but, when installed on site, represents a direct integration of German quality into the Russian interior.
Consumption of self-tapping screws per 1 m2
Table of fastener consumption for wall cladding in one layer according to the Knauf system (C 623.1):
| Name | Quantity per 1 sq. m |
| Dowel nails K 6/35 | 1,6 |
| Screws for connecting LN 9 profiles | 2,7 |
| Self-tapping screw TN 25 | 17 |
For two-layer wall cladding (C 623.2):
| Name | Quantity per 1 sq. m |
| Dowel nails K 6/35 | 1,6 |
| Screws for connecting LN 9 profiles | 1,5 |
| Self-tapping screw TN 25 | 7 |
| Self-tapping screw TN 35 | 15 |
For a partition with plasterboard fastening in one layer (C 111):
| Name | Quantity per 1 sq. m |
| Self-tapping screw TN 25 | 34 |
| Dowel nails K 6/35 | 1,6 |
For a partition with two-layer cladding (C 112):
| Name | Quantity per 1 sq. m |
| Dowel nails K 6/35 | 1,6 |
| Self-tapping screw TN 25 | 14 |
| Self-tapping screw TN 35 | 30 |
For suspended ceiling:
| Name | Quantity per 1 sq. m |
| Screw LN 3.5 x 9 mm | 1,4 |
| Self-tapping screw TN 25 | 23 |
| Dowel for fastening profiles PN 28/27 | 0,7 |
| Anchor dowel | 0,7 |
C 112
C 112
| Indicators | Values |
| Weight 1 sq. m | about 49 kg. |
| Maximum partition height | up to 9 m* |
| Partition thickness | 100 – 150 mm |
| Sound insulation index, Rw | Up to 58 dB |
| Fire resistance limit | EI 90 |
*Depending on the standard size of the frame profiles and the pitch of the racks.
Characteristics
The complete KNAUF C 112 system is a complete set of specially selected materials necessary to create a partition with two-layer sheathing from KNAUF plasterboard sheets (GKL) on a single metal frame.
Element-by-element partitions covered with KNAUF plasterboard sheets (GKL) are non-load-bearing structures.
Main building elements of the partition:
- plasterboard KNAUF sheet (GKL);
- metal profiles guide PN and rack PS.
The full composition of the complete system and the required amount of materials per 1 sq. meter of ceiling, see the “Technical Specifications” section.
Distinctive features of this system: it consists of a profile metal frame, sheathed on both sides with KNAUF plasterboard sheets (GKL) in two layers. The perimeter frame is attached to the building structures and is the supporting part for plasterboard sheets, which in turn are attached to the frame with screws, forming a rigid structure.
In addition to the main elements, the complete system includes the technical solutions necessary to solve a specific construction problem, recommendations for the work, as well as tools and devices.
All elements of the complete system C 112 are manufactured using modern technologies, undergo strict quality control, are functionally oriented and, as part of a complete system, ensure the reliability of the entire structure during long-term operation.
Composition of the complete system
| Pos. | Name | Unit of measurement | Quantity per m2 |
| 1 | KNAUF sheet (GKL, GKLV, GKLO) | m2 | 4,0 |
| 2 | KNAUF profile PN 50/40 (75/40, 100/40) | linear m | 0,7 |
| 3 | KNAUF profile PS 50/50 (75/50, 100/50) | linear m | 2,0 |
| 4a | Screw TN 25 | PC. | 13 [14] |
| 4b | Screw TN 35 | PC. | 29 [30] |
| 5 | Putty KNAUF-Fugen (Fugenfüller) | kg | 1,0 [1,5] |
| 6 | Reinforcing tape | linear m | 1,5 [2,2] |
| 7 | Dowel K 6/35 | PC. | 1,6 |
| 8 | Sealing tape | linear m | 1,2 |
| 9 | Primer KNAUF-Tiefengrund | l | 0,2 |
| 10 | Mineral wool plate | m2 | 1,0 |
| 11 | KNAUF-profile PU | PC. | ** |
** according to customer needs. [ ] values in parentheses are given for the case when the height of the partition exceeds the length of the plasterboard sheet.
Application area
Application area
It is used as internal enclosing structures in premises of various types, with dry and normal humidity conditions according to SNiP 23-02-2003, residential, civil and industrial buildings of all degrees of fire resistance and constructed in any areas, including seismic ones.
It is used both in reconstruction and in new construction.
The most universal design providing high performance, including special requirements for fire resistance and sound insulation.
If there are requirements for thermal, sound and fireproof insulation, the cavity of the partition between the plasterboard sheets is filled with insulating material made from mineral fibers.
The surface is intended for subsequent final finishing, for example, wallpapering, painting, tiling, etc.
The installation process includes the following stages of work.
- Marking the design position of the partition along the floor, ceiling and base walls.
- Installation of partition frame C 112.
- Installation of electrical wiring and embedded parts for fastening stationary equipment inside the frame.
- Installation and fastening of vertically oriented KNAUF plasterboard sheets (GKL) on one side of the frame.
- Sealing seams between KNAUF plasterboard sheets (GKL).
- Installation and fastening of the second layer of vertically oriented KNAUF plasterboard sheets (GKL) to the frame.
- Sealing seams between KNAUF plasterboard sheets (GKL).
- Fixing insulating material in the space between the posts, if provided for by the design.
- Installation and fastening of KNAUF plasterboard sheets (GKL) on the other side of the frame.
- Sealing seams between KNAUF plasterboard sheets (GKL).
- Installation and fastening of the second layer of KNAUF plasterboard sheets (GKL) on the other side of the frame.
- Sealing seams between KNAUF plasterboard sheets (GKL) and priming the surface for decorative finishing.
- Decorative finishing of the partition after installing the finished floor.
Recommendations
Installation of partitions should be carried out during the finishing work (in winter with heating connected), before the installation of clean floors, when all “wet processes are completed and the wiring of electrical and plumbing systems has been completed, under dry and normal humidity conditions in accordance with SNiP 23-02-2003 “Thermal protection of buildings.” In this case, the room temperature should not be lower than 10°C.
In conditions of high humidity (bathrooms, kitchens, bathrooms), it is recommended to use moisture-resistant KNAUF plasterboard sheets (GKLV), while it must be taken into account that in places where water directly hits the walls (bathrooms), the surface of the sheets should be covered with KNAUF-Flechendicht waterproofing.
The location of electrical wiring in the space of the partition frame should exclude the possibility of damage to them by sharp edges of frame elements or screws during fastening of KNAUF plasterboard sheets (GKL).
Knauf technologies when working with drywall
The Knauf company firmly holds its position as a leader in the modern building materials market. True German quality allows you to install durable and reliable plasterboard structures - ceilings, walls, partitions and arches. The assortment includes Knauf and GKL, and all the “consumables”: profiles, hangers, putties, primers. It is about profiles that will be discussed in the next material.
What is a profile for drywall from Knauf? This is an element made of high-quality galvanized steel intended for fastening gypsum boards in various types of structures. Their classification and technical characteristics are given in Table 1.
Table 1. Types of Knauf metal profiles
| Name | Features of application | Section, mm | Length, mm |
| Guide (PN) | Is a guide for rack profiles, necessary for creating jumpers | 50×40 65×40 75×40 100×40 | 3000 |
| Rack-mount (PS) | Used for the construction of vertical frame posts, connected to the corresponding Knauf guide profile for fastening drywall | 50×50 65×50 75×50 100×50 | 3000 |
| Ceiling (PP) | Has a C-shape, used to form a frame | 60×27 | 3000 |
| Ceiling guide (PN) | Serves as a guide for the PP; when installing ceilings, it is attached along the perimeter of the walls. | 28×27 | 3000 |
| Corner defensive | Protects corners from external damage | 25x25x0.4 31x31x0.4 31x31x0.4 | 3000 |
| Arched (PA) | Necessary for the formation of arches, domes and other curved structures | bending radius 500,1000 | 3000 |
| Corner plasterer | Installed at the ends of walls for protection during operation | 35x35 | 3000 |
| Mayachkovy (PM) | It is the basis for the surface plastering process. | 22×6 23×10 62×6,6 | 3000 |
| Enhanced (UA) | Used as a rack element when forming doorways | 50x40 75x40 100x40 | 3000 |
Calculation of plasterboard partitions (GKL): calculator
It is impossible to calculate the material without first knowing the parameters of the partition. To determine them you will need a regular tape measure. To calculate the gypsum board, only two quantities are needed - the length and height of the future partition.
We measure them using a tape measure and write them down on a piece of paper. - If the height of the room is greater than the maximum height of the drywall sheet (3 meters), then the calculator calculates the materials according to the consumption, which is indicated in square brackets. This is due to the fact that there is a need to create jumpers from the profile at the joining points, as well as its subsequent finishing.
– if the height of the ceiling of the room is up to 2.5 meters, then the calculator counts sheets of plasterboard in pieces measuring 1.2x2.5 m (S = 3m2), and for heights over 2.5 m - sheets of 1.2x3 m (S = 3, 6m2). The issue of calculating consumables is very important when installing gypsum board partitions. In order to correctly and quickly calculate the amount, you will need our calculator. The gypsum board calculator for partitions has a simple interface and requires a minimum of data to accurately calculate building materials.
Let's look at how to use this calculator correctly and measure surfaces for installing a partition. Having made preliminary measurements, you can enter the data into the form. Our calculator allows you to calculate not only the amount of drywall, but also other materials necessary for the construction of the partition - guides, screws, putty, primer, etc.
Thus, already at the first stage of preparatory work you will be able to see how much money will be needed to erect the partition and what you can save on.
Knauf plasterboard production technology
Construction sheet-gypsum boards of type A - this is the correct name for the gypsum boards familiar to everyone. This is a high-quality construction and finishing material that is used for cladding walls, constructing partitions, ceiling structures and products whose task is sound absorption and sound insulation.
Each Knauf sheet necessarily contains the following information:
- Letter marking of sheet type - GSP - A;
- The type of longitudinal edges of the sheet is indicated;
- Indicates the standard;
- Numbers that display the width, length and thickness of the sheet (dimensions are indicated in millimeters).
If we talk about technical characteristics, Knauf plasterboard is a rectangular building element consisting of two layers of special cardboard with a gypsum layer and the addition of reinforcing inclusions. The side edges of the strip are folded with the edges of cardboard.
The core of such a sheet is gypsum binder under the designation G4 (GOST 125-79).
Knauf plasterboard sheets have:
- A semicircular thinned edge, which is considered a good technological solution;
- Cladding cardboard, which adheres perfectly to the core, is “organized” by adhesive additives;
- Cardboard is used not only as a building frame, but also as a base for applying any finishing.
By the way, the technical characteristics of cardboard meet all the requirements for using this material in residential premises.
Consumption of plasterboard and materials per 1 m2 of ceilings, walls and partitions
Often, plasterboard manufacturers themselves supply the market with special materials intended for finishing it. As a rule, the consumption of putty and primer for drywall produced under one brand is slightly lower than when using materials from other companies. Once the required indicators have been determined, you can easily calculate the consumption of self-tapping screws for drywall to fasten the sheet. One sheet will require approximately 70 pieces, while two layers will require at least 110 pieces.
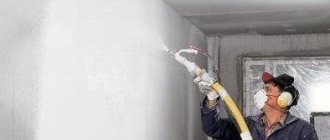
In order for mixtures to be used more economically, it is necessary to properly prepare the base for using glue. First of all, you should make sure that it is dry and has a temperature of at least plus 5 degrees. The surface must be cleaned of dirt and dust deposits, peelings, form lubricant residues and other contaminants; if necessary, it can be washed. After this, any protrusions should be eliminated.
It is extremely important to remember that fastening screws closer than 10 mm to the edge of the sheet is unacceptable, as this can cause cracking. Acrylic paint can also give the surface a matte or glossy look. As for texture, achieving it is much more difficult than using water-based emulsion.
The approximate consumption of acrylic paint per 1 m2 of drywall is the same as the previous option, that is, approximately 0.2 liters per 1 square meter.
Calculation of profile consumption per 1 m2 of materials for plasterboard ceilings
- Suspensions, profiles, fixed to the supporting structure with hardware.
- Metal frame, less often wooden slats are used. They are connected into a single frame using couplings and brackets. Using a metal profile, you can build a cellular rail frame. The metal frame can be one- or two-level.
- Plasterboard panels fixed to the frame.
When performing calculations of civil code per square meter, the dimensions and footage of the premises are taken into account. It is best to make a preliminary plan diagram of the future structure, which will allow you to make correct calculations and find out how many materials will be required to create the structure. Indicate the dimensions of the room and the placement of the profile.
determine the number of connectors for the profile: K = S*2, where S is the area of the suspended ceiling, K is the number of “crab” connectors. For example, for a room with an area of 6 m2, 12 connectors will be required. When planning to install gypsum boards yourself, you must follow the technology, the sequence of work, prepare the necessary equipment, tools, purchase more than one type of profile, hardware (screws, screws, dowels), and reinforcing mesh. Let us give an approximate calculation of the consumption of building materials for a structure created on a metal frame made of gypsum plasterboard of standard thickness: 1.11. Suspended ceilings P 112 and P 113 are made of plasterboard sheets (GKL) measuring 2500x1200 mm, ceilings P 212 and P 213 are made of small-format gypsum fiber sheets (GFL) measuring 1500x1200 mm.
Having made preliminary measurements, you can enter the data into the form. Our calculator allows you to calculate not only the amount of drywall, but also other materials necessary for the construction of the partition - guides, screws, putty, primer, etc. Thus, already at the first stage of the preparatory work you will be able to see how much money will be needed to erect the partition and on what it will be possible to save money.
What is needed to install Knauf profiles: technologies
From the table above it can be seen that there are many options for manufacturing metal profiles, depending on the specific application as frame elements. Each type has its own installation features, so you can consider the whole process using the example of installing a suspended ceiling.
To begin with, you should familiarize yourself with a number of rules:
- carry out all repair work in a dry room;
- choose ceiling profiles for plasterboard from a well-known manufacturer (Knauf, for example);
- accurate marking is mandatory, as it will allow you to avoid gross mistakes and save material;
- Before installing the profile, you must additionally check the markings using a level;
- Before covering, you need to make sure that the entire frame is strong, as this will avoid “distortions”.
Once the design of the plasterboard ceiling has been chosen and the budget has been calculated, you can go to the construction supermarket. It is advisable to purchase there:
- laser level;
- measuring tool;
- drill or hammer drill;
- metal scissors;
- two types of profiles (guides and ceiling);
- pendants;
- dowels (anchors).
In addition, to create smooth lines, you need an auxiliary tool for bending drywall and metal profiles. For example, an awl, a needle roller and special equipment for cutting metal. An arched profile will be the best solution for curly structures, since it is easier to bend than other types.