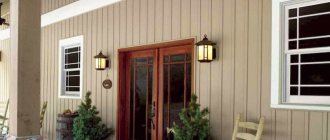
Today we’ll talk about how to cover a wooden house with insulated siding. You will understand why it is important to combine this type of facade cladding with thermal insulation. How to match both materials to each other, meaning siding and insulation. We will also tell you in detail about the technology of installing siding and installing a thermal insulation layer. Once you understand this topic, you will know what to ask the matsers who have been entrusted with finishing the facade of their house.
A wooden wall of a house, insulated with mineral wool and covered with siding
A little about siding
Many people think that siding is a material that has recently appeared on the market. Lining is one of the varieties of this finish. Therefore, siding has been around for centuries. It’s just that this material got its name not so long ago, namely, in the 50s of the twentieth century, when lining panels began to be produced in the USA and Canada. The only raw material for them was vinyl.
This finishing material was superior to wood in price, decorativeness, and durability. But the purpose remained the same. A little later, ceramic, cement and metal siding appeared on the market. That is, today this facing material is represented by a fairly wide range of models. But it should be noted that regardless of what type is used for insulation and cladding of the house, the installation technology is the same - on a frame.
Variety of siding panels
Transportation
- Siding panels must be loaded onto a flat, solid base of the body. The length of the body should not be less than the length of the packs with siding.
- During transportation, it is necessary to ensure that the products are protected from movement and mechanical damage.
- The recommended vehicle speed is up to 80 km/h. It is necessary to avoid sudden acceleration and braking.
Loading and unloading, storage
- Loading and unloading of siding should be carried out using lifting equipment with soft slings, and for bundles longer than 5 meters - using traverses.
- When unloading manually, it is necessary to involve a sufficient number of workers (at the rate of 1 person per 1.5-2 m of sheet), but not less than 2 people.
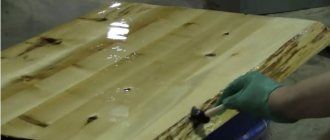
- The sheets must be lifted and moved carefully in the position as in the figure, avoiding strong bends.
- It is prohibited to throw sheets or drag them.
- Storage conditions when exposed to climatic factors must comply with conditions 3 according to GOST 15150 (unheated rooms without direct exposure to sunlight and rain).
- Packs of siding in original packaging must be laid on level ground on 50x150 mm beams with a step of 0.5 m in one row.
- When storing for more than 1 month, it is necessary to open the packaging film on each end side of the packs to ensure ventilation.
Siding: its advantages and disadvantages
Despite the fact that siding panels appeared on the market relatively recently, they have already gained popularity, displacing other materials. For example, facing bricks, which are expensive and require masonry, often remain out of use. If the first siding products that appeared in Canada were wooden, now the following material has been added to the range:
- ceramic;
- metal";
- plastic (acrylic, PVC);
- fiber cement.
The most popular types are metal and plastic panels. The reasons for its demand are excellent characteristics, optimal quality/price ratio.
Advantages of panels
There are several explanations for the “victorious march” of siding; the new material has many advantages. The undoubted advantages of the panels include:
- Possibility to carry out installation yourself. This is the main advantage, since attaching siding to a brick wall is not too difficult, and home owners often install the cladding without outside help.
- Light weight, allowing you to carry out the work even alone. However, for installing long products it is better to have an assistant. The lightness of vinyl material can significantly reduce the load on the foundation.
- Material characteristics: soundproofing qualities (vinyl), resistance to mechanical stress (metal), moisture, sunlight.
- A chance to additionally insulate a brick structure if installation is chosen using a frame (“lath-and-pie”) method.
- A wide range, allowing you to choose the optimal size and color of the material.
- Significant savings when compared with the costs of facing bricks and its masonry.
- Simple processing of siding: a simple hacksaw is enough to cut plastic.
- Long service life comparable to the service life of bricks.
Not the least role when choosing this material is played by its price. Steel siding will cost more, but the difference will be minimal, since vinyl products will require more components.
Disadvantages of siding
The list of advantages of the material can impress the owners of an almost finished house. However, you need to know exactly how to attach siding to a brick wall. Technology must be followed strictly. Even minor errors will require correction, and this will result in unplanned expenses. The practical material does not seem to have any other serious drawbacks.
But if you try, you can find fault with everything in the world, so the disadvantages of siding include:
- poor resistance to mechanical stress, with the exception of metal;
- melting of vinyl in a fire, its fragility at sub-zero temperatures;
- limited color range, different for each type of material;
- high prices for components.
It is easy to list specific disadvantages by manufacturers. Each company has its own set of elements. It is said that if the buyer decides to "reject the claim", he may lose the warranty.
A little about insulation
Now, as for the thermal insulation material. Currently, either mineral wool or polystyrene foam boards are used. Firstly, it should be noted that external insulation is the best option. Secondly, the volume of the interior of a wooden house does not decrease. Thirdly, two different construction processes are combined: facade cladding and thermal insulation of the walls of the house.
If mineral wool is chosen, then it must be covered on the outside with a waterproofing membrane, and with an internal vapor barrier. The thing is that this insulation is a hygroscopic material, that is, it absorbs moisture. Why does it lose its thermal properties? Although today manufacturers already offer moisture-resistant mineral wool boards that do not need to be protected with anything. But experts still recommend laying a waterproofing layer on top in case a leak occurs through the siding due to heavy slanting rain.
As for the thickness of the insulation. For central Russia, the optimal value is 100 mm. Let us add that both heat-insulating materials are not heavy, so the loads from them on either the walls or the foundation are not taken into account.
Insulation for siding: mineral wool or polystyrene foam boards
On our website you can get acquainted with the most popular house projects in which siding was used - from construction companies presented at the exhibition of houses "Low-Rise Country".
Price of metal material for home decoration
On the Russian market, metal panels will cost you between 8-10 USD/m2.
As for the cost of metal siding, everything is simple.
On the Russian market, metal panels will cost you between 8-10 USD/m2. Further, the price will increase depending on the texture of the panels and the individuality of their sizes in length and width. Thus, we can assume that metal panels for cladding a house belong to the class of medium-cost material (that is, between budget and luxury).
Features of metal siding: advantages, disadvantages and subtleties of operation
In the production of metal siding, the plates can be given a different texture, from imitation of rounded logs or wood to brick cladding
Metal panels for house cladding are made from various types of metals: steel, aluminum, zinc. Moreover, all of them can be produced with a width of 120-300 mm. Occasionally the panels are 500 mm wide. The length of the panels is 5-6 meters. In any case, the thickness of the metal siding is 5 mm, which allows metal cladding to be used as a lightweight finishing material. However, this is not quite true. Metal plates for finishing a house in a complete structure have sufficient weight, which requires a reinforced foundation. Therefore, when choosing a finishing material, you should take this factor into account.
In the production of metal siding, the plates can be given a different texture, from imitation of rounded logs or wood to brick cladding.
Advice: the simpler and less textured the surface of the metal siding, the cleaner the façade of the building will be and the easier it will be to maintain the cladding.
Metal siding plates are equipped with special perforations along the top edge, which simplifies the installation of panels on the frame. In addition, it is this perforation that provides for a reduction in the stress of the plates during their thermal expansion. In addition, the metal siding plates are equipped with special holes for high-quality drainage of condensate from the skin.
The advantages of metal siding include:
- Metal plates for house cladding can be used at different temperatures. Their range is -50-+50 degrees Celsius, which is ideal for all climatic regions of Russia.
- Metal siding belongs to the category of ventilated facades, which means that with proper finishing, the walls of your house will breathe freely without forming unnecessary condensation, followed by fungus on their surface.
- Metal siding does not fade in the sun and, of course, is not afraid of moisture.
Important: if the panels are installed incorrectly, slight corrosion may form at the joints and corners.
- Metal panels do not crack under the influence of temperature changes. Thermal expansion of the material does not affect the structure of the skin in any way. That is, cracks and other deformations do not appear.
- The service life of the material declared by the manufacturer is 50 years, but subject to proper conditions of use for the panels.
- The flammability of metal siding is reduced to zero, which is an important factor when choosing siding for a house.
Assembling the panels into a single skin is quite simple
- Assembling the panels into a single skin is quite simple. Therefore, even a novice craftsman without much experience can cover a house with metal siding with his own hands.
- Metal panels are easy to maintain and do not require periodic painting.
- When installing the panels, it is possible to hide all fasteners, as a result of which the coating takes on an even and uniform structure without disturbing the appearance of the building facade.
However, metal siding for houses also has some disadvantages. These include:
DIY metal siding installation
- Possibility of deformation of plates under mechanical influence. A blow with a heavy object can bend the panel and it will be difficult to return it to its previous state. You will either have to completely disassemble the casing in order to replace the strip, or be content with what you have.
- As for the thermal insulation properties of metal, this is an absolute minus. Metal plates do not heat up, unlike PVC siding. Therefore, it is necessary to arrange a thermal insulation cake under them.
- In addition, metal panels have a reduced level of sound insulation. Namely, when it rains, household members can periodically listen to a light drumbeat, albeit softened by the insulation laid under the panels.
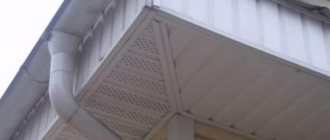
Accessories
To frame and decorate window or door openings, external and internal corners of a building, or to join panels together horizontally, special strips and slats are used. They can be selected either in color with the main panels or in contrast, to give the facade a certain charm and taste.
Also, depending on the chosen color and shade, it is necessary to select the color of the fasteners.
All these issues will be helped by sales consultants and measurers who, using tables of average quantities of fasteners, will help calculate the required number of screws, anchors and seals.
Features of vertical siding
Vertical siding comes in different lengths: 3000, 3050 and 3100 mm, width – 160, 180 and 250 mm. The thickness of one plate is 1.1 and 1.2 mm. Each type of panel is selected depending on the size of the house, taste preferences and other features.
Peculiarities:
- Vertical siding facilitates condensate drainage.
- Installation of panels is much easier and faster. In the horizontal direction, the stripes are installed from bottom to top, and in the vertical direction, you can start from the edge, middle, etc.
- With the help of vertical siding you can visually make your house larger and taller.
Important! It can be used both throughout the entire building area and in a separate area.
Advantages:
- the presence of locking locks that protect against strong gusts of wind;
- use of edging profile;
- durability;
- ease of installation;
- retains its properties under the influence of sunlight and temperature changes;
- reliability and elasticity;
- many geometric shapes and colors of panels;
- installation can be carried out at any time of the year;
- maintaining the necessary ventilation of the façade walls.
Flaws:
- vinyl siding is soft, so any damage may render it unusable;
- acrylic and aluminum types are available at a high price;
- The steel type has low sound and heat insulation; corrosion may occur in areas where the panel is damaged. The downside is its heavy weight, which creates difficulties during installation.
Important! Under no circumstances should vertical panels be mounted horizontally. This will have a negative impact on durability and will also allow water to penetrate inside.
Required tools and hardware
It is recommended to use a metal substructure to secure metal siding. The siding is attached to the substructure with self-tapping screws 4.2x16 with a press washer or steel rivets.
For work you will need: a screwdriver, a set of attachments, a tape measure, a level, a plumb line, a square, metal scissors (manual or electric), a hacksaw or a circular saw with a disk for cutting metal, a drill (perforator), a hammer (mallet), a knife thermal insulation, gloves, marker, technical documentation (ATR, PPR).
Construction of sheathing
When deciding how to properly cover a house with metal siding, take into account that the simplest and most affordable option is to create a frame from standard elements.
Wooden
Due to the fact that a properly fixed sheathing is a guarantee of the reliability and durability of the coating, the work must be approached very responsibly. Step-by-step algorithm of actions:
- To install the frame, a beam with a section of 50*40 or 50*50 is used. The material is pre-treated with antiseptics and fire retardants.
- The surface is being marked. The main posts should be placed perpendicular to the cladding panels. Lines are drawn in increments of 50–60 cm.
- After drying, the timber is drilled out for screws. The pitch of the mounting holes is from 20 to 40 cm. These fixing points are transferred to the previously marked lines. Using a puncher, holes are drilled for dowels according to the marks.
- The racks are aligned and pre-fixed, after which the beam is leveled and substrates are placed under it. Final fixation is carried out.
- For greater convenience, corner posts are set using a plumb line and level. A cord is stretched between them, allowing you to quickly align the remaining elements.
The resulting gaps between the wall and the timber are carefully filled with polyurethane foam. This will eliminate the appearance of “cold bridges” after laying the thermal insulation material.
Metal
Do-it-yourself lathing from metal profiles is erected according to the following scheme:
- Marking is being carried out. Installation lines are drawn in increments of 50–60 cm. When working with a base, 35–50 cm.
- The hanging frame elements are being fastened. To do this, holes are drilled at a distance of 35–45 cm according to the markings, hangers are attached to self-tapping screws and dowels and bent to the desired shape.
- The corner segments are positioned first and carefully aligned along the plane. A cord is stretched between them to align the remaining racks.
Carrying out work on assembling the frame requires accuracy; all parts must be placed exactly level and form a single plane.
On a note! Regardless of the method of creating the sheathing, windows and doorways are faced separately. The racks are placed along their perimeter, forming a closed system connected to the main fragments.
VIDEO:
Hydro- and thermal insulation of walls
Covering a house with metal siding often involves additional insulation. Various materials are suitable for this, but the most affordable and preferable for self-installation are mineral wool or penoplex (an improved version of polystyrene foam).
Thermal insulation and waterproofing are carried out as follows:
- When choosing a wooden frame, mineral wool is placed in the resulting cells. It is laid tightly, without gaps. Work is carried out wearing protective equipment for the respiratory tract and mucous membranes.
- The metal frame is excellent for laying penoplex. To do this, even during installation of the sheathing, the slabs are pinned onto installed and bent hangers. For additional fastening, dowels with a large head are used. The material is placed without matching the joints of adjacent rows, the corners are overlapped. Additional sealing is carried out.
- A film is stretched over the entire surface to protect against moisture penetration. The joining points are combined with a large supply of material.
On a note! If a façade with a ventilation gap is being installed, then a strip of the required thickness is mounted on the wooden frame strictly along the beam, and a Z-profile or similar element is mounted on the metal frame.
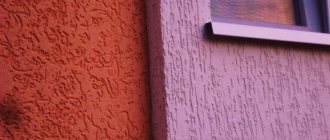
How to attach siding to a brick wall?
The first step is to prepare the walls. If the house was built a long time ago, then first they get rid of the old finishing, all the unevenness and cracks are covered with cement mortar (1 part cement, 2 parts sand). Its replacements are ready-made plaster or façade putty. After the mixture has hardened, the surfaces are treated with a primer. This procedure is repeated several times.
Armed with a pencil, tape measure and level, they begin marking the walls. In this case, there are two options, since you can choose either horizontal or vertical installation of siding. The first method is more popular, it requires a vertical sheathing, in the second case - vice versa.
For brick houses, there is another method: a horizontal structure is installed for the base, and a vertical sheathing for the walls. The most original solution is to choose different types of siding for these elements. However, the direction of the panels, as well as their combinations, is a matter of taste.
Frame construction
Guide structures are installed in accordance with the marked lines. The sheathing pitch depends on the selected material. For a wooden “skeleton” the recommended distance between elements is 400-500 mm, for a metal profile - 600 mm.
If horizontal fastening of the panels is planned, then installation of the frame begins from the bottom, with the corner guides. In the “vertical case” there are two options - from the corner of the building or in different directions from the central vertical axis. If the latter method is chosen, then first attach the panels on both sides, starting from the center.
The correct installation of all elements is carefully checked. Profiles forming corners are installed strictly vertically. To check and correctly fix the remaining elements, cords are pulled between the guides: both in the upper and lower parts of the walls.
- Along the lines, at a distance of 500-600 mm, hangers are fixed. First, holes are drilled in the bricks (not in the mortar), then dowels are driven into them.
- After their installation, hangers are attached to them, which are secured with self-tapping screws. Each element requires at least two fasteners.
- Direct hangers are installed along the perimeter of the openings. In this case, the installation step is 300-500 mm.
Before fixing the profile elements, one more operation is performed - installation of insulation.
Thermal insulation and frame completion
Since additional insulation is almost always required, the choice of material is something that any builder will face. In this case, the ideal material would be slab material - mineral wool or expanded polystyrene. The main thing is to choose the right thickness.
For the middle zone, it is recommended to buy material with a thickness of 50-60 mm. In the northern regions the value is different: at least 100 mm. However, with such thickness a difficulty arises. The fact is that the length of the antennae of the suspensions is only 80 mm. However, there is a way out: before installing the hangers, bars (50x50 mm) are first attached along the marked lines, and then the hangers are fixed on them.
In each insulation board, through cuts are made with a knife, with the help of which it will “sit” on the hangers. To ensure effective thermal insulation, the location of the holes must be determined very precisely. The slabs are laid as tightly as possible. The remaining joints are filled with foamed sealant. It, unlike polyurethane foam, does not increase in volume. The last operation after thermal insulation is fixing the vapor barrier membrane. It is attached in the same way: on the antennae of the suspensions.
A profile or beam is attached to the “insulated” suspensions with self-tapping screws. There must be at least two fasteners on each side. Installation of profiles is required around the perimeter of all openings. After completing the assembly of the sheathing, the structure is again checked for verticality and horizontality.
How to attach siding to a brick wall?
It is clear that the panels are fixed to the sheathing, but this stage is also worthy of detailed consideration. The process seems simple and understandable, but there are several features on which the success of the operation depends.
Installation of corner profile
There shouldn't be any difficulties at this stage. However, you need to pay attention to two points:
- the starting profile should be located higher than the lower edge of the corner element, the difference is 5-6 mm;
- It is imperative to leave at least 3-4 mm between the cornice lining and the profile.
The corner profile is aligned vertically, then attached to the sheathing on both sides. If the standard length (3000 mm) is not enough, then the elements are fixed with an overlap (25-30 mm). The mounting flanges of the upper element are cut off by 25-30 mm, then it is installed on top of the lower profile. The distance between the mounting shelves must be at least 9 mm. Internal facade corners are fixed in a similar way, but for them, naturally, other corner structures are used.
Setting up starting profiles
Anyone who is familiar with the features of brickwork will not be very surprised. A mooring cord is also used for installing siding. Since horizontality in this case is no less important, a temporary self-tapping screw is screwed into the first corner profile, departing 5 mm from the bottom edge.
A cord is tied to it and stretched to the opposite edge of the wall. There, an improvised mooring is placed horizontally, then a self-tapping screw is screwed in, and the free end of the cord is tied to it. Then the correct location of the landmark is checked again. All walls are “fenced” in the same way, but they can be tied not with sections, but with one long cord.
- Then they take the starting (corner) profile of the siding, apply it to the corner, mark its edges at the level of the stretched cord. It is better to put marks with a marker.
- The first strip is installed so that it is at a distance of 6 mm from the corner profile, and its upper edge exactly coincides with the stretched cord.
- Then they proceed to the installation of the next elements of the row. The main condition when using vinyl material is 10 mm intervals if work is carried out in the cold season. They are compensation gaps that make it possible to preserve the cladding during thermal expansion of the plastic.
The second installation method is to cut off the mounting flanges of the first corner panels. Some of them have holes for fastening. The following panels are installed, leaving compensation gaps.
Design of window and door openings
There are two options for covering windows and doors. These are starting profiles or special trims produced by siding manufacturers. The standard length of such elements is 3000 mm, so few of them will be required.
There are practically no special tricks here. Elements are arranged vertically (side) and horizontally (bottom, top). The most important condition is that the top bar overlaps the side ones. This precaution will give you a chance to avoid moisture getting under the cladding.
If the windows are located deep in the wall, then buy a special near-window profile. In this case, the products are produced in several sizes, so choosing a set that suits all parameters is quite easy.
Installation of siding panels
This stage is considered the simplest. As already written, work begins from the corner of the house. The siding is inserted into the corner profile and into the lower starting strip, then the horizontal line is checked with a level. They fasten it with self-tapping screws to the sheathing. Since the length (2500-4000 mm) is not enough for every wall, they are connected with a special element - an H-profile. It is attached to the sheathing before installation of the siding begins. The method of installing the H-profile does not differ from the attachment of corner components.
Do the same with the next rows, not forgetting to check their horizontalness. To install the last panel, use a finishing loop strip - J-profile. It is attached at a distance of 3 mm from the overhang. Then measure the distance from it to the edge of the penultimate element.
If it is smaller than the width of the siding, then the upper part of the last strip is cut off. Hooks are made along this edge. These are transverse cuts, their length and width are 20-30 mm, pitch is 200 mm. The cutouts are bent outward, then the bar is inserted into the finishing profile until the hooks snap into the lock.
On the roof gable, the same J-profile or an internal corner element is used for installing siding. The installation scheme is practically no different, except for the fact that the panels need to be cut not horizontally, but at an angle.
Once the craftsman has learned in general terms how to attach siding to a brick wall, he can decide whether it makes sense to do the work himself. Sometimes the written “multi-letter” does not really help to understand how work actually happens. Therefore, to become familiar with all the stages, it is more important for the master to see everything “with his own eyes.” It is likely that the following video will provide this opportunity:
Video loading...
Installing starter siding strip
Before you begin laying the main siding sheets, you must install a starting strip. To do this, you need to determine its location.
The starting bar should be 40 centimeters higher from the bottom horizontal line of the building . To secure the starting strip evenly, you should draw a line along the entire perimeter of the building on which the starting strip will be attached.
To attach the plank, you should attach it to the marked line with the upper edge and secure it with self-tapping screws in the wall. This option is suitable for a wooden wall.
If the walls are concrete or brick, then, having attached the plank to the intended line, you should mark the fastening points and drill holes for the dowels, and then fasten the plank with self-tapping screws by screwing them into the dowel .
IMPORTANT! When attaching the starting strip, a gap of several millimeters should be left between the ends to prevent deformation of the coating.
The pitch of fastening the starting strip should be up to 40 mm.
Installing the starting bar
What material will you need?
In order to complete the finishing around the window openings, you will need special components and galvanized profiles. Namely:
- Siding strips
- External and internal corner
- J - profile
- Metal profile or wooden planks
- Self-tapping screws and dowels
If the house has Euro windows, then installation of ebb and flow hoods under the windows is not required. If not, then you need to purchase these components as well.
It is advisable to choose fastening fittings that match the color and texture of the cladding panels. Or, if this is intended by the design concept, the fittings may differ in contrast from the color of the main finish.
Attention! It is recommended to use wooden beams for sheathing extremely rarely. The exception is wooden houses. In this case, its use is justified.
Preparation for installation work
Making slopes is painstaking work that will require accuracy and precision from the master.
In order to please the final result of the work, it is necessary to create all conditions for safe and comfortable work. To do this you will need to provide the following:
- Install desktop. Cutting material on a knee, stool, or canopy will definitely lead to chips and defects. Some people use a circular saw for this purpose. It provides a perfectly even cut, and also makes it possible to cut the workpiece at an angle
- Prepare all the necessary tools. Everything should be at hand. Practice shows that frequent interruptions of the work process to search for the necessary tool affect the quality of the result and the speed of installation
- Install window sills. This will allow you to accurately calculate the length of the last strip that fits under the window. The distance between it and the ebb should be minimal
Important! Some siding manufacturers also produce all the necessary fittings for making slopes. So you can additionally purchase special tides from them that will match the tone of the building.
Window siding
Siding is attached to the pre-fabricated lattice. This happens in the following sequence:
- The starting strip is fixed on the window openings
- The outer corner is fixed, which, as a rule, has a double-sided notch
- Internal corners are installed at the junctions between the strips in the window opening
- Do-it-yourself vinyl siding installation around the window
It is worth noting that the siding you have chosen is installed around the window.
If you choose metal siding, you will need to install it. Installing metal siding yourself is no different from installing any other siding. The installation diagram is identical. If you want to give your home a more aesthetic appearance, we recommend installing basement siding yourself. This article describes step-by-step instructions for its installation.
The installation process itself is quite simple, of course, provided that the sheathing for it is done correctly.
How to make sheathing for siding?
Sheathing is a series of vertical beams of wood or metal attached vertically to the exterior walls of a building.
The outer edges of these beams form a “virtual” contour. The main function of the sheathing is to support the siding panels. And the smoother this support is, the more presentable the wall covered with siding will look.
The main difficulty that the master performing this work has to face is the need to strictly adhere to angles, as well as horizontal and vertical levels. To do this, initially markings are carried out, then the rest of the installation work is carried out. They do this as follows:
- Determine the right angle at the bottom of the window opening
- Set the starting profile according to the marks made
- Starting from the lower dimensions, make the remaining markings
- In the corners of the opening it is necessary to make a kind of angle from the profile. To do this, you can attach the UD and CD profiles to each other. Then the inner corner of the siding will lie on this blank
It should be noted that installing siding without using sheathing is a gross violation of the technological process. The only exceptions are openings with a width of less than 19 cm.
Window finishing with siding on sheathing
If all angles and levels are observed, installation is not difficult. You just need to cover the finished window opening with finishing material. Difficulties arise only when it is necessary to make slopes around arched windows. How to complete this task?
Setting internal and external corners
Any angles must be set in strict accordance with the vertical line. If the angle deviates even by a few degrees, the entire structure will be uneven and incorrect.
When installing a corner (internal or external), you should step back from the top edge of the facade about six millimeters and down from the starting strip - about 8 mm.
In order to evenly fasten the corner strip, it should be applied to the fastening point, fixed in a strictly vertical position, first on the two upper screws (not tightly), and then screw in the remaining fasteners sequentially from below.
The corner elements should not be fastened tightly enough with self-tapping screws (leaving a gap of 1-2 mm).
If you screw the screws in very tightly, the metal sheet may subsequently become deformed.
If it is necessary to lengthen the corner element, then an overlap of 2.5 centimeters is made by placing the upper part on the lower one. The peculiarity of the joining for all corner parts is the execution of the joining seam at the same level .
Setting obtuse angles
General installation rules
In order to qualitatively finish the facade of a house, you should follow some rules:
- Fastening is carried out with reliable self-tapping screws longer than 3.5–4 cm with a head of 8 mm. It is recommended to use screws with anti-corrosion coating.
- The first parts must be checked for level. Further control is carried out every 3-4 fragments.
- The panels should fit fairly tightly into the top and bottom profiles, as well as into the corner segment.
When joining panels, a small damping gap (5-7 mm) is left in the grooves to compensate for temperature expansion - Elements should not sag or warp, this indicates errors.
- The joints can be additionally sealed with a seal that protects against moisture.
If you do everything correctly and carefully, the cladding will be of high quality and will last for many years.
Installation of H-profile
H-profile for metal siding is an element that serves as a design for the joints of the main cladding panels.
Installation of the H-profile is not difficult: the main thing is to correctly calculate its location .
Installation is carried out similarly to the corner elements: first, the upper screws are attached, then other screws are screwed in along the entire perforation in 4-cm increments . In this case, it is necessary to indent a few millimeters above the cornice and retreat down from the starting strip - 6 mm.
Do-it-yourself siding with insulation on a house: algorithm of actions
The process of covering a building with siding and insulation is simple. With minimal construction experience and a standard set of tools, the home owner can handle it on his own.
Let's consider a step-by-step installation algorithm using the example of vinyl siding with mineral wool insulation.
- Preparing the walls
- Installation of sheathing
- Installation of insulation
- Siding installation
Stage 1. Preparing the walls.
It is not necessary to level uneven walls. This defect will not be noticeable under the sheathing.
It is necessary to remove all protruding elements: grilles, shutters, drains, lamps, etc. If necessary, remove mold and mildew, treat the walls with protective compounds.
Stage 2. Installation of the sheathing.
You can use wood, metal or plastic sheathing. For vinyl and acrylic siding, the latter is preferable, as it has comparable coefficients of thermal expansion. The siding will not work with it even with sudden temperature changes.
If you choose wooden slats, their humidity should be no more than 15-18%. In addition, they will need to be treated with an antiseptic.
For vinyl and acrylic siding, it is better to use plastic sheathing. It has comparable coefficients of thermal expansion. This means that the siding will not behave even with sudden temperature changes.
For horizontal siding, the sheathing is installed vertically, in increments of 30-50 cm. Calculate the increment depending on the length of the panels and the width of the insulation boards.
Sheathing profiles are installed around door and window openings, as well as in corners and along the contour of the building.
Vertical and horizontal alignment must be strictly observed - this determines how even the façade will turn out.
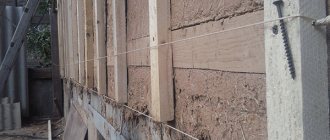
Stage 3. Installation of insulation.
To prevent mineral wool from absorbing moisture from the walls of the house, it must be protected with a vapor barrier film.
Mineral wool slabs are laid in the space between the sheathing strips in such a way that there are no cracks or gaps. The formation of “cold bridges” should also be avoided. For example, when using the Alta-Profile facade fastening system, after installing the sheathing, the profiles are dismantled, leaving the studs with the fastening bases. Insulation is put on the studs, and then a wind and moisture protective film is put on. Then the sheathing profiles are installed again and aligned vertically.
There must be a ventilation gap between the insulating film and the siding panels.
Stage 4. Installation of siding.
To begin, set the starting bar. Siding is installed from the bottom up. Each panel is fixed from the middle, gradually moving towards the edges. Secure with self-tapping screws in increments of 30-40 cm.
Before installing the last, top panel, install the finishing strip at the bottom edge of the cornice. The siding panel is fixed in the previous one, and then inserted into the finishing strip and secured in it.
It is necessary to leave a gap of 2 to 6 mm between the panels and slats (depending on the time of year when the facade is installed) - for thermal expansion of the panels.
For the same purpose, the siding is not screwed too tightly. There should be a distance of 1-1.5 mm between the top edge of the screw head and the panel.
These are general installation rules. But there are a number of features and nuances. Let's look at some of them.
Types of basement siding
According to its structure, siding is divided into four categories:
- Acrylic.
- Vinyl.
- Fiber cement.
- Metal.
Each type of protective structure has its own advantages and disadvantages. Considering these factors, you can easily determine which model to choose.
Acrylic
This is the so-called plastic siding. The polypropylene from which products in this category are made is not subject to rotting and does not deteriorate with constant contact with moisture. It does not lose its structure either in the sun in summer or during prolonged rains in late autumn. If the plastic is not subjected to significant mechanical stress, it will withstand any frost.
The disadvantages include low heat resistance. The melting point of the molecular network of this material is +85 degrees. However, already at 60 above zero it becomes more elastic.
In this case, the structure may break if it is poorly secured. He can't take a beating. And the section of the wall on which the decorative element will be placed is often subject to such loads, since people walk on the blind area and often carry large objects. If the panel is installed incorrectly, then due to its high sensitivity to temperature changes, it will become deformed.
Vinyl
This is the same plastic decorative siding, only it is cheaper compared to acrylic. The panels are made of polymer, the melting point of which is slightly lower than that of the previous model. It is environmentally friendly, and its working life reaches twenty years (with proper operation). It can be washed with water.
The disadvantages are almost the same as those of the polypropylene version. Plastic bursts with minor impacts in the cold, and can also become deformed in the scorching sun.
Fiber cement
This category of basement siding is made by pressing a mixture of cement, cellulose fibers and mineral fillers. It is sold in slabs. Positive characteristics include its durability, heat resistance, and resistance to moisture. Such a decorative element will reliably protect the base in both heat and cold.
Among the shortcomings, experts highlight its fragility. Therefore, you should be especially careful during transportation. The panels are susceptible to significant impacts, and a broken element is difficult to replace with a new one. Another disadvantage is that there are always seams between the panels that need to be sealed with special putties that are resistant to environmental influences.
Metal
This is the most reliable type of siding for a basement. It is widely used in any climate zone. There are several varieties of such decorative panels. They differ in color and sheet thickness. They are made of galvanized steel. The decorative layer is made either with paint or with a special film. Among the advantages, builders note ease of installation, as well as beauty of execution. The dimensions of the panels allow the installation of a continuous structure that will have a minimum number of joining seams. If it is installed correctly, then they will not be visible. Metal protection is not afraid of shocks and sudden temperature changes. If the decorative layer is not damaged, the sheet will not rust for more than ten years. Even with a significant impact, it will not lose its integrity, but will only be deformed.
Metal siding installation cost
Recently, many organizations have appeared on the market of building materials and services offering turnkey installation of facades. They provide calculations, purchase of materials, installation and insulation of the facade in accordance with customer requirements. The price for turnkey installation of metal siding ranges from 1,100 rubles per 1 m2 to 1,800 rubles per 1 m2, depending on the chosen design and complexity of the work.
Speaking of prices, the price for installation of metal siding without material in Moscow and Moscow Region is 550-600 rubles per sq.m. The high cost is associated with the specifics of installation, accuracy, provision of a written guarantee for installation, as well as the responsibility of installers for damaged material (scratched, bent, etc.).
| Name of works | Work prices |
| Wall decoration with metal siding panels | 400 rub./sq.m. |
| Creating a frame from lathing | 50 rub./sq.m. |
| Vapor barrier film | 50 rub./sq.m. |
| Membrane (waterproofing) | 50 rub./sq.m. |
| Laying one layer of insulation (50 mm.) | 50 rub./sq.m. |
| Laying a double layer of insulation (100 mm.) | 100 rub./sq.m. |
| Installation of ebb tides | 30 rub./m.p. |
Varieties
Metal log siding is available in single- and double-row versions. In the first case, the panel is an imitation of one log, and in the second case, two. According to consumer reviews, two-row models are more convenient for self-cladding houses, allowing finishing with the least amount of labor and in a short time. The disadvantages of double-row siding are the clearly visible joint between the panels and high requirements for the base. There is also some windage in the models, while single-row panels behave stably under wind loads.
The size range of log siding is also varied. Products are produced in lengths from 0.5 to 6 meters, which allows you to choose an individual standard size and reduce the number of joints, and in some cases even do without them. Despite the wide variety of lengths, the most convenient for installation are four-meter models, the increased demand for which fully confirms the ease of installation of this particular size. Colors and designs of models are also presented in a large assortment. The collection contains all varieties of oak, including dark, golden and stained shades; walnut and pine are widely represented. The texture of the models is also varied and takes into account the characteristics of wood of many species. The panels look very natural with an exact repetition of knots, the presence of sections of growth rings and an imitation of roughly processed wood.
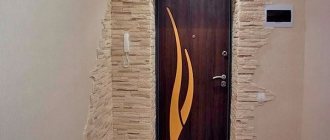
Window and door decoration
Window and door openings can be lined from the outside in several ways, identical for all structures.
The first option is the simplest: the siding is cut and fixed along the edge of the installed frame parts, solid strips are attached to the top and bottom, a flashing is installed, and slopes made of a suitable material are installed. You can make such a design using siding components. To do this, first a profile is laid on the inside, and a window strip on the outside.
In a similar way, work can be done using platbands, which are installed when the opening is shallow. They must be secured along the outer part, having previously cut off the corners at 45 degrees. Then you should assemble the structure framing the opening.
How to cover a window with siding
Installation of siding around the window differs depending on the depth of their planting:
- depth is up to 20 cm;
- the window is flush with the plane of the wall;
- arched window;
- depth over 20 cm;
This division is associated with the use of various standard elements. The industry offers several design options depending on the linear dimensions of the profiles for installation: external corner profiles and starting profiles (you can find the name J-profile or universal profile).
Before framing the windows with siding, it is necessary to create a sheathing. It is best to use metal profiles as a material, since wood does not have sufficient durability and resistance to external destructive factors.
If wooden slats are chosen as the frame, then before installation it is necessary to treat them with special protective compounds that increase the moisture resistance, fire resistance, chemical and biological resistance of the wood.
The frame must be mounted at an angle of 90 degrees, regardless of the direction of the slopes of the window opening.
Window siding trim with slope
If the seating depth of a window or door is up to 20 cm, then for cladding you can use a standard J-strap, which can have a width of up to 22 cm. Taking into account the overlap of structural elements, this method can cover an opening up to 20 cm. A finishing strip is attached to the plane of the window frame , into the groove of which the J-profile is inserted.
You can also replace the near-window strip with a system for fastening the outer corner, a universal strip and cutting strips of siding, which are laid horizontally in the grooves of the universal strip, and the outer edge is covered with an outer corner trim. This method can also be used if the window seating depth exceeds the permissible dimensions of the J-chamfer (20 cm).
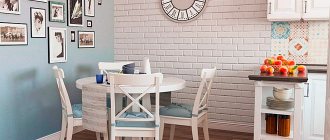
Distinctive qualities of cladding
Plastic slats can easily withstand high temperatures (up to +50 C) and are fire resistant. They are not afraid of moisture and are not infected by pathogens, are not damaged by moderate mechanical stress, do not attract insects and are environmentally friendly.
Plastic slats are fire-resistant, water-resistant, environmentally friendly, and easy to install.
This decoration on the outside of the house looks attractive and can transform even dilapidated buildings, as it allows you to hide all the imperfections of the facade. Siding is easy to install, but still, its installation requires certain skills. Siding perfectly masks pipes, curved walls and plaster errors.
Modern slats come in a variety of colors, which allow you to show your design skills and create an interesting decorative solution. You can choose drainpipes, storm drains, extensions and various related elements to match the cladding.
When choosing a decorative panel material, you should know that there are several types of it on the construction market:
Which is better: metal or plastic
Vertical metal siding
Many people are wondering which siding is preferable:
- Both the metal version and PVC have pros and cons. Metal panels can boast that they do not burn and are very resistant to fire, but vinyl, although also not flammable, melts easily due to high temperatures.
Note. Another advantage of metal panels is their ability to fade less over time from sunlight, while vinyl panels may not last as long.
- As for frost resistance, there is a difference here too. Thus, PVC options can quickly deteriorate at very low temperatures, but metal panels can withstand not such frosts.
Note. In addition, metal siding is less susceptible to mechanical stress and is less likely to deteriorate as a result. On the other hand, the dent formed on it will be more difficult (almost impossible) to fix.
Vertical metal siding
Below we list the main advantages of vinyl siding over metal:
- The price is two times lower;
- Not susceptible to corrosion, whereas for metal it is a scourge;
- Plastic practically does not change its physical properties due to temperature changes. On the contrary, metal heats up in summer and becomes cold in winter, which in one way or another affects the inhabitants of houses when the latter are sheathed with this material.
Be that as it may, the choice is always individual.
What siding to use for cladding
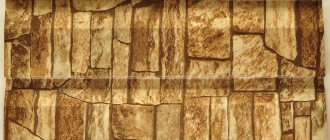
The modern market offers a huge selection of panels in a wide variety of colors and textures. Siding can successfully imitate wood, brick and stone surfaces.
What siding to use for cladding
The standard thickness of the facing panel is 1 mm. Width and length indicators are not subject to standardization and depend on the preferences of a particular manufacturer. The most common cladding panels are about 3-4 m long and about 20-25 cm wide. A large dimensional grid will allow you to choose the panels that will be most convenient to use for cladding your home.
Useful tips
Cladding should begin with the first panel from the bottom .
We strengthen it with the side to the corner profile, and the bottom - to the original panel. Now we attach it to the sheathing. Do not forget to maintain a temperature gap between the panel and the profile from the corner. It should be 6 millimeters. If you do work in winter, then the temperature gap should be 9 millimeters. We recommend starting work from the rear facade of the building - firstly, possible errors will be less visible here, and secondly, if you get to the front facade, you will already have good practice in installing siding. When the first panel is reliably defined, we proceed to extension.
So, it is quite possible to install siding with insulation yourself, the main thing is to follow the technology and in the process do not forget to once again check the quality of the work - this will save you from the need to redo it in the future.
Surface preparation, tools, fasteners
Before you begin installing the sheathing, you need to thoroughly prepare the walls.
This should be done so that condensation does not collect under the cladding and the surface does not collapse. First you need to dismantle all the elements that can be removed - shutters, platbands, drainage parts, and so on. After this, you can proceed to stripping the walls of the old decorative coating, removing peelings, sealing cracks, etc. Next, the walls are treated with a special agent to protect them from moisture and biological influences. As a rule, a specially designed primer is used for these purposes. The work can be done using a roller or sprayer. Attention! Sometimes, in order to save money, a primer is not used when preparing walls, and in vain. You should not skimp on your own coziness and comfort. The primer will reliably protect the walls from fungus and mold, and if this is not done, after a while you will have to spend even more money on repairs when the wallpaper begins to bloom.
You don't need to use any special equipment to install vertical siding. Simple tools that every owner has are quite enough. These include a building level, a screwdriver, a hammer, scissors for cutting metal, a circular saw, a measuring tape, and a square. To fasten the panels, use hardware specifically designed for this purpose: dowels and self-tapping screws.
Some “masters”, who are especially economical, use ordinary nails instead of these hardware, but the quality of the cladding is significantly reduced.
Exploitation
After installation, the cladding does not require any complex maintenance. The material is resistant to any external influences. Even if dirt gets on the siding, it can be easily cleaned with water pressure from a watering hose.
The result of covering with metal siding under a log
In the future, in case of damage to the outer covering, in order not to disassemble the system to replace a couple of panels, you can immediately purchase repair paint to cover the metal siding. Repair paint can be sold in containers of 100 g, 200 g, 1 l.
It is intended for painting the cut area and minor scratches. You can apply this paint with a cotton swab or match. The advantage of the special paint is that it adheres especially well to galvanized surfaces and has excellent UV resistance.