Conditions for using glue for MDF:
Gluing is one of the most common jobs in furniture production. Over time, it turned out that the main technologies and their development in this process belong to workers in the furniture industry, who perform veneering, gluing flat and curved parts, and lining various surfaces.
When choosing adhesive for MDF, you need to take into account the following aspects:
- materials used;
- equipment used;
- requirements for the final item.
All these conditions are difficult to combine within one type of glue. Therefore, in order to obtain a high-quality gluing result, it is necessary to correctly select the adhesive for MDF.
In the production process of various pieces of furniture, a large number of different fasteners are used, such as staples, dowels, ties, corners, etc. At the same time, glue for MDF has been used for a long time, and to this day it has not lost its relevance. Thanks to the use of such a composition, it is possible to connect any materials and parts.
Application
When working with MDF, a number of rules must be observed. First of all, the surfaces to be joined must be completely dry. Then the adhesive composition is uniformly applied, for which you can use a special sprayer. Particular attention must be paid to the edges of the elements. Excessive application of the composition and comparison of elements before the allotted time can lead to the absence of a positive result.
Another important aspect: with one-sided coating with an adhesive composition, it is sprayed on a hard surface. There are two different methods - cold and hot. The first case requires waiting about a day before using the product, the second method - after 6 hours. The main requirement for MDF glue, which is used in furniture production, is a minimum setting time and a high level of seam strength.
Help on MDF
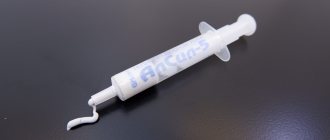
The MDF material gained recognition among many many years ago due to its low cost and long service life. In professional furniture production, specialized compounds called hot-melt adhesives are used for gluing. Companies using this type have long appreciated its advantages, some of which include high speed of work completion and a stable level of professionalism. According to their physical and chemical properties, melts are classified as thermoplastic materials. This means that when heated they acquire a highly elastic consistency. And after cooling they become hard in a short time. A high level of fluidity and ductility in a warm state and strength after cooling is ensured by the ethylene in combination with vinyl acetate that is incorporated into the polymer. In addition, they have good compatibility with various types of materials. Knowledge of the properties and technological features of using these compounds is needed by specialists who participate in the manufacture of furniture in professional production. The main disadvantage of using such glue for MDF is the need to have the appropriate equipment to complete the work. The composition is applied using a hand gun or a special machine.
For all technical issues, you can contact our specialists, who will try to advise you as fully as possible. Our phone number is in Moscow. By sending a message to our email address
We ask you to leave a note in the subject of the letter indicating that you have received technical advice, indicating your telephone number and contact information. After processing the question, a technologist will contact you.
Installation of a decorative corner
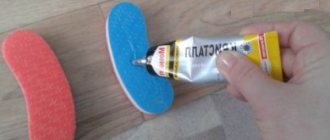
Decorative corners are used purely for aesthetic purposes. They are attached upon completion of fixing all components of the finish. To install a corner, it is better:
- first secure with mounting tape;
- then glue it securely.
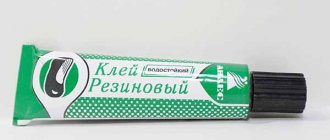
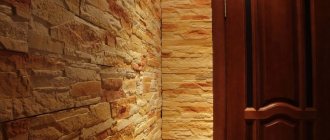
The best solution for gluing corners is the “Liquid Nails” adhesive mixture, which will not damage the coating and will securely fix all decorative corners.
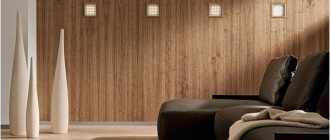
MDF panels are beginning to gain more and more popularity. Among the advantages of this finishing method, it is significant that such installation can easily be carried out by one person without anyone’s help. Moreover, this does not require any special experience. You just need to first familiarize yourself with how to properly attach MDF panels to the wall.
Is it possible to glue wallpaper onto wood boards?
There are two opposing opinions on this issue. Some of the craftsmen talk about the complete impossibility of carrying out such internal work, while the other says the opposite.
The fact is that non-woven, vinyl and paper products are usually glued without serious surface preparation. Often this is a simple matter of removing old coating. But this happens in the case of walls finished with plaster, which ensures the necessary adhesion of materials. If the work is carried out on a base of wood boards (chip and fiber), then problems arise. First of all, this is the subsequent peeling of strips in corners and at joints. Such defects arise due to poor surface preparation; it requires much more time and effort.
Indeed, gluing wallpaper on fiberboard, chipboard and MDF is not easy, but if everything is done step by step and correctly, the integrity of the coating will be ensured.
Surface preparation
- The door leaf is removed from the hinges. If the hinges are old, you will need a pry bar. Self-tapping screws can be easily unscrewed with a screwdriver.
- The door is placed on the floor or on an installed platform, which can be two chairs. The fittings are removed.
- After removing the handles, decor, and hinges, you can begin to clean the base from the old paint layer. It can be removed with a hair dryer, iron or metal spatula.
- If you are going to paste over a new canvas made of coniferous trees, then you need to remove the resin and knots from it with a knife, and then treat the area with acetone.
- The cleaned surface is leveled. Existing protrusions are sanded with sandpaper. Cracks, chips, and pits are filled with a mixture based on wood glue. This way you can restore door leaves made of stacked solid wood, chipboard, and MDF.
- After sanding, the base is primed.
To protect the floor from contamination, it must be covered with oilcloth or a piece of polyethylene.
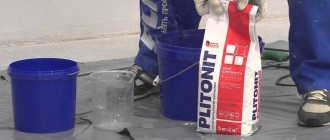
Why do you need putty?
This composition must be used if you want to install roll products on the walls in a high-quality manner. It performs the following functions:
- Creating the right clutch. In the production of wood-based panels, various resins are used, which ensure the unity of the canvas, but prevent the wallpaper from setting.
- Base protection. Due to the porosity of the material (especially untreated chipboard), the glue is quickly absorbed without creating a binding film, so application must be repeated many times. The use of a water-based composition may lead to surface deformation.
- Leveling the coating. For filing vertical structures, panels of not the highest class are used, and puttying allows you to eliminate existing shortcomings (depressions, chips, scratches).
How to glue veneer
There are three main gluing methods.
Whichever method is used, after the mixture has completely dried, you need to cut off the allowances and lightly sand the surface with No. 3 sandpaper. Then it is opened with colorless furniture nitro varnish, which dries quickly. The parts can be used no earlier than one day after veneering.
Cold contact method
The most difficult method of gluing to a prepared surface. To glue the veneer, you will need contact adhesive. The main problem of the method is that the glue sets quickly, and any inaccuracies in placement or defects in the contact of surfaces cannot be corrected after adhesion.
If the surfaces are placed correctly, then for reliable coupling they need to be given a strong pressing force. Immediately after the materials come into contact, they should be pressed with your hands for a few seconds or placed under a press. This method is better for gluing small bases.
Hot gluing
The surfaces are treated with glue, the composition dries. The wood sheet is carefully applied according to the markings made. Then the sheet is gradually smoothed with an iron. Movements are performed from the center to the edge. To avoid damaging the surface of the veneer, iron it through white paper. Under the influence of high temperature, the glue melts and the surfaces stick together. This method can be used to glue veneer onto plywood.
Technology for gluing rolled products
You can wallpaper wood panels only with your own hands. In order for all procedures to be performed correctly, it is necessary to observe accuracy and sequence of actions.
Materials and tools
For pasting work you will need the following materials and equipment:
- Primer. It is necessary to choose a composition with deep penetration. The best option is polymer mixtures. You can also use “concrete contact”.
To treat the base, exceptionally deep penetration soil is used.
- Wallpaper. The variety is selected based on the wishes and style of the room. Single-layer paper products should be abandoned.
- Glue. For each type of material there is a special composition.
- Putty. It is recommended to purchase acrylic or oil-based putty for chipboard that is elastic. This is especially true for newly built houses. Ready-made solutions are preferred.
The putty must be intended for wood or wood-based materials - Serpyanka mesh. Required for reinforcing slab joints.
- Brushes and roller. To apply primer and glue, several types and replaceable nozzles should be provided.
- Set of spatulas. You will need a small, medium and wide tool.
- Containers for mixing solutions.
- Devices for smoothing wallpaper.
Minimum set of tools for puttying walls.
Everything you need must be purchased in advance. If used tools are used, they are first cleaned of previous materials.Surface preparation
The application of roll products to different panels may vary slightly, so it is necessary to proceed from the specific situation. Preliminary work includes a number of procedures, individual for each type:
- Chipboard. This base needs sanding. The fact is that the upper structure is not always uniform, particles can flake off. To prevent them from interfering with work in the future, they are removed with sandpaper.
Fiberboard. Gluing wallpaper to fibreboards is much more difficult. This is explained by the fact that the front side of the hardboard is impregnated with a paraffin-based composition to increase moisture resistance. When gluing decorative products, this creates difficulties, so the slabs are processed with a grinding machine, evenly removing a very thin layer.
- Chipboard. The laminated coating also makes adhesion difficult, so this surface is carefully sanded - as in the previous version - until a rough base is obtained.
- MDF. To hang wallpaper on an MDF panel, you will need to perform similar procedures, but be careful: the surface only needs light sanding.
All wood-based materials must be sanded before finishing.
General preparatory processes after completion of preliminary work:
Padding. Using a roller, the surface is covered with two layers of the composition, each one is dried.
The primer is applied with a brush or roller. Sealing of joints. When working with fiber boards, the edges of adjacent ends are cut at an angle with a construction knife. Chipboard walls are not subject to jointing. Next, the seams are filled and the excess is removed.
The first to be puttied are the seams and fastening screws. Laying serpyanka. It covers the front and corner joints (there is a special variety), and a thin layer of the mixture is applied on top, completely covering the reinforcing mesh.
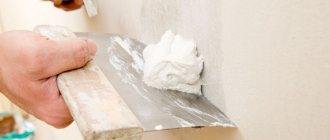
Serpyanka fiberglass mesh significantly increases the level of adhesion to the puttying surface. The base should be puttyed as follows: the solution is scooped onto the blade of a wide spatula and distributed over the surface using arcuate movements from top to bottom. The procedure is repeated, after which the coating is primed.
The putty dries for at least 2 - 3 days.
The walls are left until completely dry.
On a note! If the vertical structure has a deviation, then it is initially recommended to plaster the surface, and then lay the finishing layer of putty.
Pasting
Work begins with assessing the adhesion of the putty; for this, the surface is tapped a little. If there are no delaminations, proceed to the process:
Wallpaper pasting tool
- The work area is pre-prepared and all unnecessary items are removed. Wallpaper should be cut taking into account the fit of the pattern.
- It is recommended to start gluing from the window opening. The first strip is carefully measured, since the remaining fragments are oriented towards it.
- The glue is evenly applied to the underside of the wallpaper, after which the sheets are folded in half. This will avoid drying out and ensure the desired level of impregnation. If required, the wall is also treated with the solution.
- The strip is placed in its place, adjusted from above and pressed. For smoothing, use a rag or rubber spatula.
- The remaining elements are glued in a similar way.
The algorithm for gluing wallpaper does not change depending on the type of base.
There is a recommendation that the surfaces should be varnished. Indeed, this can be done, but achieving the desired decorative effect will be difficult. In addition, the face layer will become heavier, which can lead to peeling.
You should know! If the strips are connected end-to-end, then it is advisable to attach a special intermediate tape.
Tools for work
To perform the job of gluing PVC wall corners onto wallpaper efficiently, you will need the following tools:
Features of applying liquid wallpaper
Working with this material differs from the previous process in the technology of the last stage. This variety must be laid with a spatula and a trowel according to a pattern identical to puttying. To do this, the pre-prepared mixture is distributed into sections in an even layer.
The technique of gluing liquid wallpaper is similar to applying putty
There is an opinion that when using liquid wallpaper, putty is not needed, but the technology should not be violated.
What to do if the veneer comes off
Peeled veneer on furniture is smeared with glue and rubbed in with a piece of flannel. It needs to be folded in several layers and a block of dense wood placed inside. Lapping will not harm the varnish coating.
Sometimes the veneer peels off, completely exposing the base. To correct the defect, after gluing the remaining veneer and grinding it in, the open area of the base is puttied and then tinted with stain. The stain is matched to match the coating. The restoration is completed by applying several layers of varnish.
Source: kraskaguru.ru
Is it possible to glue wallpaper onto wood boards?
There are two opposing opinions on this issue. Some of the craftsmen talk about the complete impossibility of carrying out such internal work, while the other says the opposite.
The fact is that non-woven, vinyl and paper products are usually glued without serious surface preparation. Often this is a simple matter of removing old coating. But this happens in the case of walls finished with plaster, which ensures the necessary adhesion of materials. If the work is carried out on a base of wood boards (chip and fiber), then problems arise. First of all, this is the subsequent peeling of strips in corners and at joints. Such defects arise due to poor surface preparation; it requires much more time and effort.
Indeed, gluing wallpaper on fiberboard, chipboard and MDF is not easy, but if everything is done step by step and correctly, the integrity of the coating will be ensured.
Frameless installation - covering walls with panels
There is an alternative installation method that involves the use of “liquid nails” glue. The panels can be glued either to the frame or directly to the walls, if the unevenness on them does not exceed 2 mm/m. Often this is the method chosen for cladding unfinished brick or block masonry; it is only important to choose the correct adhesive composition.
It is recommended to use quality products. The glue must remain flexible after drying; give preference to compounds based on rubber or polyurethane. For occasionally heated dachas, you should choose frost-resistant glue; other features are determined by the surface material for gluing.
Don't forget to properly prepare the walls. Masonry and plaster must be thoroughly impregnated with primer mixtures to increase adhesion.
Why do you need putty?
This composition must be used if you want to install roll products on the walls in a high-quality manner. It performs the following functions:
- Creating the right clutch. In the production of wood-based panels, various resins are used, which ensure the unity of the canvas, but prevent the wallpaper from setting.
- Base protection. Due to the porosity of the material (especially untreated chipboard), the glue is quickly absorbed without creating a binding film, so application must be repeated many times. The use of a water-based composition may lead to surface deformation.
- Leveling the coating. For filing vertical structures, panels of not the highest class are used, and puttying allows you to eliminate existing shortcomings (depressions, chips, scratches).
It is impossible to glue wallpaper onto a wood base without preliminary putty.
Also, a significant problem is stains that can appear on the decorative layer due to the presence of resins in the composition of the sheet. They appear even after a significant amount of time and spoil the appearance of the walls.
Preparation and cutting of material
In construction stores, wood sheets are sold in rolls. Before you start cutting, the roll needs to be rolled out and straightened. Straightening is carried out by wetting with further placement under a press.
The operating principle is as follows:
- rolled out the roll;
- moistened it generously with a damp cloth;
- Lay a layer of plywood or drywall and press down.
When the roll is flattened, they proceed to cutting.
- Measurements are taken from the prepared door leaf.
- The measurements taken are transferred to the wood sheet with a 5 cm gap added on each side. The stock helps to avoid problems with incorrectly taken measurements.
- You can cut the canvas with a plywood knife or a plunge-cut saw. The smoothest cut will be made with power tools. But you cannot work with scissors; they can lead to cracking and damage to the material.
If, on the contrary, you need to make a single structure from several sheets, you can connect them with gummed tape, having previously selected a pattern on the front side. The tape needs to be passed both along the joints and perpendicular to them. The connected structure should extend 7-10 cm beyond the veneered base.
Technology for gluing rolled products
You can wallpaper wood panels only with your own hands. In order for all procedures to be performed correctly, it is necessary to observe accuracy and sequence of actions.
Materials and tools
For pasting work you will need the following materials and equipment:
- Primer. It is necessary to choose a composition with deep penetration. The best option is polymer mixtures. You can also use “concrete contact”.
To treat the base, exceptionally deep penetration soil is used.
Everything you need is purchased in advance. If used tools are used, they are first cleaned of previous materials.
Surface preparation
The application of roll products to different panels may vary slightly, so it is necessary to proceed from the specific situation. Preliminary work includes a number of procedures, individual for each type:
- Chipboard. This base needs sanding. The fact is that the upper structure is not always uniform, particles can flake off. To prevent them from interfering with work in the future, they are removed with sandpaper.
Fiberboard. Gluing wallpaper to fibreboards is much more difficult. This is explained by the fact that the front side of the hardboard is impregnated with a paraffin-based composition to increase moisture resistance. When gluing decorative products, this creates difficulties, so the slabs are processed with a grinding machine, evenly removing a very thin layer.
All wood-based materials must be sanded before finishing.
General preparatory processes after completion of preliminary work:
- Padding. Using a roller, the surface is covered with two layers of the composition, each one is dried.
The primer is applied with a brush or roller. Sealing of joints.
When working with fiber boards, the edges of adjacent ends are cut at an angle with a construction knife. Chipboard walls are not subject to jointing. Next, the seams are filled and the excess is removed. The first to be puttied are the seams and fastening screws. Laying serpyanka. It covers the front and corner joints (there is a special variety), and a thin layer of the mixture is applied on top, completely covering the reinforcing mesh. Serpyanka fiberglass mesh significantly increases the level of adhesion to the puttying surface. The base should be puttyed as follows: the solution is scooped onto the blade of a wide spatula and distributed over the surface using arcuate movements from top to bottom. The procedure is repeated, after which the coating is primed. The putty dries for at least 2 - 3 days. The walls are left until completely dry.
On a note! If the vertical structure has a deviation, then it is initially recommended to plaster the surface, and then lay the finishing layer of putty.
Pasting
Work begins with assessing the adhesion of the putty; for this, the surface is tapped a little. If there are no delaminations, proceed to the process:
Wallpaper pasting tool
- The work area is pre-prepared and all unnecessary items are removed. Wallpaper should be cut taking into account the fit of the pattern.
- It is recommended to start gluing from the window opening. The first strip is carefully measured, since the remaining fragments are oriented towards it.
- The glue is evenly applied to the underside of the wallpaper, after which the sheets are folded in half. This will avoid drying out and ensure the desired level of impregnation. If required, the wall is also treated with the solution.
- The strip is placed in its place, adjusted from above and pressed. For smoothing, use a rag or rubber spatula.
- The remaining elements are glued in a similar way.
The algorithm for gluing wallpaper does not change depending on the type of base.
There is a recommendation that the surfaces should be varnished. Indeed, this can be done, but achieving the desired decorative effect will be difficult. In addition, the face layer will become heavier, which can lead to peeling.
You should know! If the strips are connected end-to-end, then it is advisable to attach a special intermediate tape.
Features of applying liquid wallpaper
Working with this material differs from the previous process in the technology of the last stage. This variety must be laid with a spatula and a trowel according to a pattern identical to puttying. To do this, the pre-prepared mixture is distributed into sections in an even layer.
The technique of gluing liquid wallpaper is similar to applying putty
There is an opinion that when using liquid wallpaper, putty is not needed, but the technology should not be violated.