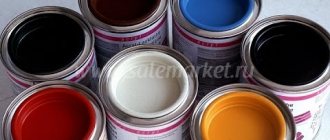
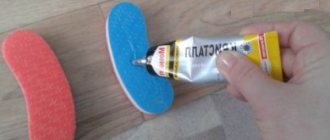
The basis of any epoxy floor is a two-phase composition of epoxy resin and its hardener. Also, the composition of the components of this type of coating can be supplemented with various additives that stabilize the mixture and increase the strength of the coating to mechanical damage (latex, casein), as well as substances that promote the fluidity of the solution. Before pouring the floor, pigments are added to the mixture. This is done to give it the desired shade.
To give the mixture the desired shade, special additives are added to it.
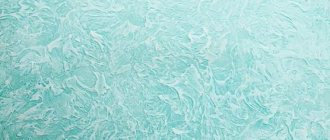
Sometimes, for a decorative effect, the composition is supplemented with diamond or other mineral chips, but such mixtures are very difficult to polish after hardening. This circumstance will create certain difficulties if you decide to make an epoxy floor with your own hands.
Sometimes the mixtures are supplemented with diamond chips
Distinctive advantages and disadvantages
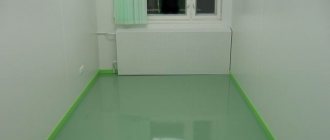
The optimal combination of components that make up an epoxy self-leveling floor gives it a number of special positive properties.
- High resistance to wear: such a surface will last for decades and will retain its presentable appearance for a long time.
- Easy to maintain: thanks to the monolithic structure of the floor, its surface is less susceptible to the accumulation of dirt and, as a result, the proliferation of colonies of harmful microorganisms on its surface. A flat and smooth surface is easier to wet clean and requires minimal consumption of cleaning agents and disinfectants.
- Resistance to temperature changes: Epoxy liquid floors can withstand various temperature fluctuations. Therefore, they can be used even in baths. Such a coating can withstand winter in an unheated room and maintain its presentation and performance characteristics.
- Chemical resistance: the surface can withstand exposure to even highly concentrated acids and alkalis.
- Good waterproofing properties: this type of flooring does not require additional waterproofing in the room, since it is endowed with almost zero vapor permeability and copes with this task independently.
- Wide prospects for design solutions.
Such floors are very resistant and durable.
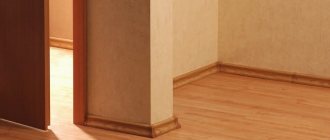
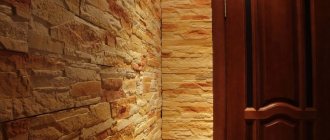
All the above-described advantages of epoxy self-leveling floors allow them to be used in premises for a wide variety of purposes, be it industrial workshops, chemical laboratories, industrial warehouses or public institutions (kindergartens, educational organizations, clinics, shopping centers, etc. ). Nowadays such floors are increasingly found in private houses and apartments.
Such floors have become more common in private houses and apartments
With all the wide range of advantages, epoxy self-leveling flooring is not without its disadvantages that should be taken into account.
- High labor intensity of preparatory work and high final cost of work and materials costs.
- Marking of the material: chips and scratches that appear during everyday use are clearly visible on the floor surface. When the need for repairs comes, it is almost impossible to choose the color of the composition that matches the damaged coating.
- Removing old coatings can be a difficult process that takes a lot of effort and time.
In addition to all the advantages, such floors also have disadvantages.
User reviews
On the Internet you can find many articles and reviews dedicated to the newfangled floor covering. Reviews about epoxy self-leveling floors boil down to the main opinion - so far this type of coating is very expensive. Although it is expected to operate for at least 20 years, people are not ready for such large expenses. On average, when purchasing an epoxy self-leveling floor, you will notice that the price of materials per m2 ranges from 350 rubles. It's quite expensive. Many users praise the self-leveling epoxy floor coating Rizopox 4101. Those who have had such a floor in their home for several years are very satisfied and recommend it to everyone. As noted by such users, during the operation of the floor it did not undergo any changes, did not fade or lose color after using special detergents.
Tips for choosing a self-leveling epoxy floor and calculating consumption
Depending on the purpose of the room prepared for installation of a self-leveling epoxy floor, a mixture with suitable characteristics is selected. Materials are classified according to the thickness of the applied coating.
It is advisable to use coatings for applying a thick layer if it is necessary to level a base with a large difference in height. Depending on the manufacturer’s recommendations, the thickness can range from 80 to 100 mm. The material consumption in this case is very high. Such mixtures are not intended for pouring a thin layer.
Compositions for forming a thin layer are used exclusively for finishing floor pouring. The thickness can even start from 1 mm. The consumption of materials will accordingly be the least.
Depending on the manufacturer’s recommendations, the thickness can range from 80 to 100 mm
Prices for mixtures for thin-layer epoxy self-leveling floors are an order of magnitude higher than those for thick layers. However, given that the consumption of such a mixture is very low, the final price becomes quite acceptable.
You can calculate the cost of covering a room by multiplying the product of the height and area of the coating by the density of the solution. For example, for 1 m² of floor with a thickness of 1 mm, one liter of mixture will be required. Multiplying the volume by the density of the composition 1.3 kg/l, we get 1.3 kg of finished mass. Some manufacturers, in order to reduce the cost of mixtures for self-leveling floors, introduce heavy additives into their composition, such as barite or quartz and river sand, as a result the density of the mixture increases to 1.65-1.75 kg/l. Consumption will increase accordingly. As a result, at the same price per kilogram, material consumption will increase by almost 30%!
Mixture consumption may vary depending on the purpose
Highly filled epoxy coatings
Epoxy coating + for concrete floors is also called “quartz floor”, “stone carpet”, “colored sand”. In these mixtures, the mass fraction of fillers reaches 85%, which makes their properties close to those of polymer concrete. Due to the high density of coatings, they have almost the same linear expansion coefficient as concrete bases. Therefore, “stone carpets” are distinguished by enviable longevity, and they adhere perfectly to concrete.
For example, 15 years ago we laid a highly filled coating in one of the premises of the Metro shopping center (today there is a fish department here). During this time, the coating of heavy-duty concrete with topping at the entrance to the center fell into disrepair, and the “colored sands” are still in excellent condition. The decorative and operational advantages of this material are so high that in Paris it is widely used for flooring in the subway and for the design of sidewalks.
Installation of highly filled epoxy coatings costs 1.5–2 times more than self-leveling floors.
They can have a thickness of up to 10 mm. “Stone carpets” are reliable, durable and withstand temperature changes well, so they are widely used in the construction of ramps, stairs, entrances and in landscape design. Fillers are painted in all colors according to the RAL catalogue. They can be mixed in any combination, which further expands the possibilities for decorating coatings.
Required tools and materials
To achieve the best possible result, you will need the following list of tools and special protective equipment:
- Grinder;
- vacuum cleaner;
- container for mixing the solution;
- drill with screw attachment;
- high pile roller;
- squeegee;
- needle roller;
- gloves;
- paint shoes;
- respirator;
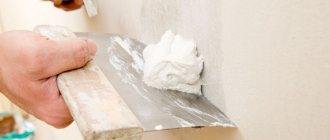
- putty knife.
Needle roller for self-leveling floor
Materials that will be needed at all stages of work:
- seam sealant;
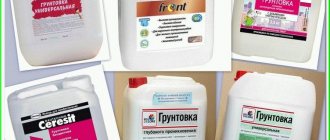
- primer;
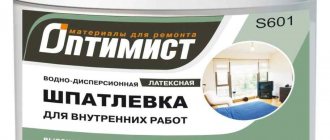
- potting mixture;
- polyurethane varnish;
- polymer composition.
Before starting work, you should prepare thoroughly
Epoxy self-leveling floor - pouring technology
The ready-made epoxy compositions that exist today allow you to fill the floor with your own hands, without having any special skills in this matter or special expensive tools.
Before you begin the process of installing an epoxy floor, you will have to take time to prepare the room in which the work will be carried out. The main requirements for the surface on which the future floor will be applied will be its strict horizontal orientation and minimal humidity. The permissible slope in the horizontal plane is 2 mm per two meters of surface length. Maximum surface humidity is 4%. This requirement is due to the close to zero vapor permeability of epoxy resin.
Now there are mixtures that do not require special preparation skills
Excess moisture from the base will quickly begin to destroy the base layer. If the mixture will be applied in place of the previous coating, traces of paint, grease stains and other contaminants should be removed, then all chips, seams and cracks should be repaired. The seams are primed and filled with sealant. The base can be secured by applying epoxy paint to it.
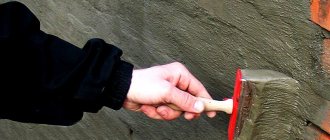
Before you start priming the floor, you need to remove any dust that has settled on it using a vacuum cleaner. After this, you can begin applying the primer layer. If the surface texture is rough, then two coats will be sufficient, but if the surface is smooth, 3-4 coats should be applied. Each successive layer is applied only on top of the completely dried previous one. Priming helps to increase the adhesion of the base to the material applied to it.
Before starting work, you should remove all debris with a vacuum cleaner.
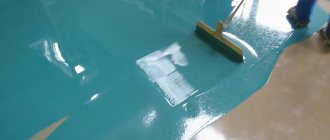
You can start pouring the base layer when the top layer of primer is completely dry. The mixture with an epoxy resin base is applied in wide stripes. To evenly roll out the initial layer, it is better to use a squeegee. It is more convenient to work in the corners of the room with a spatula. To avoid leaving marks on an already filled surface, you should wear paint shoes. Once the solution has completely filled the floor area, it is important to roll the entire surface with a needle roller to remove air bubbles.
It is important to know that in the prepared solution the polymerization processes will take effect within 30 minutes, so you should prepare and apply the epoxy mixture in portions so that it does not have time to harden before pouring and leveling. Work is carried out at a temperature not lower than 10C. There should be no drafts or sudden changes in temperature in the room until the solution completely hardens.
It takes 2 days for the floor to dry completely.
Epoxy floors dry in about 7 hours, but are fully cured in about two days. Only after complete polymerization can you proceed to pouring the finishing layer.
Before applying the final layer of self-leveling epoxy flooring, a decorative coating is applied to the base layer. It could just be a layer of decorating chips. The most original options would be surface painting with acrylic paints or a banner network with any digital image. Modern three-dimensional printing of the image you like will add special chic to the flooring.
Floors painted or digitally patterned will look very nice.
After pouring the finishing layer, wait until the surface has completely hardened and secure the result with a layer of polyurethane varnish. After the varnish has dried, which will happen in two days, you can use the room for its intended purpose.
If you strictly follow the pouring technology and sequence of work, epoxy floors will serve you for decades. No other type of flooring offers such durability coupled with aesthetic appeal.