PVC plinth - dimensions, GOST (polyvinyl chloride plinth) - the technical characteristics of this material and the features of working with it are of interest to many who have decided to start renovations in their home.
Polyvinyl chloride, or PVC, plinth is very convenient, first of all, because it comes with a cable channel - a special internal compartment for wires from various electrical equipment. By installing such a plinth and hiding all the cables inside it, you will preserve the aesthetic appearance of the room, stop suffering the inconvenience of getting tangled in cords, and protect the wire system from damage by pets.
In addition, such skirting boards are usually available in ready-to-install kits with corners, caps and connectors. If you need to remove new wires inside the cable channel, you can easily do this thanks to the removable panels. Choosing the appropriate color for PVC skirting boards is also not difficult today.
Externally, such a border looks neat and stylish; its durability is ensured by the fact that it does not deteriorate under the influence of changes in temperature and humidity, and is practically not deformed from impacts. PVC skirting boards are environmentally safe, so they can be safely installed in residential premises, including children's rooms.
If the floor plinth and its color play an important role in the interior you have planned, then with PVC plinth you will not have any difficulty in realizing your idea: this material can be easily painted, or you can immediately purchase a product of the desired color, fortunately, there is a lot of choice on the market in this regard.
Advantages and disadvantages
Plastic floor plinth is a practical solution that allows you to solve two problems at the same time - to give a finished look to the room and, if necessary, to hide wires, of which there are more than enough in our homes.
Plastic floor plinth - a practical solution
PVC floor skirting boards have the following advantages:
- Light weight.
- Simple installation, no preliminary or subsequent preparation required.
- Long service life, resistance to ultraviolet radiation and household chemicals.
- Easy maintenance, no need to regularly update the decorative coating.
- Harmlessness.
Installing plastic floor skirting is a practical solution. They are gradually replacing traditional wooden planks, as they are superior to them in many respects. There are few disadvantages. The first is that plastic is an unnatural material. The second is the flammability of plastics and the possibility of releasing harmful substances.
Using a PVC floor plinth with a cable channel, you can covertly route wires/cables
You won’t be able to argue anything with unnaturalness, but there is already so much “unnatural” around that this detail won’t play a role. In addition, good plastic is chemically neutral and does not emit any harmful substances in its normal state.
The flammability of plastics varies - there are plastics that do not burn and do not spread combustion, and there are those with reduced smoke emission, in which harmful substances are still minimized. So, if you wish, you can find a non-flammable plastic floor plinth.
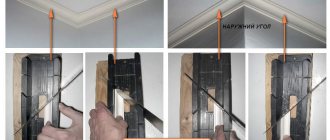
Main stages of installation work
The photo shows the installation procedure.
Since the installation of plastic floor plinths is carried out after all repair and construction work, it is necessary to thoroughly clean the room before installation.
Tool
During the installation process you will definitely need the following tools:
- drill-driver;
- roulette;
- saw and miter box;
- hammer;
- marker or pencil.
Consumables
- dowels;
- screws or self-tapping screws;
- plugs for self-tapping screws or self-tapping screws (if necessary).
Marking work
The next stage of work is marking the mounting locations for the plinth. The standard step is 40-45 cm, but is not suitable for all cases, since often the walls are not perfectly smooth. In addition, there may be various protruding or, on the contrary, recessed places, for example, niches, which requires adjustment of the markings.
This stage can be combined with cutting the plinth into pieces. For smooth walls without obstacles, use the full length of the plinth, and then use a saw and miter box to cut off pieces of the required length for the remaining sections.
Installing a plastic plinth using dowels
The photo shows the fastening of the baseboards.
Next, the installation itself begins, and most often the craftsmen solve the problem of how to fasten the baseboard in favor of the method of connecting with dowels using self-tapping screws or self-tapping screws.
First, according to the markings, holes are drilled for dowels, which are hammered into them using a hammer. Having attached the appropriate piece of plinth, a place for a hole is marked on it, which is also drilled with a drill, but carefully, at low speeds.
Then, placing the plinth against the wall, screw in a screw or self-tapping screw. Experienced craftsmen do not advise completely tightening the entire section until the end of the connection, since tightening with a screwdriver can damage the coating of the product or warp it.
This danger increases with uneven walls. It is better to finally tighten the screw or self-tapping screw with a regular screwdriver. At the end, you should cover the heads of the self-tapping screws or screws with decorative “hats”.
The product should be attached to clips in the same way, except that there is no need to drill the baseboard itself. In addition, clips or clamps are screwed to the wall, onto which the baseboard is snapped using special grooves.
Types of plastic skirting boards
Plastic floor plinth can be of the following varieties:
- ordinary;
- flexible;
- with cable channel;
- with a flexible (rubberized) edge;
- for painting.
Let's take a closer look at each variety.
Flexible PVC skirting board
If it is necessary to design columns, curved walls, roundings, a problem arises - it is problematic to use ordinary rigid planks - you have to cut them into small segments and join them using connecting elements. It takes a lot of time, the money is expensive, and the look is far from ideal, since it still turns out to be a broken line, not a smooth curve.
This is how rounded walls are decorated with standard plinths and plastics
In such cases, it is better to use a flexible baseboard. The term “flexible” is relative. In its normal state it is rigid, but bends well only when the temperature rises. Before installation on curved surfaces, it is heated with a construction hairdryer to 60-70°C, bent into the shape required and secured.
Flexible plastic floor plinth can be bent to a small radius
Easy to design a column
The width is small, you can choose the color
After cooling, it will acquire its original rigidity. They can easily decorate a column, for example, not to mention a smooth curve.
With soft edge
Plastic floor plinth is the most elastic of these products. If necessary, it can be pulled so that it fits even against an uneven wall. But it is possible to achieve complete adherence to an uneven wall without the slightest cracks only if its upper edge is made elastic - rubber.
The rubberized edge makes it possible to avoid even the slightest cracks
The elastic edge has the same color, although it is made of plastic material. Due to its high elasticity, it bends around even the slightest irregularities, leaving no cracks or gaps.
With cable channel
In a modern home there is more and more equipment and wires going to it. One of the most convenient and cheapest ways to conceal cables throughout an apartment or house is to install a plastic floor plinth with a cable duct.
A cable channel is a specially formed recess/cavity along the entire length of the baseboard. Several wires are laid in this recess - television, telephone, computer cables. There are two types:
- With a molded recess in the body of the baseboard itself and a removable decorative strip. First, the plinth is installed, then the cables are laid in the recess, and then the strip is closed.
This is a plastic floor plinth with a molded recess for cable routing. - It consists of two parts - a plastic/metal mounting strip, which is a cable channel, and a decorative plastic cover. The bar has molded cavities for laying the cable. It is mounted on the wall, the cable is laid in it, after which the plastic part - actually, the baseboard - snaps onto this strip.
This plinth with cable channels consists of two parts
The number of cables to be laid depends on the size of the cavities in them. There is more space in models of the second type - with a separately mounted cable channel. But the capabilities of the first type can be expanded by placing wires in the cavities above and below the molded channel. The difficulty is that access to them will be difficult - they are located under the baseboard. To get to them, you will have to dismantle it. Therefore, it is advisable to lay wires here that rarely require maintenance - television, Internet, etc.
For painting
There is a plastic floor plinth made of foamed PVC. Due to the use of porous material, the surface can be painted. A good option if you need a non-standard color scheme. After all, the range of colors is still limited, but this way you can choose the desired shade.
Non-standard solution - plastic floor plinth made of foamed PVC for painting
Technical features of polyvinyl chloride plinth
Repair without problems
The popularity of the product is due to its high functionality. Unlike wood, it does not require additional processing and is completely ready for installation.
Technical characteristics of polyvinyl chloride plinth:
- the need for drilling walls for laying wires has been eliminated - a cable channel is provided inside the strip;
- simple installation without special preparation;
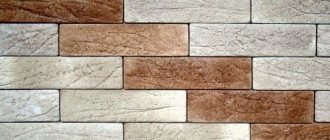
- wide range of colors - almost any shade is available from white to black, you can order the plinth in an unusual design;
- the surface imitates natural wood;
- not subject to damage due to mechanical shocks;
- completely resistant to moisture;
- repeated installation and dismantling of the structure is available;
- a perfectly flat and smooth surface does not require additional processing or coating;
- easy to clean and resistant to detergents.
Despite its many advantages, polyvinyl chloride skirting boards also have their disadvantages:
- becomes brittle at sub-zero temperatures;
- Compared to natural wood, it looks simpler and is not suitable for noble antique interiors with an abundance of massive furniture.
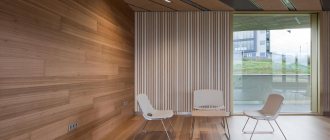
Scope of application of PVC skirting boards
Plastic and laminate - a good combination
Polyvinyl chloride skirting boards have firmly entered modern life. They are used for decorative finishing of residential interiors and public places. They are suitable for floor coverings made of artificial materials - laminate, linoleum, carpet.
Household use:
- installation of additional sockets;
- transfer of large household devices with further wiring;
- installation of a satellite dish or computer equipment - cable pulling may be required.
GOST is the key to quality products
Quality standard
Electrical combined polyvinyl chloride skirting boards in accordance with GOST 19111-2001 are molded products for interior decoration.
They must meet the following requirements:
- manufactured according to technical drawings in accordance with GOST regulations;
- Skirting boards are produced with different surfaces - smooth, matte, glossy. Embossed and corrugated surfaces using various dyes are allowed;
- when selling, all products in a batch must have the same uniform color;
- The color of the plinth must be stable and not fade from sunlight or electric lighting;
- There should be no defects on the front surface - tubercles, dents, cracks, stains;
- All edges are smooth without nicks or bends;
- Products are packaged in packs wrapped in plastic film, taking into account the protection of the ends.
According to GOST R50827-95, electrical PVC skirting boards must have the following differences:
- Removable front panel for quick wiring during the repair process and after its completion - does not violate the integrity of the product;
- Availability of 3 sections of cable channel for additional convenience;
- Installation is carried out directly on the surface. If the installation of a power cable is not intended, then self-tapping screws are used for fastening; otherwise, liquid nails are used.
A product that fully meets the stated requirements will last a long time and will not lose its performance characteristics.
Dimensions
Plastic is one of the most flexible materials, allowing you to make products of any shape and size. Therefore, a plastic floor plinth can be of any cross-section and size, but it still has certain limitations that are related to the practical side. In general, plastic skirting boards are produced with the following parameters:
- height 50-120 mm;
- thickness 10-26 mm;
- length 2000-25000 mm.
Some types of plastic floor skirting boards with dimensions
These are the most common sizes, but there are some variations. For example, there are wider ones at the bottom - about 50 mm. They are needed if the gap between the wall and the floor covering is slightly larger than what the technology requires.
Rules for calculating the amount of material for installation
In the case where the work of installing the plinth is done with your own hands, it may be difficult to calculate the required amount of material. It is not enough to just measure the length of the room around the perimeter.
How to correctly calculate the required quantity
Photo - the plinth goes around an obstacle.
Since the standard length of a plastic floor plinth is 2.5 meters, we should proceed from this value - you can simply divide the length of the perimeter by 2.5 m and get the number of units of material. You need to round up.
You should also take into account the length of the walls in the room in order to avoid a large number of joints on each of them. For average rooms, 1-3 joining seams on each side are optimal. Sometimes joining is carried out in places of decorative and technical protrusions, which should also be taken into account.
You can use an online service, which allows you to get fairly accurate data. It is only necessary that the instructions be strictly followed when performing the calculation.
Advice. It is better to buy material with a small reserve than to save, arguing that if there is not enough, you can buy more. Products from different batches, even from the same manufacturer, can have quite noticeable external differences.
Additional elements
When installing a plastic floor plinth, you will need not only the plinths themselves, but also additional (additional) elements to them. This:
- External and internal corner.
- Connector - for joining two pieces of plinth.
- Plugs - for designing cuts at the junction with the doors.
- Brackets - for laying cables in corners.
Types of additional elements for PVC floor skirting boards
The number of additional elements is calculated for each individual case. You will have to count how many external and internal corners there are in the room being designed. Counting the plugs is also easy - two are required for each doorway. It’s a little more difficult to determine the number of connectors, but you can take them with a reserve.
How to install a plastic floor plinth: three installation methods
Do-it-yourself installation of plastic skirting boards takes place in a certain sequence and can be done by anyone who has ever held a drill in their hands.
Connectors and fastenings for plastic floor plinths
For fastening plastic profiles, they usually use: plastic strips or metal clips, which must be screwed along the length of the decor being installed.
Moldings for plastic decor
For almost all types of plastic curtain rods, the elements are connected through special moldings:
- corners - they come in two types: internal and external;
- connectors - they are used to join pieces of planks in a straight line;
- caps, left and right - are intended for decorating the end sections of the plank, say, from the edges of a doorway or furniture located close to the wall.
It is advisable to buy connectors with a reserve, since it is impossible to completely eliminate the possibility of unexpected trimming.
Installing a plastic skirting board with self-tapping screws
Marking
Marking begins from the corner of the room, which is located farthest from the front door, on the long wall. Place a corner on a plastic plinth and apply it to the selected corner so that the corner fits exactly into it. The first segment is marked at a distance of 50-100 mm from the end of the corner, and the rest - in increments of 250-500 mm. The marks should be located in the center of the bar.
On level areas, the marking step is chosen larger; for uneven areas, the opposite is true.
How to make holes for screws
Making holes
- For brick and concrete walls, holes are drilled at the marked points and dowels are driven in, after removing the debris and dust generated from drilling.
- For plasterboard and other similar materials, screws are driven into the plank without pre-drilling.
Installation of skirting boards
Remove the decorative strip from the baseboard and apply it to the marked wall with screwed-in dowels. They pierce it with an awl in the places where the dowels are attached and insert the screws. They need to be screwed in all the way, but not so much as to dent the bar.
It is recommended not to tighten the screws too much so that the plank can evenly adhere to the wall.
Having secured the first segment, insert a connector into its end, tightly fit the beginning of the next segment and fix it. It is recommended to place the plinth pieces so that the connection is in the middle of the wall.
Installation of skirting boards
Installation methods
There are two ways to install plastic skirting boards:
- Screws or dowel-nails through the surface of the baseboard.
- Using special clips.
There is also a way to attach it
The second option is only suitable if the walls are perfectly smooth. On walls with curvature, it is better to use the usual fastening method - using self-tapping screws or dowels, the plastic floor plinth can be pulled close to the wall so that it does not lag behind the wall. In this case, it is better to use models with a rubberized edge.
Fastening with clips
This method of fastening is implemented using two types of fasteners - clips in the form of separate plates and a long plate of the same length as the plastic baseboard. The difference is that the long clamp is used as a cable channel, that is, in this case, cables/wires can be hidden in the plastic plinth.
The principle of fastening clamps of any type is the same:
- Clips are attached to the wall.
- The plastic part simply snaps onto them.
Fastening plastic skirting boards using clips
It’s worth saying again: this method is only for perfectly smooth walls, otherwise the result will be unsatisfactory. The procedure is simple:
- A mark is made on the wall at the height where the clip will be located.
- A horizontal line is drawn along the mark (it is convenient to use a laser level).
- Focusing on the line, attach clips or a bar with a cable channel.
- Laying cables. They can be additionally secured with plastic ties or double-sided tape.
- The front panel of the plinth is installed.
PVC plinth with a separate cable channel is installed in almost the same way
When installing, it is important to place the clips at the same level. Only then will it be possible to secure the decorative strip without problems. The permissible run-up is less than a millimeter, so before fastening we try to carefully check the position of the fastening bar or clip. One option is to make a template. To do this, cut a piece about 15 cm long, make a hole in it and use it as a measurement, applying it in the right places.
Installation through the baseboard using dowels/screws
This method is also suitable for not very smooth walls. A hole is made in the plinth, through it, using a self-tapping screw or dowel, it is attached to the wall.
Everything seems simple, but only until you start doing it yourself. And here problems arise: in what order is it better to drill, at what distance from each other to install the fasteners, how to do it so as not to spoil the appearance too much.
There are several ways, but the most correct algorithm for installing a plastic floor plinth is as follows:
- We place the plank against the wall, press it, and level it. If there is an assistant, he keeps it in a fixed position. If you are working alone, secure it with masking tape. You can also drill and install one extreme fastener, which will firmly fix the bar and prevent it from moving.
Installation through the baseboard - Take a drill with a thin metal drill bit 3-4 mm. Take a longer drill so as not to damage the plastic with the chuck. We make marks on the profile and on the wall. First of all, we drill along the edges and in those places where the baseboard “lags behind” the wall.
- We apply intermediate marks in such a way that there is a distance of 35-40 cm between the fastening elements (in extreme cases, more is possible, but not more than 50 cm).
Drilling without damaging the baseboard or flooring - that’s the challenge
The last stage is masking the installation location of the fasteners. This step is eliminated if the plastic floor plinth had a formed cable channel and the fasteners were installed in this recess. If you had to drill through the front surface, we mask the remaining holes with stickers in the form of small circles, which are matched to the color of the baseboard.
Selection of screws/screws/dowel-nails
First, about the sizes - the load on plastic skirting boards is usually not very large, so they take small fasteners. Optimally - diameter 4-5 mm (6 mm is possible), length - 25-40 mm.
The color of the fasteners - white, yellow, black - is chosen depending on the color of the plastic plinth. The choice is simple - to make it least noticeable.
Fasteners are chosen with flat, wide heads
When choosing, look at the shape of the cap. It should be large and as flat as possible. In this case, it will be easy to disguise everything.
A few practical points
When installing a plastic floor plinth with a cable duct, it is more convenient to lay the cables already tied here and there into a bundle. If the cables are very hard, they tend to jump out. In this case, it is more convenient to use double-sided tape for the screed. This will hold the conductors in place.
You can cut some types of plastic floor plinths with a regular stationery/wallpaper knife, but it is better to use a saw with a metal blade
Even with the correct calculation of the length of the plinth pieces (they should extend 2-3 mm into the additional element), the outer corners tend to pop out. To get rid of this problem, the connection is coated with sealant. It is better to use silicone. After drying, it remains elastic and can be dismantled if necessary.
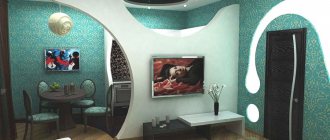
How to choose the right product by size and more.
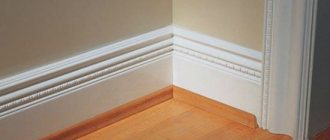
- Simple decorative panels should cover the area where the floor and walls meet.
- If you place the plinth on a wooden floor, in particular on parquet, then its base should be 2-3 mm larger than the thermal gap.
- The presence of an elastic edge somewhat complicates the calculation of the final installation area.
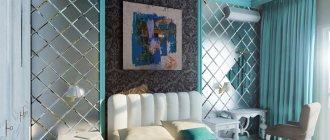
- The decor should fit into the color scheme of the floor and walls. Depending on the style of the interior of the room and the overall color, the plinth can either visibly delimit them, or visually continue the horizontal surface.
- For some floor coverings, say, carpet, special models are chosen.
- Products with a cable channel will help you organize full-fledged workplaces in the shortest possible time.
Plastic plinth in a modern interior
Thus, the selected plinth must satisfy two conditions:
- fit harmoniously into the interior of the room;
- perform a specific functional responsibility.
Baseboard device
The construction of polyvinyl chloride skirting boards will be useful for any home craftsman or future specialist to know. In addition to mechanical fasteners, liquid nails can be used. However, if you use this technology during installation, dismantling will be impossible.
The average height of the plinth is 52 mm, while its depth is 23 mm. Inside there is a cable channel, which is covered with a soft edge on top. There is the same one below. On top of this is an internal mounting panel. In the center there is an external decorative profile, which makes up the main part of the product.
What is PVC?
First, let's figure out what PVC is. The abbreviation simply stands for PolyVinyl Chloride. In other words, in its original form it is a transparent plastic material that has a lot of positive qualities, which are also inherent in the products made from it.
Let's list them:
- Chemical resistance to alkaline liquids, various solvents, acids and mineral oils.
- Fire safety - the material does not burn in air and melts at temperatures of 150–220°C. In this case, the maximum possible temperature of use is ±65°C.
- High dielectric properties, which makes it possible to produce PVC skirting boards (floor and ceiling) with cable ducts.
- Flexibility - products made of polyvinyl chloride have sufficient ductility and at the same time bending strength.
- The transparency of the source material allows you to experiment with color by adding various dyes during the production of products.
- Resistant to color retention - the material does not fade even in direct sunlight.
- Minimal water absorption, which allows the use of such material, in particular, baseboards, in any room, including wet ones - kitchens, bathrooms, bathrooms.
- Easy care - just any detergent and a soft cloth is enough.
- Easy installation allows you to carry out all the work yourself.
Positive qualities of plastic finishing
PVC skirting boards also have all of the above technical characteristics. Briefly it sounds like this:
- Durability.
- Easy to install.
- Versatility.
- Practicality.
- Reasonable price.
The durability of this finish is obvious. The thickness of the plinth walls is about 1 mm. Therefore, it withstands installation and dismantling well, and is also quite resistant to mechanical damage. In this case, of course, it is not expected that it will be kicked or hit with a hammer. Thanks to the properties of the plastic from which it is made, the plinth is not afraid of moisture, does not rot and is not damaged by corrosion.
Easy installation consists of fastening the product to the wall using liquid nails or self-tapping screws, which are screwed in in increments of 40–50 cm. Mounting clips are not required, but if desired, you can attach the baseboards to them as well. PVC skirting boards can be easily cut with a regular sharpened knife or metal file. The corners do not require additional processing with a file or sandpaper, since the top is covered with special PVC overlays that follow the shape of the treated area.
The versatility of finishing products made of polyvinyl chloride is a variety of colors and shades, as well as stylization of valuable wood species - oak, alder, ash and cherry.
The practicality of plastic products used for finishing lies in their increased bending ability. They can be used to decorate the joints of walls and floors if the geometry of these structures is far from ideal evenness. Regardless of the curvature of the wall, such products always fit tightly to it. The presence of a cable channel (many models have several of them, and they can hide up to 15 different wires) also indicates the practicality of plastic skirting boards.
The affordable price allows the use of such finishing material by almost all segments of the population, since its price is much lower than wooden models or those made from MDF. Skirting boards can be used both during new construction and during cosmetic or major renovations of premises.
Methods for attaching ceiling decorative elements
Mounting option for ceiling plinth
PVC skirting boards can be used to decorate the joints between the wall and the ceiling, which can be finished with any material. But PVC skirting boards ideally complement the ceiling, trimmed with panels made of a similar material - polyvinyl chloride.
In addition to a large number of advantages, these products also have several disadvantages:
- They are able to emphasize the unevenness of walls. Therefore, in this case, polyvinyl chloride skirting boards are not used.
- Skirting boards are thin, so they are unable to hide large gaps between the ceiling and the wall.
Among the advantages are:
- Minimum maintenance, maximum color matching - when purchased together with PVC panels.
- Possibility to buy polyvinyl chloride decorative products complete with fastenings for them.
- The ability to hide the gap between the ceiling covering and the wall, which is necessary when installing PVC panels. The material may expand slightly as the temperature rises; therefore, installing it close to the walls is prohibited.
There are two mounting methods:
- using UD profile;
- to the edge of the ceiling covering.
Both fixation options have a small error in the form of gaps between the covering of the walls or ceiling. It’s easy to get rid of them - all the cracks need to be filled with colorless or colored (to match the finish) sealant.