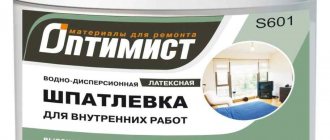
Putty is a preparatory stage before decorative finishing of surfaces. Thanks to competently performed work, the walls can be made as smooth as possible, eliminating obvious defects, chips and other errors remaining after applying the rough layer. If you turn to specialists for help, you will have to pay a tidy sum, especially considering the purchase of materials. But, you can do the work yourself. To do this, you need to study the basic principles of this process, watch a video on how to putty walls with your own hands, where the stages are explained from A to Z, and boldly get down to business.
Advantages of do-it-yourself putty
Before painting the surface, gluing wallpaper or performing other types of finishing, the putty process is simply necessary. Several advantages are worth noting:
- The walls after putty are smooth, without flaws, chips or cracks.
- If the result is not perfect the first time, everything can be redone several times, eliminating even the smallest details, and the quality of the coating will not suffer in any way.
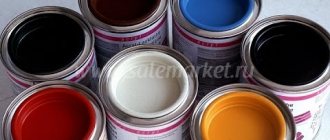
- Putty materials are inexpensive and are offered in a wide range.
- The solution used is white. Decorative material of any shade can be applied to it.
- Puttying walls is a process that anyone can do on their own.
Types of materials for putty
According to the intended purpose, putty for walls can be:
- starting, leveling;
- finishing;
- specialized;
- universal;
- textured (decorative).
Starting putty is produced in the form of coarse dry additives. And is used for pre-finishing. With its help, serious flaws and irregularities are corrected, and a reliable basis is created for the finishing layer.
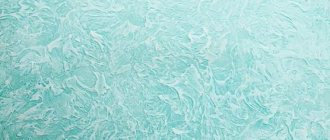
In turn, the finishing putty material is made from fine powder or a plastic ready-made mixture. With proper preparation and precise execution of all technological processes, you can make the wall perfectly smooth and even. We also use some finishing mixtures for decorative purposes, creating pictures and original patterns using putty on the walls.
Types of putties
There is also a universal putty on sale, which we use for all stages of work; we simply apply the mixture in several layers.
Based on the composition, we distinguish the four most common groups:
- oil-glue;
- cement;
- plaster;
- polymer:
- Acrylic.
- Latex.
Each of them has its pros and cons. It is impossible to say unequivocally that one is better and the other is worse. The choice depends on numerous factors and nuances of the work that needs to be performed.
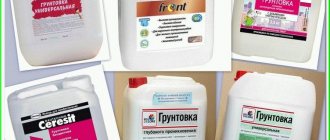
When purchasing putty, be sure to read the information on the packaging. It contains the composition, characteristics, method of preparation and use, expiration date and storage conditions.
Advice: When purchasing, pay attention to the fact that it is better to take material for the starting and finishing layers made by the same company. They will be perfectly compatible and provide good grip.
Types of spatulas
A good spatula for puttying walls is used when performing a wide variety of construction and repair work. To make a tool plate, the manufacturer uses different materials.
They often choose metal, plastic or rubber. Today on the market you can buy spatulas that are used for highly specialized purposes.
To process the load-bearing surface, it is rational to use products with a flat surface, a holder made of plastic or wood, or a metal plate.
The material discussed in the article varies, so its price will be based on the manufacturer and type of material used.
Facade
Despite the fact that this tool is called that, it can be used both for facade processing and for interior finishing of load-bearing structures.
A professional spatula for putty has a more massive blade, which is made of durable steel and cannot be deformed during use.
Using such a tool, you can easily apply the building mixture to the surface to be treated. The working surface of the spatula resembles a quadrangle with two parallel and two non-parallel sides, thirty cm or more wide.
Facade
A façade spatula is most often used simultaneously with a painting spatula. If the layer of putty will be applied with one solid ball, it is more convenient to collect the building mixture from the container with a more compact analogue. Depending on the size of the ball, the consumption of finishing putty per 1 m² will depend.
At the stage of applying the last ball, the spatula is used as an additional element. The construction mixture is placed on it, and using a painting spatula, it is scooped up in small portions and applied to the surface.
Painter
For finishing, it is more rational to use a paint spatula. Using it you can perform the following manipulations:
- make the surface as smooth as possible after applying the putty material;
- mask the seams between plasterboard layers;
- earn defects and notches;
- handle complex structures.
Like the façade spatula, it has a trapezoidal shape and is complemented by a plastic or rubberized handle.
Painter
- the minimum width of such a spatula is 20 mm;
- thickness. The plate of the painting tool is, as a rule, thinner than that of the façade analogue;
- level of elasticity. The tool is distinguished by a more elastic and bendable blade;
- material. For the production of paint spatulas, alloy steel is used, which is resistant to corrosion due to the chromium content, while the other analogue under consideration is made from steel with a carbon content of over 0.6%.
Painting tools are divided into the following types:
- for professional and non-professional work;
- those that can be used once.
Metal scraper
If you still don't know which spatula to choose for putty, don't forget to buy a scraper.
It has a narrow scope of application and is used to remove excess building material from the surface.
Scraper
Its feature is considered to be the thickest blade, which does not deform; it is made of durable metal. This spatula has a relatively small width of 50 mm.
Rubber
Most often it is used for rubbing seams. This is a solid layer of rubber that varies in type and shape and is used to mask scratches and dents in fiberboard flooring.
But most often, such a spatula is purchased for grouting tile joints, and you don’t have to worry about its integrity during operation.
Rubber
Rubber can never affect the quality of the tiles, no matter how hard you clean them. The spatula perfectly follows all the unevenness and roughness of the surface, so it is ideal for grouting joints.
For tiles
This type of spatulas is not particularly distinguished by its wide range. They can be divided only by a couple of characteristics: the size of the teeth, which are used to determine the ball of glue used, as well as the shape. The larger the ball, the longer the putty dries. The latter differs only in width.
In the first case, a spatula with a width of 20 cm is used, in the second the width may be larger. Such differences can be characterized by different areas of application.
Tools with teeth are used when working with small-sized rectangular wall plates made of baked clay, and a falcon-shaped tool is used for massive slabs that decorate floor and wall coverings.
For tiles
Regarding the height of the teeth, the following standard sizes are available on the market: 0.6, 0.8, 1, 1.2, .4 mm. If you need a larger tool, then purchase a classic spatula.
The thickness of the tile adhesive layer may increase if it is applied simultaneously to both the facing surface and the tile. But only the directions of application of the material should be opposite.
When working with rectangular putty plates, you should also pay attention to the rubber spatulas used to rub the seams. By the way, they are used as spatulas for car putty, which also vary in width.
Classic sets of such tools consist of several types of spatulas. They are considered semi-professional and working with them is extremely tiring. Most likely, it is more rational to use them for processing small objects and large tiles.
Scope of application, advantages and disadvantages of oil-adhesive putty
Oil-adhesive putty for walls improves waterproofing, protects walls and plaster from destruction due to the evaporation of large amounts of moisture. It is used for technical cladding of some premises (such as closets, basements, bathrooms), for painting with oil paint and for finishing wooden plastered surfaces.
| Positive sides | Negative sides |
| Affordable price. | Not used for wallpapering or painting with decorative paints. It is very quickly absorbed into the walls and appears in spots after finishing. |
| Increases the waterproofing properties of the coating. | |
| Protects coatings from exposure to steam. | |
| Increases the service life of the surface, protecting it from destruction. | |
| Excellent for finishing kitchens, bathrooms, washrooms, technical rooms. | |
| Long service life. |
Cement putties
They are sold in the form of dry mixtures that must be mixed with water. Used to prepare walls for wallpapering or painting.
| Positive sides | Negative sides |
| Affordable price. | It takes time to prepare before starting work. |
| High moisture resistance. | It dries quite quickly when finished. |
| When dry, it lasts for a long time. | It shrinks significantly, which can cause small cracks to appear. |
| Not afraid of changes in temperature and humidity, durable. | |
| Excellent for finishing kitchens, bathrooms, washrooms, technical rooms. | |
| Long service life. |
Gypsum putties, their features
Gypsum putty is available in powder form and is prepared immediately before use. Used for dry rooms. There are some types (with hydrophobic additives) that are not afraid of moisture.
| Positive sides | Negative sides |
| Very plastic. | Not resistant to high humidity. |
| Levels surfaces well. | Requires preparation before work. |
| The result is achieved even when using one layer. | When prepared, it dries quickly, so you need to knead in small portions. |
| Good thermal insulation characteristics. |
Tool material
First of all, all construction spatulas differ in the types of materials from which they are made. They can be:
- rubber;
- metal;
- plastic.
For the manufacture of rubber devices, oil- and petrol-resistant, high-density rubber is used. There should be no cavities, sagging, dents or bubbles on its surface. Bummer is also not allowed.
Steel is used in the production of metal spatulas. It must comply with GOST requirements. The tool with a stainless steel blade is considered to be the highest quality and most versatile. By spraying you can determine the quality of the metal. If the surface becomes dull, it is ordinary iron that is subject to deformation.
For plastic instruments, use high-density polyethylene, polypropylene or polyamide. It cannot be cracked, warped, pitted, chipped or silvered.
The spatula handle is made of hardwood lumber, plastic or plastic thermal rubber.
The tool is distinguished by the width of the blade:
- Wide. Blade length ranges from 150mm to 400mm. Used to eliminate uneven surfaces and curvatures. It is convenient for her to level the applied putty.
- Average. The length of the plane is 100−150 mm. The main task of such a tool is to seal holes. It makes it possible to ensure that the top layer of the material is smooth.
- Narrow. Blade length minimum 20 mm up to maximum 100 mm. This type of device is used to fill small defects that may remain after a medium spatula. It will not be able to level the surface, but it is convenient to take the solution from the container and apply it to the surface with a working spatula.
The selection of tools for finishing work will depend on their type and skills of the performer.
Polymer putties, their features
Polymer putty is an almost ideal option. It is very plastic and characterized by moisture resistance. Can be used for almost any room. This material can be used for decorative plastering of walls.
| Positive sides | Negative sides |
| Used as a finishing putty. | High price |
| Plastic. | |
| Convenient to use. | |
| Easily lays on the processed base. | |
| Minimum material consumption. | |
| Long service life. |
Choosing a tool for applying finishing putty
In order not to be completely confused by the presented options and to purchase a product that will perform the assigned tasks, we recommend that you pay attention to these characteristics. First of all, you should pay attention to the handle.
It should be comfortable and it is better if there are no flaws or sharp protrusions on the surface. If they appear during operation, it means you bought a low-quality product.
Don't buy spatulas that are too long or too narrow. They will be inconvenient to use during operation, and they will be extremely difficult to use.
To level the surface, it is more rational to purchase a product that is shaped like a trapezoid. Tools in the form of triangles or droplets are not so convenient.
Shaped like a triangle
Moreover, they performed poorly during operation. The blade of the working tool should be smooth, at the same time moderately flexible, and not deform with minimal pressure.
Ceramic brick is a material that has been successfully used in construction and renovation for a long time.
Putty can almost perfectly level the surface, as well as make it strong and durable.
Crushed stone is mined by crushing rocks and metallurgical waste.
If, while pressing on the blade, it begins to bend strongly during operation, the construction mixture will roll off such a spatula, and it will even be difficult to apply it to the wall, not to mention leveling it. Spatulas with excessive rigidity will undoubtedly become deformed during operation.
The correct spatula should be equipped with a blade that will spring slightly when pressed. To apply the finishing putty, you can use a tool whose blade is made of stainless steel.
This will make it easy to clean after work and will ensure there is no corrosion that will negatively affect the finish. A spatula with an iron blade and metal coating is considered a low-quality product and requires the most careful care to avoid the formation of rust.
It can negatively affect not only the material, but also the surface being treated. Pay attention to the blade. It should not be sharpened; such products can be effectively used for other types of work.
For more information about choosing a spatula, watch the video:
Required materials and tools
It is quite possible to putty the walls with your own hands. The video will introduce you to everything you need to have to carry out the work. It is worth preparing the necessary tools and materials in advance:
- A container in which the putty solution is mixed.
- Starting and finishing putties, primer solutions.
- Spatulas (for large areas a wide spatula is used, and in hard-to-reach places it is more convenient to do the work with a small, angular one - level the solution at the corners).
- Drill with mixer attachment. Using this tool, mix dry putty and water until smooth.
- Brushes and rollers. With their help, a primer is applied, which ensures excellent adhesion of the putty to the wall.
- Level for checking evenness. It is used if the surface of the walls has significant flaws.
- Sandpaper. Used for rubbing the putty surface so that it becomes perfectly smooth.
- The starting putty is rubbed with coarse sandpaper, and the finishing putty with fine sandpaper.
- Hand sander (a tool with clamps for sandpaper) – used for easy grouting.
Tools for wall putty
Externally, putty tools are similar to plastering tools. But there are some differences. The spatula blades for puttying work should be as thin as possible and bend slightly when you press the tool handle. This makes it possible to apply a uniform thin layer. When purchasing a tool, you need to pay attention to the fact that the spatula blade should be perfectly even, smooth and with rounded edges.
The tool must always be perfectly clean. Before work, wipe it with microfiber or a well-washed rag. After work, thoroughly wash all equipment and wipe it dry. Since the remnants of old batches, hairs, lint, dust will not allow you to complete the work to the desired result.
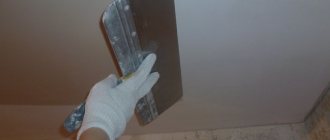
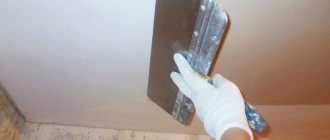
How to apply putty
Use a spatula to scoop up the mixture from the container and spread it over the canvas of the façade tool. It is necessary to ensure that the working solution is located along the edge of the entire canvas in an even roller with a diameter of 2-3 cm.
The solution should always be applied to the work surface from the edges. If it is a wall, then the optimal start is from the bottom up. The lifting height is determined empirically, 0.8-1.2 m.
The angle of inclination of the spatula relative to the plane plays a critical role. At an acute angle, 30˚ or less, the putty is applied in a thick layer. This option is used to fill deep depressions and irregularities.
IMPORTANT: the angle specified at the beginning must be maintained throughout the entire trajectory of the tool.
If at this time there is a bulge under the canvas, then a “dip” will form behind it, in which there will be no mixture. This flaw is corrected with a spatula.
The spatula blade should not be held strictly horizontally, but with a slight slope. For right-handed people, you need to slightly lower the corner of the instrument closest to you, and for left-handed people, on the contrary, lower the far corner. In this position, excess mortar will be evenly collected from the lower edge of the spatula, respectively, the other side will form a much more even plane.
Usually one portion is enough for 1-2 passes “from bottom to top” (depending on the thickness of the layer and the quality of the wall). Consistently, according to a similar scenario, 3-5 portions of putty are smeared. At the same time, each time the facade spatula is cleaned with a spatula, and the collected composition is again carefully laid with a roller on the edge of the canvas. Then the work vector is changed to perpendicular. Now the spatula needs to be moved in a horizontal plane.
This change allows you to straighten the vertical lines. But the angle of application of the tool needs to be increased to 60-80˚. In this case, the layer of putty will be much thinner, and the excess working mixture will begin to collect from different edges of the canvas.
This sequence of actions is performed to putty 2/3 of the wall in height. From above, work is carried out according to a similar scenario, only with top-down movements.
IMPORTANT: if small cavities or dimples remain, they are removed during application of the second layer.
Preparation of putty
When ready, the putty is:
- dry;
- ready to use.
Polymer putty does not require special preparation. You just need to open it and use it for its intended purpose. To dilute the dry mixture, you need a container in which you will knead, as well as water and a drill with a “mixer” attachment. Standard ratio for diluting putty: 2.5 kg of mixture per 1 liter of water.
Breeding stages:
- Pour water into the prepared container.
- Add the required amount of dry putty evenly to the water, avoiding lumps.
- Let the powder swell for a minute and stir with a mixer for 2-4 minutes until a homogeneous mass is obtained.
- We give the putty time to set (3-15 minutes), depending on the type.
- Mix again with a mixer.
- The finished solution should resemble thick sour cream in consistency. A very liquid mixture will drain, but a thick mixture will be inconvenient to work with and will leave lumps on the wall.
Dilution of putty
Bringing out corners
An angle spatula can only be used if there is a strictly right angle of 90˚ between adjacent walls. Otherwise, such a tool will only rip off the previously applied putty.
Work with an angle spatula as follows.
Using a spatula, apply and level the working mixture to the adjacent walls along the entire length of the corner. Special evenness is not required, the main thing is to fill the corner with a slight excess.
After this, the work is carried out with an angle spatula. It is pressed tightly against one of the adjacent walls (without fanaticism), and the other is barely touched. Deviation from the vertical is approximately 15-20˚. That is, the corner edge of the tool itself should not be adjacent to the corner of the wall along its entire length. The tool touches the corner only with the bottom edge.
Move the corner spatula from bottom to top, approximately 4/5 of the height. Then, in the same way, it is lowered from top to bottom.
This version describes the process of filling a vertical corner; the horizontal corner is dealt with in the same way.
If the angle between adjacent walls is not straight (not 90˚), then it is leveled with ordinary spatulas.
See also: Plastic apron for the kitchen
But you will need a metal profile. It is fixed to one of the walls strictly vertically , at a distance from the corner equal to the width of the blade of the spatula (narrow spatula). Screwing in self-tapping screws is allowed, as the holes can then be easily covered.
The sequence of actions will be described using a vertical angle as an example. First, putty is applied to the wall without a profile along the entire length in a corner. In this case, the corner is “filled in” with a slight excess. On the same wall, using a façade spatula, level the applied mixture using vertical movements of the tool.
Then, move the spatula from bottom to top, along the wall with a limiter (metal profile), while simultaneously pressing the back side of the canvas with the fingers of your free hand. The angle between the spatula and the wall is ≈30-45˚.
With this approach, an even angle between the walls is obtained, without changing its geometric value.
After work, the metal profile is unscrewed and the holes under it are covered.
Preparing the base
An important stage of the work is the careful preparation of the wall, which should be as clean as possible (no stains, old plaster, nails, wallpaper residues). You should also not leave old paint and whitewash.
Please note that after removing the old layer, cracks can be found on the wall. They just need to be sealed correctly. To do this, we expand them as deep as possible into the wall. Next, remove dust and lumps using a brush. Treat the crack with a primer and leave until completely dry. We seal the crack with starting mixture or sealants, pressing the solution as deep as possible, and level the top with the level of the wall. After the sealant has dried, go over the crack with sandpaper.
When the old coating is removed, remove the dust. It is advisable to use an industrial vacuum cleaner or broom, brush, or damp cloth for this purpose. After the wall has dried, we treat it with a primer, which improves the adhesion of the mixture to the surface and reduces the amount of moisture absorption by the plaster, improving the strength of the base.
Wall putty technique
You can learn how to putty walls correctly without any problems. The work consists of applying first the starting and then the finishing layer. We dilute the mixture to a homogeneous consistency. It is better to apply putty on the wall with a large spatula.
Starting putty
Irregularities on the surface larger than 3 mm are sealed with starting putty. This is a coarse-grained mixture, the purpose of which is mainly rough processing. The result is a smooth but porous surface.
Scheme for aligning plasterboard wall seams
First, using a level, we check how smooth the walls are. If there are no problems in this regard, then apply the solution in broad strokes, pressing the spatula all the time at one angle relative to the wall (adjusting the putty layer). If the spatula is strongly inclined towards the wall, the layer will be thick. If the angle is larger (60-750), then it will be possible to apply a layer of up to 1 mm.
In areas with significant unevenness (depressions, humps), the putty must be applied in a large layer, leveling the surface using trowels. We continue this way until we achieve a flat surface. When the starting layer has hardened, we sand the wall, removing splashes, sagging, and traces of tools.
Using reinforcing mesh
If there are large differences in surface level, you can install a mesh; with its help, leveling the walls is much easier. The base is reliable and strong. In addition, the risk of cracks is reduced.
We fix the mesh using glue, which we apply with a brush or roller. We press the mesh against the wall and coat it with glue on top. We give it time to dry and begin to putty. You can also secure the sickle by pressing it against the wet putty applied to the wall. Then we level it and strengthen it on top with another layer.
During puttying, special attention is paid to processing internal and external corners. We carry out this work using an angular spatula. On the outer corners we use special perforated overlays, which are embedded in a layer of putty. When it dries, we process the joints, apply the solution to the sides of the corners, level it with an angle tool, without leaving a groove. In this case, we pay attention to controlling the plane level. Remove excess mixture.
Reinforced mesh
Aligning the first layer
After the starting layer is ready and dry (the drying time is indicated on the packaging), we sand the surface with sandpaper, removing small imperfections (stripes and bumps). Sweep away the dust after sanding with a broom.
Applying finishing putty
This is the final stage of preparation before decorative finishing. On clean walls we apply a primer, and then a thin, no more than a few millimeters, layer of putty mixture. At this stage, fine-grained products are used that can hide microcracks and the slightest defects. Everything is done very carefully. The putty is carefully leveled to ensure a perfectly flat surface.
The applied layer must be dry. Then the surface is rubbed with fine sandpaper, using a good lightening agent. The work can be considered completed.
Tip: If we are puttingtying walls under wallpaper, it is not necessary to achieve perfect smoothness, since even the thinnest wallpaper will hide small unevenness and differences.
But the requirements for the surface that we prepare for painting are much higher. The paint does not hide defects at all, so you will have to bring the surface to perfect condition by applying several thin layers of putty.
A few secrets of finishing putty:
- Apply the solution in a thin layer (1-2 mm) from top to bottom, pressing the spatula against the wall at an angle of 20°. If the layer is too thick (more than 5 mm), it may crumble after drying.
- Each time you apply the mixture to the instrument, you must wipe it with a damp sponge, removing any dried residue.
- The finishing putty must be given time (36 - 48 hours) to dry thoroughly and only then can it be sanded.
- Irregularities left by the tool and stripes left by a spatula on the joints can be easily removed with sandpaper, so they do not need to be re-sealed with another layer of the mixture.
Puttying walls, although a rather labor-intensive process, is not technically difficult. Everyone can do this work on their own, the main thing is desire.
Features of preparing the working mixture
This stage should be given special attention. The fact is that in the process of preparing a ready-made solution from a dry mixture, several cycles of complex chemical processes go through.
During these reactions, the formation of crystalline hydrates begins, which serve as centers for the formation of cement stone. When stirred, the mixture is enriched with air oxygen, and the reaction changes its character from an avalanche-like to a smooth one. In other words, setting will occur evenly throughout the entire mass, without regard to the thickness of the applied composition.
It is required to strictly adhere to the proportions indicated on the packaging. Most often, the base mixture requires 3-3.5 liters of water per 10 kg of dry putty.
See also: MDF panels for walls
Maintain technological breaks between stirring.
Almost all experts note that properly prepared putty with a mineral binder, in consistency and softness, does not differ from ready-made mixtures supplied in buckets.
The finished composition should have the consistency of thick sour cream, without any compactions or inclusions. It should rub between your fingers without any specific squeaking or crunching.