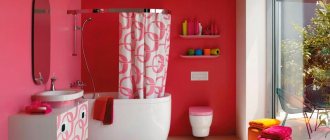
How to choose a living room color
The color scheme of this room should be made in shades that promote relaxation, both emotional and physical. Psychologists recommend several primary colors:
- Mint.
- Wheat.
- Light blue.
- Lilac.
- Green.
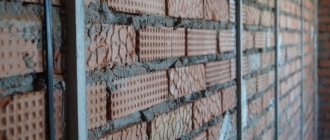
Despite the popularity of painting walls, many people prefer to wallpaper their walls the old fashioned way.
However, among the variety of this material, it is easy to get confused and not everyone knows how to choose wallpaper for the living room. To make the right choice, several criteria must be taken into account:
- Properties of this or that type of wallpaper.
- Naturalness of the material.
- Price.
- Color (plain or printed).
In recent years, cork or bamboo wallpapers have become especially popular, as they have excellent sound and heat insulation properties and also look great in the interior.
What tools are used?
Full review of enamels for metal: tips on selection and use The
basic options for devices for professional construction or painting and plastering work include manual, pneumatic and electric equipment. The description of the most commonly used types is worth considering in more detail.
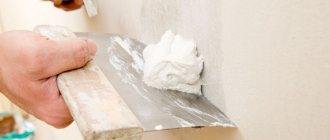
Putty knife
A hand tool with a rubberized or wooden handle used for applying putty compounds and smoothing surfaces. Has a wide and flat working surface. For finishing work it can be made of metal.
The rubber spatula has a trapezoidal shape, allows you to seal seams without damaging the base coating, and usually does not have a handle.
Brush
It duplicates the functions of a brush, but is larger in size. Allows you to quickly cover a significant surface area with adhesive or primer. Sometimes used instead of a spray gun.
Brush
There are quite a few types of brushes. For adhesive compositions, voluminous terry options are used, mounted on a long handle. A slightly less productive option in terms of speed of covering large areas is whitewashing brushes made of bast and synthetic fiber. With a pile length of up to 10 cm, they have a width of 200 mm and are suitable for applying whitewash inside and outside buildings.
A round or rectangular hair brush is a product with a removable or permanent handle, made from natural bristles. It can also be used to work with whitewash compositions. For smaller jobs, a classic handbrake is used: a brush with a diameter of up to 54 mm. In a metal frame, such products are considered universal. For adhesive joints, it should not be used for liming.
File brushes for the finest painting works are available in round and flat versions. The bristles in them are always white and hard.
Trimming brushes are similar to brushes, but differ in size. A rectangular product with a working platform of 15x76 mm can create a roughness effect on the surface. There are special requirements for the bristles: they must be as stiff as possible.
Roller
Foam rubber and fur (natural and synthetic) products are considered the most productive. There are special types of products: for working on staircases or with narrow metal racks. Such products are made with two rollers; they allow high-quality processing of the surface to be painted.
Universal models usually have a foam roller, but are available only in a disposable version. Miniature rollers with dimensions up to 100 mm and diameter up to 30 mm are suitable for ceiling work, painting narrow areas, and decorating rooms. Facade models have a fleecy coating that covers any unevenness well. Needle varieties are used for piercing drywall or leveling bulk mixtures.
Mechanical devices
This category includes 2 types of tools.
- Spray gun with manual control. Allows you to achieve uniform coloring, sensitive to the purity and thickness of the paint.
- Electric or manual spray gun. Sprays the composition under pressure, ensuring maximum speed.
Spatulas
Spatulas are used to prepare for painting a wall or ceiling: applying and smoothing putty. Metal or wooden spatulas are available in various forms and differ in part from each other. The metal spatula includes: a blade, a shank and a handle. Wooden is made from hard wood material. To prevent deformation, the spatula is also impregnated with drying oil.
Spatulas with a wide blade are used for puttying large surfaces. A narrow blade is used for puttying beams, doors or frames. Spatulas with teeth are used to spread the mixture on the surface of mastics and adhesives.
Professional painter's tool and its use
Orbital sanders: features and selection tips
What else does a painter need to perform painting work? Well, of course, rollers!
The most productive tool is a fur or foam paint roller, which is placed on a special handle with a rod and an axis. The length of the rollers varies from 100 to 250 mm, and the diameter is 40-70 mm. Using this tool allows you to paint an impressive area in one go. In addition, rollers are used for priming the surface.
Fur roller. Such a roller should not be used for painting surfaces with lime compounds, since the fur may be damaged and this will significantly deteriorate the quality of painting. Before starting painting work, the roller must be prepared by immersing it in water for some time.
Foam roller. To make the roller, foam rubber with a hole drilled in it is used. A hollow tube is placed in the hole, which, in turn, is put on the machine axis and secured with a nut and washer.
There are special types of rollers used for painting staircases, balcony posts and other structures. This tool has two machines, and its shape resembles scissors with rollers instead of blades.
To use these hand tools for painting work, you will need a special container or bucket with a squeezing mesh, which is used to remove excess paint. The roller must be dipped into the paint, then rolled over a squeezing grid, and only after removing excess paint can you begin to paint the surface.
After finishing work, the roller should be thoroughly washed with soap.
Tassels
The variety in the tassel finisher's toolkit requires a more detailed consideration. Manufacturers of painting tools today offer brushes that are widely used in finishing and come in different shapes, types and sizes.
Brushes are divided according to their purpose as follows:
Fly feathers. These brushes are designed for working on fairly flat areas. Hard bristles have a length of up to 180 mm. The brush has a working part diameter of up to 65 mm.
It is more advisable to apply casein and adhesive compositions to the surface using brushes.
Whitewashing. These brushes have a working part size of up to 200 mm, with a bristle length of 100 mm. It is similar to a fly brush, however, the performance of work with such a brush will be higher.
Macrow brushes. A type of whitewash brush can be considered a whitewash brush. The length of the bristles can be up to 100 mm, which contains almost 50% horsehair.
The diameter can be up to 80 mm in a circle shape, and the width of the working surface is 120 mm in a rectangular shape. Has a high intake of paint material.
Handbrake brushes. When performing a small amount of work, it is advisable to use a hand brush. They are available in diameters up to 50 mm. They have bristles up to 70 mm long. The pile contains horsehair. There is a void inside the brush for more filling with paint.
Flute brushes. At size. the working part of the brush is 100 mm, the thickness is up to 20 mm. The bristles are not hard, of good quality. It is used to smooth out visible marks from a hand brush. Professionals prefer flute brushes that use badger hair.
File brushes. Usually, for painting in hard-to-reach places, it is customary to use special, paneled brushes. They are round and flat, with a working part size of up to 20 mm. White hard pile, framed with a metal rim.
Trimmings. This brush usually has the shape of a rectangle. With the help of trimming you can get a texture like shagreen. It has hard and short bristles.
Depending on the material of the bristles, brushes are:
- synthetic. They have great wear resistance and the ability to leave a uniform paint layer. This is an important quality of the instrument.
- natural. The working part of the brush is pork wool and horse hair. Sometimes they can complement each other, badger hair can be added. For oil paint, this is considered the ideal tool.
- combined. These brushes combine natural and synthetic components.
Before using a new brush, soak it in water for two hours. After finishing work, the brushes must be washed in water or solvent.
Surface priming
Types of metal cutters and tips for choosing
Surface priming is one of the most important stages of painting work, which consists of applying a special layer to the surface, which ensures its reliable adhesion to finishing materials. The thin film that forms during priming allows the surface to evenly absorb the applied paints and varnishes.
It is almost impossible to carry out any type of painting work without a primer.
The primer can be applied in one or several layers. It all depends on the type of surface and its quality.
Basically, all primers have a specific purpose, for example, a composition for applying adhesive paints. Although recently, universal primers have increasingly begun to appear in construction stores.
Priming for painting is carried out at least twice, and each layer of primer must dry well before applying the next one. The work is done with a roller or brush.
The process of priming the surface for subsequent application of plaster or wallpaper is identical to the process described above before painting. The difference may lie in the types of soil compositions used.
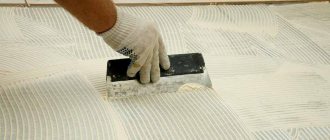
Puttying surfaces
Surfaces in any room, especially if finishing work is carried out in an old building, are most often characterized by unevenness, the presence of a huge number of defects in the form of tubercles, cracks, roughness, etc. To perfectly level surfaces, a puttying process is used, which consists of applying a special leveling compound - putty .
Wooden or metal spatulas are used to apply putty. Putty is applied one to three times. The number of layers depends on the condition of the surface. Each layer must dry, after which it is cleaned using pumice or sandpaper. The next layer should be applied to a dried and thoroughly primed surface. Subsequent layers should be thinner than the first.
Putty application technology
- The surface must be cleaned of dirt, grease stains, old wallpaper or paint;
- They should not be damp or frozen;
- Before applying the putty, the surface is primed;
- If there are increased requirements for reliability, you can use reinforcing mesh with a fine mesh
- The first method is starting putty. This is the cheapest method. After the first layer of putty has been applied, it is dried, after which the finishing layer is applied, for which special compounds are used. The second method of application is using a spray gun. The putty is diluted to a liquid state and applied by machine. This application method allows you to quickly and efficiently putty large volumes.
Features of the putty:
- It is best to prepare the mixture in small portions so that the putty in the container does not dry out and form lumps and crumbs that will greatly interfere with the quality of the finish.
- To apply the mixture in corners, it is worth using special types of spatulas;
- The thickness of the finishing layer should not exceed 2-3 mm;
- When working with a spatula, it should be positioned at an angle of 30 degrees relative to the working surface;
- If wallpaper will be pasted onto the surface in the future, it is possible to use coarse-grained putties such as Vetonit LR+. If you need to putty for painting, then putty must be used with a fine grain, for example Maksi
- The starting layer should be applied using a wide spatula. The layer is applied in a vertical, horizontal direction, as well as diagonally.
- layer of putty, the previous one must dry. This will take a day.
What types of tools are used for plastering work?
Author: Anastasia Isakova · Published 04/30/2018 · Updated 01/27/2018
During the renovation process, professional and home craftsmen are faced with the need to level walls and ceilings. A budget option that allows you to quickly, effectively and inexpensively eliminate defects on the base surface is plastering. For high-quality preparation of the surface of walls/ceilings for final finishing, professional tools for plastering work are used. The list of equipment is quite extensive; craftsmen use modern devices that simplify work and speed up the work process.
Features of plastering work
To plaster walls, cement-sand mortar is traditionally used, but you can purchase ready-made plaster mixtures. Special solutions differ in their component composition, purpose, and area of application. Whatever plastering option is chosen, you need to know the basic points of the work process:
- To prepare surfaces, special plastering tools are needed. A trowel and a floor trowel are not enough to level “complicated” walls or apply decorative plaster.
- Plastering is carried out in two stages: preparing the base and applying a leveling plaster mixture. Preparatory work includes improving adhesive properties and installing beacons.
- Plaster work is not limited to leveling walls (ceilings) for finishing. You can use protective, decorative (relief, Venetian) plastering.
- A layer of plaster helps to level the surface, hide existing defects (cracks, chips), and prepare the walls for subsequent wallpapering or painting.
- To simplify work on large areas, mechanized equipment is used - plastering machines mix the solution and deliver the finished mixture through hoses.
It is rational to plaster large objects (production workshops, warehouses, sales areas) using special equipment. Craftsmen use manual labor on small objects - residential buildings, apartments, office premises. The use of plastering equipment in the work requires the participation of at least three craftsmen in the process - filling the mixture, supplying the solution, leveling with the rule.
We recommend: Stencils for wall decor (55 photos)
Tools used at the preparatory stage
The working tool is selected depending on the condition of the unprepared base surface of the walls/ceilings and the type of plastering (protection, relief, volumetric decor). Before any type of work you need to prepare the surface. After taking level measurements, the master determines the curvature of the walls and checks the angle (the rotation is more or less than 90 degrees). This allows you to set the thickness of the plaster layer, which can cover surface defects and compensate for the curvature of the walls.
Preparatory work is carried out using the following tools:
- Protruding and strongly convex sections of the wall are beaten with a hatchet or a plaster hammer with a pick. The tool is used to make notches that provide more reliable adhesion of the plaster to the surface.
- Priming the walls to increase adhesive properties is done with a paint brush. A large brush with long thick bristles works well on the surface for deep penetration of impregnation into the base.
- The placement of beacons in a plane is done using a plumb line. The tool allows you to accurately determine uneven areas of the surface and stretch threads between the beacons in the horizontal, vertical plane and diagonally.
- To align beacons relative to the horizon plane, a rack level is used.
- To simplify the process of marking and installing beacons, some master plasterers use a high-precision laser level.
- Wooden or metal squares with markings help to set slope and corner beacons. A high-strength nylon thread is pulled between them - an indispensable equipment for work.
The strength, integrity, and uniformity of the applied layer of plaster depend on the quality of the preparatory work. Depending on the complexity of the preparatory process (deep cracks, uneven corners, the presence of old coating that is difficult to remove), the master may need a hammer drill, a hacksaw, or a chisel.
It is convenient to carry out work when all the tools and equipment for plastering and finishing work are at hand, because it is not always known how complex the process will be.
On the video: what tools should a master finisher have?
Working equipment for plastering surfaces
After completing the preparatory stage, you can begin the actual plastering. The thickness of the applied layer depends on the unevenness of the walls. In some situations, it is enough to “trim” the surface with a thin layer of plaster mixture to smooth out imperfections. But there are times when you need to “throw” the solution in a thick layer, then you can’t do without beacons, a construction grid and rules. What tools and devices are used for plastering:
- The trowel is the plasterer’s main tool, which is used to perform the bulk of the work. In simple terms, a trowel is called a trowel. With its help, the solution is evenly smoothed over the surface to be treated.
- Falcon - used for applying a certain amount of plaster mixture. It is inconvenient to bend over each time to get the solution, so the mixture is scooped onto the working surface of the falcon, and from there it is removed with a trowel and applied to the wall.
- Poluter (poluterok, grater) is a wooden or foam device for rubbing a surface, eliminating roughness and unevenness. The final leveling is carried out after the solution dries slightly until it hardens completely.
- A spatula is a steel or rubber tool used to smooth out a mixture. An even trowel is used when leveling a flat surface; for plastering in corners and shaping slopes, an angled trowel can be used.
- Steel trowel - a tool that can be used to smooth and iron the wall surface being processed. With light pressure with a steel trowel, the top layer of the mortar is compacted, which increases the performance properties of the base.
- The rule is a strip of wood or aluminum profile at least half a meter long. The rule is to level the layer of plaster between the beacons. The greater the distance between them, the longer the master's rule should be.
Installation of beacons is a prerequisite for obtaining high-quality, uniform coverage. Beacons are struck using a plumb line and nylon thread. Galvanized steel guides are used as beacons. The step between them is at least half a meter. After spreading the solution onto the wall in a thick layer, the master takes the rule and distributes the composition between the guide beacons, removing the excess mixture. Next, a trowel is used to evenly level the solution.
Accessories
Plastering and finishing work can be carried out manually and using construction equipment. In addition, if a thick layer of plaster mixture is to be applied, beacons must be placed and a mesh laid to improve the adhesion of the solution to the base. In their work, craftsmen additionally use the following tools and devices for plastering work:
- Plaster corners - metal products are used to form external corners.
- Construction mesh - mounted between the beacons, when a thick layer of the mixture is applied to an uneven surface.
- Painting mesh - the material is laid on areas of the wall with shallow cracks when applying a thin layer of plaster.
- Mixer - manually preparing a solution from cement, sand, water is long and tedious; the mixer attachment is inserted into a drill and the mixture is quickly prepared.
- Plastering machine is a mechanical device for automatically stirring the solution and applying it to the walls.
When performing decorative plaster, a Venetian trowel is used - a special spatula with teeth, veins, and stripes. With their help, unique patterns and visual effects are created on the surface of the walls.
If the prepared surface is to be painted after the applied layer has dried, it is necessary to use a painting and plastering tool for finishing. Brushes, rollers, and brooms are used to apply paint; on large areas, spray guns are used to quickly spray the paint composition.
Plastering tools are needed in the work of every craftsman when leveling the surfaces of walls and ceilings. When choosing products, you need to pay attention to the quality of the working surface, handles, the absence of nicks and chips, and the strength of the connection.
We recommend: How to make a decorative roller for walls with your own hands
Review of tools for decorative finishing (2 videos)
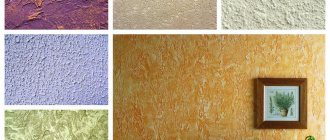
Modern decorative paints
Modern decorative paints make it possible to create thousands of different structures, colors and coating methods. Thanks to the latest developments in the field of decorative materials, paints have been created that amaze the imagination with their beauty, which at the same time can be applied to any surface and used in rooms for any purpose.
Working with modern decorative paints is more reminiscent of the work of an artist than a painter. The application of some compositions involves several technological operations and involves the use of various and unusual tools, and the work of creating a surface texture is not always within the capabilities of an ordinary craftsman, since it requires certain skills to perform it. However, the latest decorative paints allow you not only to create a cozy atmosphere in your home, but also to realize your wildest design fantasies.
All types of decorative paints are created on the basis of aqueous dispersions of polymer film-formers using copolymers of vinyl acetate and acrylate. The filler is calcium carbonate, the particle size of which is no more than 10 microns. To achieve the required consistency, thickeners and structuring additives are also added to the paint.
Thickeners are associative substances based on acrylate or polyurethane or water-soluble cellulose ethers, and structured additives are represented by kaolin, bentonite, amorphous highly dispersed silica and water-soluble silicates.
Matting additives regulate the degree of gloss. The decorative effect of coatings is due to the addition of high-viscosity silicone with organic solvents, original pigments or fillers.
The shades of decorative paints are very diverse. Some of them are available in only one basic white color and are intended for further tinting.
In addition, it is not recommended to tint white coatings yourself - inept actions can lead to a decrease in their quality.
A distinctive feature of decorative paints is their diversity and the uniqueness of the resulting coating. The paint dries quickly, so painting the surface can be completed within 24 hours and the resulting coating can be subjected to wet processing and cleaning.
Decorative paints are not intended for outdoor use - they can only be used indoors.
The composition can be applied to both latex and oil paint, but it cannot be mixed with latex-based materials.
Step 4: Finishing
If the surface preparation for applying the finishing layer is not carried out correctly, choosing even high-quality and expensive paint will not help achieve success. At the same time, expensive paint does not guarantee excellent results and achievement of your goals. To avoid serious mistakes, you need to know the following:
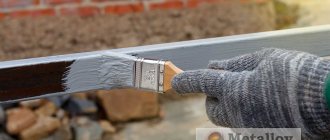
- For rooms with serious exposure to temperature and moisture (for example, the kitchen), a suitable option is durable water-repellent alkyd enamel. An unsuitable option is a cheap polyvinyl acetate composition that does not tolerate washing well.
- Rooms with direct exposure to water (for example, bathrooms). A suitable option is rubber paint. An unsuitable option is vapor-permeable acrylic paint.
- Living quarters (for example, bedroom, children's room). A suitable option is environmentally friendly, vapor-permeable paint. An unsuitable option is silicone paint.
Remember that each specific painting task requires its own special actions depending on the purpose of application and the properties of the surfaces being painted.
How does a paint roller work?
The design of this tool is quite simple.
A classic roller consists of several parts:
- The so-called “machine” is a handle and a rod on which the working part is attached.
- A solid roller on a rod is the basis of the roller.
- A soft coating that distributes paint over the surface.
This basic roller design can be modified depending on the type of work for which it is intended. For example, in an angle paint tool, the solid roller has a wheel base rather than a cylinder. And in the facade roller there is also a bearing that slows down the movement.
According to the type of fastening, rollers are divided into:
- Console - the most common type of tool, where the working part is attached to the handle on one side.
- Fork – the fastening is on both sides. Such devices are used for painting large areas of walls or floors.
If possible, change the coating of the rollers:
- Solid or non-replaceable - the ability to replace the used coating is not provided structurally;
- Replaceable – worn-out covering (usually fur) can be replaced.
Based on the material of the handle and frame, painting tools are divided into the following:
- Solid – standard rollers made of plastic or aluminum.
- Wire - typical for frame structures, where the working surface is mounted not on a solid roller, but directly on the frame. This gives the roller increased flexibility and allows you to paint even uneven surfaces.
Brushes
The next professional painting tool in a decorator's kit is a brush. This tool is directly similar to a brush, only the geometric dimensions are much larger.
As a rule, the brush has a rectangular working part. When large volumes of priming and painting of smooth surfaces have to be completed, finishers usually use a brush.
If it is not possible to use a spray gun, you can use a brush. To moisten the surface of walls and ceilings, before the next technological process, using a brush will be very advisable. For rational use of the tool, the brush is often attached to a telescopic extension handle.
If the bristles are made of metal wire, the brush is used to remove the old layer of paint or wallpaper. Before filling, wooden surfaces are roughened with a wire brush. After the work is completed, the working part of the brush is cleaned and stored in a container.
Peculiarities
It is quite difficult to cover all existing types of professional painter’s tools. Indeed, to obtain an optimal result, a specialist has to perform various manipulations: leveling, cleaning, smoothing the coating. Depending on the operation, the purpose of construction-painting and painting-plastering tools, and even their sizes, change. Among the distinctive features of tools for painting work is the mandatory presence of a contact surface with which the work is carried out
It is also worth paying attention to the fact that in addition to basic devices, there are auxiliary
Baths. With their help, excess paint is removed from the paint roller. This cuvette is made of polymer materials and has a corrugated bottom. The use of trays helps to ensure the most even laying of the coating and to avoid splashing of painting compounds.
Each type of painting supplies has main features
The first thing you have to pay attention to is geometry and shape. It is quite diverse in brushes, which can be:
- square;
- round;
- rectangular;
- oval.
It is also customary to consider the features of stubble separately. It can be artificial: universal, but with restrictions for contact with particularly caustic solvents. These brushes are especially convenient when working with varnishes.
Natural bristles are more flexible and soft, it is convenient to work with drying oil, oil-based and alkyd-based paints.
The rollers also have some differences. There are collapsible or reusable models, in which there is a moving replaceable part, and monolithic structures (disposable). Among the pile options, several solutions can be called the most popular.
- Based on polyamide. They are considered universal and have high absorbency.
- Based on polyacrylic. May dissolve or interact with binders of paints and varnishes.
- Made from polyester with a characteristic fibrous structure. They are characterized by low wear resistance.
- Made from foam rubber. Suitable only for working with water-based materials: oil and alkyd components corrode the material.
- Made from natural fur. They are practical, versatile, wear-resistant.
- Made from velor. They are used for finishing, have short pile and a uniform surface structure.
The length of the pile also matters. The more prominent the coating, the more difficult it is to paint over it. Accordingly, short-pile velor models are only suitable for smooth walls and ceilings without relief.
Accessories
Along with the basic tools, to facilitate their work, specialists use the following devices:
- baths;
- cuvettes;
- brushes;
- spray gun.
A paint bath is a plastic container with a textured bottom. Serves to brush off excess paint from the roller, thereby getting rid of accidental splashes in the workplace.
A cuvette is a deep plastic box used for the convenience of mixing various solutions or paints and varnishes.
Metal brushes are used to remove rust or difficult dirt from floors or walls.
The spray gun is a very convenient car painting tool for extensive painting in a short time. It is notable for the fact that it helps the painter apply the paint coating in an even layer.
There are 2 models: electric and pneumatic. In the first case, the paint is supplied using a built-in pump, and in the second it is powered by a compressor.
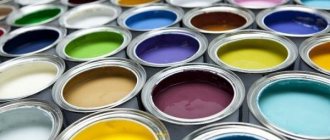
With a large selection of working equipment, the main thing is not to miss out on quality products from the best manufacturers of painting tools. For example, the following companies have proven themselves well:
- the German company “Matrix” presents a huge range of products with the strictest quality control;
- The Swedish company “Anza” has proven itself in the field of production of painting tools, thanks to the constant improvement of its
- goods and selection of the highest quality and durable consumables;
- The Finnish company Sokeva has conquered the construction market by producing brushes that perfectly retain their original properties even after repeated use.
Russian manufacturers, organized on the basis of specialized enterprises, are also trying to keep up. Companies from the former Soviet Union (Ukraine, Belarus) are also trying to produce the same high-quality products. Especially when you compare them with Chinese goods.
How to choose the right living room
Before you start purchasing the contents of the room (furniture), it is important to carefully plan the entire interior in the smallest detail. This process takes a lot of time and effort, especially for non-professionals, so to get rid of the hassle, it is better to contact a design company.
The first stage of planning will be to determine the functionality of the room. To do this, you need to draw on paper a detailed plan of the room, taking into account all window and door openings, niches, bay windows and similar elements. Then determine the purpose of the living room: will it be just a relaxation area, a study or a room for holding parties.
The filling of the room directly depends on this point, for example, for an office you will need a computer desk or a multifunctional bureau, a comfortable chair and several shelves for books and documents. Zoning of space is also quite popular in the design of the living room.
Most often, this technique is carried out by contrasting painting the walls in colors that are radically different from each other, or by light separation. It is worth noting that this technique is often used in the design of small spaces.
Tools and accessories for painting work
A spray bottle is a paint container equipped with a spray gun. The principle of operation of the tool is as follows: paint particles are captured by the air flow and transferred to the surface to be painted. A spray bottle can greatly facilitate the work of a painter. No hand tool allows you to apply paint as quickly as a spray gun. The quality of painting is incomparably better - the paint applies evenly and the surface becomes smooth.
The spray gun can be used not only by a professional painter, but also by a home craftsman.
During the Soviet Union, the role of a spray gun was often played by domestically produced vacuum cleaners, which were equipped with a special attachment that was placed on a glass jar.
Since the lime or adhesive composition used contains particles of lime or chalk, before filling the spray bottle with it, it is necessary to strain it through a sieve or cheesecloth. In this case, you will have to clean the tool nozzles much less often.
The paint container should only be filled 3/4 full. In order for the lid to fit as tightly as possible, it is necessary to moisten the rubber ring located on it with water.
The jet should not be too long or short; the optimal length of the torch is selected experimentally.
When the sprayer starts to malfunction or misfire, it is necessary to clean the sprayer nozzle.
Spray guns are available in manual and electric versions. Manual sprayers are considered the easiest to use, while electric sprayers, although a little more difficult to use, are much more effective. The performance of a spray gun is significantly higher than that of brushes and rollers. Using this device for painters, you can apply glue and lime paint to the surface, and special paint spray guns are used for thick paints and varnishes.
The composition, before pouring it into the spray gun, must be filtered through 2-3 layers of gauze or through a fine sieve. To ensure that the paint lies on the surface as evenly as possible, choose a nozzle with a small hole, otherwise, firstly, the surface to be painted will be damaged by streaks, and secondly, the paint consumption will be greater.
The length of the spray gun torch can reach 75-100 cm, and this is the optimal distance for applying paint.
With normal paint thickness, the pressure should be 3-4 atmospheres. If the paint is liquid, the pressure is reduced, otherwise it is increased.
Here you can see pictures of tools for painting work, which a professional cannot do without:
For painting work, some other tools and equipment are additionally required:
- a knife with a durable blade that ensures precise cuts and a handle that should not slip. It is better to choose options with a rubberized handle, which will ensure a reliable grip and safety of the knife;
- chisel as an auxiliary tool for cleaning grooves and chamfering. Chisels are flat, semicircular and figured. For flat chisels, the sharpening is one-sided, while for semicircular chisels, the chamfer is made from the outer (convex) or inner side of the blade;
- ruler 100 cm long, 3-5 cm wide and 10 mm thick for layering panels, drawing lines and other purposes. Typically, wooden rulers are used with a chamfer on one side;
- sandpaper block for cleaning and sanding ceiling and wall surfaces in preparation for painting. Usually small homemade blocks of wood or cork are used, which are wrapped in sandpaper, but you can also purchase a ready-made one, equipped with plastic clips for securing the sandpaper;
- steel mesh, buckets and sieve.
Advice:
The quality of work largely depends on the quality of the chosen tools and devices for painting work. In addition, after finishing work, all tools must be thoroughly cleaned of dust and paint residues. Otherwise they will become unusable.
Auxiliary and additional devices and tools
Of the most common auxiliary painting devices, it should be noted:
- painting bath. It is a plastic tray with a wavy surface. Typically used for roller painting;
- cuvettes. Plastic boxes with high sides for mixing various solutions during painting work;
- metal brushes. They are usually used to clean surfaces from rust, as a preparation before painting;
- spray gun. This tool significantly increases the productivity of a professional painter.
A carefully selected tool is the guarantee that a professional painter will perform finishing work with high quality, will not allow overuse of materials, and will ensure labor safety.
Types by purpose
The shape of the roller depends on its functional purpose. In addition to the basic painting tool with a standard design and dimensions, there are several more types.
Facade
The device has a large diameter and length of the roller, as well as a long handle. The handle can be telescopic (retractable). Equipped with a bearing that slows down movement at high speeds. This roller is designed for outdoor work and painting large areas.
Pressing
This is not exactly a paint roller, as it is used as an auxiliary tool for finishing work. A hard rubber or synthetic surface helps distribute pressure effectively across the surface.
Pressure rollers are most often used for:
- Rolling and smoothing wallpaper - the roller has a classic cylindrical shape.
- Smoothing wallpaper joints - with a barrel-shaped roller.
Angular
A tool designed for painting corners and other hard-to-reach places. It is distinguished by a long handle (sometimes with a telescopic device) and a small diameter roller resembling a wheel.
Radiator
This roller is designed to make painting the back of batteries and pipes easier. Equipped with a long thin handle and a compact working part. The working surface is specially made ribbed.
Needle
Auxiliary tool for finishing work. There are rollers with sharp and soft needles. Sharp ones are needed for making holes in drywall and other finishing materials. Soft ones are most often used for rolling out and smoothing self-leveling floors. Sometimes a roller with soft needles is also used as a painting tool to create textured surfaces.
Brushes
One of the most important painting tools shown in the photo are brushes, which, depending on the nature of the required work, are divided into several types:
- flywheel;
- handbrake;
- flute;
- whitewashing;
- maklovitsa;
- trim;
- paneled.
The fly brush is used when painting large areas. For convenience, the length of the bundle (about 100 mm) is shortened with twine 2-3 mm thick, and at least 50 mm of the bundle must be wrapped.
The handbrake is a small brush with a short handle. Available in diameters 26-54 mm. It is used when painting individual areas with adhesive dyes. Before starting work, it is tied with twine, which is untwisted over and over again according to the wear of the hair. The binding should leave a beam up to 40 mm long.
Flute - a flat brush from 25 to 100 mm. It has found its application in smoothing out irregularities after applying paints and varnishes.
The whitewash brush is produced up to 200 mm, 45-65 mm thick and 100 mm long. It is used when treating individual areas with adhesive or casein dyes. A whitewash brush is considered more effective in comparison with a fly brush, since it makes it possible to achieve impeccable coloring of the area.
The brush is a round or rectangular block with a brush, the length of which reaches 100 mm, and a handle. Used to cover large areas with adhesive or casein dyes.
Trimming - a rectangular brush with a hard spine brush. Used to smooth out surface irregularities after painting with adhesive or oil paints.
The panel consists of an iron frame with a diameter of 6-18 mm and a light, hard brush. It is used when painting inaccessible places and applying panels.