Is it possible to dilute the ready-made putty mixture for walls with water?
In construction stores, putty is sold in dry form: it will have to be mixed with water.
Ready-made formulations are quite expensive and are not suitable for use in large volumes. Inexperienced builders may encounter a number of difficulties when breeding. There are 2 types of putty: starting and finishing. The first is needed to level the surface, the second serves as the basis for any decorative finishes. The method of preparing each solution is different. It doesn't require much effort or skill to get started. The process of diluting the finish looks technically more complicated, since you need a drill with a mixer attachment.
The dry mixture can be diluted with plain water or, even better, with a liquid primer. Some sellers sometimes try to impose a professional solution for these purposes. However, this is all a waste of money. Water will do the job perfectly. It can be added at the beginning of work or during the process if the thickness of the material is not satisfactory.
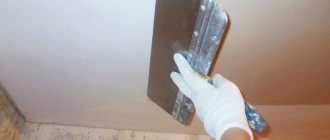
The walls are puttied at an angle: the larger it is, the thinner the layer of putty material will be needed for the job. You need to work quickly, without leaving even for a minute. This will prevent the mortar from turning to stone.
Scope of application
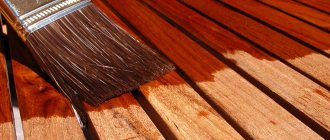
Wood putty is used for processing or restoration of various surfaces. It can be used for finishing cladding made of MDF panels or plywood, and used when preparing parquet for further painting. The mixture is actively used to restore door panels, window frames or old flooring. These are the most common uses, but this list can be expanded, because the product is quite universal.
It is important to note what properties the putty conveys to the surface in order to understand why it should be used in general:
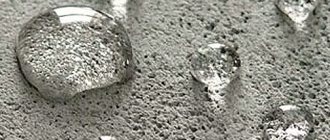
- The moisture resistance of wood increases significantly, which has a beneficial effect on its service life.
- Regardless of what type of putty material you choose, it can be used to mask existing defects, and some compositions can cope with very large damage.
- Using putty, you can emphasize the texture of the wood.
- The surface that has been treated with the material in question can be safely painted or covered with a decorative layer of varnish.
- The putty used to finish the flooring is characterized by excellent adhesion to the surface. It perfectly fills existing unevenness and even the smallest cracks that are sure to appear in the parquet after several years of use.
How to do this correctly and how to dilute semi-finished products?
To understand the intricacies of diluting a semi-finished product, sometimes it is enough to read the instructions. But each type of putty mass has its own characteristics.
- You need to select a container - its volume will depend on the amount of putty needed for repairs. It is most convenient to do the kneading in a plastic container, but you can take an aluminum one.
- The water should be at room temperature: the dry mixture will not dissolve in cold water, but hot liquid will “cook” it and turn it into an incomprehensible mass.
- Make sure that the mixture from the bag is dry.
- For maximum quality, it is better to use a drill with an attachment. The tool should have a soft start mode, so as not to splash the room, rotate the nozzle in both directions. The ideal mixing speed is 600 rpm.
There are two universal ways to dilute putty.
- Pour the dry mass into the container and gradually pour in the liquid. You need to look at the proportions on the packaging. Stir gradually. The process is somewhat reminiscent of preparing yeast dough: housewives carry out similar manipulations with flour.
- In the second option, we do all the steps in reverse: first fill in the water, and then slowly add the powder. It is best to bring the mixture to a homogeneous state with a construction mixer. The device will give the solution the required viscosity.
Before deciding how to dilute the putty, you need to know that this material is used for interior decoration and exterior work. Based on the scope of its use, the solution can be given a detailed classification - according to composition and proportions.
Acrylic
Diluted with ordinary water. The volume of liquid should not exceed the weight of the construction mixture by 3–5%. After adding water, the composition is thoroughly mixed. The surface to be puttied is cleaned, slightly moistened, then you can begin to work. It is possible to apply several layers: their number depends on the relief.
The surface must dry well. Only after this do they begin grinding and polishing.
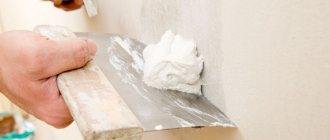
To work, you will need several wide spatulas. First, mix a small amount of solution. It is important to practice transferring it from one spatula to another so that the mixture does not end up on the floor. This method helps you understand how to apply putty to the surface.
Gypsum based
Gypsum putty can be paste or powder.
It is used in rooms where there is no high level of humidity. It dries in two to three days. Often it is used to decorate walls intended for painting. The cooking algorithm looks like this:
- The composition is poured into a bucket filled one third with water.
- After thirty seconds the powder should settle.
- The solution is mixed with a power tool for several minutes.
- If the mass has not acquired sufficient viscosity, add more water or powder. The main thing here is not to hesitate: after a while it will no longer be possible to do this.
- The solution is stirred twice in a row, maintaining an interval of one minute.
- Check the viscosity level: if everything is done correctly, the putty will easily stick to the wall, but will not remain on the spatula.
With cement
This type eliminates any unevenness, cracks, and can be used in any room - both with high humidity and with dry air. Additionally, cement putty is used to finish the facades of buildings made of concrete or brick.
Stores sell ready-made solutions or dry mixtures. The required consistency is achieved by kneading. The density will depend on the type of work. For example, to level walls, a thick mass is needed: for defects to become invisible, the layer can reach several centimeters.
Having applied the first layer of the mixture to the surface, do not rush with the second: it can curl up and tear off the initial layer, increasing the drying time. Wait until the first layer is completely dry.
Polymer
Polymer putty is made on the basis of polymers and plasticizers. Its main advantage is the combination of plasticity and elasticity. These mixtures are suitable for different types of premises. The solution is applied in a light layer; it can be used even on rough surfaces.
- To mix such material, dry powder is poured into a container with liquid.
- Mix thoroughly by hand or with a tool.
- After ten minutes, knead again.
- Polymer putty is applied to the surface of the walls in a layer no thicker than 3 mm.
- The dried surface is smoothed with sandpaper. This must be done with smooth movements in a circle, but without pressure.
Withered
Many have encountered a situation where, over time, a dried lump was discovered in a jar of putty. There are three factors that can lead to this mixture being in an unusable dried state:
- Temperature conditions : storage at sub-zero temperatures is not allowed.
- Sealing of packaging. When the can is opened, the mixture dries quickly as the diluent evaporates.
- Over time, most substances in nature undergo caking and separation. During long-term storage without movement, the particles are arranged into levels.
Types and properties of wood putties
In everyday life and in production, a variety of wood putties are used, which differ in the components they contain. The principle of operation of different materials is approximately the same - they prevent the penetration of moisture into microcracks, recesses and holes, eliminate visible defects and prevent the base from becoming dirty. Most often, putties are used when processing frames, doorways and panels, floor coverings, baseboards, plywood, etc.
Plaster
Such putties are not suitable for outdoor work because they tend to strongly absorb moisture. In addition, in terms of strength and elasticity, they are inferior to many analogues. It is better to use such materials only for small areas that will not be exposed to aggressive environmental factors. They can also be used to seal internal wooden bases in dry rooms. The advantages of gypsum putties include high vapor permeability, environmental friendliness, preservation of the natural microclimate in the house and low price.
Acrylic
Acrylic putty is quite often used for woodwork. This material is non-toxic, does not emit any odor, and can be used for exterior and interior use. Waterproof acrylic putty is not afraid of moisture, temperature changes, and moderate mechanical loads. It adheres securely to the base and is suitable for treating floors and exterior walls of a building. The composition can be used to seal small cracks and wood pores, as well as deep defects in wood. After drying, high-quality acrylic putties are characterized by low shrinkage and can be washed. Other advantages of acrylic-based materials are:
- high aesthetic qualities;
- ease of application due to plasticity;
- elasticity and absence of cracking in the future;
- long service life;
- protection of boards from fire;
- Possibility of sanding after drying.
Non-shrinking composition for wood based on acrylic
Latex
Putties with a latex base are characterized by very high plasticity, easy to apply and level with a spatula. They are characterized by excellent adhesion to wood, are firmly fixed on its surface and withstand further mechanical processing - planing, sawing, sanding, etc.
This group of materials can be used for interior and exterior work, since it is frost-resistant and does not deteriorate due to temperature changes. Latex putties are suitable for places with high humidity, and after drying they can be painted in any shade. They can be used to treat walls, structures, and also be used to eliminate defects on furniture, doors, chipboard and fiberboard panels.
Polymer
Highly plastic polymer compounds allow you to repair even the deepest cracks in wood. They are characterized by:
- environmental safety;
- absence of shrinkage, peeling, cracking;
- maintaining quality under the influence of ultraviolet radiation;
- high speed of hardening and complete drying;
- long service life;
- protection of wooden surfaces from clogging and pollution;
- repelling dust.
Each polymer putty is thermal and moisture resistant. This means that the composition is ideal for outdoor use, since it does not deteriorate from moisture, frost, or high temperatures.
On an oil-adhesive basis
Such compositions are made on the basis of oils, drying oils, adhesive components, plasticizers and solvents. They are suitable for treating facades before painting them. Oil-adhesive putty is a moisture-resistant mixture that does not deteriorate from the influence of precipitation, wind, frost and other adverse factors. It allows you to create a perfectly flat plane, suitable for processing large surfaces. This type of putty is perfectly combined with other finishing materials.
Universal oil-adhesive mixture with antiseptic
Epoxy thermal and moisture resistant
Epoxy putties are two-component compositions, one part of which contains epoxy resin and pigments, and the other part contains a hardener with plasticizers. After mixing and applying the product, the most durable, durable and damage-resistant wood coating is formed. It is not afraid of deformation, does not crack, and is not subject to shrinkage. Epoxy does not deteriorate at all from water, literally repels precipitation, and can withstand repeated freezing and thawing. The finished coating can be painted and sanded. The only disadvantage of epoxy putty is the high price.
Useful advice from experts
Even experienced craftsmen are not always able to create a uniform mixture. It will be useful to get acquainted with some of the “tricks” of builders:
- Before preparing putty, be sure to thoroughly rinse the container.
- If water is taken from a pond, it is advisable to filter it through at least a layer of paper.
- To prevent the mixture from drying out in vain, it is better to prepare it in small portions. A suitable amount is one that you can spend in twenty minutes of work. After this time, the solution begins to thicken.
- If the mass turns to stone, it can be softened with cold water. But you won’t be able to do this several times with the same material: the effect will no longer be there.
- You cannot dry the layers of mortar using an accelerated program (for example, with a hair dryer) - they will crack.
- When working, it is better to use large spatulas: with them it is several times easier to process large areas without external elements such as heating pipes.
The homogeneous composition of the putty is important both for the basic leveling of the surface and for the finishing one. Therefore, when working, it is important to monitor cleanliness, check the water and powder for foreign impurities, and use high-quality tools. Compliance with all rules and stages will allow you to achieve a decent result.
Source
Acrylic wood putty
Acrylic wood putty: apply correctly
Wooden surfaces are beautiful in their appearance.
Their owners are especially pleased with such high-status and beautiful floors.
But caring for them is troublesome, because they need to be painted regularly. And often it is necessary to eliminate some irregularities.
Acrylic wood putty is simply irreplaceable in such cases.
Advantages of this material
Like any other material, acrylic wood putty has a number of advantages:
- Protects wood from cracks and damage;
- Doesn't let it dry out;
- It perfectly levels the surface;
- It dries quickly, which means there is no need to interrupt the main repair process;
- Elastic;
- Does not have harmful components;
- Available in various colors, the basic ones are white, oak and pine;
- Perfectly suitable for further finishing with paints and water-dispersion varnishes;
- In addition, it is used in preparation for laying chipboards, laminate, ceramic tiles, etc.
Despite the fact that it has enough advantages, there are also disadvantages:
- Due to the speed of drying, it is not always possible to have time to level the surface, which means there will be defects that need to be eliminated with sandpaper;
- Sanding should be carried out wearing a mask, because the dust from this process is very harmful to our body;
- It will not be able to seal large cracks and cracks in one go, which means you will need to apply several layers.
We apply it correctly
Before applying putty, carefully prepare the wooden surface.
Sand over all visible defects, remove dust and other debris. In order for the putty to adhere better and more firmly to the wood, you need to treat it with a primer.
There is no need to lay a thick layer and try to smooth it out.
It is better to do this in a thin layer, carefully filling the voids and crevices. Movements must be neat and precise.
Important! No price or high quality of this material will help you repair large defects; this can only be eliminated by completely replacing the canvas.
The easiest way to apply putty is with a spatula, and excess should be removed with sandpaper. To level the surface of the wood, especially the floor, use gauze.
It will need to be laid on the first layer of putty. The second layer is completely covered and after drying it is sanded and cleaned.
Please watch the video:
Important! Putty is a material that is very difficult to wipe off, which is why you need to work with it very carefully and precisely.
What is it diluted with?
Typically, this material is sold in a prepared and ready-to-use state.
It fits well and holds tightly, even on vertical surfaces. If for some reason it thickens, it can usually be diluted with water or liquid primer.
Usually, cunning businessmen offer special solutions that are more expensive than the mixture itself. They are of absolutely no use to you. It is best to use plain water.
Let it brew for some time and only then mix it thoroughly, preferably with a construction mixer.
Water can also be added during the mixing process if you are not satisfied with the thickness of the material.
Correctly puttying parquet joints
To do this, a mixture of uniform consistency is applied to the surface with a stainless steel or plastic spatula.
Take a wide spatula and use it to rub the solution into the gaps of the parquet board. Ideally, you need to treat the entire surface.
Especially if this distance is very large. There is no need to try to fix them in one go; it is better to do it in several approaches.
After thorough drying, we take the abrasive material and clean off the excess. Sandpaper grit 100.
We remove all dust and other contaminants. Do not delay the application of the decorative coating, which will finally secure the putty in place.
Recommendations
Any process has its own subtleties that you need to know and carefully follow:
The putty and finishing material must be from the same manufacturer so that they fit perfectly together.
Often, manufacturers organize promotions for the purchase of related products, so you can purchase not only a high-quality product, but also save on it.
Mixtures on different bases can give unpredictable results, and usually negative ones.
There were cases when such a tandem led to damage to the wood and sometimes it was impossible to fix it. In such cases, a complete replacement is required.
The preparatory stage must be mandatory - the removal of damaged areas, dust, dirt and old coating. It is advisable to use a special brush at the end.
We apply putty with a small protrusion; it is better to remove the reserve than to end up with an unsightly depression.
All putty defects can be eliminated only after proper drying and only by sanding. Start with coarser grit sandpaper, gradually moving to fine grit.
Try to putty as quickly as possible, because the mixture dries quickly. And while this is good for experienced craftsmen, a beginner can make a lot of mistakes and ruin the material.
If you choose a dry mixture, then prepare a small amount that can be used at a time.
After all, if the composition of a larger quantity is not developed, it can quickly become unusable.
After use, the finished composition must be carefully closed, ensuring tightness, so that it does not lose its beneficial properties.
If you are using a container for preparing putty. take something disposable that you won’t mind throwing away, because it’s practically impossible to wash it.
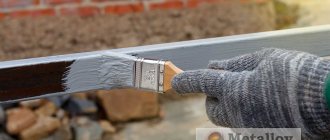
Work with gloves, because when the mixture gets on the skin, it dries it very much and profuse peeling often occurs.
Even the increased wealth of your family is not a reason to replace wooden floors or other similar surfaces every year.
This is both costly and troublesome. It’s easier to keep them in good condition and regularly carry out repair work.
Additional video on the topic:
And there is nothing better than using acrylic wood putty to eliminate small cracks, crevices and other irregularities.
Share this article with your friends on social media. networks!
Selection and application of wood putty for interior work
It is impossible not to notice that there is a return of building materials that were previously considered to be relegated to the background due to new technologies. Thus, wood materials are becoming increasingly popular. In addition to their environmental friendliness, they have many more advantages. They are used at all stages of construction work. But in order for them to acquire their best qualities and also maintain their service life, they have to be processed. For this purpose, wood putty is used, which is used for external and internal work.
Properties of putty
You should not think that only walls are puttied to prepare them for painting. No, internal work involves a much larger set of activities. Ceilings, floors, doors, in general, all wooden surfaces need finishing. Therefore, such a material must have the following properties:
- the prepared composition must be plastic for a long time;
- due to its consistency, it cannot be lumpy or too liquid;
- its strength corresponds to the strength of the surface on which it is applied;
- have excellent adhesion to wooden structures;
- after drying, the appearance of cracks is unacceptable;
- the hardening procedure should occur gradually; too fast a process will not allow for good grinding;
- paint and varnish compositions - must be well applied to the finished surface.
Wood is a rather demanding material, so the putty intended for it must have certain properties
Types of putty for interior work
There are many types of putties for interior finishing. Their choice entirely depends on the type of surface being treated, as well as on the financial capabilities of everyone who decides to engage in finishing work. For example, the price category of epoxy and polymer materials can vary significantly.
Such material is produced exclusively through the use of chemical components. Acrylic wood putty, after complete drying, forms a fairly strong but elastic layer. It lends itself well to subsequent processing. It won't take much effort to polish it.
It is believed that this type of putty is the most environmentally friendly. That is, its effect on the human body is practically not observed. Can be used to finish any type of surface. This can be very convenient, because you don’t need to select your own composition for each material. Cannot be used for sealing large seams and cracks. It is believed that the optimal layer thickness cannot be more than 2-3 mm.
Epoxy
This type of putty is used to seal and level out any imperfections that may be on wooden surfaces. This versatility can be achieved due to the fact that epoxy putty adheres well and does not require effort for application.
It has the following advantages:
- the epoxy composition dries quickly enough;
- does not require special tools for operation;
- You can putty any imperfection with it;
- after complete drying, it is sanded;
- epoxy putty is resistant to moisture;
- practically does not interact with chemicals;
- complete adhesion to all groups of materials.
To achieve the greatest effect, fillers are added to epoxy solutions. They impart increased viscosity. How much of such a substance to add to the composition is calculated only locally.
It differs from other putties in that it forms an elastic and white layer after application. Does not require special skills to carry out the work. Excellent adhesion to wooden structures. Can be used as a starting or finishing composition.
On a note! Gypsum, unlike epoxy materials, has a unique property. It can take excess moisture from the room and, if necessary, give it back. This allows you to create a very comfortable climate.
This putty is intended exclusively for interior work.
Polymer
This is quite modern material. It consists of various polymer components. It depends on them what qualities the composition will have. This putty is perfect for all stages of work. She:
- perfectly masks seams;
- seals even the deepest cracks;
- well suited for subsequent finishing works, such as painting, varnishing;
- eliminates cracks that form from water penetration.
There are mainly acrylic (mentioned above) and latex compositions. The first ones are used much more often. The latter, having unique properties, are quite expensive.
Oil-adhesive
This putty is used to correct numerous defects that form on window frames, ceilings, doors and frames. Not used for floor work. Possessing a wide palette of shades, it does not require additional addition of color. The only significant drawback is the long drying time.
Waterproof
An excellent option for those rooms where there is high humidity. That is, this putty is suitable for bathrooms and kitchens. Possessing increased moisture resistance, it is not subject to harmful effects. Excellent for subsequent painting.
Rules for applying putty on wood
So, it became clear that there are a sufficient number of different types of wood putty, the use of which depends solely on the specific case. The main thing is to carry out all work according to the rules and carefully.
Some application tips:
- The surface is carefully prepared - dirt, dust, grease stains and paint are removed.
- The area or the entire surface is degreased. To do this, use a soap solution or alcohol.
- The application area is well dried.
- Putty (epoxy, acrylic) is applied using a spatula so that there is a little more of it than required. This is done because the solution shrinks.
- After drying, the area is sanded.
- Starter or basic. It is applied to correct all major imperfections and prepares the surface for subsequent processing. This layer can reach several centimeters.
- Finishing. Apply to a well prepared and dried surface. Gives final completeness and serves for subsequent application of decorative coating (painting).
- Interior decoration Ceiling
- Walls
- Doors, arches
- Window
- Stove, fireplace
This method is used for work on all types of wooden surfaces.
Puttying a wooden surface
Number of layers
Putty for wooden structures involves applying two layers:
Wood is a rather unique material. It has been used for many thousands of years. And even now it has not lost its attractiveness. But all wooden surfaces require careful processing. For this purpose, there are many types of putties for interior work. Their use does not require special skills or tools. The most important thing is to follow certain rules and the sequence of application stages.
- Kitchen decoration
- Bathroom, toilet
- Corridor, hallway
- Balcony, loggia
- Other rooms
- Finishing of buildings Country and private houses
- Wooden houses
- Baths, saunas
- Finishing materials Drywall
- Cladding panels
- Wallpaper, cork
- Tile
- Laminate, linoleum
- Decorative plaster
- Finishing work Plaster
- Primer
- putty
- Painting, whitewashing
Finishing a bathroom or bathroom is a more complex task than it might seem at first glance.
External slopes on windows are an integral part of any home. For such work there may be.
Wallpaper is one of the most common finishing materials for walls, and sometimes even ceilings, which are different.
How to choose and use wood putty?
When applied correctly, wood putty for exterior use allows you to obtain “breathable” walls or other building structures, protecting them from moisture, the environment and harmful microorganisms that can cause great harm to human health and the structure. This product will also help in filling cracks, voids, and various wood defects. The ease of application and durability of the coating depend on the correct choice of putty, so you must follow the advice of experts and give preference to a quality product.
How to choose the right putty?
The main purpose of acrylic wood putty is to level the surface, as a result of which defects are filled and thorough preparation for subsequent cosmetic finishing occurs. Acrylic putty must meet certain indicators:
- have good ductility for quick and uniform distribution of mass over the surface;
- dry quickly so as not to cause inconvenience during work;
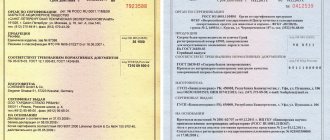
- the presence of quality certificates indicates the environmental friendliness of the products;
- wood putty should have a normal balance between price and quality;
- when purchasing a dry mixture, a good indicator is very small particles, which indicates the possibility of smooth and uniform application to a wooden surface;
- acrylic putty, which has high adhesion, allows you to create better adhesion of the solution to the surface, this extends the service life of the wood.
Acrylic putty for wood
Wood putty has several types, which differ in characteristics and require a specific application; instructions are always attached to each product:
Masking screw heads with putty
Making your own putty
The mixture contains ingredients such as linseed and turpentine oils, casein, food gelatin, borax, ammonia, and crushed pumice. This makes it possible to create wood putty with your own hands. Experts say that this process is labor-intensive, does not cover the costs, and some ingredients are much more difficult to obtain than to buy a quality product. The price will exceed the cost of the finished mixture, so the solution is very rarely made by hand.
Putty process
Before carrying out construction work of any complexity, it is necessary to ensure compliance with safety precautions and protect your hands and face. It is advisable to clear the room of unnecessary objects and furniture; if this is not possible, experts recommend covering all things with polyethylene. To prevent dry hands, you need to wear gloves and protect your face with a high-quality respirator. In order for this process to go quickly and without problems, it is necessary to prepare in advance the necessary tools for work and subsequent cleaning:
- broom, bucket, washcloth;
- primer and wood putty;
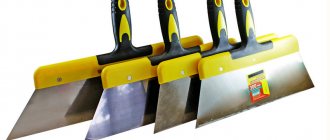
- brush, trowel, roll of sandpaper, scraper, spatula, steel wire brush.
By mixing sawdust and PVA glue you can get a putty for sealing cracks in wood
To carry out quality work, it is necessary to prepare the surface. Be sure to remove all old coatings that were on the tree. This is done using a brush or solvents to facilitate the cleaning process. If it is impossible to remove protruding objects (nails or staples), they are covered with enamel, after which the entire surface is wiped with a damp sponge.
To increase the durability of the coating, it must be treated with a primer, the choice of which must be taken with great responsibility: it must be combined in composition with the putty.
When choosing a dry mixture, it must be kneaded, and it is better for novice workers to purchase a ready-made one. When there are significant defects on the surface, builders use serpyanka, which is a narrow tape that can hide cracks. For convenience when working, it is better to use 2 spatulas of different sizes, with which the composition is evenly applied to the surface and distributed along the wall with diagonal movements. After applying the first layer, you must wait until it dries and smooth out any unevenness with sandpaper. The second (thinner) layer also needs high-quality processing, after which you need to wait for the surface to dry completely.
Wood putty color palette
A few words in conclusion
Basic wood putty is characterized by the presence of large particles in its composition and, depending on the surface, can be applied in a layer of several millimeters or centimeters.
After complete drying, the treated surface becomes rough.
The finishing mixture is smooth and is applied over the base mixture for final leveling. When you plan to wallpaper, 2 layers are enough. When painting walls, it is necessary to apply up to 5 layers of finishing putty.
The most popular mixtures are the foreign product for woodworking Tikkurila and the Russian composition for wood primer Tex.
What are the proportions of cement mortar for plastering walls?
- Putty and plaster difference What is the difference between plaster and putty? Plaster and putty are mixtures widely used in construction for…
Epoxy putty for metal Putty for metal: which one to choose The photo shows a surface coated with a composition with glass fibers Depending...
What is the best way to dilute “Premium” acrylic wood putty?
It is necessary to putty the wooden windows in the country house. I heard earlier from a friend that the “Premium” putty is very good. I'll go buy it tomorrow. I just don’t know, it probably needs to be diluted. Please advise me how to dilute the “Premium” acrylic wood putty?
The preparation of this type of putty is not difficult or requires any special unusual techniques. The putty is diluted with ordinary water in a volume not exceeding 3-5% as a percentage of the weight of the building mixture. After adding water in the required proportions, the substance is thoroughly mixed. After mixing, the solution is ready for use. The surface to be puttied is cleaned and moistened immediately before the operation. Depending on the surface topography, the mixture can be applied in several layers. After drying, the created relief is rubbed and polished with sandpaper with a fine abrasive texture.
Wood putty “Premia” is not a dry mixture that requires mixing with the addition of water.
This is a ready-to-apply composition.
Just open the package (container), mix thoroughly (for example, with a spatula) and you can work with it.
Apply to the surface with the same spatula, the layer is thin and uniform.
If necessary, it is diluted with ordinary water, since this is an acrylic putty, or a liquid primer, as an option.
If you stop at water, then the water is clean, I would also advise giving the water time to settle, only then add it to the putty in small portions.
But I would like to note that too thick “premium” putty may indicate that there is a problem with the composition, or the expiration date (storage) has expired or it was not stored correctly (for example, frozen), perhaps the container was not tightly closed, etc. .
This acrylic putty is sold in both white and colored, and can be matched to the color of the wood.
White is often purchased if the wood will be painted in the future.
Source
Composition and technical characteristics (consumption per 1 m2)
The putty is based on liquid acrylic. This synthetic substance is produced by processing acrylic acid. Varieties of putties are sold in ready-to-use form. The plastic, viscous consistency of the white mass is packaged in plastic containers of different sizes. The container is equipped with plastic handles for comfortable transportation.
In addition to the main component, various fillers are added to acrylic putties that change the characteristics of the finishing product. The mass also includes water.
When marble chips are added to the composition, the strength of the building mixture increases; the product is suitable for coating various surfaces, including wood and metal. When purchasing, it is taken into account why the product is selected based on the components of the mixture.
The material has the following technical characteristics:
- The putty dries in 12 hours at a temperature of about +20°C;
- when covering the surface, the thickness of the putty layer is less than 5 mm;
- The material is applied at a temperature of at least +12°C;
- mass density - 1.8 kg/m³;
- The shelf life of the composition is 1 year.
The consumption of building material per 1 m² of surface is 1.1-1.2 kg, depending on the quality of the product and the thickness of the layer.
How to dissolve VGT universal acrylic putty?
Last year we bought VGT universal putty, now we want to use the leftovers. How to dissolve VGT universal acrylic putty?
Acrylic universal putty "VGT" is available in finished form,
If you need to change the consistency (for example, the putty is too thick), then it dissolves (more precisely, it is diluted) with ordinary water.
But water is added to the finished putty without fanaticism, no more than three percent of the total mass of the “VGT” putty; after adding water, mix thoroughly.
It is also important to note that after drying (completely), this putty is no longer soluble in water, it does not absorb water at all, because it is a waterproof putty.
This putty is applied in a thin layer and is usually used for painting, that is, the putty itself is not the finishing layer, but the last of the preparatory ones.
Last year we bought VGT universal putty, now we want to use the leftovers. How to dissolve VGT universal acrylic putty?
If you stored it in the wrong conditions in an open container, the putty will set and will not dissolve with anything, just throw it away.
It has a shelf life of one year and that is if stored properly.
Source
We apply it correctly
Before applying putty, carefully prepare the wooden surface.
Sand over all visible defects, remove dust and other debris. In order for the putty to adhere better and more firmly to the wood, you need to treat it with a primer.
There is no need to lay a thick layer and try to smooth it out.
It is better to do this in a thin layer, carefully filling the voids and crevices. Movements must be neat and precise.
Important! No price or high quality of this material will help you repair large defects; this can only be eliminated by completely replacing the canvas.
The easiest way to apply putty is with a spatula, and excess should be removed with sandpaper. To level the surface of the wood, especially the floor, use gauze.
It will need to be laid on the first layer of putty. The second layer is completely covered and after drying it is sanded and cleaned.
Please watch the video:
Important! Putty is a material that is very difficult to wipe off, which is why you need to work with it very carefully and precisely.
Putty is a faithful friend in leveling walls
This finishing composition differs in type of binding component and is:
Each of the compositions is intended for starting or finishing types of work. The starting layer masks defects, chips, and removes imperfections. The thickness of the finishing layer is much thinner, it creates an absolutely smooth surface. There are also universal powders, the use of which is acceptable in both cases.
In stores you can find both dry powders that require dilution with water, and ready-made pastes. The puttying process is simple, even a beginner can handle it. The price of the product is affordable.
Useful video
Before starting decorative finishing, you should level the walls and correct all existing flaws. The process of eliminating defects should be given special attention, because in the future the quality of the repairs will depend on it. The aesthetics and attractiveness of the interior depend on the correct geometry of the room. Correctly executed puttying will allow you to avoid problems caused by the curvature of the walls. In this article we will get acquainted with different types of mixtures and learn how to properly dilute putty.
Types of putty and features of their dilution Today you can easily purchase both ready-made and dry mixtures that require dilution. The first ones go on sale in special containers. The second ones are packaged in durable paper bags. Putty that does not require mixing is sold at a higher price, so it is advisable to buy it only for a small amount of work.
How to dilute with a mixer: proportions
A small amount of clean water at room temperature is gradually poured into the dry powder. The mass should be mixed with a special construction mixer, initially at low speeds, then the number is increased by changing the speed to a more powerful one. The power tool must be clean so that the remnants of the old product do not fall on the surface being treated. Then you should take a short break, about 15 minutes, and then continue kneading. In total, you need to mix until a homogeneous mass is obtained.
The speed of the mixer during mixing should be kept relatively low to avoid excess air getting into the composition and thereby the formation of bubbles on the wall at the time of applying the putty.
The proportions for mixing the solution are taken from the manufacturer's instructions supplied.
Independent preparation of the composition
When deciding how to putty a wooden floor before starting to lay the laminate, many consumers come to the conclusion that it is better to prepare the mixture themselves to complete the work. The whole essence of the process comes down to the fact that the floors must first be strengthened (if there are “walking” boards), then a frame made of thin bars must be built, and then the free space between the joists must be filled with a composition made on the basis of PVA. This is a great way to level the floor before laying laminate or linoleum.
First option
To prepare the composition you will need a sufficient amount of fine wood sawdust and PVA glue. The thick mixture is poured between the bars, leveled using a rule or a large spatula and allowed to dry thoroughly. After drying, the resulting surface (which can be considered ready for laying a new coating) will be quite hard and durable, there will be no cracks or irregularities left on it.
Second option
Animal glue (10% of the total mass), liquid drier (2.5%) and turpentine or glue kerosene (12.5%) are used. This means that to prepare 1 kg of the mixture you will need 200 g, 50 g and 250 g of the listed substances, respectively. This putty needs to be welded:
Heat animal glue and add soap to it. Slowly, stirring constantly, add drying oil, turpentine and drier into the resulting hot mixture. When the mixture thickens and becomes a homogeneous mass, carefully introduce a small amount of chalk.
Continue stirring the mixture while heating until the putty begins to resemble thick sour cream. You can putty until the prepared putty begins to cool. To heat up the cooled mass, just use a water bath, which will ensure gradual and uniform heating.
It is important that the putty you prepare yourself meets the basic requirements for this kind of composition. It must be elastic and durable
In addition, the most important quality of such a mixture is high adhesion. It is this that guarantees a long service life of the floor without swelling and cracking. An equally important detail is the homogeneity of the mass.
Third option
There is another simple recipe for making wood putty with your own hands. It is prepared on the basis of PVA glue. To implement your plan you will need:
- PVA glue;
- water;
- dry mixture for finishing putty.
It is necessary to pour glue into the prepared container (about 1/3 of the total expected mass of the composition), add 2/3 of water to it, then gradually introduce any finishing putty, remembering to stir constantly. Dry putty should be introduced in small doses, mixing thoroughly until a homogeneous elastic mass is obtained.
Now it can be applied evenly to the surface to be restored and allowed to dry completely. You can begin processing with fine sandpaper no earlier than after 12-15 hours. After restoration using such a mixture, the old surface will look perfect, and any paint will fit perfectly on it.
We dilute putty for different purposes
According to its purpose, putty is divided into starting and finishing, specialized and universal, and the optimal consistency of the solution for these groups is somewhat different.
- Starting putty is designed to level the surface of the wall. It is applied to hide significant defects such as cracks and scratches. The mixture of such putty should be moderately liquid. It is recommended to apply the starting putty in several layers. It has good penetrating properties, which allows it to fill the surface structure and create the necessary adhesion.
- The finishing putty can be applied either directly to the surface or on the starting putty. It can only mask minor unevenness and is usually applied in a thin layer. Its main function is to make the base for painting or pasting as smooth as possible. The technology of how to dilute finishing putty is practically no different. However, in this case, the consistency of the putty must be perfect, without even small particles and lumps. It is applied in a 1mm layer, so even minor defects will be immediately visible. Before mixing a new portion of putty, you must thoroughly rinse and dry the tools, container and nozzle.
A highly specialized putty is used to finish certain areas to hide their imperfections. There is also a universal putty that can be used in any type of work, slightly inferior in quality to the above. In this case, when solving the problem of how to dilute putty for walls, the proportions need to be clarified on the packaging, since the ratio of water and dry components may differ among different manufacturers.
Diluting the dry mixture is one of the simplest stages of puttying, which anyone can handle if they have the necessary knowledge. Armed with the information provided in the article, you can save on the purchase of ready-made putty compositions, and enjoy the pleasure of creating beauty and comfort in your home with your own hands.
Oil putties
This wood putty is intended for external use. It is based on solvent and oil. Building facades are treated with this product before the painting procedure.
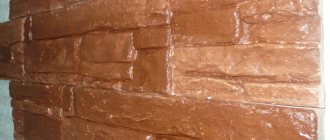
Oil putties have a wide range of colors and imitation for different wood textures.
- Finishing putty: types, application technique and characteristics. Tips for choosing the best composition
- Knauf plaster - characteristics, properties, types, applications and mixing of the mixture (105 photos)
- Do-it-yourself floor screed: types, construction technology and advice on choosing materials and tools. Video instructions and 110 photos from professionals
How to properly dilute finishing putty for walls at home without a mixer
To knead manually, you will need a dry, clean container. You need to pour the required amount of powder into it. After this, add water in accordance with the required proportions.
It is imperative to knead in this sequence, otherwise lumps may appear, which will be extremely difficult to get rid of later.
The resulting solution is thoroughly mixed, after which a three-minute pause is made. The solution swells. Then mix again until smooth. The resulting mass should be more liquid in consistency compared to the starting one.
Breeding
The finished putty should be plastic and pliable. Pay attention to the homogeneity of the mass. It is not allowed to contain impurities, lumps or other defects.
The consistency of the mixture should not be too thick or liquid. Let's figure out how to prepare a putty mixture using a mixer and manually, and also learn about the proportions in which the components should be used.
Without mixer
So, let's try to prepare the mixture without using electrical appliances:
- In order to dilute gypsum putty using the manual method, you will need a clean construction bucket. Before mixing the solution, make sure that the container is thoroughly dry.
- At the next stage, you need to pour dry powder into the container.
Attention! If you first pour water and then add putty, the mass will form lumps, which are quite difficult to get rid of.
With mixer
Now let’s find out how to dilute wall putty using a mixer:
- A clean construction bucket must be filled with liquid. Standard instructions recommend filling this container to 1/4 of its volume.
- Next, you need to pour the putty mixture into the center of the bucket. If the manufacturer has not given clear recommendations regarding the amount of powder, it should be poured until it rises 1/3 above the water level.
- Afterwards, you need to wait until the dry putty is completely immersed in the liquid. Typically this process takes from 5-25 seconds.
- Finally, it is necessary to mix the contents of the container until smooth, using an electrical appliance.
About application technology
Acrylic paint, plaster and any other material for finishing work can be applied in different ways. The finishing putty is applied in two ways: mechanically or manually. You can putty using special units. They release the composition under high pressure. The mechanical option is good if you need to decorate large areas. For interior decoration and when working with miniature façade elements, the manual finishing method is used.
Reinforced mesh is applied to the corners of the facade of any building. Only then can you dilute the putty to the desired consistency and start working. The use of a mesh allows you to form really clear, regular angles, and the coating itself will be strong and complete.
The algorithm for applying putty material to the work surface is as follows:
- We clean the surface from any contaminants, level it, and clean out relief defects;
- We prime the walls with the prepared composition;
- The required amount of putty must be diluted as required by the construction task. If the composition was initially ready, the mass is still thoroughly stirred;
- When the diluted mixture is ready for use, the master applies the required amount of acrylic composition to the surface manually or using a machine. We putty carefully, but quickly. The choice of method for working with compositions depends on the texture that is preferred.
When the acrylic finishing putty has already dried, but still retains its elasticity, a pre-thought-out pattern or imitation (for example, a bark beetle) is formed on the surface. At this stage, you cannot do without a special roller or plastic “grater”.
What is important to observe proportions for different mixtures?
The putty is diluted depending on the following factors:
- what component is it based on: gypsum, cement or polymers;
- what type of work needs to be done: starting or finishing;
- what surface should be treated: wall or ceiling;
- type of room where renovation work is carried out: wet or dry, inside the building or outside.
Standard proportions look like this:
- 1 kg of gypsum powder is mixed with 0.8 liters of water;
- 1 kg of dry cement mixture with 0.4 liters of water;
- 25 kg of polymer composition is poured into 10 liters of water.
An excessively liquid consistency, which will lead to smudges on the wall, is avoided. It is also unacceptable to use powder that is too dry. As a result of kneading, the resulting homogeneous slurry should not contain lumps.
Before preparing the composition, you need to read its instructions, since the proportions of some manufacturers may differ from standard standards.
Self-prepared putties
It is not profitable to use store-bought putties to fill large defects in wooden floors (sinks, cracks). In such cases, homemade mixtures are used to fill the main volume of the crack or chip. The middle fraction filler will reduce the degree of shrinkage of the material. After they have dried on top, the area to be restored is thoroughly treated with high-quality store-bought putties. There are many recipes for homemade putties; each master brings his own nuances that increase certain properties of the paste (shrinkage rate, adhesion, drying speed, strength). Here are the most famous ones.
Resin paste
This method prepares a small amount of the mixture for small-scale work. Rosin is used as a solid filler, which is tinted to match the color of the wood using ocher:
- In a heat-resistant container, mix ozokerite and rosin in a 2:1 ratio.
- The mixture is melted on a burner and ocher is added in the same amount as ozokerite was taken.
- The mixture is stirred until a homogeneous mass is obtained.
You can only work with this putty while it is hot. If it begins to harden, it is heated again and work continues.
Chalk based pastes
Chalk has a finely dispersed structure, combines well with oils and varnishes, the mixtures are homogeneous and plastic.
Oil paste
Oil putties are often prepared independently due to the availability of components. To treat the floor that will be painted, you can prepare the following mixture yourself:
- a kilogram of drying oil is taken as a base;
- 1% drier (10 grams) is added to it, which is used to speed up the drying of oil paints and varnishes. The cheapest are NF-1, NF-4;
- season the drying oil with chalk powder. Per liter of drying oil take 2 kg of powder, but it can be adjusted depending on the required degree of thickness of the mixture.
Chalk and PVA paste
PVA glue and chalk are mixed until a creamy mass is obtained. Depending on further use, sawdust can be added to the mixture. In this case, you will get putty for filling large cracks. This mixture takes a long time to dry. To speed up drying, craftsmen add finishing gypsum putty.
A mixture of chalk and varnish
To mix the putty, use a varnish based on the same solvent that will be used in the finishing coat. In this composition, chalk can be replaced with small sawdust. When restoring an old coating, wood dust can be collected from a sanding machine bag. If the sawdust in the bag is dirty, it is prepared by sanding down any piece of wood.
For craftsmen who install parquet, there is always something to putty on the floor. By sanding the wooden parquet, they obtain an authentic filler for the putty material. Therefore, they take putty binders (colorless acrylic suspensions) to the site. They are mixed with wood powder of the parquet being treated and a paste is obtained that is completely identical in appearance to the coating material. After treating the seams with this composition, they become completely invisible.
Video of how the mixture is prepared and applied to the parquet:
Types of putty
- Putties prepared for use. Sold ready-made in plastic buckets. The peculiarity of this substance is its short shelf life.
- Dry mixture - intended for mixing. Sold in bags and is the most common use. The advantage of dry mixtures is their low and affordable price, convenient transportation, the ability to prepare any degree of viscosity you need, as well as a long shelf life. The disadvantage of dry types of materials is that the resulting mass must be applied to the surface as soon as possible after mixing to prevent it from hardening.
Types of Binder
- Cement. Putty with a cement base is characterized by high water resistance, and it is intended for use in rooms with high levels of humidity. The disadvantage of this substance is precipitation after application to the surface, after which it is necessary to apply an additional layer. Also, this type hardens relatively slowly, which is why small microcracks may appear.
- Polymer. This type is the best and highest quality coating, but due to the high price, fakes are often found.
- Plaster. This species does not settle. It can be applied in a thin layer. The disadvantage of this type of substance is the fear of temperature and moisture changes.
USEFUL INFORMATION: Is it possible to paint drywall without prior putty?
Subtleties of work
No matter how modern and versatile this or that building material may be, working with each individual type requires certain skills and knowledge. Masters are happy to share their experience with beginners. Here are the most valuable tips and recommendations:
- Sub-zero temperatures indoors or outside (if we are talking about working with façade putty) provoke a sharp decrease in the elasticity of the composition. The best time to use acrylic compounds is dry and warm weather;
- It is important not to overdo it with acrylic materials. The maximum thickness of the finishing layer is 10 mm. Minimum layer – 3 mm;
- Moisture-resistant acrylic putty can be used not only for total finishing of wood, but also for the restoration of some products. You can choose a putty that perfectly imitates wood texture. This is a wonderful alternative to “classic” wood paint;
- It is allowed to use acrylic compounds for working with metal. Before application, both the shade and texture of the finishing material are carefully selected so that it looks organic, complementing the overall finish. If necessary, individual parts are torn with paint.
Volumetric cavities need to be sealed in several stages. If the material is applied in a thick layer at once, it can spread, giving unsightly relief defects. It is better to process areas in stages, applying thin layers of material. This will allow you to both do the work efficiently and accurately, and save a small amount of material for other areas. The paint is used only when the mixture has hardened.
Without experience and without the necessary practice, it is difficult to do the work accurately, efficiently and quickly the first time. Especially many problems arise if the mixture is chosen incorrectly. That is why it is important to use informational or practical support from professionals at any stage.
How long does it take for the finished mixture to dry?
The drying time of the putty depends on:
- type of putty mixture;
- thickness of the applied layer;
- air temperature/humidity;
- the base on which the composition is applied.
The average drying rates are:
- starting gypsum mixture with a layer thickness of up to 30 mm - one week;
- finishing composition of gypsum - 4-6 hours;
- starting cement mortar - 5 hours;
- finishing layer up to 3 mm - 1 hour.
Regarding polymer putty solutions:
- epoxy - 8 hours;
- latex - from 12 hours;
- acrylic starting layer up to 1 mm thick - 3 hours, finishing layer 3 mm - 24 hours.
The leveling mixture can harden quite quickly, so to save money it is better to knead it in small quantities.
During repair work, the process of filling walls cannot be ignored, since only after completing this stage can the desired result be achieved. Knowing the rules of kneading and the technology for applying the leveling agent, the implementation will not require much effort and will be within the control of even a novice master.
Useful tips
Let's take a look at the recommendations of experts:
- When stirring putty using a power tool, make sure that the drill bits are washed and thoroughly dried;
- A layer of diluted putty that is too thick can lead to uneven hardening;
- Stir the solution thoroughly against the sides of the container;
- The consistency of the solution should not be too thick or thin.
For further decorative finishing of the walls, putty is used. This is a very important moment in the process of cosmetic or major repairs, because the durability and appearance of the wall finishing will depend on the quality of application of the putty mixture. The quality of the putty depends not only on the application technology, but also on the correct dilution of the dry mixture. Therefore, before starting each repair, you should know how to mix putty for walls.
Features of applying putty mixture with video
You can putty the lights with the help of specialists, or yourself. If you decide to level the walls with your own hands, you should understand that there are different types of putty. It all depends on the material under which the surface is puttied. The first way is by painting. This type is labor-intensive and complex. The surface should be perfectly smooth. To begin work, the walls must already be plastered. There are several features:
- It is necessary to use a painting net. It is attached to the starting base, then reinforced with two layers of putty.
- The finishing layer must be applied 2 or 3 times.
- The finished surface must be cleaned carefully, otherwise all the material will crumble.
The second method is by gluing wallpaper. Opinion is a labor-intensive process. The result should be such that the sizing goes well, without unnecessary nuances. It is better to use dry material than ready-made material. Preparation for work consists of the following stages:
- Removing old material from the area.
- Wipe clean walls with water. Wait for the surface to dry.
- Remove dirt with a brush
- If the wall is smooth, you can prime it. Otherwise, you need to plaster.
- You need to prime with a roller. For corners use a brush. Wait until completely dry.
- Using a clean spatula, apply putty to the walls.
- If the walls are covered with plasterboard, the finishing layer is applied once.
- Before gluing wallpaper, the walls need to be sanded.
It is better to mix dry putty in small portions. Since it is not stored for long under these conditions. Auxiliary tools are used clean, without any residues of old material. The mixture, which has hardened a little, is diluted with a small amount of water. How to dilute putty for walls, what are the proportions and how can you do it without a mixer? Every specialist has heard these phrases. The proportions are indicated on the packaging. The construction mixer is replaced with a drill with a special attachment.
Source
We make the putty ourselves
There are several ways to make your own mixture. You can make them at home. The only thing you will need is to purchase the necessary components. So, let's look at the simplest options.
1. Putty made from a mixture of PVA and chalk. This composition is considered the simplest. It's easy to do:
- chalk, in the form of a fine fraction, is diluted in PVA, the composition is brought to homogeneity;
- the mixing process continues until a mixture is obtained that resembles sour cream in consistency;
- if it is necessary to seal cracks and seams, then add sawdust;
- After application, the solution dries for about a day.
Homemade putty from a mixture of PVA, chalk and sawdust
2. A mixture of varnish (water-soluble) and chalk. This composition does not require large financial costs. After all, instead of PVA, cheap varnish is used. The operating procedure is the same as in the previous version. In addition, such putty with your own hands turns out to be much stronger and more elastic. The desired color appears by adding tint. It can even be used for work on chipboard and OSB. When preparing, it is better to adhere to the following plan:
- It is better to start mixing in the evening, then by the morning you can get a ready-made solution;
- varnish and chalk are mixed to obtain a paste-like consistency;
- it doesn’t matter if it turns out a little thick, you can add a little water;
- in the case of starting work, sawdust is added;
- Drying time up to 12 hours.
Using chalk and water-soluble varnish, you can easily and inexpensively make wood putty at home
3. A mixture of drying oil with the addition of oil. For this you will need:
- flax oil - two hundred and eighty grams, turpentine oil - sixty grams;
- perlite (pumice powder) – thirty grams;
- casein – twenty grams;
- gelatin - twenty grams;
- borax - twelve grams;
- ammonia 18% - eighteen grams.
Everything needs to be done in the following order. The oil is mixed with pumice. Three hundred grams of water is added to the resulting mixture. Then all other ingredients are mixed. The resulting solution is heated in a water bath (t – 90 °C). Everything is mixed well, you need to achieve a homogeneous structure. The mixture is ready when it looks like a paste. Then it is removed from the heat, allowed to cool and used. It retains its properties for an hour.
Do-it-yourself putty must be used within an hour
4. Wood putty made from chalk, sawdust and nitro varnish. This composition is used for work in non-residential premises and outdoor work. The fact is that after application, due to the nitro varnish added to it, the solution acquires a rather unpleasant odor. It is almost impossible to get rid of it. The preparation procedure is the same as for previous formulations: you need to get a creamy mixture.