One of the simplest and at the same time indispensable hand tools is a spatula. This device is used when performing repair and construction work, and not only by specialists, but also by home craftsmen. When choosing a tool for work, you may encounter such a difficulty as the wide variety of models. Choosing the appropriate spatula option not only improves the quality of the work process, but also saves money, eliminating unnecessary costs. Before you start learning how to use a spatula, you should understand such important issues as, for example, what this tool is intended for and what types there are.
What is a spatula and what is it used for?
A spatula is a construction tool designed for applying adhesive solutions, as well as leveling and decorative mixtures. Structurally, this device is a simple device consisting of the following parts:
- The working area is a wide blade made of stainless steel in accordance with the requirements of state standards.
- Handle - can be located with the blade in the same plane or at a right angle, and is designed to improve the convenience of using the device. The way the handle is positioned affects the technique of using the hand tool. The handle is made of hard plastic, which is rigidly connected to the blade of the tool. There are also tools with handles made of wood, rubber or aluminum.
Most construction spatulas are designed this way, but there are also other models. Their design depends on the purpose, so first let’s look at the issue of the types of tools based on the material they are made of.
Features and Requirements
The spatula is a small, convenient and easy-to-use device that fits easily in your hand. A plastic, rubber or any other spatula is a plate of a certain shape with several cutouts along the edges. Their presence makes it possible to create the contour of the seal seam, giving it a round or angular shape.
The device in question is also used not only to form seams, but also to remove excess material from the surface, which certainly appears when they are compacted.
A corner or any other spatula for seams has a number of useful characteristics:
small size , so it can be placed for storage anywhere,
durability and possibility of repeated use,
versatility , because it can be used not only for leveling and creating internal and external corners, but also for removing excess material from the surface.
It must be said that such devices can be divided into categories according to the following criteria:
Let's say a few words about each of the criteria.
By shape and size
Manufacturers produce models of spatulas for grouting joints of various shapes, which allows you to choose the most convenient solution for a particular case. Most often on the market there are models of a square or similar shape with protrusions on each edge. The corners are beveled at 45 degrees and have an additional overhang. Such a simple design can significantly increase the efficiency of the device and makes it as practical as possible.
Using such a tool, you can make seams that will have different contours, height, thickness and other characteristics.
Note that in the center of the spatula you can often find a small depression, thanks to which it is convenient to hold the tool. The sharp edges of the spatula allow it to slide smoothly over the surface being treated, while making it possible to adhere very tightly to the coating and easily remove excess sealant.
There are other models. For example, triangular spatulas are in great demand. They are convenient to use in cases where there is a need to seal joints in places that can be described as hard to reach.
This type of device allows you to simply remove excess sealant and at the same time ensure the continuity of the seam.
According to the material of manufacture
This criterion is very important, because not only the durability of the spatula will be a relevant issue here. The material must be selected in such a way that the sealant does not stick to the trowel surface and can be easily removed . But in practice, it often turns out that the spatula still needs to be treated with a certain substance. For example, to increase the efficiency of a silicone model, it is better to first lubricate it with a soap solution.
If we talk specifically about materials, then models made of rubber and silicone are the ideal solution due to their high elasticity. In addition, they crack less often and retain their original appearance perfectly. But spatulas made of rubber and plastic are not so practical. The reason is susceptibility to deformation. But they also have an advantage - increased density, which is why many craftsmen prefer to work with them.
Read also: How to make a magnet for curtains with your own hands.
Tool production material
The most popular are metal spatulas, but there are also other varieties. Metal devices are also called universal, as they are suitable for working with different types of building mixtures:
- putty;
- plaster;
- tile adhesive;
- decorative plaster.
For the production of metal spatulas
Stainless steel is used, the advantage of which is its resistance to corrosion. This allows you to increase the service life of the device for a long time. In addition, the working part of the device must have sufficient strength and flexibility, so it is very important to use special alloys that meet these requirements for the manufacture of the product.
In addition to steel, manufacturers also produce plastic spatulas
, which have elasticity and are intended to perform actions such as smoothing or applying materials in a thin layer. They are usually used when gluing wallpaper, when it is necessary to smooth out the resulting folds.
Plastic spatulas can also be used to apply adhesive mixtures or liquid wallpaper, because the main advantage of such products is their gentle effect on the surface being treated. Unlike metal products, plastic spatulas are susceptible to negative effects such as abrasion and scratching, so they do not last long and need regular replacement.
There is another type of tools under consideration - rubber spatulas
. A distinctive feature of such products is their high elasticity parameter. Unlike plastic and metal models, rubber ones can bend depending on the surface topography.
They serve primarily for removing adhesives and sealants protruding onto the surface. The rubber part can have varying degrees of hardness, which can reach the level of plastic products. That is why such spatulas can be used to smooth out folds or apply building mixtures in a thin layer.
Material selection
On the modern market of construction and finishing materials, putties are presented in a wide range. Their compositions differ in purpose, properties and pot life.
Before you start purchasing material, you need to familiarize yourself with some characteristics of each type:
- Polymer putty is a finishing coating and is used at the end of finishing work. The mixture levels the wall surface well and has high moisture resistance;
- Gypsum is approved for use only in enclosed spaces. Forms a smooth surface, hardens and dries quickly;
- Cement putty has high moisture-resistant qualities and can be used in finishing bathrooms and kitchens. The disadvantage of this type is the likelihood of cracking after drying. To prevent cracks from occurring, the surface should be periodically moistened until the inner layer is completely dry.
According to the form of release, putties can be dry, requiring independent preparation, or ready-made. According to their intended purpose, there are specialized, leveling, finishing, decorative and universal solutions. The choice of material is carried out individually and depends on the type of work performed and the degree of exposure to external factors.
You should also purchase a primer. To form both external and internal corners, it is recommended to use deep penetration solutions. This will ensure good adhesion of the mortar to the wall and prevent peeling and chipping of the plaster.
From the tools you need to prepare three spatulas: two straight ones 25 and 10 cm wide, and an angular one. To obtain a homogeneous solution when using dry mixtures, you will need a paddle attachment on a drill or construction mixer. As a surface leveler, you can use a sanding float with sandpaper or a mesh attached to it, and when preparing the surface for wallpapering, it is better to use an abrasive with a grit level of P100 - P120.
To strengthen the outer corners, you should purchase perforated corners, and to form the inner corners, you should purchase a sickle mesh.
Types of spatulas: classification by purpose
Many novice craftsmen mistakenly believe that a spatula is only intended for applying putty to walls and then leveling it. The defining features of this device depend on its configuration, material of manufacture, size and other technical parameters. If you have to work with a spatula, it is initially recommended to understand the issue of their varieties. After all, the quality of the relevant manipulations depends on this. Let's look at the different types of spatulas below.
Criterias of choice
In order to choose a high-quality and reliable tool for the job, when purchasing it, it is recommended to evaluate certain criteria:
- comfort of the handle. The speed and quality of the work performed will depend on this. The tool should fit easily in the hand and be held firmly, so you should choose models that have a wide but short handle. The type of blades is assessed separately - they should not have defective areas and be smooth;
- The choice of spatula is carried out according to the area of its use. The dimensions of the tool itself and the material used for its manufacture must fully correspond to the type of work that needs to be performed. For example, with a wide spatula a layer of soil mixture is densely applied, but it is absolutely impossible to eliminate unevenness on the base;
- a tool must be of high quality, and in terms of this indicator, stainless steel products are the best. Such fabrics do not leave marks on the surface, are reliable, and have a long service life.
When choosing an angle spatula, pay attention to the material from which it is ready.
Sometimes stores offer equipment made of iron that has a special coating. It is not advisable to use it, since traces of rust remain on the finishing layer. They can even show through the wallpaper.
The blade should be flexible. A hard tool may break during work. There are also super flexible specimens that are difficult to apply putty with.
Painting spatulas: design, purpose and application
Painting
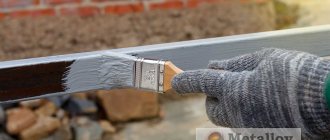
- one of the most common types of straight blades, which consist of a metal part and a handle made of plastic, rubber or wood. The working part of the painting spatula is made of stainless steel, and its width can vary from 20 mm to 450 mm. The thickness of the blade ranges from 1.5-2 mm, and its shape is often trapezoidal. The main purpose of these types of tools is to complete the final finishing of surfaces: walls or ceilings. These types of finishing often include plastering or puttying.
A paint spatula with a small width is designed for working in hard-to-reach places, for example, when it is necessary to smooth out putty next to a window sill. If work is being carried out to prepare walls for subsequent wallpapering, then for such purposes it is better to use devices with a working part width of 250-350 mm. Typically, devices with a width of 100-150 mm are used in conjunction with the main devices. They serve to collect the appropriate mixtures from a bucket and then distribute them along the blade of the main device. Using two tools together allows them to be cleaned against each other.
Due to the fact that the blade of a paint spatula is very thin, it can bend when applying physical force when smoothing the surface. That is why it is very important to be able to work with such tools correctly. To form a flat plane, you should guide the device so that the edge of the blade is directed at a right angle to tear off.
This is interesting! A paint spatula can be used to remove old wallpaper or a layer of paint. For such purposes, special devices are produced that are distinguished by the presence of a thicker and more durable blade, but painting-type products are also suitable for these purposes.
Work technology
The first step should be a visual inspection of the surface of the corner and removal of obvious protrusions using a construction knife. Then you should check the verticality of the walls using a level and note strong deviations with a pencil. Next, both walls are primed at a distance of 30 cm from the corner. After this, you need to apply the required layer of putty to places with obvious depressions and chips.
The layer thickness should be small, so if necessary, it is better to apply several thin layers.
The next step will be to apply a layer of putty to the surface of the walls adjacent to the corner from top to bottom and install a metal or plastic corner with perforated sides into the newly applied solution. Excess mortar that comes out through the holes in the corner must be removed using a narrow spatula.
When using a plastic model, it is important not to confuse it with a corner for plastering, which has fairly thick sides and is not suitable for putty. The advantage of plastic linings over metal ones is the impossibility of oxidation, corrosion and destruction.
Next, the perforated corner needs to be leveled and a solution added under it where necessary. After the putty has set, you can begin to putty the adjacent walls. The solution is applied alternately to both surfaces at a distance of 25-30 centimeters from the corner and leveled with a spatula. Excess mixture is removed with a narrow spatula. The thickness of the putty applied must be sufficient so that the perforated pad does not become exposed during sanding.
If you do not plan to glue wallpaper, then the chamfer at the joint can be removed. This will prevent subsequent chipping, but will somewhat reduce the attractiveness of the corner.
After the solution has dried, you can begin grinding the corner and then priming the surface. Then the finishing putty is applied, which, after drying, is also carefully sanded. If after applying the finishing solution some flaws are discovered, they should be puttyed, allowed to dry and sanded again. Finally, the surface is primed again, after which it becomes ready for fine decorative finishing.
It should be remembered that the formation of slopes using a perforated corner is possible when making right angles. The material is not used for finishing beveled corners.
Facade spatulas and their purpose
If painting products are used primarily for finishing interior work, then façade products are used for finishing facades. The characteristic features of such tools are:
- increased blade elasticity;
- high strength of the handle;
- large blade width - from 200 to 400 mm.
High rigidity of facade spatulas is achieved due to the reduced distance of the blade from the edge to the handle. This parameter plays a very important role, because this type of tool is designed to work with heavy types of building mixtures, which, in addition, are applied in a fairly large layer.
The large blade width plays an important role, allowing you to cover a larger surface area, thereby speeding up the work process. Facade spatulas can also be used for indoor work, for example, when the plane of the room has already been formed and the task is to increase the smoothness of the walls. Due to the large width of the blade, the working process is accelerated many times.
This is interesting! If you are a beginner, it is not recommended to choose facade spatulas with a width of more than 300 mm for work. This will complicate the manipulations of plastering the facade.
Geared device models: what is the secret of their use
When visiting hardware stores, you probably had to pay attention to spatulas, which are somewhat different from facade models. This difference lies in the design of the working part, that is, the blade. If on a facade device the edge has a flat surface, then on gear models there are cutouts in the form of squares or triangles. This is where the corresponding name came from - notched spatulas, which are also called corrugated spatulas. What these types of devices are intended for, we will consider further.
Due to the presence of teeth on the edge of the tool, the working mixtures are evenly distributed. This is very important when the process of laying ceramic tiles or insulating the facade of a building with sheets of foam plastic or polystyrene is carried out. The use of such tools allows not only to evenly distribute the adhesive mixture on the surface of the material being glued, which is a very important point on which the quality and reliability of the connection depends, but also to save the consumption of the adhesive composition.
Notched spatulas also come in different types. The teeth on the devices are small and large. If devices with large teeth are used to work with ceramic tiles or insulation materials, then products with small teeth are used when laying materials such as carpet, linoleum and mosaic.
Gear devices are not only metal, but also rubber. The use of rubber devices depends on the type of material on the surface of which the adhesive mixture is applied. Many people mistakenly believe that glue must be applied to the surface while holding the spatula at an angle. The tool should be held at right angles to the surface.
This is interesting! When working with plasterboard or porcelain stoneware, it is necessary to use notched trowels with a maximum tooth size of 40x40 mm.
Do-it-yourself puttying of drywall corners
Publication date: 03/23/20
When working with drywall, it is necessary to learn the technique of processing corners when attaching a perforated corner for putty. Leveling walls using a material such as drywall is a fairly popular procedure, as it easily solves the problem of the need to correct the curvature of the surface being treated. That is why it is so important to master all stages of work, which will allow you not to resort to the help of specialists.
Angle spatulas and their purpose
An experienced builder always has corner types of spatulas in his arsenal, which are a highly specialized type of tool designed for finishing internal and external corners when plastering walls. A characteristic feature of such tools is a blade curved at a right angle. The possibility of using the device for finishing internal or external corners depends on the configuration of the handle. If the handle is directed inside the corner, then such a device is used to align internal corners.
To learn how to use such tools, you will need to practice. After all, the specifics of leveling corners are quite complex, and therefore not even all specialists prefer to work with such devices. They are replaced by ordinary spatulas, which are used in pairs.
This is interesting! Spatulas for external corners are practically not used, since external corners are set using perforated corners.
Putty
During the restoration of each building, builders are faced with the alignment of corners, both internal and external. To level the corners, you first need to select the optimal solution and apply it in the future.
The solution differs according to existing criteria:
- Degree of preparation. The solutions are dry and, accordingly, have a low cost. This solution is easy to use, you just have to dilute it yourself. In addition, there are ready-made mixtures on sale that do not require preparation.
- Proportion of binders . The composition can be made of gypsum or cement. For example, cement mortar has excellent moisture resistance, which makes it possible to use it for filling the corners of a kitchen or bathroom. The only drawback is the possible cracking of the finished coating after the mixture has completely dried. Gypsum cladding is used only to cover the interior walls of a room - this is explained by the fact that it does not have a high degree of protection against dampness.
- Purpose. Solutions are universal and decorative. In addition, there is a special leveling material.
The variety of existing types should not be intimidating, because you can always consult with a specialist before purchasing.
When selecting the desired composition to be used when leveling corners, you need to pay attention to the number of grains in the solution. This indicator affects the quality of the future facing coating: the lower the indicator, the thinner and better the finishing layer will be.
Before starting work on leveling the corners, it is worth preparing the tools that may be needed during facing work:
- Corner trowel. This special tool is used when leveling the outer corner of a building, including inner corners. It differs from other options in the special fastening of the handle, which is fixed on the sides of the corner.
- Construction level.
- Perforated plastic or metal corners.
- Assorted metal spatulas.
What is a scraper: what is it intended for?
One type of hand-held device is a scraper, which is used to remove old plaster from the surface before applying a new layer. A tool is used to remove mortar, glue or paint that has hardened on the surface.
To successfully cope with the assigned tasks, the scrapers have a special design. The edge of the blade is well sharpened, which is necessary for effective removal of various frozen solutions. The blade width usually does not exceed 70 mm, which is done specifically to increase the efficiency of the tool. For the manufacture of scrapers, high-strength stainless steel is used, which is resistant to abrasion.
The blade is subject to abrasion as it is used, so it can be sharpened by removing the outermost part of the edge with a file. The design of the spatula in the form of a scraper provides a crescent-shaped recess. It is designed to be used with a hammer to remove difficult contaminants.
This is interesting! There are many different modifications of scrapers that are designed to perform specific actions.
Wallpaper spatula: how to use
When gluing wallpaper, it becomes necessary to use additional tools. This can be a roller, which costs at least 200-300 rubles, or you can use a special spatula. The plastic device is quite effective in removing air bubbles from under the wallpaper, and also aligns them tightly against the wall. That is why wallpaper devices are often called pressing devices.
The wallpaper spatula is made of plastic and is shaped like a wing with an acute angle. It is designed specifically for smoothing wallpaper along the fold line. Manufacturers produce tools in other forms, but which option will be most convenient and comfortable to use can be judged by their practical use.
This is interesting! When choosing a spatula for wallpaper, you need to pay attention to such an important factor as the absence of burrs. The slightest defects on the surface of the spatula will lead to damage to the surface of the decorative items being smoothed during use.
Technology of use
Now let's figure out how to work with an angle spatula. Let's assume that the joints on the walls are “filled up” by 1 cm or more, which is not uncommon in new buildings. In this case, they will have to be re-plastered.
What to do if the walls are plastered normally, but the joints still “failed” a little? In such cases, experienced professionals recommend different ways to solve the problem. For example, it is proposed to use a corner profile or a construction square. But there is another option that does not require serious skills and a lot of time.
Japanese spatulas - difference from standard models
The Japanese spatula differs from the classic versions in its design. It consists of a working part, to which a holder is attached on the opposite side of the edge. The working part is a rectangular or triangular plate, and the tool is used for processing curved surfaces, finishing and finishing.
The working part can be made of steel and plastic. Steel types of Japanese spatulas are designed for working with flat surfaces, while plastic ones are better suited for processing rounded areas or profile shapes. Typically, tools are supplied not individually, but in a set. The set includes 4-5 devices of different widths, which is very convenient when working with different areas of the surface.
This is interesting! This type of tool is in great demand when carrying out car body work. The device is very convenient for applying putty to metal parts of the body, and allows you to smooth out the composition with high precision.
Complex shapes
To putty complex architectural structures and arches, it is recommended to use a plastic corner that bends in any direction and allows you to form smooth and beautiful corners. Before you begin applying putty, you need to visually inspect the surface and remove protrusions using a plane or construction knife. When finishing drywall structures, you need to run your hand along the edge of the surface and check it for protruding screws. If protruding caps are detected, the fasteners should be tightened.
Spatulas for suspended ceilings: types of tools
Recently, the method of decorating a room using suspended ceilings has become increasingly popular. Although the design seems simple only after the work, its implementation requires considerable physical effort, as well as the mandatory use of a special tool. These tools include spatulas, which are called “for suspended ceilings.”
Structurally, the devices consist of a handle with a blade, but differ from classical devices. This difference lies in the variety of shapes of the working part - the tips. There are the following types of spatulas for suspended ceilings:
- straight - used to tuck the fabric in hard-to-reach places. Their width does not exceed 20-50 mm;
- curved - these are the most popular types of tools when working with suspended ceilings. Bending angles vary, so devices should be selected depending on the profile of the baguette;
- corner - designed for threading the fabric into the corner parts of the room;
- semicircular - they are used in the case of a specific shape of the baguette profile. The main advantage of the devices is the high speed of filling the canvas into the baguette.
- electric - a type of spatula, through which the movement of the blade or tip is carried out automatically using electrical energy.
The wide variety of tool shapes is due to a number of features of suspended ceilings. If you plan to install a suspended ceiling yourself, then it is important not only to study the step-by-step technology for performing this process, but also to select the necessary types of spatulas and other tools.
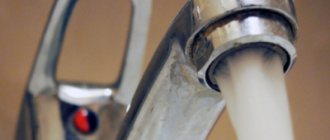
Spatulas for sealants: what are they?
There is a special type of tools that are designed specifically to work with adhesives, sealants and silicone. As a rule, such devices have a rubber working part, which eliminates the possibility of damage to the surface on which the substance is applied.
A rubber spatula for sealant is used:
- when grouting joints between tiles;
- when installing plumbing equipment;
- when gluing aquariums, glass and mirrors.
In almost all cases where it is necessary to apply adhesive or sealant to fragile materials, a special type of spatula with a rubber tip is used.
Curly spatulas and their purpose
Few people know that in addition to all the types of spatulas listed above, there is one more variety. It is called a figured spatula, the main purpose of which can be understood from the name. This type of tool is used to form the appropriate relief on putty or paint that was previously applied and did not have time to dry.
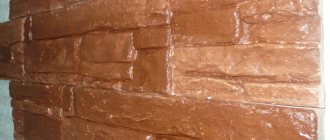
The creation of figured reliefs is carried out due to a specific design. Externally, the tool has little in common with classic spatulas. With its help, you can create different types of textures that will imitate wood, stone and other types of materials. The use of a spatula is carried out by applying it to the surface.
To make shaped devices, plastic and rubber are used, and the working part, instead of a sharp edge, has different patterns. The products also come in different sizes, allowing them to be tailored to suit different surfaces.
Principle of operation
Puttying external corners. Putty is carried out by forming surface joints at right angles. You need to install nozzles on the edges of the wall so that you can correctly apply the putty to the outer areas.
Specialized nozzles can be different:
- Metal. In the production of nozzles, galvanized steel material or aluminum metal can be used. To reduce the weight of the structure so that the product can be buried in putty, perforations are made on the sides. The disadvantages of this type of tool include the possible occurrence of corrosion in galvanized areas.
- Plastic. In shape, such plastic products are very similar to metal nozzles, only the plastic material has the highest service life. This design is often used when processing uneven wall surfaces with significant protrusions or various other defects.
- Flexible . Such nozzles are used for lining corners that are located in openings with arched geometry. Flexible nozzles are also used if it is necessary to plaster curved areas on a plasterboard surface. The special design of the corner will allow you to bend this product at the desired angles without damaging the edges. These overlays are used only when processing rectangular surfaces, but filling of other concrete planes is carried out without the use of auxiliary structures.
How to use a spatula: instructions for using the tool
The main types of spatulas used in construction and repair work were discussed above. Don't forget that the tools are also used in the kitchen, where they are used to serve confectionery products. Once all types of construction spatulas are known, you should move on to the next stage - learn how to use them. To do this, we will consider the features of using several types of devices that are most in demand.
Tips and tricks
- Puttying should begin with preliminary preparation. You should purchase the required amount of the mixture in advance.
- We must not forget that it is advisable to align all the walls at once along with the corners.
- If work was interrupted, the dried area of putty should be moistened with water.
- For shaping, you can use a special angled spatula. To work with it you will have to practice a little.
- The putty solution must be prepared in the required quantity. The consistency should be pasty. If significant drying of the mixture has occurred, which has led to the formation of numerous lumps, then it can no longer be used.
Puttying corners is not the most difficult process, but it does require patience and a little skill. It is impossible to level them unless you are prepared in advance for the fact that you will have to apply a significant amount of mortar to the entire wall.
How to use a sealant spatula
You can make a spatula for sealant yourself using improvised means, but if you have to work with the device often, then it is better to purchase a factory version. In addition, when purchasing factory spatulas for sealant, you can order them in a set, which will include different configurations.
To understand how to use a spatula for sealant, let's look at the example of the need to seal seams between a bathtub and tiles. This is a fairly common situation that will be of interest to many:
- Initially, the area where the sealant needs to be applied should be thoroughly cleaned, degreased and wiped dry. The effectiveness of the work depends on the quality of preparation.
- After this, you can begin applying the sealant.
- Once a layer of sealant has been applied to the groove between the bathtub and the wall, you must use the appropriate spatula. You need to choose it depending on the angle between the bathtub and the wall. If the bathtub is installed correctly, the angle will be 90 degrees, so choose the appropriate tool.
- Use a spatula from start to finish, pre-cleaning its surface from excess sealant.
- After the first layer of sealant has been removed, all that remains is to complete the final finishing. To do this, it is necessary to moisten the surface of the seam to be treated with soapy water and repeat the procedure of passing with a spatula.
This completes the process of sealing the seams between the bathtub and the wall. Sealing seams using a spatula not only helps to achieve an aesthetic appearance, but also eliminates the occurrence of fungus (blackening of the seams). The seams between window sills and windows, countertops and walls in the kitchen, etc. are processed in the same way. A detailed description of the process for the correct use of a sealant spatula is presented in the video
How to use a notched spatula
If the purpose of a notched spatula is known, then it would seem that it could be difficult to use. However, as practice shows, there are still difficulties. And so that a novice master does not transfer the adhesive solution (which is not cheap for a second) and tiles or other materials, you should first read the instructions. The instructions are not complicated, but they will allow you to correctly install tiles and other building materials. Let's find out how to use a notched trowel correctly using the example of gluing a mosaic to a wall:
- First you need to choose the right type of tool. It is selected depending on the thickness of the building material, which “sits” on the adhesive solution. The height of the spatula tooth should not be greater than the thickness of the building material, in this case the mosaic.
- Having chosen the appropriate type of spatula, we proceed to applying glue to the surface. If it is a hard material, for example, tile, then a layer of glue is applied to its surface. If it is soft, like a mosaic, then the composition should be applied to the wall.
- The surface on which the material is glued must first be covered with soil. Next, a layer of glue is applied, spreading it over the surface. The spatula should be held at a right or slightly inclined angle.
- Next, the adhesive material is applied. To do this, press it tightly to the surface.
- Now we draw conclusions about the correctness of the work done. Between the seams of the mosaic, the layer of glue should not come out. If this is the case, as shown in the photo below, it means that the spatula is chosen correctly, and most importantly, the glue is consumed in the required amount.
The situation is similar with laying ceramic tiles. If you choose the wrong notched trowel, an excess amount of glue will form between the seams, which will need to be removed. This takes time, and besides, the tiles must be immediately washed off the glue. With the right choice of spatula, such disadvantages are eliminated.
Wallpaper spatula: learning to use the tool correctly
If you plan to hang wallpaper yourself, then first you need to stock up on the necessary tools. One of these is a special wallpaper spatula, how to use which we will consider further:
- The wallpaper device does not have a specific shape, which makes it convenient for working with any area. This can be either a flat wall surface or with various protrusions, roundings, corners, etc. A special wallpaper spatula copes with any unevenness better than any device (including a roller).
- The tool is very easy to operate. To do this, you need to lean the strip of wallpaper against the wall or ceiling, then pick up the device and carry out the joining and removal of air.
- The presence of a pointed edge along most of the tool allows you to adjust the wallpaper to ceiling moldings or skirting boards.
The wallpaper spatula is easy to use, unpretentious, and in addition to all the advantages, it is very cheap. It’s much easier to work with than a roller or rags, so if you still don’t know how to glue wallpaper correctly, quickly and efficiently, then it’s time to buy a wallpaper spatula.
Corner filling technology
Based on their appearance, they distinguish between external (external), internal and curved corners. Each type has its own forming and finishing technology. You should especially consider the option of plastering the corner of the wall where it meets the ceiling.
External
To simplify the process of puttingtying an external right corner with your own hands, it is convenient to use special corner pads with perforated shelves. They are made of galvanized steel or plastic. Plastic corners are more practical because... are not subject to corrosion, traces of which may appear on the wall surface over time if metal is used.
The order of work is as follows:
- apply a thin layer of putty along the entire height of the corner;
- attach the perforated corner to the surface and press it into the solution;
- using a building level, check the vertical position and overall correctness of the fit;
- in case of deviations, level the position of the corner by applying putty under it;
- wait until the solution sets and then apply the putty solution to the surface of the wall on both sides of the corner.
After the putty has dried, treat the surface with an abrasive mesh and saturate it with primer 2 times. Cement mortars may exhibit slight shrinkage, which can be compensated for by applying a thin layer of the mixture and sanding again.
Internal corners
Puttying internal corners is somewhat more difficult. Especially in cases where their size differs from 90°. When performing work, remember that the putty layer should not be more than 2-3 mm. Large differences can be leveled only by classical plastering.
Putty is applied from the corner towards the plane of the wall. Very often the angular vertical is piled up or down. Therefore, during finishing, the surface must be constantly checked for this parameter. In this case, each of the walls is plastered separately.
Getting the perfect angle by applying mortar and leveling with a spatula is very difficult. The desired result is achieved by finishing sanding each wall separately. Grouting should be done using a plaster abrasive mesh No. 100-120.
Curvilinear corners of arches
Manufacturers of building materials produce flexible plaster corners especially for arched areas. One of their shelves has slits across the entire width, and allows for straight line bending. Otherwise, the technologies for puttying curved surfaces are no different from finishing external corners.
Where walls meet the ceiling
The corners between the walls and ceiling are also internal. The peculiarity of their finishing is that putty is done only after plastering of the walls is completed and perforated plaster corners are not used. The solution should be applied to the ceiling in a minimum layer.
The leveling process is mainly aimed at obtaining a flat wall surface, since floor slabs are usually flat anyway. If the slabs do not match in installation height, then it is best to consider the option of a suspended or suspended ceiling, in which case puttying will not be required.
How to use an angle spatula
If there are no difficulties in leveling the outer corners when plastering the walls, since special perforated corners are used for this, then difficulties arise with the inner corners. And in order to solve these difficulties with maximum efficiency, you should use special corner spatulas. To learn how to work with them, you will need to practice, since the tool has a specific design. To ease the fate of a novice craftsman in the process of leveling internal corners when plastering walls, detailed instructions are provided on how to use a corner spatula:
- The most important thing when working with a tool is to get the hang of how to quickly manipulate it. Plastering walls is a long process, and delay will lead to a slowdown in the pace of work, and as a result, delaying the repair. To prevent this from happening, it is recommended to master the tool.
- There are two ways to start working with an angle spatula. The first method involves applying a layer of putty to the surface of the instrument, after which it is applied to the inner corner. The second method involves first applying the composition to the wall and then passing it along the corner with a spatula for control leveling.
- Before starting work, it is recommended to check the tool for accuracy. To do this, use a square to check the angle ratio and, if necessary, calibrate. The advantage of such a tool is also the fact that it can be used to align not only straight angles at 90 degrees, but also those with various deviations. To do this, you must first adjust the tool and get to work.
The video below shows the process of how to properly use an angle spatula.
Rules for puttingtying internal and external corners of walls
You need to figure out how to use an angle spatula. For example, joints in modern houses often fall to a distance of about 1 cm or even more. You'll have to plaster them from the very beginning.
In a situation where the walls are quite suitable, the plaster does not need to be replaced, but the joints have failed a little, which becomes noticeable to the naked eye. Experts can recommend various methods to resolve problems.
It is possible to use a corner profile or a construction square. There is also a method that can be performed by a person who is far from construction skills and special skills at home. Should be purchased:
- materials for putty;
- corner spatula;
- gypsum plaster;
- profile;
- stepladder;
- level.
Using an angled spatula is quite simple; don’t be intimidated by your lack of skill. If plasterboard sheets were used during the repair work, then the profile was probably left in stock. However, you should look for whole products; pieces will not work. Otherwise, they will need to be purchased at a very affordable price. It is also worth considering some nuances:
- You should start from the top half of the wall. Take the profile and an angled spatula, place it with its legs towards you so that one side of the spatula rests firmly on the profile, and the other touches the other surface.
Important! The tool must touch the surface of the wall, move freely and easily, without causing difficulties.
- The profile should be fixed using dowels or self-tapping screws. One end is firmly fixed, while the other remains free to move.
- Strengthening occurs in such a way that one side is positioned vertically and strictly level. Also in such a situation, you can use a plumb line to check. Even the smallest blockage to the side will subsequently be noticeable, which will make the room unattractive and uncomfortable.
- Experts recommend using a level for vertical installation, while fixing the other edge of the profile. Ultimately, it will be possible to use a vertical guide when working with the tool and creating a perfectly even angle.
- The solution should be of sufficient thickness, not spread and adhere firmly to the surface. It is advisable to add a gypsum composition to the mixture. However, you need to remember that you should work with the mixture quickly so that it does not have time to dry out; it also sets in a few seconds. You may not have time to level the surface.
- when working with putty at the finish, you should firmly hold the tool at an angle of 20 degrees from the surface of the walls;
- the mixture must be applied from left to right and from top to bottom;
- movements should be fast and uniform;
- the tool must be held by the handle, which does not cause discomfort, it should be comfortable;
- To obtain a flat surface, you immediately need to press the corners of the canvas with your free hand.
Important! The most critical moment is considered to be the one when you have to pull out the solution or mixture with an angle spatula. The tool should rest only on the profile, and not on the wall itself. When the work is done correctly, you can straighten the corners in one go and make the room attractive and neat. After this, you can remove the profile guides and apply putty evenly along the corner.
To putty joints, you should also consider a few tips from professionals:
It is necessary to understand that you should not try to save money on repair tools; only in this situation will it be possible to make truly high-quality repairs and achieve moral satisfaction.
How to use a long facade spatula when plastering walls
Very often, novice craftsmen when plastering walls have many questions about how to properly use a long spatula. In fact, it is no more difficult to work with them than with a regular one with a narrow working part. To understand the principle, you need to know the following:
- When you buy a long spatula, you pay attention to the evenness of its edge.
- It often has a slope in one direction, and therefore many say that this is a defect and the device is not suitable for plastering walls.
- In fact, there is no marriage in this. Even if you managed to find a device with a smooth edge, this does not mean that such a tool is not a fake.
- During the process of plastering the walls, the working edge of the spatula will bend in one of two directions. Moreover, the user needs to pay attention to this from the very beginning of using the tool.
- The photo below shows what the plane of a long spatula should look like. It should have the shape of an arc.
- This is the correct spatula and is ready for use. It is necessary to apply a layer of putty on the wall with the opposite side from the arc. In this case, the putty will lie smoothly, and the corners of the tool will not form grooves.
In order not to peer into the plane of the spatula every time, it is recommended to mark the side with a marker on which the solution should be applied. The solution is applied with a painting device over the entire surface of the working part of the long device, after which the composition is applied to the wall and then smoothed. The video below shows the process of how to properly work with a long spatula.
To summarize, it should be noted that learning to work with different types of spatulas is not difficult. The main thing is to choose the right type depending on the nature of the work. If you do not have experience working with hand tools, then before performing important work, it is recommended to practice in order to master the operation of such a device.
Manufacturers
If we talk about manufacturers of spatulas and similar devices, it should be said that the market offers products from both domestic and foreign brands. Among domestic companies, it is worth mentioning such brands as “MasterPlast”, “Politex Yug”, “Nash Instrument”. In addition, a large number of instruments produced in our country are not marked for some reason. For the most part, domestic spatulas cope well with the responsibilities assigned to them.
If we talk about products from foreign manufacturers, there are a lot of them on the market. Spatulas from the Belgian brand Soudal, the company Startul Master from Poland, the Polish company TOPEX, and the German companies OTTO Fugenfux and Storch . Most of the above-mentioned models are distinguished not only by high quality workmanship, but also by the materials used for their manufacture, which ensure the durability of the spatulas. It should be mentioned that there are many products and companies from China on the domestic market. But their quality will be somewhat worse than that of products from European and Russian manufacturers.