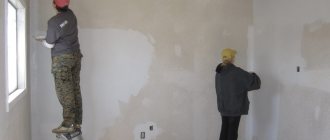
Problem areas in the bathroom are well known to housewives; these are the joints between the plumbing and the wall, the corners where the bathtub or shower is located, the junction of the sink and the wall. No matter how much you cover or paint over them, after a while new “flowers” bloom. But there is a good chance to overcome the “blooming”. Not long ago, bathroom border tape went on sale.
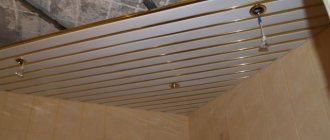
Joint in the bathroom
This is a relatively new product that housewives have already appreciated. Border tape can improve the design of a room for hygiene procedures. Its main purpose is to protect secluded and hard-to-reach places from moisture penetration, to seal and prevent moisture from getting under the bathtub, behind the sink, or behind the countertop. And this will entail the eradication of mold, mildew and other problems caused by the constant presence of dampness. The main advantage of the product is its ease of installation; any owner of such a room can install it independently.
Main characteristics
The border tape has a plastic structure, thanks to which it adheres well even to uneven wall surfaces. High-quality fixation is ensured by a special applicator on the edges of the product. When used, the tape is at an angle, which ensures that water falling on it drains into the bathroom. Throughout its entire service life, the bathtub tape retains its flexible, strong structure, does not get wet or crack.
Bath border tape
To install the tape, a complete set of materials is purchased, which consists of:
- curb tape rolled into a roll;
- special knife for cutting;
- corners (they are available in sets with curly ribbons);
- applicator.
Border tapes are available in a wide range in construction stores and specialized markets. Prices for the most popular curb models are shown in the table:
| Manufacturer | Dimensions, mm | Cost, rubles |
| MakroPlast LWE | 20x340 | 520 |
| MakroPlast LWE | 30x340 | 700 |
| Ultima | 38x320 | 250 |
| Ultima | 30x320 | 280 |
| Unibob | 30x335 | 400 |
Installation steps
The process of installing adhesive tape is quite simple. You can cope with it without outside help. This is especially true for borders with an existing adhesive layer. The whole procedure will take no more than an hour. In some cases, more time may be required to prepare the surface.
Preparatory work
The most important part of the instructions for installing curbs is the preparatory work. If you make a mistake at this stage, the reliability of the glued tape will be extremely low. You should approach your work as responsibly as possible.
Preparing the surface is not that difficult. If there is old tape stuck on it, it should be removed by removing any remaining sealant. The surface of the bathtub and the wall where the border will be glued must be degreased with an alcohol solution, diluted soda or a gentle cleaning agent.
After this, you will need to wipe the surface with a thick cloth or dry it with a hairdryer. It is better to use the second option, as it is more reliable.
Tools
Before gluing borders, you need to make sure you have all the tools and materials. Without them it will not be possible to complete the work. In addition to borders, you should prepare:
- mounting knife;
- roulette;
- masking tape;
- pencil;
- sealant;
- putty knife.
If you use regular tape without an adhesive layer, you will need to additionally purchase acrylic sealant or glue. They will be used to connect the border to the wall and the bathroom.
Cutting strips
A very important step is cutting the strips. The adhesive tape must match the length of the tub and its width. You need to measure the necessary parameters and mark the cut locations. When cutting the tape, keep in mind that it should be 2 cm longer than the curb of the bathtub. Also, after this, it should be bent along the fold line and the lower corner should be cut off at an angle of 45°.
This is interesting: How to align the corners in the bathroom - we present it in detail
Installation technology
Installation of curb tape includes several steps:
Stages of installing a flexible border
Preparing tools
So, to glue the border tape to the bathtub you need to prepare the following tools:
- sharp mounting knife;
- tape measure and pencil;
- putty knife;
- masking tape.
Please note that the tape will not withstand acidic silicones. In case of contact with them, it begins to deform and lag behind the surface.
In addition, you will need plumbing sealant and alcohol.
Surface preparation
Before gluing a flexible border, you must prepare the surface. Keep in mind that the durability of the curb depends on the quality of this procedure.
Result of improper surface preparation
The joint is prepared as follows:
- First of all, you need to clean the adjacent surfaces from any dirt and dust. You can wash them with detergent and then dry them ;
- Next, the prepared surfaces should be wiped with alcohol to degrease them;
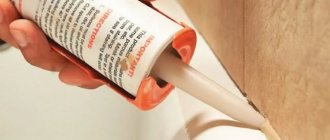
Sealing the joint
- Now the joint needs to be sealed. However, manufacturers claim that self-adhesive curb tape for the bathroom is an independent waterproofing agent. But, as practice shows, this procedure is not superfluous.
Excess sealant must be removed
Sealing is very simple - fill the gap with sealant. If necessary, level the surface with a spatula. If excess sealant remains on the surface, it must be removed after hardening.
The sealant is very difficult to wash off by hand. Therefore, I recommend avoiding contact with it with dry hands. If your hands are wet, you can even level the seam with your finger, since the sealant does not stick to a wet surface.
Marking and cutting borders
Now you need to prepare the tape itself.
To do this you need to do the following:
- measure the length of the seam;
- measure a piece of the required length and cut it with a mounting knife. Keep in mind that the length of the tape should be 2-3 centimeters longer than the length of the sides of the bathtub;
Fold the tape in half along the fold line
- Bend the prepared section along the fold line. The sector that will be located below should be cut at an angle of 45 degrees. If the tape is shaped, there is no need to cut the corners, since it comes with self-adhesive decorative corners.
Installation
Now you can start gluing the border.
The instructions are quite simple:
- Before gluing the shaped tape, you need to mark the border of the edge on the wall. It is best to use masking tape for these purposes;
We start work by gluing decorative corners
- then, if the tape is shaped, stick the corners on all corners, first tearing off the protective film from the back;
- then heat the border using a hair dryer. This will make it more elastic and allow it to stick to the surface better ;
We tear off the protective film and glue the border to the surface
- Now gradually peel off 15-20 centimeters of the protective film, and carefully glue the border. At the same time, press it firmly against the surface. Keep in mind that the harder you press it, the better and longer it will stay on the surface .
In the photo - gluing figured tape
- Seal the gaps in the joints of the tape with silicone sealant and be sure to level the surface with a wet spatula.
If after a day you notice that the tape has not stuck in some areas, it should be glued with sealant or even “liquid nails” glue.
This completes the installation process of the flexible border.
Which border tape to choose
Self-adhesive tapes are made primarily from synthetic polymers, due to which they differ in the necessary performance characteristics: moisture resistance, elasticity, resistance to temperature changes and household chemicals. Manufacturers apply a butanol-based adhesive to the back surface of the tape. The shape of the borders can be angular or curly. They go on sale in the form of rolls, complete with an applicator and sometimes a construction knife.
Installation of curb tape for the bathroom
Curved borders should also be equipped with a pair of corners.
When choosing a border tape, pay attention to several important nuances
Width. A tape that is too narrow may not be enough to cover the seam, and if it is too wide, the bathroom will look sloppy. The length of the material in a roll is usually within 3.5 meters. This is quite enough to cover a rectangular bathtub on three sides, and an asymmetrical or corner bathtub on two sides, respectively.
But in any case, it is better to take all measurements in advance. There can be a wide variety of color options, but white remains the priority for manufacturers, so other shades often have to be searched for or purchased to order. Few people pay attention to the fact that curb tape has a shelf life, which, as a rule, does not exceed two years. When the material is stored in an unacceptable temperature range or the packaging is damaged, the self-adhesive layer dries faster.
This is interesting: Carpet on the floor
Positive and negative aspects of the material
Tape sealant has the following advantages:
- the polymer border is easy to remove and replace if damaged;
- a wide tape reliably protects the connection from leaks and mold;
- the color of the polymer base can be selected in accordance with the shade of the bathtub or wall;
- using curb tape you can seal both straight and curved joints;
- The tape material is insensitive to temperature changes and high humidity levels;
- the appearance of the seam does not depend on the accuracy of the craftsman, and after self-repair there is no need to remove the remaining sealant around the gap.
Tape sealant.
Curb tape also has several disadvantages:
- The service life of the product with proper installation and operation is only 2-3 years, and if the storage or gluing conditions are not met, this period is reduced;
- aggressive chemicals and household chemicals based on acids can react with the polymer, which will lead to a deterioration in the appearance of the compound;
- If the polymerization conditions are not met during installation or if the waterproof layer does not fit tightly, it will move away from the surface and moisture will seep under it.
Types of border tape
Colored options for adhesive tape
Bathroom sealing tape is made of polyethylene and does not have any design variations as such. But for ease of selection, this material is conventionally divided into types according to a number of external features and installation technology. These signs include:
- Product width. Adhesive tape for the bathroom has a range of sizes in width so that you can choose the appropriate material for a specific seam thickness. In the vast majority, the kit includes a strip 320 or 350 millimeters long. There are tapes in widths of 20, 40 and 60 millimeters. This length is quite enough for the sealed border tape for the bathroom to completely cover three sides of a standard font, the length and two end sections.
- Product color. Most tapes are made white by default, but in large plumbing stores you can find a wide range of different colors. Colored border tape for the bathroom allows you to choose the material to match the color of the interior or as close as possible to it.
- Installation method. The vast majority of products are manufactured with a self-adhesive surface, which allows the tape to be mounted without additional adhesives. But there are models that do not have an adhesive side and such a sealing tape for the bathtub is mounted on neutral silicone or acrylic sealant.
- Decorative design. It is rare to find products on sale that have figured trimming or even decorative embossing, but such figured border tape for the bathroom is not particularly popular due to its inflated cost.
The differences described above can be called conditional, but it is necessary to know them in order to select the appropriate model for a particular case. You can see what waterproofing tapes look like in the photo in the article.
Types of border tape
In the manufacture of self-adhesive tapes, predominantly synthetic materials are used. Thanks to this, bath borders have the following technical characteristics:
- Elasticity.
- Moisture resistance.
- Resistant to household chemicals.
- Resistant to changes in temperature and humidity.
These are the main criteria when choosing material for bathroom cladding. Many manufacturers are engaged in production, so the choice should be approached responsibly. Study reviews and choose curb tape only from trusted suppliers.
Three rolls of border tape
Bath borders are supplied to the market by the manufacturer in the form of rolls and have an adhesive composition on the back side. Also included is a special applicator, with which you can easily highlight the joint angle. If we talk about varieties of products, then you need to understand that they are absent.
Here are a few key points that make the self-adhesive border a little different:
- Form. The tape can be angular or figured. The figured tape has a middle longitudinal sector, on which there is no adhesive composition.
- Width. The width should be selected depending on the size of the gap formed.
- Length. Rolls of 3.5 meters are usually sold. This is enough to cover a bathtub, but it’s better to take measurements before purchasing.
- Colors. According to the standard, the tape always comes in white. However, in specialized stores you can find border tape in pink, turquoise, beige and other shades.
The border tape can be made in different colors.
These are the main differences that this product can boast of.
Before purchasing, make sure that the border tape is designed to seal the seam between the bathtub and the wall
If you are interested, then you can read the recommendations on choosing a bimetallic radiator.
Conditions for proper work performance
When applying border tape to a bathtub, the following requirements must be observed:
- When purchasing and using, be sure to pay attention to the expiration date and date of manufacture of the material. The old tape partially loses its adhesive qualities, and its service life is generally about 2 years, so if it was not completely used during gluing, then it is better to resort to using the remainder after a year. The main thing is that during storage the remaining material is in its own packaging at room temperature.
- Before gluing the tape, be sure to clean off pieces of cement, sealant and other protruding elements.
- It is not advisable to apply pasting at temperatures below +10°C.
- When cleaning, you do not need to test the adhesion of the curb. The surface of the material just needs to be rinsed with water and periodically wiped with a sponge soaked in soapy water.
- You should wait a few hours before testing the moisture resistance of the new tape.
Characteristics of border tape
Modern manufacturers offer a wide range of different decorative disguises for such gaps. Among them, bathroom border tape has become quite popular. It is an adhesive-based strip made of polymers. This material is highly resistant to various persistent chemicals and acids. In addition, such decor is hydrophobic and does not contribute to the emergence of harmful microorganisms on its surface.
This is what self-adhesive bathroom curb tape looks like
This sealant is affordable and easy to install and dismantle if necessary. In addition, the material has a rich color palette and looks very attractive throughout its entire service life.
The scope of application of polymer strips is very wide. They can be used in almost any room with different functional purposes. Therefore, when purchasing a product, check where you plan to use it. In the bathroom, border decors can be used to decorate the seams between the walls and any plumbing fixtures, including shower boxes and washbasins.
The product is produced in small rolls about three meters long.
The product is released in bundles. The length of one such roll is about three meters. In this case, the thickness and width of the decor may vary. The entire back surface of the strip is impregnated with butyl adhesive, which will allow it to be hermetically installed on the problem area. The material itself is quite hygienic, although for reliability it is impregnated with antifungal additives, which prevent the occurrence of mold at the joint seams.
Among the polymer analogues presented for these purposes, decorative borders will be the best choice. Other plastic skirting boards will not be able to resist the proliferation of fungal microorganisms as effectively. As for the complete sealing of the joint with tiles or porcelain stoneware, such an undertaking will require lengthy work and certain skills in cladding. In addition, this material will cost significantly more, and will require additional measures to seal the seam.
Installing the tape at the joint
First apply the tape and measure the required lengths
In order for the waterproofing tape for the bathroom to serve for a long time, it is necessary to strictly follow the sizing technology. To better describe the process, we will provide step-by-step instructions and at the end of the article we attach video material that will show everything clearly. So, the installation process looks like this:
Bathtub adhesive tape is laid starting from the longest section of the joint. To do this, we measure the segment we need by leaning it against the long section and cut it off with a utility knife.
It is very important here that the adhesive tape for the bathroom is measured without tension, otherwise you will end up with an uneven edge. Then we bend the border tape in half along the entire length of the segment so that its adhesive side is on the outside. Then we remove about 5-6 centimeters of the protective film from the adhesive surface and glue it clearly to the joint, starting from the corner. Then unroll the tape and, using a rubber spatula or finger, press the remaining parts to the surfaces as firmly as possible
The harder you press, the stronger the silicone bathroom tape will be glued to the joint. After the first section (5-6 cm) is glued, remove another 3-4 centimeters of the protective tape and glue it again. And so on along the entire length of the segment.
Installing mounting tape at the joint
- In the same way, measure and glue the remaining sections of the joint. In places of corner joints, pasting is carried out overlapping the previous layer.
- At the end of the pasting, the bath border tape is cut at the corners with a stationery knife at an angle of 45 degrees. In this case, the depth of the cut should affect both tapes, after which we leave it all for 24 hours for the material to completely shrink.
If after 24 hours you find that the tape around the bathtub has come off in some places, then most likely these places were damp or not sufficiently degreased. In this case, you can glue these areas using liquid nails or any other high-quality glue. If you use a wide curb tape for the bathroom, then it is advisable to install it at a temperature not lower than +10 degrees, and also avoid low temperatures during the shrinkage of the material throughout the day.
After reading the material presented in the article, you already know how to install polyethylene or silicone tape for bathtubs and will be able to carry out the installation yourself.
How to choose quality colored border tape
To choose high-quality colored border tape, it is advisable to buy it in shopping centers, since it must be stored at a temperature not lower than +10 degrees, otherwise it will lose its adhesive properties. The storage period should not exceed 2 years. Do not expose the tape to open sunlight. Particular attention should be paid to the integrity of the packaging. Damaged or torn packaging may render the product unusable.
You can apply the border tape to the bathtub yourself. This does not require the skills of a professional repairman.
The main advantages of using border strips
Border tape is the most affordable and easy-to-install material. Numerous consumer reviews speak of the advantages of this method of joint sealing. Here are their main advantages:
- Affordable price.
- Quick installation. Anyone can glue it.
- Reliable sealing of seams.
- Due to the fact that the adhesive composition is applied over the entire surface of the tape, it adheres perfectly to the surface of the side of the bathtub and the wall.
- It does not wrinkle under loads, it is resistant to various damages and impacts.
- It has a high degree of plasticity, it bends perfectly at any angle, and no cracks form on it.
The disadvantages of the material include its fragility. Unlike ceramic curbs, which can last for decades, a flexible bathtub curb will need to be replaced after 2-3 years. However, due to the affordable price and ease of installation, the need for replacement will not create any special problems.
Cases when seam sealing is indispensable
Some owners, having installed the bathtub as close as possible to the wall, believe that it is not at all necessary to carry out work to seal tiny gaps. This opinion is wrong. Professionals recommend sealing even seams whose width does not reach two millimeters. After all, the resulting gap will become a place where moisture will constantly and unhindered penetrate, which will undoubtedly lead to the growth of mold in the bathroom.
In addition to its unpresentable appearance and unpleasant odor, the fungus can cause serious health problems. These microorganisms aggravate respiratory and heart diseases, including in completely healthy people.
If you do not seal the seam between the bathtub and the wall, sooner or later fungus will appear in this place
Therefore, you should not save on your health. Reliably sealing the joint during repairs is much smarter than the long and grueling process of getting rid of fungal spores. Moreover, the materials intended for these purposes have a very reasonable cost.
In addition, they are usually installed quickly and without much difficulty. Most owners are interested in how reliable the bathtub border tape is, how to glue it, and a video with detailed instructions for installing this type of decor. Answers to all such questions can be found in our article.
Types of border tape
Colored options for adhesive tape
Bathroom sealing tape is made of polyethylene and does not have any design variations as such. But for ease of selection, this material is conventionally divided into types according to a number of external features and installation technology. These signs include:
- Product width. Adhesive tape for the bathroom has a range of sizes in width so that you can choose the appropriate material for a specific seam thickness. In the vast majority, the kit includes a strip 320 or 350 millimeters long. There are tapes in widths of 20, 40 and 60 millimeters. This length is quite enough for the sealed border tape for the bathroom to completely cover three sides of a standard font, the length and two end sections.
- Product color. Most tapes are made white by default, but in large plumbing stores you can find a wide range of different colors. Colored border tape for the bathroom allows you to choose the material to match the color of the interior or as close as possible to it.
- Installation method. The vast majority of products are manufactured with a self-adhesive surface, which allows the tape to be mounted without additional adhesives. But there are models that do not have an adhesive side and such a sealing tape for the bathtub is mounted on neutral silicone or acrylic sealant.
- Decorative design. It is rare to find products on sale that have figured trimming or even decorative embossing, but such figured border tape for the bathroom is not particularly popular due to its inflated cost.
The differences described above can be called conditional, but it is necessary to know them in order to select the appropriate model for a particular case. You can see what waterproofing tapes look like in the photo in the article.
How to make the right choice
In addition to its functional function as a sealing object, the tape also has a decorative function. It gives the bathroom a finished look; shaped, colored products increase the attractiveness of the interior. When choosing a suitable tape model, you need to evaluate several characteristics:
- width of the product - if there is a large gap, you should not purchase the narrowest model with a thickness of 2 cm, it may not be enough. An overly wide model may not look aesthetically pleasing. Therefore, you should purchase a self-adhesive border with a width equal to the width of the joint with a margin of approximately 10-15 mm;
- the standard length of the product does not exceed 3.5 m. For bathtubs of classic shapes, one roll is enough to seal joints on three sides, for corner, asymmetrical models - on two. If the font has non-standard dimensions, then more than one roll of tape may be required;
- colored, figured models have a more attractive appearance, but are rarely found on sale. The classic white color with a smooth texture will suit any interior.
Materials
The main criterion by which borders for bathtubs and sinks are chosen is the material of manufacture.
Polyethylene border tape for sinks and bathtubs
Reliably seal the holes from moisture. They are easy to use and cheap compared to other materials. There is a wide range of border tapes of different widths, lengths and colors. The tape has a self-adhesive base, so even a child can handle gluing such a border.
A significant disadvantage of such a border is its fragility. Such curbs are usually used as a temporary solution to the problem. If you want to extend the life of the curb tape and provide more reliable protection from moisture, you can additionally use a sealant under the tape. However, even with this method of use, the tape will last you several months, no more.
Plastic
The next longest lasting curb is a plastic curb. Made of very practical and at the same time inexpensive plastic, such a border is securely attached to the bathtub and wall using special glue. At the same time, plastic borders are very light and do not weigh down the structure; they are easy to install and easy to clean. They go well with any materials. However, such borders also have their drawbacks - the plastic can fade and darken over time, it is easily scratched, and soon you will also have to replace it.
Ceramic
It should be matched to the tiles used in the bathroom. Such borders are much more durable than those described above and can serve you for decades. Ceramics provide good sealing and are durable in themselves. However, you need to be careful - if installed incorrectly, the ceramic border may crack.
Installation of ceramic borders requires the use of special equipment and certain skills.
A natural stone
Such borders certainly require an appropriate interior. Marble and granite borders are almost eternal, but in a small bathroom lined with ordinary ceramic tiles, they will look ridiculous. They are quite bulky and require certain skills during installation.
How to properly glue border tape to a bathtub: the correct technology and sequence of work
The process of gluing the material is carried out as follows:
- Initially, you should take measurements and mark on the tape the size of the edge of the product, making an allowance for the corner joint, if any.
- The cut part of the material must be folded in half or along the visible creases with the glue side facing out. To increase elasticity and make installation work more comfortable, you can additionally warm it up using a hairdryer.
- According to the rules, it is necessary to paste the tape in the corners, then along the length and, last of all, along the width of the bathtub, gradually removing the protective coating.
- Next, you need to gradually separate the protective strip 12-15 cm from the adhesive layer so that you can apply it to the joint in time, pressing tightly against two surfaces, but initially against the bathroom.
- The material in the corner of the bathtub should be laid on top of each other, fixing it to the wall, and the border on the product should be cut at an angle of 45°. Next you need to glue it to the bathtub by removing the protective coating.
It is recommended to avoid getting water under the tape for 24 hours, and if after this time it is possible to identify places with inadequate adherence to the tile seams, it is required to paste it using liquid nails or sealant.
Device
Border tape is a special means for sealing seams, which is a long strip of polymer base, impregnated on one side with a butyl adhesive. It is sold in rolls up to 3 meters long. One package of this sealant is enough to seal the seams between the bathroom and the walls. Self-adhesive border tape has the following properties:
- Moisture resistance. The polymers from which the sealant for seams in the bathroom is made is not subject to the destructive effects of moisture. In addition, the sealing tape does not absorb water and repels it.
- Chemical resistance. The material from which the seal is made withstands the effects of aggressive household chemicals used to clean the bathtub.
- Stable adhesion. Thanks to the adhesive butyl layer and the active adhesion it has, the seal is firmly fixed on any type of finishing material.
Methods for sealing bathtub joints without self-adhesive tape
Self-adhesive curb tape is the easiest way to update a room after removing mold and performing cosmetic repairs. Without the ability to replace old equipment and completely change the design of the room, it is enough to completely clean everything and seal the seams and joints in the bathroom. If there is a need to quickly restore order, all you need to do is clean all surfaces using active substances, after which you need to cover the joints of the product with self-adhesive tape, which guarantees neatness.
You can also connect a bathroom with tiles or wall coverings made of other materials using a number of the following methods:
- To seal small cracks (up to 0.2 cm), you can use silicone.
- Sealing the gaps between the bathtub and the wall can be done using polymer, PVC and borders made from other materials, but it should be borne in mind that they do not provide protection against the formation of fungus and mold.
- A special ceramic border used not only as a baseboard for bathrooms, but also when decorating seams in the bathroom, and most often when its dimensions are large. This material is mainly laid on cement, like ceramic tiles.
- Curbs made of porcelain stoneware and other building materials are not designed for this task, although they have an attractive appearance, they still do not provide adequate protection at the joints with the bathtub, which is a favorable place for mold to form.
Benefits of using border tape
Using curb tape to seal joints in a bathroom is a common option as it is a cheap and easy method. Bathroom border tape has a short service life and does not tolerate the presence of acidic silicones. The polyethylene from which border tape is made has many advantages.
The advantages of curb tape include the following factors:
- low cost of material;
- ease of installation;
- neat appearance;
- reliable protection against moisture;
- the material tolerates temperature changes well;
- prevents the development of mold and mildew;
- perfectly hides uneven joints;
- does not crack under shock loads;
- not exposed to household chemicals;
- has an optimal balance of flexibility and rigidity;
- high ductility (easy to fit both on rectangular joints and on curved planes).
Border tape is supplied in the form of compact rolls.
A number of enterprises around the world are engaged in the production of these tapes. They create high-quality moisture-resistant material that meets sanitary standards. This cladding element is supplied to the market in the form of compact rolls in the manufacturer's packaging.
What it is?
The tape has excellent characteristics due to its special composition, which, among other things, includes thermoplastic ethylene polymer, and a fairly large thickness for such a material, about 2 mm. A hot-melt adhesive composition is applied over its entire width, which ensures good adhesion to the surface. The tape itself contains chemicals that prevent the occurrence and spread of mold and mildew. Today, curb tapes are produced by a large number of both domestic and foreign manufacturers.
Border tape
Preparing for installation of curb tape
Preliminary sealing of a wide seam with sealant
Before gluing the tape to the bathtub, a number of preparatory work is required to ensure the proper level of adhesion and reliable waterproofing. The fact is that the curb tape for the bathtub is not installed over a gap that exceeds 2 millimeters; such a gap must first be sealed. Further steps to prepare the surface are carried out according to the following scheme:
- Preliminary sealing of the seam. Many craftsmen, before gluing the tape to a bathtub with a large gap, initially seal it with acrylic sealant or tile adhesive. This is necessary because if there is a void under the curb, it can be easily damaged by pressing with a finger. In addition, this free space without proper ventilation will become a source of mold.
- Surface cleaning. Self-adhesive bathroom tape requires a perfectly clean and grease-free surface; only in this case is a tight fit and complete insulation of the joint guaranteed. The joint must be cleaned of dust and dried well using a hair dryer or a hair dryer.
Once all these steps have been completed, you can begin installing the bathroom curb.
Important. If the tape does not have a self-adhesive surface and a special adhesive solution is included with the product, then installation of the border tape on the bathtub is carried out after preliminary priming of the joint area
Preparatory work
In order for the installation to be airtight and at the same time aesthetically pleasing, it is necessary to carry out preparatory work . They consist of the following stages:
- It is recommended to first seal large gaps between the wall and the bathtub with tile adhesive or acrylic sealant. This should be done so that there are no voids under the curb. Otherwise, pressing with your finger may damage the tape.
- Glue the border onto a degreased, perfectly clean surface. Only in this case will it be possible to glue it tightly and completely isolate the gap. Surfaces are cleaned of dust, washed with vinegar solution or antifungal compound and rinsed with water several times. Afterwards, the wall and edges of the bath are thoroughly dried with a hairdryer.
The preparation is complete and now you can begin the main work.