Gypsum plaster mixture is characterized by its low cost and ease of use; for these reasons, it is often chosen for self-preparing the surface for further finishing. Despite the positive aspects of the material, there are also negative aspects that force beginners to wonder, is it possible to lay tiles on gypsum plaster? The answer to this question will be given in the article, and the subtleties of the process will be discussed.
Is it possible to glue tiles onto gypsum plaster?
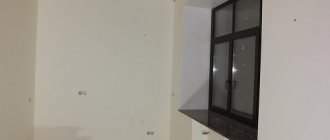
Gypsum plaster is a good option for creating a prepared base for wallpapering or painting. The absence of coarse fillers helps to obtain an even coating, which does not need to be treated with a finishing putty mixture in the future. The gypsum composition is distinguished by its white color and quick-drying properties.
These reasons increase the demand for the composition, but when working with tiles, other properties are also required. Therefore, the question is often asked: is it possible to glue tiles to plaster? Among the disadvantages of such a solution are:
- Increased ability to absorb moisture particles; as a result, in a humid environment, the base may become covered with biological formations, the integrity and reliability of the coating will be compromised;
- Not a high level of resistance to mechanical loads, which makes it difficult to glue the tile material to the surface;
- If metal products are attached to a plaster base, it will cause rust to form over time.
Therefore, the answer to whether it is possible to glue tiles onto gypsum plaster would be undesirable. But when you have to use a plaster mixture, there is no way to choose another one. For example, if a wall in a room was previously treated with it, then during the process you will need to take into account some features.
The gypsum composition is distinguished by its white color and quick-drying properties.
About Rotband plaster
Dry mixture Rotband is a type of gypsum plaster mixture intended for leveling the surfaces of walls and ceilings.
According to the instructions and if you have experience working with gypsum mixtures, Rotband quality allows you to skip the puttying process and immediately paint or wallpaper the plastered surfaces.
The mirror-smooth surface of Rotband is achieved by rubbing and smoothing the surface. However, such a smoothed surface is not needed for laying tiles; it is enough to bring the walls of the bathroom or toilet into the correct geometry according to the levels.
Features of gypsum coating
However, the question also has its advantages, because of which there remains a desire to lay tiles on a gypsum surface. If you glue the tiles onto plaster, the process will be accompanied by the following advantages:
- No further shrinkage will occur;
- The gypsum base is distinguished by its plasticity, which simplifies the application process;
- The fine-grained structure makes it easy to carry out the grinding stage;
- The material does not bear additional load on the base;
- Retains heat well;
- High degree of vapor permeability.
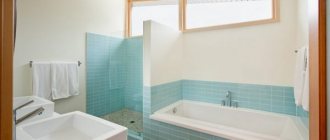
If the renovation will be carried out in the bathroom or kitchen, where the humidity level is usually high, then it is recommended to abandon this mixture.
The gypsum base is distinguished by its plasticity, which simplifies the application process.
Basic properties
Plastering with gypsum-based mixtures is one of the most common construction works. This finishing option is used for treating walls in living rooms. The huge advantage of this plaster is that it is very convenient to use - the mass is homogeneous and plastic, without any rough particles. You can safely glue even non-woven wallpaper onto a frozen base. The finish dries quickly and allows you to maintain an optimal microclimate in any room. The material also has its drawbacks, which should not be forgotten:
- Porous structure. The plaster does not lie tightly, forming a specific surface, which negatively affects the final characteristics of the coating.
- Minimum strength indicators. Gypsum mixtures harden quickly, but after pinpoint impacts and other mechanical damage, marks remain on the surface. Deep cracks cannot be ruled out.
- Moisture absorption. Due to increased porosity, plaster cannot withstand the effects of dampness. Over time, moisture softens the top finishing layer, which can lead to mildew or even mold.
- Negative effect on metal. When using self-tapping screws, nails and construction mesh, characteristic traces of corrosion may appear on the surface.
Important! If the composition includes gypsum, then such material should be used as carefully as possible in the kitchen and bathroom. It is necessary to follow all the manufacturer's recommendations for the repair to be truly durable.
The technology of laying durable ceramics is accessible even to beginners
How to choose glue
The choice of adhesive solution in order to obtain the adhesion strength of the ceramic tiles to the surface must be done correctly. It is not worth gluing the finish to low-quality compounds; they will not be able to withstand the loads exerted. When choosing glue, pay attention to the following parameters:
- Material, dimensional parameters and other nuances of the tile itself;
- The type of base, it is necessary to select compositions suitable for the gypsum base.
To obtain a high level of adhesion to the material, manufacturers use special additive elements. Adhesives with components obtained after oil refining, as well as with latex, have proven to be the most effective.
It is not worth gluing the finish to low-quality compounds; they will not be able to withstand the loads exerted.
Preparation of the adhesive mixture
Most often, adhesive compositions are produced in dry form. Before application, they are diluted in certain proportions with water. In this case, the ratio is always prescribed on the packaging of the composition, and it is imperative to strictly follow the specified recommendations in order to obtain all the declared properties after dilution.
It is advisable to carry out mixing with a construction mixer or a drill with a special attachment for mortars. Then it will be easier to obtain a homogeneous mass without lumps.
It is advisable to carry out mixing with a construction mixer or a drill with a special attachment for mortars.
Required Tools
To carry out the work correctly, you need to prepare the required mixtures in advance; you will need a primer and adhesive mixture. Also crosses, tile material, and grout for finishing the wall. Among the tools, the following types should be highlighted:
- Spatulas for applying plaster;
- Construction knife;
- Roller and brush;
- Fine-grained sandpaper;
- Level, meter, marker, ruler;
- Tile cutter;
- A spatula with a serrated edge.
To carry out the work correctly, you need to prepare the tools in advance.
Preparing the surface for installation
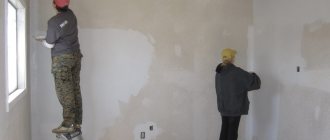
In order to affirmatively approach the question of whether it is possible to lay tiles on plaster, it is necessary to first carry out a high-quality preparatory stage of work. You should start by getting a flat wall.
If you are working with an old layer, it is first recommended to tap the surface to find poorly adhering areas. A visual inspection of the surface also helps to identify defects, where these flaws are found, the plaster is removed and a new layer of mortar is applied. When, during the assessment of the surface, it became clear that the falling off zones occupy a large area, it is necessary to completely eliminate the gypsum base, otherwise the tiles will fall along with it.
When all minor flaws have been repaired, the surface is sanded to obtain a perfectly flat base. A new layer of gypsum mixture is applied.
When all minor flaws have been repaired, the surface is sanded to obtain a perfectly flat base.
How long should plaster dry?
It is important to glue the tiles to completely dry plaster. The drying process lasts for different periods of time, depending on the type of composition. The process varies from a week to two.
It is influenced by the thickness of the layer, as well as the microclimatic conditions in the room. If the layer is no more than 10 millimeters, then 5-7 days are enough, but when there is high humidity in the room, drying will take more time.
If you lay the tiles on a wall that has not dried, the strength characteristics of the base will not be achieved and the bonding reliability will not be high.
It is important to glue the tiles to completely dry plaster.
Primer work
In this case, a primer is required. It will help create protection against moisture absorption by the gypsum, and will also provide better adhesion. It is necessary to choose the right solution; if the tile material is not heavy, then you can use a composition made of synthetic resins. If the tiles are of medium-heavy types, then this option is also suitable. To get the maximum effect, they resort to multi-layer processing, usually 2-3 layers are done.
It is necessary to carefully treat all areas; if there is no primer layer in a hard-to-reach place, the tile material can fall quickly and pull the rest of the tiles with it.
The primer will help create protection against moisture absorption by the plaster, and will also provide better adhesion.
Leveling walls with plasterboard for laying tiles
One of the options for leveling walls under tiles is finishing with plasterboard. For wet rooms, use only moisture-resistant gypsum plasterboard. You can attach it in the usual way to a metal frame or directly to the wall using glue. If the unevenness is significant, then only the option with a frame is suitable. In other cases, it is better to glue drywall to the walls, since the frame method “eats” 5 cm of space on each side of the room.
To complete the work you will need:
- metal profile rack and guide, hangers;
- level, grinder or metal scissors, screwdriver or drill;
- GKLV sheets (green), masking tape, self-tapping screws.
Procedure:
- Draw up a diagram of the frame. It consists of two horizontal guide profiles and rack-mount vertical ones. Two sections of the rack profile are mounted in the corners, the rest are installed in increments of 60 cm. If you subsequently plan to hang cabinets on the wall, then the increment is made smaller (up to 40 cm) and additional horizontal transverse sections of the profile are installed in the place where the furniture is supposed to be fastened.
- Apply markings to the walls according to the drawn up diagram.
- Using a grinder or metal scissors, cut the profile into pieces of the required length.
- Using dowels, attach the upper guide profile to the ceiling.
- Using a plumb line, determine the position of the lower guide profile and screw it, also with dowels.
- Use self-tapping screws to attach hangers to the walls to secure the rack profile. During work, check their position with a level.
- Install and secure the vertical profile with screws according to the markings. Check that each element is installed correctly by level.
- Secure the gypsum board sheets to the resulting frame with self-tapping screws. The joints between the sheets must fall on the rack profile. They need to be sealed with sickle tape.
- Also cover the corners with sickle tape.
- Putty the seams and screw heads with a special putty for drywall.
- The water-repellent properties of gypsum board can be enhanced by treating the sheets with a water repellent for drywall.
- To improve adhesion, be sure to apply a gypsum board primer under the tile adhesive.
If you decide to glue drywall without installing a frame, then proceed in the following order:
- Apply primer to the walls.
- Clean the surface from dust and dirt.
- Apply handfuls of drywall adhesive onto the sheets or wall in 30cm increments.
- Attach the sheet to the wall and set it level.
Installation of gypsum boards with glue
Pasting technology
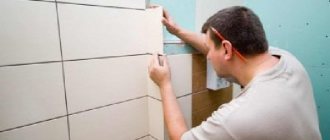
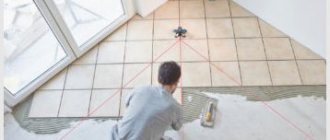
The laying technology is no different from working with tiles on other types of substrates. First, the prepared adhesive solution is applied to the wall using a notched trowel. You also need to apply the composition to the tiles. It is desirable to create less load on the gypsum base; for this reason, a spatula with short teeth is selected.
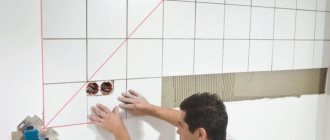
Lay the tiles according to the prescribed pattern; it is recommended to mark the rows in advance. If you need to fit the tiles to a difficult area, then cut them on the floor with a tile cutter. But they leave this moment until the end of the work; first they lay the main part. After the adhesive solution has dried, a grout mixture is applied and the surface is cleaned of dirt.
Lay the tiles according to the prescribed pattern; it is recommended to mark the rows in advance.
Suggestion from the editor
It is hardly worth using granite or marble samples that are characterized by increased weight as tiles. We recommend using very well-proven clinker tiles on plaster, the detailed laying technologies of which have been worked out on any surface.
Multilayer scheme - from brick to tile
The layout of the tiles, when there is plaster underneath, looks like this:
- 1 – penetrating primer, corresponding to the nature of the rough surface;
- 2 – glue for fixing insulation boards;
- 3 – insulation board, we recommend using mineral wool basalt boards, although the list of quite worthy options is very large, including even foam chips;
Scheme of laying clinker tiles on a surface treated with plaster (see description in the text)
- 4 – dowels for fixing the insulation; note, you should not rely only on glue, more reliable fixation is also necessary;
- 5 – mesh-reinforced plaster;
- 6 – primer to increase the adhesive properties of materials;
- 7 – adhesive composition;
- 8 – clinker tiles.
This finishing method greatly simplifies and speeds up all the work, but it is not suitable if tiles are planned in the future
Disadvantages of gypsum base
Whether or not to plaster the surface with gypsum mixture for further gluing of tiles can be decided by studying the disadvantages of the process. The following problems that may arise are identified:
- Low adhesion strength of the material;
- Increased ability to absorb moisture;
- The layer is porous;
- In a humid environment, the likelihood of mold and mildew forming on plaster is high.
The layer is porous.
If you are making a choice about what kind of plaster to apply to the wall before gluing the tiles, then the gypsum option will not be the best solution. But, when it is necessary to lay it on the old layer, then if it holds well, you can create a reliable adhesion that will be durable. Then you should carry out all the stages of preparing the base, which were described in the article.
Synthetic primer
It is possible to glue lightweight tiles onto a wall finished with gypsum plaster after pre-treating the surface with a special primer, the main components of which are synthetic resins. The use of such a composition contributes to:
- reducing surface porosity by half. Tile laid on a pre-primed wall adheres better and lasts longer;
- reducing the absorbing properties of the gypsum mixture. The glue loses much less water, which ensures reliable fixation of the tiles;
- maximum increase in adhesion of the base to the tile;
- the acquisition of some plasticity by the gypsum surface due to the formation of a thin elastic film on the plaster treated with a primer. Thanks to this, the absorption of water does not cause cracking of the fragments;
- protecting the wall from fungus and mold due to the antiseptic properties of the synthetic primer;
- significant increase in moisture resistance of plaster;
- strengthening the entire gypsum layer due to deep penetration of the primer composition. This is manifested by the ability to withstand shock loads.
Primer of a wall with gypsum plaster
