All in all, masonry
tiling on
a curved
floor is a pointless exercise, since in the end, unevenness and problems will still go out, and
the tile will be damaged.
Unified construction rules exclude a similar installation process, since the result will be in a positive state for a shorter time. Correct installation involves preparatory work, which includes performing a leveling screed. Still, sometimes there is no other choice but to lay the tiles on an uneven surface. How to act in this problematic situation is discussed further in the publication.
Installation stage
Technological features of laying tiles on an uneven floor
If the foundation is uneven, the process of laying tiles takes twice as long.
Laying tiles can be done on a screed with a slight slope. In other cases, the surface is leveled using the “self-leveling floor” technology. However, using this method leads to an increase in level, which is sometimes unacceptable.
Before starting cladding, familiarize yourself with the nuances of the technology:
- an uneven surface doubles the operating time;
- the volume of glue depends on the defects of the screed;
- to knead mixtures and solutions you will need an electrical appliance;
- On an uneven floor it is better to lay 30x30 cm tiles.
Correct calculation of tiles is not only about measuring the area, but also taking into account additional factors:
- size and type of tile;
- glue thickness;
- base material;
- defects and obstacles on the surface.
If you need to cut tiles, pay attention to the size of the scraps. When they make up more than 50% of the area of the fragments, you need to purchase double the volume of material for one row. When calculating, add 10-15% to the resulting number to cover the costs of defects and incorrect cutting.
What to do with uneven planes: solutions
As mentioned above, significant relief will have to be removed, otherwise the tile will not lie. A self-leveling screed is useful for this. This product will allow you to easily achieve a perfectly smooth surface, although it will take more than one day to dry. Special mixtures speed up the process, but work will be suspended for several days. It is important to understand that this will raise the floor and, as a result, you will have to adjust the surface level throughout the house.
Level control example
The screed will also be a lifesaver in the event of a significant tilt. Unfortunately, it will also eat up space, but gluing the tiles will be much easier.
In general, the screed has its advantages:
- perfectly aligns;
- fills open voids in the rough base;
- has an antifungal effect;
- allows you to hide the underfloor heating system;
- provides additional heat and sound insulation.
If this option is not suitable at all, then it is quite acceptable to do without alignment. In this case, the tiles are laid on the floor according to special rules that differ from the classical methods of laying tiles. Otherwise, you should not count on a good and reliable result: the first defects will appear in the first month of operation. However, if you follow the recommendations, even on such a poor base, the tiles will last for more than one year.
Tiles are cut before use
Criteria for choosing adhesive for tiles
It is recommended to choose glue with platinators.
The selection of glue depends on the installation location - indoors or open space. For example, outdoor compositions can withstand temperatures from +40 to -40°C. For closed rooms, such characteristics are not taken into account.
The range on the market is no different, but when leveling the floor it is recommended to choose glue with a plasticizer. A thick layer allows you to lay the tiles efficiently and avoid uncoupling during work.
Preparing the surface and using a self-leveling mixture costs less than the cost of tile adhesive. An additional plus is that ceramics lay down easier.
Leveling the floor under tiles: methods and features
Any floor finishing must be installed on a flat, dry and durable base. But it is a rare concrete surface that meets these requirements. Therefore, various methods are used to level the floor under the tiles with your own hands:
- Tile adhesive (ready-made dry mixtures);
- Self-leveling (leveling) compounds;
- Cement-sand composition (screed).
Each of the above methods has its own advantages and disadvantages. Let's take a closer look at them.
Tile adhesive
Leveling the floor with tile adhesive.
From a professional point of view, it is better to use specialized products - levelers, thin-layer finishing compositions. But since the adhesive composition contains all the necessary components (cement, quartz sand, plasticizers), it is actually allowed to be used for smoothing the floor for laying tiles. But there are several nuances here.
Firstly , experienced professionals recommend:
- If the floor is almost flat and a thin layer is required, then you need to mix the glue with a large amount of water until the consistency of liquid sour cream is obtained;
- Preparing the floor for laying with differences of 5-10 mm is carried out with a thicker mixture, optimally in 2 passes. That is, the first time a preparatory layer with a thickness of 3-6 mm is poured and stretched, and the second time a finishing layer, no more than 4 mm.
Secondly , many craftsmen prefer to use cheap mixtures for leveling, and when working directly with tiles or porcelain stoneware, use expensive, professional compositions with a high degree of adhesion and plasticity. In addition, they already contain special water-repellent additives, due to which preliminary waterproofing is not required. This is true for kitchens, balconies, hallways and other similar rooms.
Thirdly , there are no clear instructions. Each master develops his own work algorithm, but the principle is the same: cleaning, priming and applying a leveling mixture. The discrepancy is only in proportions, and most importantly - in timing. Cement needs at least 28 days to fully mature and gain strength, but the percentage of its content in adhesive mixtures is less than half of the total mass. In addition, the composition contains a variety of plasticizers, including hardening accelerators, increasing workability, etc. Therefore, it is worth focusing on such an indicator as the period after which full load on the ceramic flooring is allowed. As a rule, for internal work this period is from 5 to 7 days.
The technology is simple:
- The concrete base must be cleaned of dust, dirt, paint, oil and other stains, peeled and loose areas, and if necessary, deep holes, cracks and cavities must be filled with a repair mixture.
Filling cracks with repair mixture.
- Prime the prepared floor with a deep-penetrating, strengthening or adhesive compound.
- Prepare the mixture for leveling the floor with glue according to the instructions. When working in a thin layer, add a little more water - 10-20%. Apply the finished composition to the concrete base and carefully spread with a wide spatula or rule. The maximum pot life of the solution is from 30 minutes to 2 hours.
- After a day, inspect the resulting surface, if necessary, trim off sagging and other irregularities using the rule.
- After 5-7 days, the floor is ready for further work. That is, you can apply waterproofing mastic and lay floor tiles.
Self-leveling compounds
An incredibly convenient development that allows you to smooth the surface of the base with a layer from 2 mm to 10 cm is leveling compounds. They are divided into basic levelers (coarse-grained), universal and finishing (fine-grained thin-layer). Let us immediately note that all three types are suitable for our purposes (depending on the thickness of the layer). To form a durable coating, it is better to use cement or cement-gypsum compositions.
The advantages of bulk compositions are speed and ease of working with them. It is allowed to lay ceramic tiles, porcelain stoneware, artificial or natural stone within 3-5 days after pouring. You need to select the appropriate composition based on:
- Areas of application (indoor or outdoor);
- Method of use (manual or machine);
- Layer thickness.
The installation of a self-leveling floor must be carried out strictly in accordance with the instructions. The surface is cleaned of dirt and old coatings, weak areas are removed and filled with repair mixtures. Next, a primer is applied in 2-3 layers with mandatory drying for 12-24 hours.
Along the perimeter of the room, the level of the new floor is marked on the walls or point beacons are installed. When forming a layer with a cross-section of more than 1 cm, it is advisable to use a damper tape.
The solution is mixed in the proportion indicated on the label, poured onto the surface and distributed with a spatula or squeegee. The coating is rolled with a needle roller for deaeration and compaction. The leveled base will be ready for further work in just a few days.
We recommend: DIY self-leveling floor.
List of required tools
Tools for laying tiles
High-quality tiling depends on the chosen tool for laying tiles. Porcelain stoneware, glue and a hammer are not enough for the work. Professional tilers use special equipment. If you are planning one-time work and need to reduce the burden on your budget, rent a tool.
To cover an uneven floor, you will need basic equipment: a hammer drill with a whisk attachment or a mixer, a tile cutter, a grinder and wire cutters.
Additional accessories:
- rubber hammer for tapping;
- trowel and notched trowel;
- ladle for adding glue;
- scraper, construction knife;
- a set of plastic crosses or SVP;
- extension cord and pencils;
- roller for applying primer.
Auxiliary tools: tape measure, squares, water or laser level (spirit level), aluminum rules 2.5 and 1.5 m.
Grouting kit:
- bucket 2 l.;
- grout spatula;
- rubber and felt gloves;
- hard washcloth;
- foam rubber and 10 liter capacity.
When performing construction work, follow safety precautions. When using an angle grinder, wear glasses. A respirator will prevent dust from entering your respiratory tract. Use gloves to protect your hands from minor injuries.
SVP is an innovative scheme that allows you to level the tiles on the floor when laying. The system is suitable for ceramics and porcelain tiles with a thickness of 3-20 mm.
Preparing the base
The floor must be clean and dust-free.
The preparatory stage is the main part of any construction work. Ensure that the floor surface is level, otherwise it will not be possible to lay the tiles perfectly. A prepared base helps to achieve high-quality cladding.
A large layer of adhesive will not help hide unevenness. If there is an old coating, dismantle it, then form a screed and waterproofing. For leveling, you can choose any method: dry, wet or warm floor. An important point is to follow the work technology.
Dismantling involves removing thresholds, baseboards, old tiles and other irregularities from the surface that prevent installation close to the wall.
Floor preparation
The process of preparing the floor for tiles is to level the floor. In those places where there are holes, you need to smear them with cement mortar yourself; tubercles more than 3-4 mm high should be removed. Immediately before laying the tiles, all debris, grease marks, and remnants of the previous floor covering are removed from the floor.
Important! If you want to lay tiles on an uneven floor, it is better to immediately abandon this idea, because... You won't be able to achieve a good result.
If linoleum was previously laid, there is a risk that fungus and mold could form under it. Experts recommend treating such a surface, since moisture often accumulates under the linoleum, especially in the bathroom and toilet.
If you need to replace the old tile covering, you need to knock it down using a hammer drill. Some people try to lay “tiles on tiles”, i.e. new one on top of the old tile. This option has the right to life, but preparation will take much more time. Firstly, you should make sure that the old coating does not “walk”, secondly, notches are made with a grinder over the entire floor area, thirdly, the surface is covered with organic-silicate soil, and only then a layer of new finishing is laid out. This is all possible, but it would be correct to place the tiles on the screed.
After removing the old tiles, it is important to evaluate how smooth the coating is. To do this, you need to take a level and apply it on different sides. If there are strong differences, it is recommended to fill the floor with a solution. Here, it is not a self-leveling floor that is suitable, but a regular leveler such as “Plitonit P3” or a cement mixture for screed. You can watch all this on video and do it yourself. Next, a single layer of primer is poured onto the cleaned coating, and the side expansion joints under the wall tiles are filled with silicone. If, after removing the old covering, the floor turns out to be almost perfectly level, you can start working without a screed.
Floor waterproofing - is it necessary?
Indeed, waterproofing the floor is the most important stage of repair. But how necessary is it in your case? In general, it is recommended to do waterproofing in rooms that have water supply and sewerage, i.e. in the bathroom, toilet and kitchen.
How important is it? — In principle, you don’t have to do it, but before you do this, calculate how much it might cost you to repair your apartment and the apartment of your downstairs neighbors (if there are any) in the event of an unexpected burst of a faucet or pipe? The cost of floor waterproofing averages about 450 rubles per 1 sq.m., which is quite affordable, and it can be done simply, with your own hands. Therefore, before abandoning this stage of work, think about how much risk you are willing to take in this situation.
Instructions for laying tiles on uneven floors
Before starting work, read the standard “Insulating and finishing coatings” (SNiP 3.04.01-87/SP71.13330.2011). The surface of the concrete floor must be dry and free of debris, dust and oil. Work on laying floor tiles takes place in three stages: marking, cladding, grouting.
Marking
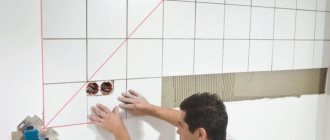
The markings will help to lay the tiles evenly.
The tiles are laid using one of 3 methods: “seam to seam”, “staggered” and diagonally. The markup depends on the selected type. The first two options involve calculating the amount of material taking into account the seams. Leave diagonal installation to professionals.
Markup rules:
- In the far corner of the room, mark the first row of tiles with a straight line.
- Mark the location of the material. If the tile has a pattern, place all the elements for complete drawing.
- Near the entrance, the marking of rows is done taking into account entire fragments. Depending on the parameters of the tile, a distance from the far wall may be required.
- When laying out, consider the size of the seams.
- For precise marking, lay the tiles over the entire floor surface.
Make reference marks and stretch the beacon cord along the wall. Avoid creating wedges near other surfaces. To make the lines clearly visible, use bright markers.
Facing
The evenness of the cladding must be checked with a level.
Before laying the tiles, treat the floor with deep penetration soil. After 2-3 hours you can start working.
Laying tiles with your own hands on an uneven floor:
- Prepare the adhesive mixture according to the manufacturer's recommendations. If the surface is curved, make a thick composition. The volume of the batch should not exceed the amount of mixture per 1 m².
- Using a notched trowel, spread the adhesive onto the floor and then onto the tiles. The furrows of the mixture are placed perpendicular to each other.
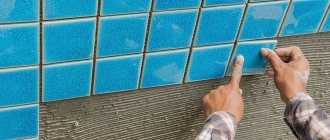
- Lower the prepared fragment onto the surface, lightly pressing it to the desired level. Control the horizontal position of the spirit level. Take a rubber hammer and tap lightly to compact the tiles. Movements must be fast and precise, since it is not recommended to remove the tiles after installation.
- In a similar way, you need to lay tiles on a curved floor along the following lines. Level the surface to the level of the first row.
Remove excess adhesive after the tiles have settled. Use cross stitches to create uniform seams on the surface. Place the leveling system at the corners, at the intersection or with an indentation of 2-3 cm. Immediately clean the gaps of glue, otherwise it will be difficult to remove it after drying.
Grouting joints
The grout should be lighter than the tile itself.
The final stage of work is grouting the joints, which is not carried out when laying tiles end-to-end. Before proceeding, wait until the glue has completely dried. Remove crosses or other alignment system. Clear the surface of large debris and vacuum the floor.
To grout, use a cement-based mixture according to the following scheme:
- Cover the edges of the tiles with masking tape - this will avoid contamination and make cleaning easier.
- Dilute the mixture with a rubber spatula. Using movements perpendicular to the seam, apply grout, applying light pressure to fill cavities.
- Remove excess mixture.
- Wait until completely dry and remove the tape. Wipe the surface with a damp sponge.
Grout is an element that influences the design of the room. Choose materials one tone higher or lower than the color of the tiles.
Tile laying sequence
Laying ceramics on an uneven surface is a rather unique process. There are certain conditions that must be met in order to avoid difficulties in the future.
- According to the rules, tiles begin to be glued from the wall or from the corner. In this case, you should do things differently. First you need to measure the height over the entire surface and find the highest point. We will have to start from there.
- From this point, markings should be made to the walls, checking the distance taking into account subsequent trimming. You should also take into account the type of future coating from an aesthetic point of view, how it will look when entering the room and being in its various places.
- When laying the tiles, you will have to level them step by step, selecting the thickness of the adhesive base, and it may take some waiting time so that the glue hardens and the tiles do not “float.”
- In order to lay out the tiles with high quality, it is advisable to mark the level in advance with construction thread, and during work use a construction level, at least one meter long.
- The adhesive mixture should be prepared not according to the instructions indicated on the package, but a little thicker, this will make it easier to manipulate the tiles when leveling and subsequent shrinkage will be less.
- Glue must be applied both to the floor and to the tile surface.
- It is advisable to clean the seams of glue immediately, otherwise after drying it will take more effort and time.
Recommendations from the experts
The work of tiling the floor yourself includes selecting materials, preparing the surface and giving the coating a finished look. At each stage you need to adhere to technology and study the features of the procedure.
Expert recommendations:
- before marking, calculate the coverage area;
- Install first along the long wall;
- clearly mark the location of the drawing;
- To save grouting material, use a syringe or pastry bag.
Follow the technology and recommendations to simplify the process of laying floor tiles. Make sure tools and materials are available. Taken together, this will lead to the expected results. If difficulties arise, seek advice from a specialist.
Preparation
This stage includes:
- Removing old flooring. I had linoleum flooring.
- Dust removal of the room. Cleaned the room thoroughly before laying the tiles.
- I additionally used a primer from Ceresit - it costs around 629 rubles. The main advantage is the drying time. The downside is the liquid consistency. After application, leave the surface to dry completely, one hour was enough for me. And then, I started to test lay out the ceramic tiles. Placed it around the entire perimeter of the kitchen. After that, I set aside the required amount of tiles that had to be cut. If you want to buy a better quality primer, then choose KNAUF BETOKONTAKT, its consistency is thick, dries quickly and does not leave solutions. Price from 2000 rubles.
Tools needed at this stage: primer roller, dilution container, damp cloth.
