The bathroom is the face of the whole house; guests inevitably end up there. Therefore, it should look presentable. There are no trifles in this matter: the floor, ceiling, walls must be covered not only with practical, but also with beautiful material that is easy to maintain and maintain. As an option, along with large-sized ceramic tiles, builders began to use mosaic tiles.
Traditionally, mosaic is considered a high-class material, and previously not many could afford to use it for renovation. The main difficulty was laying many small tiles, but now this problem has been solved. Mosaic on a mesh that combines individual particles into easy-to-install blocks allows you to attach the material quickly and without much effort. But before you go to the store, it’s worth learning more about the types of mosaic tiles, their purpose and the nuances of installation.
Mosaic tiles in the interior
Features of the material and its varieties
Mosaics are small (1x1 cm) fragments of finishing materials, located at regular intervals and forming a single picture. In the case under consideration, these elements are fixed on a flexible metal mesh. This material can be used for cladding floors and walls, as a covering for kitchen furniture, and even for decorating facades and garden paths.
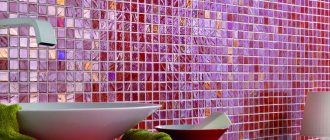
According to the type of surface, mosaic can be glossy or matte. Gloss is easier to maintain and is more often used for walls in rooms with high humidity (bathroom, kitchen), while matte tiles, which have anti-slip properties, are more suitable for flooring.
Another criterion that affects the appearance, technical characteristics and cost of the mosaic is the material of manufacture. On sale are mosaics from:
- Ceramics. These tiles differ from standard ceramic tiles only in size. It comes in different textures and colors and can imitate other materials. The main advantages are affordability and ease of care.
- Glass. Glass mosaic laid on the floor
Glass mosaic
in a shower stall or swimming pool creates an indescribable play of glare. It is quite durable, thanks to the smalt it contains, and has a wide color palette. Resistance to moisture and temperature changes makes it ideal for bathrooms. It is also resistant to fungus and is easy to care for even in damp areas. Disadvantages: high cost and limitations in the choice of glue and grout. - Natural stone. Stone mosaics are made from jasper, marble, sandstone, etc. A coating made of such material looks impressive on garden paths, walls, floors and the facade of a building and always turns out to be unique, because in nature there are no identical stones. But the high price often scares away buyers.
- Concrete. Mosaic tiles, made from concrete and marble chips, are more often used for outdoor work. It can withstand high loads and is suitable for use in harsh climates.
- Metal. The manufacturing material for this tile is stainless steel. Due to its spectacular appearance and increased wear resistance, the installation of such mosaics in the bathroom, as well as covering floor surfaces with it, has recently become increasingly popular.
Mosaic laying - all the important working points
Laying mosaics is a very interesting and creative process. The photographs show examples of the work of professional craftsmen - all of them are worthy of praise and admiration. In this part of the article we will try to learn how something similar can be implemented yourself with minimal time and labor costs. We will also cover all third-party issues regarding materials and tools to make everything as clear as possible.
Mother-of-pearl surface - elements are arranged in a checkerboard pattern
Unique handmade
The sink is lined with white smalt mosaic, the countertop is made of acrylic stone
Selection of adhesive composition
The choice of glue type is influenced by the material used to make the mosaic, as well as the base on which it needs to be placed. You have several options from which we will choose.
Table 2. What type of glue to choose for mosaic
| Photo | Description |
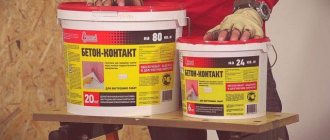
| Dry cement-based adhesive | The most common solution is cement-based adhesive. It is sold in bags of different packaging. It is inexpensive, but has good characteristics and properties. These compositions are made on the basis of white or gray cement. More often, the first option is purchased for mosaics, as it allows the material to become less dirty. When preparing it, it is mixed with liquid latex or water. There are three types of such adhesives - deformable, elastic and rigid. They are selected for the base to be finished. Rigid adhesive is needed to work on stationary dimensional surfaces, which, if they experience deformation, are very insignificant, for example, on a wall made of brick, cinder block, etc. Elastic and deformable adhesives are very effective when the house is constantly subjected to loads that create deformation of the structure and its vibrations. For example, it is framed or there is a metro line nearby. They are also designed for installing tiles on wooden surfaces and other materials with high thermal expansion rates. |
| To work with mosaics, it is very convenient to use diluted glue. It is stored in a hermetically sealed bucket, which significantly increases its production time. Since mosaic processing can take a long time, this property will help avoid wastage of material. The cost of such glue is higher. The composition includes various minerals, acrylic and water. Its consistency is pasty, medium thickness - it is very convenient and pleasant to work with. The color of the material is white. The setting time of this glue is higher than that of cement glue and reaches 40 minutes, which allows you to adjust the position of the glued sheets if necessary. It has excellent adhesion even to complex substrates - mosaics can be glued directly onto old tiles, for example. The use of this solution is 100 percent justified when you are engaged in complex, painstaking work. |
| Two component adhesive | Two-component reactive adhesives are made from epoxy resins and polyurethane. They consist of two substances mixed together - a hardener and a base. In this case, a chemical reaction occurs - the resulting mixture hardens into a very strong and elastic mass. These compounds are completely waterproof, so they are ideal for swimming pools, baths, saunas and bathrooms. The composition does not use water, so this solution is the only correct one when laying mosaics made of sandstone and similar rocks. Mosaics can be mounted on any surface, even glass. The strength of such compounds is very high and they last an incredibly long time. For beginners, it is not recommended to use such glue, as it has a short development time. You need to have experience and accurately calculate the amount of mixture to be prepared. |
Now let's summarize the information a little to understand which composition is better to choose. If you want to finish the job as quickly as possible, then two-component compositions are what you need. We also take them for complex foundations in terms of its material and movements. If the mosaic is transparent, then it would be correct to choose the color of the glue to match it - more often they take white as a neutral base. Opaque elements can be installed with any adhesive.
Expert opinion: Masalsky A.V.
Editor of the “construction” category on the Stroyday.ru portal. Specialist in engineering systems and drainage.
If the tiles are laid in places that are constantly in contact with water, it is necessary that the adhesion of the adhesive is at least 2 MPa, and that it itself is waterproof.
It’s a crime to save money when creating such luxury on glue.
What should be the base for a mosaic?
An ideal mosaic wall will be smooth, durable and clean. If it does not crumble, then applying glue to it is very convenient. Such a surface will be gypsum or cement plaster - we do not write how it is made, since this is the material for a separate article. Just remember what the wall should be and achieve it with all your might. We are now interested in its preparation.
Table 3. Substrate preparation
| Step, photo | Description |
| If the presence of small recesses on the wall when laying large tiles is not of particular importance, then the mosaic cannot be placed on such a base, since individual elements have a small area and can fly off. Therefore, we arm ourselves with medium-grade putty, spatulas and inspect the wall. If we find something, we eliminate it. Large and smooth changes will not affect the strength of the finish, but when they pass through a mosaic on a fiberglass mesh, the size of the seams will change, so it is first necessary to achieve a certain evenness. To work, use a rule and a spatula. |
| After all restoration measures have been carried out, growths and debris may remain on the wall. We clean everything with a spatula and, if necessary, bring the surface to a smooth state with an abrasive mesh. |
| Next, the walls are primed. Deep penetration compounds are usually used, which will make the plaster stronger and bind all the dust on it. The primer is selected according to the glue that will be applied to it. Interesting to know! If your bathroom walls are covered with plasterboard, then you will need to seal the seams between the sheets and cover the screw caps. |
The working process
Along the way you will need the following tools:
- An electric drill with a mixer attachment for mixing glue.
- Buckets for these purposes and cleaning tools - if you bought a ready-made composition, we do not take these points into account.
- A laser or water level for setting rows and a bubble level for checking the position of individual elements.
- A notched grinder for applying glue to the wall (you can also use a spatula).
- Any roller for pressing and rolling mosaics on the wall.
- The right tool for cutting. A stationery knife, a mosaic cutter, an electric machine for part-time work and an emery stone for the same purposes will come in handy here.
- A grater for rubbing seams.
Roller mosaic cutters
Among additional devices and materials, we note grouting paste for seams and spacer crosses.
Mosaic grout
Table 4. Instructions for laying mosaics
| Steps, photo | Description |
| It is very important that the position of the mosaic is level. We mark the wall horizontally at the height of the second row. You need to take into account the height to which the floor will rise when laying it, if the mosaic reaches it. If the floor has already been laid, then laying can begin directly from it. |
| According to the markings, we attach the metal profile PNP 27*28 - it will serve as an excellent, even base while the glue sets. It is difficult to align the mosaic on the canvases, since they are flexible and the mesh can sag. Take the canvas and make a vertical marking, which will serve as an additional guide. |
| So, we can begin. We take the chalk and apply glue from the bucket to its flat side with a spatula. We then spread it on the wall in a layer of several millimeters. We pass in this manner only the area that we are guaranteed to have time to fill. It is important to cover the entire base evenly so that the gray concrete walls do not show through. |
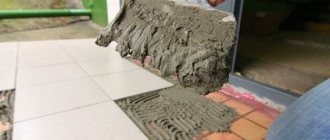
| Then we take a comb and stretch it through the glue applied to the wall. We do this once, in one direction. The size of the mosaic comb is 3*3 mm. |
| We remove the protective film from the back of the mosaic and glue it at the intended level. You can actively use a laser axle builder in your work. |
| Now the canvas needs to be pressed evenly to the base. This can be done using a flat grater or roller like this. In this case, excess glue will be squeezed out a little into the seams, which will strengthen the adhesion of the materials. Then we remove the excess glue and move on. |
The rest of the canvases are placed in exactly the same way. If trimming is required, then send it to the inner corners, but it is better to try to avoid them altogether. Finally, the joints are grouted - for this they use the same grater. The mosaic wall is ready and looks great.
When renovating an apartment, the planned design of a small bathroom often causes difficulties for many. Therefore, a special article will examine the main factors that influence the ease of use and aesthetics of a given room, and will also present several options for designing a bathroom.
Video - Laying mosaics
What should the surface be coated with?
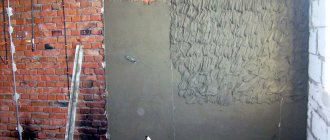
Unlike ordinary tiles, mosaics are placed not just on a flat, but on a perfectly smooth surface, otherwise, due to the flexible mesh base that follows any unevenness, the pattern will be spoiled and the edges will not meet. Therefore, the technology for laying mosaic tiles requires careful preparation of the base.
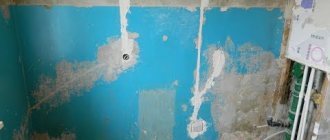
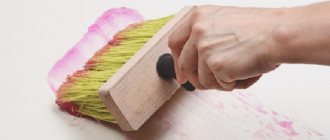
Filling small irregularities on walls
First, the walls or floor are cleaned of old coating and dust. Then they are checked by level for the presence of height differences. To make it easier to eliminate unevenness, use the following technique - thickly rub chalk on an even strip of suitable size and, pressing well, move it along the walls or floor. In places where there is no chalk left, there are depressions that need to be filled with plaster or concrete mixture (if mosaics are being laid on the floor). In case of serious flaws and cracks, it is more rational and easier to level the walls with plasterboard, not forgetting to sand the joints and screw heads.
The prepared surface is dust-free and treated with a deep penetration primer. This will improve adhesion, providing better adhesion between the materials. After the composition has dried, you can proceed to the installation of the mosaic.
Preparation for installation
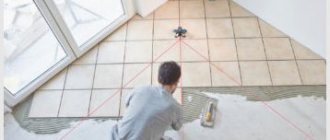
In order to correctly lay the mosaic , when preparing the surface for cladding, you should outline the area on which the mosaic . It is necessary to take measurements of three sheets of mosaic , located at the same distance from each other, and apply the resulting dimensions in the form of a pattern to the surface vertically and horizontally so that the result is a grid. Thus, the wall will be divided into several sectors, each of which will be equal in area to 9 mosaic .
How to choose the right adhesive for mosaic tiles?
Glue
Some types of mosaics are very picky about adhesives, so you need to choose an adhesive based on the specific material you plan to work with. Laying mosaics on a mesh is carried out using the following compounds:
- Standard glue. It consists of sand, Portland cement and modifying additives. Suitable for laying opaque tiles on standard surfaces.
- Polymer composition. Polymer components provide reliable adhesion, making the adhesive suitable for cladding surfaces of complex shapes.
- The glue is white. It includes the same components as the standard one, the only difference is the white color, supported by special components. Laying glass mosaics is carried out only with this solution.
- Homemade solution. The necessary ingredients are water, cement and fine, well-sifted sand. All components are mixed to a medium-thick consistency using a drill with a special attachment. The cost of such glue will be low, but it is better to use it for concrete or stone mosaics.
If you have to work with a wooden surface or drywall, the glue must be selected individually. In particular, for wood cladding it is recommended to add PVA to standard adhesives.
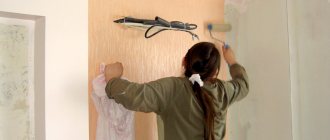
How to glue mosaics on walls?
One more important point should be considered: how to glue a mosaic on a wall. In this case, a white mixture is recommended so that the translucent coating does not acquire unwanted shades. The solution must be of a thick consistency, with texatropic qualities that ensure the cladding is resistant to slipping. However, it is worth remembering that before gluing the mosaic to the wall, it is necessary to prepare the surface itself. It should be smooth, clean and dry. The adhesive composition can smooth out minor roughnesses of the base; for more serious defects it is better to use special leveling mixtures. The permissible air temperature in the room is from +5°C to +30°C. Any video on how to glue a mosaic shows that you will first need to draw the surface to be tiled into squares, which will correspond in size to the mosaic modules. Such precise geometry will help make all seam joints as uniform as possible, so that the covering looks like a single mosaic carpet.
Mosaic laying technology
The question of how to properly glue mosaic tiles on a grid is of interest to many novice tilers. You should start by laying out the mosaic fragments in the chosen order on a horizontal surface. For the convenience of further work, the tiles should be numbered. However, if your mosaic does not have a specific pattern, this stage can be neglected.
Glue distribution
Laying mosaic tiles begins with the most visible area. This is necessary to make it easier to disguise the places where the material was trimmed. It is advisable to think through the laying scheme and location of the cuts in advance. If the pattern and size of the surface requires cutting only along the seam, you can divide the mesh with ordinary scissors-nippers, and to carefully cut the tile itself you will have to use a glass cutter.
The adhesive composition is applied to the surface to be coated in small portions, taking into account that it takes about 15 minutes to dry. The solution is spread with a notched trowel (tooth height 6-8 mm), a tile is applied to it and leveled. The result is checked by level. In order for the mosaic to stand up well, you cannot press it with your hands; instead, the laid tiles are rolled with a rubber roller. If you are laying tiles on a kitchen “apron”, before starting work, its lower border is outlined with a line and a metal profile is attached along it, on which the material will rest.
The material is carefully pressed with a roller
Pay attention to the distance between the sheets; it should coincide with the spaces between the individual tile fragments. If visible ends of the mesh remain at the joints of walls or other surfaces after trimming, they can be hidden under a decorative border. Having finished laying, clean the mosaic covering using fresh glue - remove excess solution with a damp sponge. Then the surface is wiped dry and left to dry for 2-3 days.
Grouting joints
Laying mosaic tiles with your own hands is completed by cleaning the seams. To do this you will need a grout mixture. There are compositions based on cement, latex and epoxy. When choosing, be guided by the operating conditions of the tile; if it will be exposed to thermal stress and chemicals, you should use grout with the addition of epoxy resin. But keep in mind that its use will require preliminary protective treatment of the mosaic with wax.
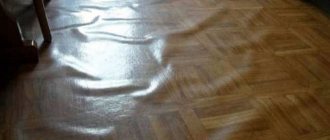
Grouting joints with white compound
The color of the grout is no less important. It sets off the mosaic pattern and, if chosen poorly, can ruin the whole picture. To ensure the right color combination, compare the grout to a small piece of your tile when purchasing.
The selected mixture is diluted with water, following the instructions on the package. If you are using grout with a water-repellent effect, then in the process of preparing the solution you cannot do without a drill with a mixing attachment. It is recommended to apply the solution with a rubber spatula. The work will go faster if you use a spatula measuring 15-20 cm.
The finishing touch is cleaning the coating from excess grout
The grout mixture dries in 10-15 minutes, after which the excess composition is removed by wiping the surface of the mosaic with a damp sponge in a circular motion. Frequently washing the sponge will prevent streaks from appearing on the tiles. The installation of the mosaic is completed; all that remains is to let the coating dry.
Bathroom renovation is a creative process where attention to detail never goes amiss. When choosing a wall covering material, consider the conditions under which it will be used, as well as how the tiles combine with the floor, ceiling and other elements. Pay special attention to textiles. It’s good if it repeats the color and pattern fragments of the selected coating.
Let's summarize. With careful attention to detail and the use of the necessary tools, the technology of laying mosaics on a grid does not pose a problem even for a non-professional. So maybe you should show a little diligence and imagination and decorate the interior of your home with a mosaic pattern?
Eggshell mosaic
Eggshell mosaic has a very beautiful name - “crackle”. It looks decent, adding subtlety and sophistication to any interior. And the material for it is prepared as follows:
- First, you need to soak the collected shells in a baking soda solution (2-3 days) to soften the organic matter.
- Afterwards, the remaining protein is carefully removed with a brush (but there is no need to touch the inner film).
- Next, the shells are colored with food coloring for Easter eggs in the desired colors.
- At the very end, the multi-colored shell fragments are thoroughly dried.
The “egg” mosaic technique is not too complicated, but it will require painstaking execution.
First you need to prepare the base - thickly and evenly grease a sheet of paper or plastic tracing paper with PVA, and then leave it for 3 to 15 minutes until it gelatinizes (sticky tack).
The finished shells are laid out on the base with their bulges up, at intervals - you need to achieve the appearance of a certain pattern, pattern. Afterwards, the finished picture is pressed down with a special board so that the shell is flattened and broken into smaller fragments. Then the board is removed and the image is smoothed with a special wooden stick. Then tissue paper soaked in flour paste is placed on the panel and left until completely dry.
After drying, the paper must be soaked and removed with a damp sponge along with the remaining paste. Next, the picture needs to be dried properly - for several days (3-4, no less). And you can begin the final processing of the panel - creating craquelures, that is, beautiful “antique” small cracks. To do this, you need to use mascara consisting of shellac and bile.
You have to drip the mascara onto the dried image from a pipette, then wait a few minutes and remove the remaining ink with a damp sponge. Bile allows the carcass to scatter along cracks in the shell, and shellac polymerizes it there, giving strength to the panel. It turns out very beautiful.
In the end, all that remains is to polish the finished painting with coated paper, without pressing.
Grout
You should study the instructions attached to the grout you have chosen and only then begin work. Before applying the composition to the mosaic, you must remove all excess glue from the surface using a wet sponge (for paper-based mosaics). At one time, using a rubber spatula, you can distribute the grout over an area not exceeding two square meters.
Excess grout is removed diagonally using a rubber trowel. The grout dries within 10-20 minutes depending on the room temperature. If everything was done correctly, the grout will eventually darken.