Installation of plaster mesh
Mounting mesh for plaster is used to securely fix a thickened layer of finishing mixture on the surface of walls and ceilings.
Using the mesh, foundation defects and possible errors when plastering premises are eliminated. The mounting mesh evenly distributes the load from the plaster layer over the entire surface of the base, thereby preventing the appearance of cracks in the finishing material. The use of reinforcing mesh extends the service life of the plaster coating.
Methods for attaching beacon profiles
In construction practice, 2 main methods of attaching plaster beacons are used:
- For solution.
- For the threaded type of fastener - a special bracket (it is possible to use plastic “eared” fasteners).
For solution
The method allows you to securely attach profiles to any type of base: brick, wood, concrete. To complete the installation, you will need to apply the solution at several points marked on the wall and attach a beacon. Next, you need to accurately set the profile and check the verticality with a level. Then you should wait for the solution to dry at the attachment points. If the beacons have not moved, you can begin the process of plastering the wall.
The advantage of this method is its simplicity and the ability to correct errors.
Using a special plastic “eared” mount
The main task of this type of fastener is to securely hold the beacons. The configuration of the fastening material is represented by a kind of adjustment system. Fastening “eared” beacons is especially effective when plastering ceilings and slopes. Also, do not forget about this type of clamps when pouring floor screed.
- high installation speed;
- reliability and durability of fastening;
- You can start completely plastering the walls immediately after installing the intermediate beacons;
- If a mistake was made, the product can be dismantled and then used again.
Basic rules for choosing plaster mesh
Attaching the plaster mesh to the wall is done according to certain rules. You just need to choose it correctly first. The manufacturer has made sure that there is a wide selection of fiberglass mesh on the market.
If you don’t want to dive into the issue, you can trust an experienced master. He will select the mesh, the correct fasteners for it, and will help to properly attach it to the wall.
You can see photos of different types of mesh. But the most important thing is to choose it correctly. We will now consider in detail how to attach the mesh under the plaster and how to choose the right one.
When choosing a grid, you should pay attention to the following nuances:
- The mesh must have good resistance to the action of alkaline solutions. To do this, it must be placed in such a solution for 25 days, after which it must be tested for tensile strength. The reduction in strength should be minimal.
- The mesh should be tested for tensile strength . To do this, you need to take a small piece of mesh and try to crumple it into a ball, after which it should take its original shape.
- You should pay attention to the quality and size of the cells.
- All main characteristics of the product are indicated in the manufacturer’s passport indicating the tests performed.
Attention: Do not forget to immediately purchase fasteners, because the mesh must adhere to the surface and not bulge.
Installation of fiberglass plaster mesh
In order to properly fasten fiberglass mesh to concrete or other surface, you need to start from the top, securing the material with self-tapping screws to the upper cells. Moving down, we will fasten around the perimeter, which should be enough. When applying plaster, the mesh itself will adhere well to the surface.
When laying two nets nearby, it is necessary to make a slight overlap. Remember that you need to measure the material so that its pieces are as large as possible. A solid mesh reinforces better than one divided into fragments.
Important! Try to position the mesh in such a way that after applying a layer of plaster, the material is recessed into its surface at a distance of about half a centimeter. This will ensure the highest quality reinforcement.
Technology of plastering on mesh
Grid plaster is an effective way to rough-finish walls. A particular advantage of this method is that it allows you to apply a thick layer of mortar, which during the finishing process will not slide or peel off under its own weight. What is the procedure itself, what types of mesh should be used in certain cases, and how to attach them? More on this later.
How to attach metal mesh?
To work with a metal mesh you will need self-tapping screws, construction dowels and metal mounting tape.
- Before installing the canvas, it is necessary to cut off the required piece, having previously measured the area on which the plaster will be applied in the future. To cut thin material, metal scissors will be sufficient. If the product is made of wire with a diameter of 2 mm or more, you will need a grinder. The cut fabric must be degreased by wiping it with a rag moistened with a solvent.
- Attaching the mesh under the plaster should begin from the ceiling. The top of the material is secured along its entire length with self-tapping screws, under the heads of which cut pieces of mounting tape are placed. Wide washers can also be used as spacers, but they are much more expensive than tape.
- When installing on a concrete or brick surface, you need to drill holes in the wall and insert plastic dowels into them.
- The distance between the screws depends on the size of the cells and the thickness of the mesh itself. But in any case, it is desirable that the fastening step be no more than 40-50 cm. In places of fixation, the canvas may come into contact with the wall, and in the spaces between fasteners it should not contact the surface, since in this case the quality of the plaster layer will deteriorate.
- At the joints, the material is installed with an overlap of 8-10 cm.
- A properly secured fabric should be well tensioned. If the material does not vibrate in places where there are no fasteners, then everything is in order. Otherwise, voids may form under the mesh, which will negatively affect the quality of the finish.
Installing a fiberglass product
Fiberglass mesh is used in the following cases:
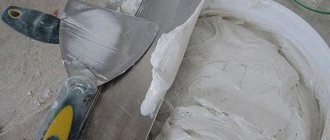
Attaching mesh for fiberglass plaster is much simpler. Installation is carried out using an adhesive composition (glue), the glue is applied to the wall and then the mesh is immersed in it using a spatula. There is no need to purchase additional elements involved in fastening.
The installation process starts from the top and requires a 10cm overlap. It is strictly forbidden to lay the fabric end-to-end or cut it.
To ensure maximum strength of the coating, we fasten the structure in the middle of the plaster layer. In this case, the product is pressed with a spatula into the wall with just hardened mortar.
Plaster mesh: installation methods and requirements
During internal plastering work, it is necessary to use fiberglass plaster mesh:
- interior partitions made of foam concrete blocks;
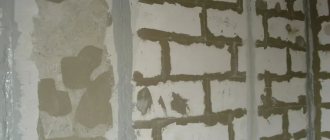
- at the junctions of two materials, for example, brick and concrete are very often found at the places where they are connected to each other;
- on existing cracks with an overlap of 10 cm on each side of the crack;
- with a plaster layer thickness of >50 mm, this is mainly found in old houses. In this case, a metal mesh is used to create additional adhesion to the wall.
In all other places, the use of plaster mesh is not justified. There is no need to apply a plaster mesh to concrete monolithic walls; in this case, the plaster mesh even reduces the adhesion of the plaster layer to the surface.
During facade work, it is necessary to install the plaster mesh on the insulation or on the wall so that the decorative plaster or putty does not crack over time.
Purpose and methods of installation of plaster mesh
There are two types of mesh for plastering work:
1. Fiberglass (fiberglass)
All plastering meshes must have a cell size of at least 5 mm to ensure good adhesion to the surface.
The plaster fiberglass mesh must be smeared into the plaster layer so that it is located in the thickness of the layer. 2. Metal (galvanized)
Metal mesh is attached to the base with self-tapping screws or dowel-nails and is used, as a rule, in old houses when plastering brick walls with a large plaster layer of 50 mm or more. This is done to create a “skeleton” - additional support so that the plaster layer holds firmly to the surface of the walls. If the thickness of the plaster does not exceed 50 mm, then you can do without it.
We also suggest that you familiarize yourself with the most important information on plastering work (current SNiP, tolerances, special soils, plastering on beacons, removing beacons, etc.).
Reinforcement using plaster mesh
As a result of shrinkage of the building, mechanical stress, changes in humidity and temperature conditions, small cracks may appear on the surface of walls, floors and ceilings. This does not affect the overall load-bearing capacity of the building, but spoils the appearance and increases partial air permeability. To reduce the likelihood of cracks and strengthen the plaster, reinforcement is carried out with fiberglass mesh. Unlike metal mesh, fiberglass mesh is not subject to corrosion and has high elongation properties. Reinforcing meshes are successfully used for both interior and exterior decoration.
When carrying out work on external insulation of a building, the presence of a reinforcing layer is mandatory. Reinforcing meshes vary in material, density, thread thickness, and cell size. According to international standards, the main separation parameter is considered to be surface density. This parameter is decisive when choosing a mesh for interior and exterior work. For interior work, reinforcing mesh with a density of 110 to 160 g/m2 is used (with a cell size of 5x5 mm). For facade finishing, this figure is higher (from 160 g/m2), because the outside of the building is more susceptible to mechanical stress, precipitation and temperature changes. When carrying out reinforcement on the outside of a building, the surface density of the mesh may vary depending on the floor.
So, for the basement floor it is necessary to use a mesh with the highest density, since the likelihood of mechanical impact is much higher here. Starting from the second floor, you can use a grid with lower rates. The technology of reinforcement using fiberglass mesh has its own characteristics. Attaching a fiberglass mesh to the base with nails (like a metal one) and then applying a layer of plaster or putty is a gross violation.
Fiberglass mesh is effective inside the plaster layer, not at the edge.
At the first stage, a layer of plaster or putty is applied to the surface to be treated. If a plaster solution is used, then the thickness of the first layer is 2/3 of the total value. When laying the mesh on putty, the layer thickness is 3-5 mm. Then a fiberglass mesh is laid and pressed well (recessed) onto the plaster layer. It is thoroughly rubbed in, all folds and irregularities are removed. For these works it is better to use a wide stainless steel spatula. They can not only smooth the mesh well to the base, but also remove excess solution that has seeped through the cells. Individual panels of fiberglass mesh are glued strictly vertically. The edges of adjacent panels must overlap each other by 10 cm.
Useful tips
Let us highlight one very important point that concerns the technology of applying the plaster layer. The wall under the plaster must be clean and sound. Therefore, first of all, we clean the wall surface from dust using a vacuum cleaner or broom. And then it must be primed, preferably with a deep penetration primer, which penetrates deeply into the wall material, where it polymerizes, increasing the strength of the top layer. As soon as the primer has dried, we proceed to installing the mesh structure.
And other recommendations:
- To install the plaster mesh, it is better to use small self-tapping screws. You will have to drill holes for the dowels, and this is just another dust that you previously got rid of. The smaller the holes, the less dust.
- Some craftsmen apply primer after installation. Not the best option, because puddles of primer form in places where the material comes into contact with the wall surface. This especially happens if a fiberglass sheet with small cells is installed. In principle, both options are used today, and everyone decides for themselves what to do. But keep in mind that before using the solution, the wall plane will have to be primed twice.
- The mesh is laid on the surface in overlapping strips with an offset of one cell. If this is a fiberglass option, then the overlap should be carried out with a mixing of 3-5 cm.
Mesh reinforcement
Before leveling the walls with a plaster mixture, you must first prepare them and install beacons. Quite often, in finishing work, a mesh is used for plastering walls (made of metal, plastic or fiberglass). In this article we will tell you what a reinforcing mesh for plastering walls is, why it is needed, and which one to use in a particular case.
Is plastering mesh needed for finishing work?
Recently, the so-called European-quality renovation has become increasingly popular. That is why reinforcement mesh has often been used for finishing work (this feature is a European standard for the quality of repairs).
The common belief that the plaster mesh affects the quality of adhesion of the mortar to the base is incorrect. Good adhesion of the plaster mixture to the surface is ensured by high-quality cleaning and primer treatment. Reinforcing mesh for plastering walls is needed in order to reduce the number of cracks and make them less noticeable as a result.
Types of plaster mesh
Plaster meshes made of metal, plastic or fiberglass are available on the domestic market. Such meshes are subject to requirements for their density, which should be in the range of 150-170 g/µm.
Depending on what material the mesh is made of, the scope of its use is determined. Plaster mesh made of plastic is also called painting mesh. It is intended only for gypsum plaster, which does not contain cement. Therefore, such a mesh is used only for finishing.
Fiberglass plaster mesh will be a practical solution for applying a small layer of plaster mixture (up to 20 millimeters).
For walls with surface differences exceeding 4 cm, a metal plaster mesh is used. A thick layer of plaster needs such reinforcement, since it can behave in the most unpredictable ways (for example, swell and move away). For cement-based plaster mixtures, experts recommend using a steel mesh, because this particular metal is resistant to the harmful effects of alkalis.
Metal reinforcing mesh is also recommended for strengthening clay plaster. In this case, it is most practical to use a mesh with a cell size of 50 by 50 millimeters.
To finish the external walls on the ground floor, a metal plaster mesh is also used, since this part of the wall is under the influence of mechanical loads.
How to attach a plaster reinforcing mesh to a wall?
In order to attach the plaster mesh to the wall, you need to use dowel nails (diameter 6 mm) and a self-tapping screw (diameter 4.5 mm). It is necessary to make holes in the base for fasteners. After this, part of the mesh is measured according to the height of the wall.
Plastering brick walls
Plastering brick walls
Brick is a very popular building material of our time; it has high strength, heat and sound insulation. It is used to build both load-bearing walls of houses (old houses) and interior partitions of new buildings.
The presence of brick walls in your home makes you wonder how to finish them?
Plastering brick walls is a mandatory construction process that cannot be done without.
While walls made of foam blocks and tongue-and-groove gypsum slabs do not need to be plastered, provided the masonry is of high quality, then brickwork cannot be made smooth with putty alone. So, the finishing of brick walls must begin with plastering work , which can be done either manually or by machine. All work must be carried out according to beacons, this guarantees an ideal vertical level and alignment of all the necessary planes.
Let's consider all the technological stages of plastering brick walls:
- We remove the old plaster from the brick walls and knock it down using a hammer drill.
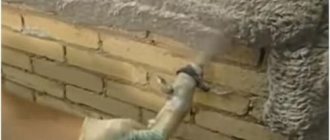
- We prime the surface. For bricks, Knauf Grundirmittel primer is used; it is a concentrate, which is diluted with water in the proportion as indicated on the packaging. The primer can be applied with a fur roller, and in hard-to-reach places (corners, protrusions, etc.) use a wide paint brush.
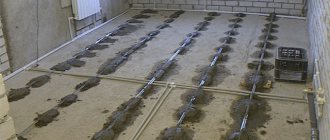
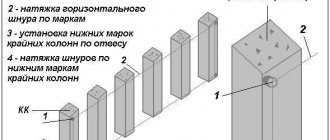
- After the primer has dried, you can begin to place the beacons; for this, use a bubble or laser level, nylon thread and a 6 mm or 10 mm beacon profile, depending on the thickness of the plaster layer. On larger layers we recommend using a 10mm beacon as it is more rigid.
- The next stage of plastering work on bricks is the installation of the plaster mesh. It is not needed in all cases. If the thickness of the plaster layer is 50 mm or more, it is necessary to attach a metal plaster mesh with a cell of 8 x 8 mm or 10 x 10 mm. The mesh is attached to the base either using standard dowels and self-cuts, or dowel-nails using a pneumatic construction gun. Metal plaster mesh is needed for better fastening of plaster (from 50 mm thick) to a brick wall.
- Applying a plaster layer. As mentioned earlier, this can be done manually or by machine using a plastering station.
- After the brick walls are plastered, you need to remove the beacons from the walls and seal the beacons.
The subsequent stages of wall finishing can be started only after the plaster layer has completely dried (after about 2 weeks).
Prices
The cost of plastering brick walls depends on the complexity of the object. For old buildings the price is 350 rubles/m2, for new buildings - 250 rubles/m2. As a rule, in old houses the height of the walls is more than 3 meters and the thickness of the plaster layer reaches 50 mm or more; these factors affect the cost of plastering work.
Plastering brick walls in St. Petersburg (SPb) Vyborg
Brick is one of the most common types of building materials. For the construction of houses, white silicate (made of lime and quartz sand) and red ceramic (made of clay) are used. For wall cladding, facing bricks can be used, the color of which today can be any color.
Among all varieties there are
- solid bricks
- hollow bricks
The shape of the voids can be any: open, closed, slotted, etc. Voids in bricks reduce the thermal conductivity of the material and reduce the overall mass. It retains heat well and dampens sounds, but its strength is significantly lower than in the case of solid brick.
In addition to ordinary and facing bricks, they produce figured bricks, used for the construction of pillars and arches, as well as textured bricks - with a relief pattern on the front side. There are also specialized clinker bricks: for finishing facades and for paving streets - pavement.
Brick characteristics
- Resistance to changes in humidity and temperature;
- Good sound absorption;
- Significant thermal inertia (the ability to maintain temperature for a long time);
- The strength of a brick depends on its brand, for example, brand 100 means that the brick is guaranteed to withstand a compressive load of 100 kg per cm 2;
- frost resistance.
By plastering brickwork, the following goals are achieved:
- various types of unevenness are leveled out,
- the seams are closed,
- the walls are insulated from moisture, preventing it from freezing;
- plaster improves the sound and thermal insulation properties of walls.
Preparatory work for plastering walls
Before starting plastering work, it is necessary to knock off the old layer of plaster with a hammer and chisel. A surface that has not previously been plastered is prepared by using a trowel to knock down unnecessary bulges that protrude from the masonry seams.
It is also necessary to clean the wall of dust and remove oil stains from it. This task is best accomplished with a five percent solution of hydrochloric acid, which needs to be used to treat the entire surface of the brickwork.
Or such places on the wall are removed using a chisel and hammer. Also, with these tools, seams about 1.5 cm deep are cut out on the brickwork, and small notches 3-5 mm deep are made on the bricks.
If the brick is old, then it needs to be picked out until it stops crumbling. After this, the surface is cleaned of the resulting dust with a damp broom (high-pressure apparatus or sandblaster).
Primer. What is it for?
One of the important aspects of preparing brickwork for plastering is the use of a special primer. This procedure is mandatory for subsequent plastering and finishing work.
Penetrating into the surface, the primer strengthens it, improves the adhesion of the material to the base, and also prevents the appearance of cracks, mold and mildew.
Primer and plaster of brick walls are found:
- deep penetration,
- strengthening (used for crumbling loose surfaces),
- against alkaline,
- general purpose.
Before applying gypsum Turks, the following compositions are used to finish brickwork, both in the case of ceramic and sand-lime bricks, when the surface is characterized by increased hygroscopicity (the ability to absorb moisture):
- Grundirmittel (Used to prevent uneven setting of plaster mortar, for manual or mechanized plastering indoors);
- Rotband primer (This is a ready-to-use, polymer, solvent-free, modified dispersion. It significantly improves the adhesion of the plaster and the base, prevents dehydration of the plaster solution, as it prevents the penetration of moisture into the base. This eliminates the occurrence of cracking of the plaster layer.
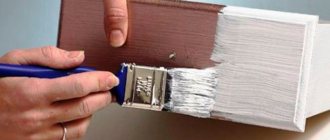
The primer is applied with a roller, brush or spray. After application, the primer layer must be dried, but dusty surfaces are not allowed.
To pre-treat the surface of old brick walls before applying a leveling layer of cement-sand mixture, experts recommend using plaster to spray:
- Knauf adhesion
. This is a dry mixture made on the basis of quartz and limestone aggregate, cement, and chemical additives designed to provide increased adhesion.
A new brick wall can simply be moistened before plastering without priming. However, before starting plastering work, you should make sure that the shrinkage process of the fresh masonry has already been completed, otherwise cracks in the plaster layer may occur.
Joints of dissimilar types of material
An important stage in preparing the surface of enclosing structures for the start of plastering work is strengthening the joints of dissimilar materials of wall structures.
This need is associated with the danger of cracks in the plaster due to different drying rates of the mortar on different surfaces, as well as due to differences in the physical properties of the materials.
How to attach a mesh to a wall
A thin reinforcing frame is secured using mounting tape. Wicker mesh will require screws or dowels if the wall is concrete. Before installation, the material is cut into pieces of the required size. The distance between the fastenings depends on the weight of the mesh fabric and the size of the cells. The maximum distance is 40 cm.
It is advisable that there be empty space between the wall and the mesh; only in the places of fastenings can the canvas fit snugly against the wall.
Installation of fiberglass sheeting
The mesh is fixed around the perimeter of each piece, the canvases are laid end-to-end, without overlap. The fastenings of the pieces should not match. The mesh is not fixed in the middle of the piece; it will be held in place due to the viscosity of the building mixture.
When cutting fiberglass, the pieces are cut so that they cover the wall as much as possible. The strength of the plaster depends on this.
Coating with polymer sheets
The material is attached to the wall horizontally, starting from the top, from the ceiling. The canvases are stretched on the floor and then cut. The overlap is made up to 15 cm; it is not advisable to make a larger overlap.
Metal coatings
For cutting, use metal scissors or a grinder. The canvas is first degreased with a solvent, and the lubricant used in the manufacture of the wire is removed. It can leave noticeable oil stains on the walls.
What are they?
For different types of bases, different types of meshes are used:
Masonry
This mesh is made from polymers. The cells in the grid have dimensions of 5*5 mm. It is used for plastering brickwork.
Universal mesh
It is used not only for plastering work, but also for finishing work using putty . It is made from polyurethane. Several types are available: cell size 6*6 mm is considered small, 13*15 mm is medium and 22*35 is large.
Fiberglass mesh
Made from specially treated fiberglass. It is used for both plastering and finishing work. Cell dimensions 5*5 mm. This is the most resistant mesh to chemical influences. In addition, fiberglass tolerates elevated temperatures well.
Plurima
This type is made of polypropylene. Resistant to aggressive environments. Has a cell size of 5*6 mm. Can be used for plastering internal and external surfaces;
Armaflex
The mesh is made of polypropylene, but additionally has reinforced cell corners. Cell dimensions 12*15 mm. It is used when plastering surfaces with a thick layer.
Steel mesh
It consists of steel rods soldered at the corners of the cells. There is a range of steel mesh with different mesh sizes.
Metal grid
Due to its susceptibility to corrosion, it is used only for interior work. Just like steel ones, they have different cell sizes.
Galvanized
Unlike metal, it can be used for outdoor work.
Which one to choose?
In order to select the correct mesh, you need to use a level to determine the differences in the base. This will allow you to know approximately how thick the plaster layer will be.
There are several solutions for using a grid:
- If the expected plaster layer is less than 20 mm, it is recommended to use a universal mesh. It will do an excellent job of fixing the mortar and preventing the appearance of cracks.
- If the plaster layer is more than 3 mm, a metal mesh is required.
- If the differences are more than 50 m, you should think about covering the walls with plasterboard.
Surface finishing
We are waiting for the final layer of plaster to dry thoroughly. Then we apply the final finishing, painting, whitewashing.
Attention! You should not plaster a freshly laid wall: if the masonry settles, the plaster may crack.
It is also impossible to apply gypsum mortar to a concrete surface. Cement and gypsum enter into a chemical reaction with each other, the plaster swells and then falls off, the gypsum penetrates the surface of the wall and destroys it. To avoid this, a 0.4 cm thick lime mortar is applied to the wall. The gypsum should not come into contact with cement or improved lime mortar. You cannot plaster with lime mortar over gypsum, since when drying, lime shrinks and gypsum expands. At the same time, they peel off from each other and the outer layer disappears.
Applying plaster under wallpaper and painting
Before starting work, you should determine exactly how the room will look and what will be used as finishing materials. If you choose wallpaper, you need to determine its type and thickness in advance. If they are thin, you need to apply several layers of leveling plaster. This will allow you to hang the wallpaper without any unevenness or bubbles.
For the room in which wallpaper will be pasted, it is better to purchase ready-made dry mixtures, since using them you can prepare higher-quality plaster.
If plastering the wall surface occurs before painting, you should carefully prepare the wall, without leaving even small irregularities on it. The whole process is carried out in several stages:
- first, a leveling layer is thinly applied;
- then, if necessary, two more layers are applied to eliminate defects;
- after the surface has dried, the finishing layer is applied;
- Before painting, the wall is sanded until a smooth surface is obtained.
If the described technology for applying plaster is fully followed, the surface is obtained without any unevenness or defects. To do everything correctly, it is better to carefully watch the video, which shows how professionals work.