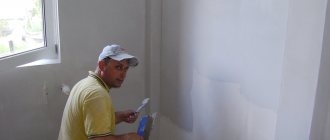
How to level the walls is up to everyone to decide for themselves. As a rule, plaster is chosen by those who are interested in the result, and not the speed of work. Although it is more difficult to work with mortar than with HA sheets, high-quality plaster will last 20 years and nothing will happen to it.
The biggest disadvantage of the “wet” method is dirt and dampness during work. But as a result, they get a strong, reliable foundation.
And yet, one cannot categorically say that drywall or plaster is better. It would be most correct to say that the materials complement each other perfectly. The main thing is to use them correctly.
In what cases is it better to use
Having found out the advantages and disadvantages of the materials in question, you can decide which is better, plaster or drywall for walls in each specific case. To make a decision, you will need to analyze the input data: the degree of deviation of the vertical wall, the base material, whether the manufacture of complex structures is required to give the interior the intended appearance, operating conditions of the room, the need to mask any structures and communications, what material is planned to be applied as finishing cladding on the walls and the experience of the master.
Drywall
To resolve the doubt whether it is possible to cover the walls with plasterboard instead of plaster, the following list of circumstances in which the installation of plasterboard is preferable will help:
- if the base is a wooden surface, for example, in a country house or country house, when they are a permanent place of residence;
- if necessary, disguise internal communications without the use of tedious gating and if there is free space in the room;
- if there is a need for additional insulation of the room or sound insulation;
- with significant differences in the vertical wall (more than 20 mm);
- if it is necessary to complete finishing work in the shortest possible time;
- when doing the work yourself, when it is not possible to hire a professional to plaster the walls;
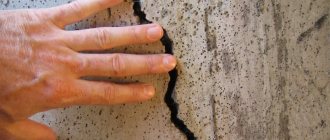
- if necessary, eliminate flaws in masonry made of aerated concrete, gas silicate blocks, bricks and foam blocks;
- in cases where it is necessary to eliminate protruding parts of the foundation made of FBS.
In ambiguous conditions, when it is possible to use both materials, you should calculate whether it is cheaper to level the walls - with plasterboard or plaster, and then make a decision.
Plaster
If you need to decide how best to level the walls - with plasterboard or putty, the main criterion for making a decision is the magnitude of the vertical difference of the base and the purpose of the room.
For small vertical deviations, you can use gypsum plasterboard and plaster the surface, but if you are going to hang heavy shelves or other objects on such walls, you will only have to plaster the base.
Leveling plaster is used in the following cases:
- when preparing bases for subsequent finishing with heavy materials (decorative stone slabs);
- for leveling the surface in rooms with high humidity levels (in the bathroom);
- if it is necessary to secure massive objects to the walls;
- in small rooms when you need to save space;
- when the treated surface deviates from the vertical within 20 mm;
- in rooms where sudden changes in temperature and humidity conditions are possible.
Why do this?
Everyone knows that drywall is almost perfect - there is no particular need to level it. Plaster is used only to improve the appearance of the sheets. But these compounds must also be applied in other cases when it is necessary to cover the joints between sheets, various recesses and self-tapping screws sticking out. In fact, the plaster compositions have the function of putty; they are used when wallpaper is glued to drywall or tiles are laid. Under decorative plaster, such material is also quite acceptable.
There is a serious debate among experts about whether it is possible to plaster plasterboard sheets in principle. Some of the disputants point out that low-quality material with an insufficient level of moisture resistance cannot be covered with plaster: this will lead to gradual deformation, since the applied layer will be damaged by the released moisture.
When walls covered with gypsum board sheets have pronounced deformations, a layer of plaster will only worsen the situation. It would be much more correct to remove the cause of the distortions, rather than fight them themselves. It’s another matter if only minor deviations from the normal topography are detected. It is also necessary to apply basic plaster before decorative plastering. It allows you to guarantee accelerated drying and improve the polymerization process.
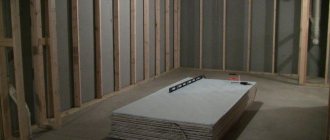
Consequences of wallpapering without prior puttying
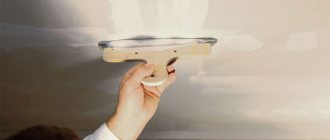
After installing the plasterboard sheets, we see, although a dull grayish, but absolutely flat and smooth surface:
Smooth and even - one of the main advantages of gypsum plasterboard
In addition, we are talking about cardboard with excellent adhesive properties. So is it necessary to putty on such an excellent coating, dooming yourself to additional work and unnecessary financial waste?
In order to determine the answer to this question, I want to draw your attention to a whole set of problems that you will have when choosing a simpler path that excludes the use of putty:
- No matter how ideal the contours of the plasterboard sheets are, there will still be gaps between them, although not wide . Over time, the difference between areas that have a solid base and areas that do not have one, that is, falling into the gaps, will become too noticeable. Or perhaps this will happen right away, it all depends on the thickness of the canvas;
Demonstration of what will happen at the joints of drywall sheets if you apply wallpaper to drywall without putty
- Is it possible to glue wallpaper on gypsum plasterboard without puttingty on the screw heads? Another relevant point. The fact is that metal sooner or later begins to rust . Rust, of course, eventually appears through the decorative cladding, irrevocably disrupting its aesthetics;
- Above, I noted that cardboard has good adhesion. Too good, in fact. Therefore, when you want to change the finish, you will have to tear off the canvas along with the front cardboard layer of gypsum board . After such barbaric treatment, the plasterboard sheets themselves will have to be changed;
There is still one way out of this situation: use a special steamer to remove wallpaper. With it it is possible to keep plasterboard sheets intact. However, keep in mind that the price of such equipment is quite high, and for one-time use it is much more profitable to rent it rather than buy it.
Special wallpaper steamer
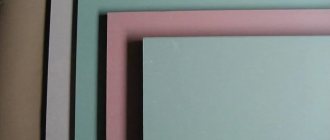
- Classic gypsum boards are gray in color , modified with green or pink. Is it possible to glue thin paper sheets onto such bases? Only if you want to end up with a mixture of all these shades;
In this case, there is also a solution: buy exclusively thick vinyl wallpaper on a non-woven backing with a bright, intricate pattern. In this case, the entire color spectrum of drywall will not be able to manifest itself through such a reliable barrier.
Vinyl wallpaper on a non-woven base does not care what color the plasterboard sheets underneath are.
- Let's return a little to the cardboard itself, or rather its hydrophobicity. If you did not use special moisture-resistant sections, then expect that the cardboard covering of the gypsum board may simply get wet and fall apart from the glue that impregnates it . The gypsum core will also begin to crumble in this case.
Consumption and ideal quality of putty
It is very important to know the exact area of the drywall surface being treated. This allows you not only to save on materials, but to prevent the mixture from drying out.
The easiest way to calculate the area is using sheets of drywall. Each one has a meaning on it, usually on a label. Simple addition allows you to find out the desired number.
When preparing the mixture, you must adhere to certain recommendations and technology. The maximum supply of ready-made putty should be enough for no more than 30 minutes.
If some mistake was made during the preparation of the putty or the mixture began to dry out, it must be thrown away and a new one prepared. If you use such putty, the wall may eventually begin to crumble in some places.
As an example, you can watch a video that contains instructions on how to putty drywall.
Why putty gypsum boards?
Drywall does not form a monolithic surface - mobility is maintained at the joints of sheets, at external and internal corners. Products with factory edges have chamfers that create indentations. If the wallpaper is stretched over the joint, it may tear, creases and folds may form on it as a result of thermal deformations of the base.
Learning how to putty drywall correctly
Tools you will need:
- bucket for solution;
- wide and narrow spatula;
- rubber spatula (as for grouting joints when laying tiles on the floor, described in this article);
- construction mixer, you can use a drill attachment;
- special sandpaper for grouting.
To mix the putty solution, you will need a bucket and a mixer (drill attachment)
Preparation of putty solution and priming stage
- To properly putty drywall, you need to make the right putty solution for drywall walls or ceilings. The consistency of the mixture should resemble thick sour cream. It is better not to prepare a lot of solution at once; the lifespan of the diluted mixture is about an hour. To start, take about 3-4 kg of dry mixture. For a room of 20 m2, this solution is enough for approximately 1/3 of one wall if you have gypsum putty, or 1/4 of the wall if it is cement. In terms of time you will need 10-15 minutes and you need to give 5-10 minutes for the putty to settle. If you use a ready-made putty mixture, then at this stage you will save time.
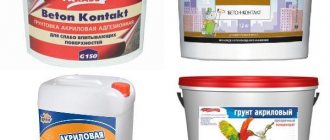
- All walls need to be primed. So, for a room of 20 square meters. m, you will need about two hours. You will need about 5 liters of primers, it will cost an average of 700-900 rubles.
It is better to cut drywall joints at an angle so that the putty fits better.
How to properly putty joints of plasterboard sheets, seams and arches?
- All drywall joints must be sealed with reinforcing tape.
- Then putty the screw heads and drywall joints over the tape with putty starting mixture. It is better to putty the heads of the screws using a “crosswise” motion.
- The internal corners of plasterboard walls must be puttied first on one side, and after drying on the other.
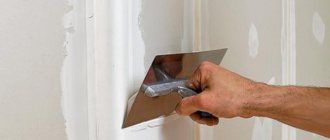
- To level the outer corners with putty, you must use perforated aluminum corners. Corners in a room are often subject to mechanical damage, so it is better to use aluminum corners, this will prolong their life. Secure the corner to the surface of the corner, and then fill it with mortar.
- To process arches and other curved surfaces, use plastic perforated corners.
To putty the joints of drywall sheets, use a special sickle tape, on top of which a layer of putty is applied.
Applying the starting layer. Costs for initial puttying of plasterboard ceilings and walls
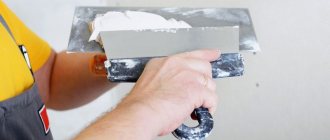
- Next, take a narrow spatula, pick up putty with it, apply it to a wide one, then spread it evenly over the surface of the wall. The putty should be applied at an angle of 20-30 degrees, which will ensure optimal layer thickness.
- After the starting layer has dried, it is necessary to smooth out all the irregularities and cover up the depressions and recesses. The starting time for complete drying is about 12 hours, and largely depends on the applied layer. Finally wipe the surface of the walls with a highly abrasive mesh.
For simplicity, let’s take a room for renovation with an area of 20 sq.m.
- The duration of the entire process of applying the starting putty in a room of 20 square meters. m is about 15-16 hours, and if you need to putty the ceiling, then add another 5 hours.
- Material consumption for walls: about two packs of 25 kg of gypsum mixture, and about three of cement.
- Consumption of materials for the ceiling: you will need about a pack of gypsum plaster, and one and a half cement plaster.
- The cost of treating an entire room with a ceiling for gypsum putty will be approximately 1200 rubles, for cement - 1500 rubles. In many ways, the amount of material consumed will depend on the thickness of the applied layer. You cannot make a very thin layer, it may crack.
Applying putty to the seams of plasterboard sheets
Finishing putty of walls for wallpaper and painting
- Now the finishing layer is applied and rubbed until smooth. If you plan to glue wallpaper further, then applying a finish is not necessary. The finishing putty is applied in a thinner layer, so its hardening time is shorter.
- After just a few hours you can start grouting. It takes about 40 percent less time and materials, so your costs for finishing putty will be about 800-1000 rubles.
When planning your budget for purchasing materials, do not forget to include 300-400 rubles for the purchase of grout mesh; you will need 10-15 of them.
Finishing putty on plasterboard ceilings for wallpaper and painting
When working with the ceiling, all stages are identical, the only difference is greater complexity and inconvenience during work.
Grinding
This is the final leveling stage. To carry out the work you will need a special grater with an emery mesh.
Attention! At this stage, protective equipment is required: a respirator, goggles and gloves. When grouting, a lot of dust is generated, small particles of putty fly off, which can get into the eyes or respiratory tract. The mesh can scratch your hands, so it is advisable to work with gloves.
Use a grater to go over all the irregularities: waves, bumps, lumps of solution, stuck particles. It is important here not to overdo it and not to strip the putty down to the drywall. Internal corners require special attention, as there is a risk of leaving grooves from the trowel on the adjacent wall.
USEFUL INFORMATION: Design possibilities for plasterboard ceilings
Gypsum plaster Rotband (Knauf)
This is a dry universal plaster mixture with high adhesive properties based on gypsum with the addition of light aggregate and chemical polymers.
Rotband plaster is ideal for plastering walls and ceilings in rooms with normal humidity levels, as well as in kitchens and bathrooms.
More and more people, when making renovations, give their preference to gypsum plaster. With its help, you can perfectly level the walls and hide any defects and cracks. Having good adhesion to any surface, gypsum plaster is ideal for finishing ceilings. In addition, such plaster is absolutely environmentally friendly and difficult to ignite.
When is the best time to use drywall?
It is more appropriate to use plasterboard sheets in the following situations:
- Differences vertically and/or horizontally exceed 60 mm - preliminary installation of a frame made of profiles will help level out any unevenness on the surface of the base.
The main thing is that the size of the room accommodates this. Photo 8. Frame for gypsum boards on walls with significant deviations - The need to disguise utility lines (electrical wiring, pipelines, ventilation ducts, etc.) - in this gypsum board has no equal, since it can be used to hide any plumbing and other elements.
Photo 9. Creating a box to mask communications - Limited time frame for repair work - when using plasterboard sheets, there is no need to wait for the finished surface to dry and then gain strength. The next day after filling the seams, you can begin finishing.
- Wall cladding in frame and wooden houses - here it is definitely better (and cheaper, moreover) to use plasterboard.
Its properties are more similar to natural materials. Such walls are extremely rarely plastered due to poor adhesion of the mixture to wood and the need to make shingles on the surface, which significantly increases the labor intensity and cost of the work. Photo 10. Finishing gypsum board walls in a frame house
How to putty GVL for painting and wallpaper
Decorative painting and wallpapering are the most popular options for finishing surfaces lined with gypsum fiber board. Maximum smoothness can only be achieved by filling everything, the joints between the slabs, and the exposed screws. All work will be done in three stages:
- padding;
- preliminary puttying of the place where the sheets are glued;
- final puttying of the entire surface, finishing stage.
Do not forget that special dilutable compounds will be required for the installation of gypsum fiber board elements.
Do I need to prime drywall before applying putty?
The main property of a primer is to improve adhesion between the base and coating materials. If you plan to seal only corners, joints and mounting holes on drywall, the priming step can be neglected. But experts recommend priming ALL surfaces, down to the smallest defects.
Moreover, for reliable adhesion of all layers, it is advisable to apply a primer:
- before and after puttying seams and defects. It is convenient to work here with a small brush, thoroughly wetting the area of work;
- corners before and after installation of leveling and arch-forming elements;
- the entire surface to be finished before applying the finishing putty and after that - for painting, plaster or wallpaper. Here it is more convenient to work with a roller (for the ceiling - with a long handle).
To avoid a possible “conflict” between putty and primer, it is better to take products from the same manufacturer and pay attention to the labels: the primer must be intended specifically for drywall!
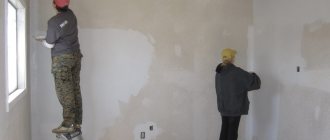
Preparation for plastering
The process begins with selecting the right tool. For work you will need:
- Spatulas - wide and narrow. It is more convenient to apply the mixture to even and large areas first. Craftsmen recommend taking one with a width of 44 cm. The narrow one is useful for hard-to-reach places, corners and joints.
- Level. Without it, it is difficult to determine whether everything is smooth.
- Roller with a long handle for priming. It will save you from climbing stairs.
- Vacuum cleaner, preferably industrial. It will be needed to remove dust.
First of all, vacuum the surface or remove dust with a damp cloth. Contaminants interfere with the adhesion of soil and putty to drywall.
Cleaning dust from drywall with a vacuum cleaner
When the dust is finished, check whether the screws are screwed in correctly and their heads are recessed deep enough. Next, move on to the primer. Prime the areas that will be puttied: joints, seams, holes. After the soil has dried, they begin to putty.
The putty is taken ready for use or in the form of a dry mixture. In the second case, they spend it as quickly as possible.
The putty layer does not exceed three millimeters. Deep irregularities and seams are reinforced. This protects the putty from subsequent cracking. Use serpyanka or paper tape.
First there is a layer of putty, the tape is applied and pressed on top, and then covered with a solution for better adhesion. Internal and external corners are closed in the same way, but using profiled corners with perforations, which provide access to the surface of the putty when pressed into the corner. Excess putty is immediately removed with a spatula. For reliability, the corner elements are fixed with self-tapping screws.
After drying, minor blemishes are removed with sandpaper. The quality of work is checked using a level or a regular rod. Then the entire surface is primed. A deep penetration primer is used to ensure good adhesion to the plaster. Craftsmen recommend an acrylic mixture that impregnates the plaster, strengthening it to a moisture-resistant state.
This is done with a roller, and the primer is taken in excess, but so that there are no smudges. When the soil is dry, begin plastering.
Putty joints
Next the joints are sealed. When understanding how to prepare plasterboard walls for wallpapering, you need to understand that this is the most crucial moment. If the seams are puttied poorly, there will be bumps and holes on the wall, which looks very ugly. The depressions will be noticeable even under the wallpaper.
To do this you will need the following tools and materials:
- putty knife;
- serpyanka mesh;
- special putty for seams;
- container for working solution.
USEFUL INFORMATION: Selecting fiberglass wallpaper for painting
Work progress:
- The edges of the sheets are chamfered at the factory at an angle of 45 degrees. If the drywall is cut, you need to remove the chamfer before installing the sheet with a special plane or after installation using a sharp construction knife.
- Before puttying, the joints are especially carefully treated with a primer, which must dry completely.
- First, dilute the putty according to the instructions. Then the working solution is applied along the entire length of the joint, carefully ensuring that the gap is filled.
- The solution is also applied 5 cm to the left and to the right of the joint. Then a sickle mesh or paper tape is laid on top of the first layer, which will reinforce the joint. The mesh must be laid so that it lies flat and fits tightly to the surface of the drywall. Then the next layer of putty is applied over the mesh, leveling it to create a smooth surface without bumps.
Mesh or tape can also be used to process internal corners, especially if the walls do not meet clearly perpendicular to each other. To ensure a clear angle, the mesh must be carefully pressed with a spatula. If this is not done, the corner will turn out to be rounded.
Is it necessary to apply plaster to drywall?
Today there is an opinion that it is impossible to apply plaster on walls finished with plasterboard under any circumstances. A large mass of plaster in combination with water in its composition will lead to damage to such surfaces and deformation of the frame.
However, this does not apply to decorative types of plaster, which can be easily applied to gypsum boards as a residual finishing option.
However, if you still need to level the surfaces, some experts recommend adhering to the following technology:
- Apply plaster only to sheathing consisting of moisture-resistant plasterboard;
- before work, you need to carefully treat the sheets with deep penetration soil;
- The plaster must be applied alternately in several thin layers.
But taking into account this technology, and in the event of differences or defects, you can simply use starting gypsum putty, which will eliminate the defects.
Puttying drywall surfaces is an almost mandatory step, but it can be neglected in some cases. So, is it necessary to plaster drywall before wallpapering and painting?
Puttying under wallpaper
If, after installing plasterboard structures on the walls, you plan to glue wallpaper, then you don’t have to resort to completely puttying the sheets.
It is important to follow the rules for preparing walls:
- Without fail, the joints are reinforced with tape and the fastening points are hidden with putty. At the joints of plasterboard elements, reinforcing tape is initially glued and coated with a thin layer of special putty for sealing joints. The points where the screws are screwed in are simply coated with putty.
- The rest of the surface must be carefully covered with deep penetration primer, which will act as protection for drywall.
- Puttying is carried out by applying the mixture to the surface. After drying, minor defects may appear that will hide the wallpaper.
All the intricacies of this work are shown in the video:
Plaster for wallpaper and painting
If you plan to paint walls and ceilings made of plasterboard, then puttying is necessary. All imperfections will be visible on the painted surface, and color consumption will increase significantly.
The material used is "Rotband". This is a gypsum mixture for universal use. It is used as a starting and finishing mixture in a complex.
Stages of applying plaster:
- All walls finished with gypsum plasterboard are first prepared by applying deep penetration soil. This increases the adhesion (adhesion) of the plaster to the top layers of drywall. The soil also “blocks” the rapid and deep penetration of water from the plaster mixture.
- Be sure to seal all joints between sheets. They are glued with reinforcement tape (serpyanka) and plastered with a mixture for reinforcing joints. After drying, these lines are rubbed with a grater and sandpaper, removing minor defects and sagging.
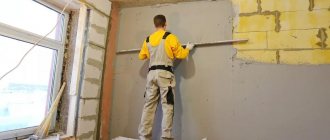
- The plaster composition is applied with a wide spatula (width from 300 mm), placing it at an angle to the surface of 30–40 degrees. When applying, you do not need to press hard on the tool, otherwise the plaster will lie in waves, forming unnecessary sagging. The starting composition is laid until the desired layer thickness is obtained. On large defects, the mixture is applied in 2 approaches, in layers of 3–5 mm.
- After the starting mixture has dried, it must be finally leveled with putty and a finishing compound. It is applied in a thin layer up to 1 millimeter, eliminating the smallest defects on surfaces.
- Drying will last 1-2 days, the dry plastered wall will be snow-white. After this, using fine sandpaper with a grain size of 120–160, it is necessary to eliminate minor defects.
Plaster is used to prepare already mounted plasterboard walls with cracks or dented areas for painting or wallpapering. Moreover, the size of the damage does not exceed 10–15 mm.
The same technology is used to prepare drywall for tiles.
As a result, plastering plasterboard surfaces comes down to eliminating minor defects and defects; you can also level the level with differences of no more than 10–15 mm.
Functions performed by putty
So is it necessary to putty drywall under wallpaper? Above I described what will happen if the canvas is glued onto clean gypsum boards. But what does putty do to neutralize all of the above-mentioned adversities? It's simple: it creates a thin and reliable layer between the cardboard and the finishing material, which:
- Masks joints between drywall sections and screw heads . That is, they will no longer be able to appear on the front side of the cladding;
Drywall with putty seams and fasteners
- Provides a white, neutral background against which even the thinnest wallpaper will look great;
Drywall that has turned white after puttying before wallpapering
- Prevents cardboard from coming into contact with glue , which prevents it from getting wet and being destroyed;
- Keeps plasterboard intact when removing wallpaper in the future.
The paper sheets peel off from the putty quite easily, without disturbing the cardboard layer of the gypsum board
Features of preparatory work
Even if the sheet material appears clean, it must be prepared by brushing away construction dust and debris. The wall is primed, including those places where the mixture is planned to be laid. If the surface will be used under difficult conditions with high humidity, a primer with antiseptic additives should be used. To prevent the plaster from cracking during shrinkage or temperature changes in the linear dimensions of the material at the seams, sickle tape is glued to these places.
You can increase adhesion by walking over the surface with a damp sponge.
Particular attention should be paid to the seams, where a lot of dust most often accumulates. You can use a brush to clean chamfered seams.
Priming technology
Recommendations for applying primer to drywall
Before applying the primer to the surface, it is necessary to clean it from dust and dirt. It is best to clean with a wet cloth. Wait until the wall dries and apply primer.
Large surfaces of walls and ceilings are primed with a roller. At the joints you need to go through the soil several times. In problem areas - corners, it is necessary to prime with a brush. The primer on the wall must be applied from top to bottom to avoid the soil dripping onto the floor.
After the first layer has dried, apply the second at intervals of at least 5 hours, but it is better to wait a day for all the components of the primer to work.
How and with what should I treat drywall before wallpapering?
In order for the finishing material to adhere firmly to the walls, it is necessary to use glue that matches the type of wallpaper. However, you should not skip the intermediate stage in the entire process of pasting wallpaper onto drywall.
The treatment of walls begins with their priming.
Processing material
To prime the surface, deep penetration primer based on acrylic and latex is used. This material will provide:
- reliable adhesion of wallpaper to the wall;
- uniform application and economical use of the adhesive solution;
- protection of drywall and wallpaper from adverse factors.
Primers are available in the form of a dispersion of acrylic particles and latex. If the composition is concentrated, it can be diluted with water to the desired consistency.
Processing process
The surface of the sheets is primed twice. The first time the layer is applied to a fully assembled surface with unclosed seams.
The primer is applied with a roller, and at joints and corners - with a wide brush. When priming joints, the primer must be passed so that the liquid penetrates all the way to the profile.
After the primer has dried, putty is applied to the surface, and first the joints are sealed using the starting compound and reinforcing tape.
The dried putty at the joints is sanded and these places are primed again.
Then they putty the entire plane, removing all the irregularities. Putty walls and ceilings are cleaned with meshes of various brands in ascending order: M80, M120, M240. If the surface requires it, then you can start with the M60 mesh.
Before applying the primer a second time, the surface is cleaned of dust. Then they prime. You need to prime the second time in two layers. The second layer is applied after the first has completely dried.
Twenty-four hours after applying the second layer of primer, begin wallpapering.
Do I need to putty drywall before wallpapering?
The joints between sheets of drywall are sealed using putty and reinforcing tape. Thus, unevenness appears on the surface of the wall, which must be smoothed out with putty.
Why do you need to putty drywall before wallpapering?
Puttying the walls before wallpapering will create a perfectly flat surface without joints or irregularities, which will certainly have a positive effect on the quality of the wallpaper.
Preparing for putty
The gypsum board surface is puttyed after installation of the sheets. Before filling, all surfaces are cleaned of dust, dirt and primed. The sockets and switches are removed from the walls. All sockets and switches are insulated with protective film to avoid electric shock.
Putty joints
Puttying of joints is carried out with reinforcement with serpyanka mesh. The mesh is glued to the joint, cut at an angle of 90 degrees. The joint on top of the mesh is filled with putty. When filling joints, use starting putty or a special compound for joints. The putty is allowed to dry and then cleaned of sagging and irregularities.
Putty corners
Puttying of external corners of plasterboard structures is carried out with starting putty using reinforcing perforated corners made of metal or plastic.
The filling process is the same as when sealing joints. The corner is installed at the installation site and secured on top with putty.
When reinforcing corners, several types of structures are used. Corners made of thin perforated steel are used on vertical and horizontal projections. Plastic corners are used to form arches and curved lines.
Treatment of gypsum board fastening points
If you leave the gypsum board fastening points untreated, then over time the screws and putty will rust from moisture and this rust will come out. To prevent this from happening, all fastening points after priming are treated with the same putty solution as the joints. A thin layer of putty is applied to each screw.
This operation is performed simultaneously with sealing the joints of plasterboard sheets.
Processing external corners
Drywall is a rather fragile material. The outer corners are especially susceptible to destruction: chips often appear on them. To prevent this from happening, they need to be reinforced, but a simple sickle mesh will not be enough for this. For external corners, a special perforated aluminum corner is used.
USEFUL INFORMATION: What glue should I use to glue photo wallpapers: what glue is needed for different photo wallpapers?
For work you will need:
- putty;
- putty knife;
- perforated corner;
- level;
- container for putty.
Sequence of work:
- A layer of putty putty is applied to the corner and the perforated corner is carefully placed against it.
- The aluminum product is carefully pressed into the wall. When pressed, the solution will protrude through the perforation. Excess construction mixture is collected with a spatula.
- Use a level to check how level the corner is. If necessary, it is trimmed, pressed with the level itself or the rule. The aluminum corner should stand up straight and not stand out from the general plane.
- When the putty has hardened, final leveling is carried out: the corner is rubbed with mortar, the perforation is filled with building mixture, and the plane is leveled.
Selection of plaster
Drywall can be plastered with different materials, which are not the same in composition and properties. For wall and ceiling gypsum boards, it is allowed to use only those solutions that do not contain water or include a minimum amount of it. Polymer compositions are suitable for all sheets, and cement compositions are suitable only for moisture-resistant ones.
Gypsum plaster
The material is used in dry rooms because it contains gypsum, which does not tolerate moisture well. Gypsum-based plaster is well suited for gypsum board sheets, as it has a similar composition and quickly sets and hardens. The advantages of the gypsum mixture are:
- vapor permeability, no influence on the microclimate;
- environmental friendliness and fire safety;
- light weight, versatility;
- ease of mixing, application, restoration of damaged areas;
- minimal shrinkage, no cracks;
- low consumption.
Gypsum plaster composition Volma
In addition to fear of hydrophobia, gypsum plaster has other disadvantages - reduced frost resistance, the solution hardens too quickly, and the inability to add large portions at once.
Cement plaster
The main component of such a building mixture is Portland cement. Sand, plasticizers, and various additives are used as additives. Most cement plasters are considered frost-resistant, so they can be used for exterior work. They quickly and firmly adhere to the base, are easy to spread and apply, durable, resistant to moisture. Using cement mixtures, you can give moisture-resistant drywall additional protection from water.
Moisture-resistant cement-based composition Weber.Vetonit
The disadvantages of such plasters are:
- heavy weight, unsuitable for thin gypsum board sheets;
- long-term development of final strength;
- poor vibration tolerance.
Modern polymer compositions
Polymer plasters are an invention of recent years. They may have a gypsum or cement base, but their properties are still determined by the added polymer materials:
- acrylic;
- silicone;
- siloxane, etc.
Acrylic silicone plaster
Such building mixtures easily withstand high humidity, are elastic and do not shrink, quickly gain strength and do not deteriorate from mechanical stress or vibration. They are suitable for any premises, as well as for outdoor work.
The weight of such mixtures is small, so they do not weigh down the plasterboard wall. The disadvantages include the high price of such products. In addition, they are sold already diluted in small packages, which is not always convenient.
Is it necessary to apply plaster to drywall?
Today there is an opinion that it is impossible to apply plaster on walls finished with plasterboard under any circumstances. A large mass of plaster in combination with water in its composition will lead to damage to such surfaces and deformation of the frame.
However, this does not apply to decorative types of plaster, which can be easily applied to gypsum boards as a residual finishing option.
Only decorative plaster can be applied to drywall
However, if you still need to level the surfaces, some experts recommend adhering to the following technology:
- Apply plaster only to sheathing consisting of moisture-resistant plasterboard;
- before work, you need to carefully treat the sheets with deep penetration soil;
- The plaster must be applied alternately in several thin layers.
Plastering a plasterboard wall is carried out as a last resort using tools and separate rules
But taking into account this technology, and in the event of differences or defects, you can simply use starting gypsum putty, which will eliminate the defects.
Puttying drywall surfaces is an almost mandatory step, but it can be neglected in some cases. So, is it necessary to plaster drywall before wallpapering and painting?
Puttying under wallpaper
If, after installing plasterboard structures on the walls, you plan to glue wallpaper, then you don’t have to resort to completely puttying the sheets.
When preparing a plasterboard surface for wallpapering, the walls are puttied in a thin layer without removing the ideal surface
It is important to follow the rules for preparing walls:
- Without fail, the joints are reinforced with tape and the fastening points are hidden with putty. At the joints of plasterboard elements, reinforcing tape is initially glued and coated with a thin layer of special putty for sealing joints. The points where the screws are screwed in are simply coated with putty.
- The rest of the surface must be carefully covered with deep penetration primer, which will act as protection for drywall.
- Puttying is carried out by applying the mixture to the surface. After drying, minor defects may appear that will hide the wallpaper.
All the intricacies of this work are shown in the video:
Plaster for wallpaper and painting
If you plan to paint walls and ceilings made of plasterboard, then puttying is necessary. All imperfections will be visible on the painted surface, and color consumption will increase significantly.
The material used is “Rotband”. This is a gypsum mixture for universal use. It is used as a starting and finishing mixture in a complex.
Knauf is distinguished by high product quality indicators.
Stages of applying plaster:
- All walls finished with gypsum plasterboard are first prepared by applying deep penetration soil. This increases the adhesion (adhesion) of the plaster to the top layers of drywall. And also the soil “blocks the rapid and deep penetration of water from the plaster mixture.
Drywall should be primed carefully, without making any mistakes. Be sure to seal all joints between the sheets. They are glued with reinforcement tape (serpyanka) and plastered with a mixture for reinforcing joints. After drying, these lines are rubbed with a grater and sandpaper, removing minor defects and sagging.
Correct reinforcement of plasterboard joints The plaster composition is applied with a wide spatula (width from 300 mm), placing it at an angle to the surface of 30–40 degrees. When applying, you do not need to press hard on the tool, otherwise the plaster will lie in waves, forming unnecessary sagging. The starting composition is laid until the desired layer thickness is obtained. On large defects, the mixture is applied in 2 approaches, in layers of 3–5 mm.
Plastering the walls is done without applying pressure to the tool. After the starting mixture has dried, it must be finally leveled with putty and a finishing compound. It is applied in a thin layer up to 1 millimeter, eliminating the smallest defects on surfaces.
The finishing putty is applied in a thin layer. Drying will last 1-2 days, the dry plastered wall will be snow-white. After this, using fine sandpaper with a grain size of 120–160, it is necessary to eliminate minor defects.
Removing defects using sandpaper
The same technology is used to prepare drywall for tiles.
As a result, plastering plasterboard surfaces comes down to eliminating minor defects and defects; you can also level the level with differences of no more than 10–15 mm.
Coating a plasterboard wall with paint
If there is a very large difference in the levels of different areas, it is not advisable to use thick layers of plaster that the frame and its cladding cannot withstand.