Nowadays, leveling walls and ceilings with plasterboard is one of the most popular repair and finishing technologies. The gypsum plasterboard sheets themselves, their components for creating a frame or materials for frameless installation - all of them are not very expensive, the procedure for working with them is simple and can be quickly mastered even by novice craftsmen, and the leveling process itself, compared to the same plastering, takes much less time and does not require highly qualified performers.
How to putty drywall for painting
The result is a smooth surface of the walls or ceiling, almost ready for further finishing operations. However, the word “almost” is used here for a reason - in order for the finish to look truly high-quality, there is still work to be done on the surfaces. This publication will discuss how to putty drywall for painting - why it is required, what materials are recommended to be used, and the basic technological techniques for performing this important stage.
But first, you need to understand the question - is it really necessary to putty plasterboard surfaces just before painting?
Characteristics of drywall
Drywall is considered one of the most convenient materials for decorating walls with your own hands.
Advantages of gypsum boards:
- affordable price;
- long service life;
- the ability to perform high-quality installation with your own hands;
- flexibility;
- ease of processing;
- reliability.
So, now it’s clear why drywall stands out favorably against the background of other materials. Especially when it comes to wall treatment.
GKL sheets are suitable for leveling walls and for the construction of additional objects - arches and partitions.
Typical houses of yesteryear were characterized by uneven walls, so the construction of an interior plasterboard partition will be a solution to this serious problem.
Each such structure is built on the basis of a frame. This allows you to install insulation. In addition, the frame provides an additional level of sound absorption. As a result of this installation, it becomes possible to create a beautiful room design and disguise pipes, ventilation ducts, and electrical wiring.
Seams between gypsum boards
GCR is mounted using a system of profiles. With the frameless method, a specialized adhesive composition is used. But regardless of the chosen fastening method, puttying remains a mandatory step. The surface is processed manually or mechanically.
Manual work is considered to be of higher quality, so this method is preferred. However, the duration of the procedure increases due to natural reasons.
Reasons: is it necessary to putty standard drywall before gluing wallpaper onto sheets?
- After some time, the trellises will lose their original appearance, resulting in the need to replace them. On the unputtyed surface of sheets, wallpaper texture strips can only be removed together with the gypsum board cardboard covering. As a result, they will need restoration or complete replacement.
- The treated surface makes the finish durable. Properly selected putty fits perfectly onto the sheet and bonds with it. Part of the wallpaper glue penetrates into it, thus binding the finishing elements. Treatment is especially important for moisture-resistant sheets, since without it the adhesive composition may come off.
- Anyone who still doubts whether it is necessary to putty the drywall before wallpapering should take into account that without a layer of putty, the inscriptions on the sheets may be visible. Moreover, moisture-resistant gypsum board has a green color, which is quite noticeable through thin trellises.
- Puttying joints is a separate article, because without it the seam areas will stand out against the general background. Processing the entire surface avoids differences and unevenness, thus ensuring an ideal plane.
Based on the above factors and the practical experience of many craftsmen, we can conclude that it is simply necessary to treat walls made of plasterboard before gluing the trellises. All that remains is to choose the right putty composition.
How to putty drywall under wallpaper
Excellent light is important when puttying drywall under wallpaper - bit.ly/2win_ledlenser How to putty drywall under wallpaper!…
Roughing
Painting drywall without putty is impossible, primarily due to the presence of seams. To completely disguise them, you will need:
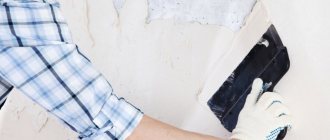
- Fill the indentations with the mixture. In this case, the spatula is positioned almost horizontally, which allows you to get the most even surface possible.
- Tape the seams with sickle tape, which will prevent the formation of cracks. Apply a layer of putty on top and level it.
- Seal all existing self-tapping holes on the ceiling and walls.
After drying, the seams are first sanded using a float and then primed with a brush.
Finally, all joints on the ceiling are taped with paper tape, which will prevent microcracks from appearing. To fix it, use PVA glue.
Processing the corners of walls and partitions made of plasterboard has its own specifics. First, they, like door and window slopes, are reinforced with perforated aluminum corners, for which putty is used. The corner is pressed in such a way that all the holes in the profile are filled with the mixture. Then, using a wide spatula and mortar, level the surfaces.
Plastering drywall: what and how to do it
- ready-made dry or paste mixture;
- container for preparing dry formulations;
- primer;
- spatulas with narrow and wide blades;
- mesh for painting work;
- paint brush (preferably several different lengths);
- construction knife;
- devices for grouting.
The seams of plasterboard sheets must be filled with putty and leveled along the entire length. To do this, it is recommended to use narrow spatulas. Then the solution is covered with a reinforcing mesh, which needs to be pressed a little. Then the mesh needs to be completely covered with an additional layer of putty.
A spatula with a wide blade is already used here. When applying the primer mixture, any omissions are unacceptable, and the joints are glued with tapes (serpyankas), and then covered with special reinforcing compounds. On a dry surface, such lines are erased, removing slight deformations and sagging. The actual difference between putty and plaster comes down to the grain size of the material. By reducing it, developers make the applied layer thinner, and it also becomes less rough.
It should be taken into account that in any finishing material the actual size of the fractions is less than the maximum specified by the manufacturer. But at the same time, when producing putty, the raw materials are sifted more thoroughly than when producing plaster.
Technology: sequence of work
After the gypsum board sheets are fixed to the frame, it is time to prepare the drywall for finishing. Let's consider the case with a full cycle - for painting. In this case, the drywall must be puttied in at least two layers. For other types of finishing that are less demanding on surface quality, we simply remove unnecessary steps. The order of work is as follows:
- Coating with deep penetration primer.
- Sealing screw holes.
- Puttying joints using serpyanka mesh or special paper tape.
- Sealing corners - external and internal.
- Primer for drywall.
- Puttying the entire surface with the starting composition and sanding any uneven surfaces.
- Primer for gypsum board.
- Putty with finishing composition and putty of uneven surfaces.
- Primer coating for finishing.
Do-it-yourself drywall putty - learning the nuances
We recommend: 12 reasons for putty defects on walls. How to fix the situation?
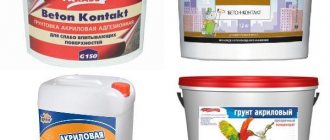
A few words about which putty is best to use for gypsum board. Any one will do - gypsum or polymer based (latex). Polymer putties are usually finishing - they provide a very thin layer and a smooth surface. There are both starting and finishing plaster ones. Difference in particle size. You can use any, as long as the quality is good.
There are two forms of drywall putty - dry in bags and diluted in buckets. Before use, dry mixture must be diluted with water in the indicated proportions and stirred until lumps dissolve. Compositions in buckets are already ready for use, but are more expensive. But they are guaranteed to have no lumps.
Is it necessary to apply plaster to drywall?
Today there is an opinion that it is impossible to apply plaster on walls finished with plasterboard under any circumstances. A large mass of plaster in combination with water in its composition will lead to damage to such surfaces and deformation of the frame.
However, this does not apply to decorative types of plaster, which can be easily applied to gypsum boards as a residual finishing option.
Only decorative plaster can be applied to drywall
However, if you still need to level the surfaces, some experts recommend adhering to the following technology:
- Apply plaster only to sheathing consisting of moisture-resistant plasterboard;
- before work, you need to carefully treat the sheets with deep penetration soil;
- The plaster must be applied alternately in several thin layers.
Plastering a plasterboard wall is carried out as a last resort using tools and separate rules
But taking into account this technology, and in the event of differences or defects, you can simply use starting gypsum putty, which will eliminate the defects.
Puttying drywall surfaces is an almost mandatory step, but it can be neglected in some cases. So, is it necessary to plaster drywall before wallpapering and painting?
Puttying under wallpaper
If, after installing plasterboard structures on the walls, you plan to glue wallpaper, then you don’t have to resort to completely puttying the sheets.
When preparing a plasterboard surface for wallpapering, the walls are puttied in a thin layer without removing the ideal surface
It is important to follow the rules for preparing walls:
- Without fail, the joints are reinforced with tape and the fastening points are hidden with putty. At the joints of plasterboard elements, reinforcing tape is initially glued and coated with a thin layer of special putty for sealing joints. The points where the screws are screwed in are simply coated with putty.
- The rest of the surface must be carefully covered with deep penetration primer, which will act as protection for drywall.
- Puttying is carried out by applying the mixture to the surface. After drying, minor defects may appear that will hide the wallpaper.
All the intricacies of this work are shown in the video:
Plaster for wallpaper and painting
If you plan to paint walls and ceilings made of plasterboard, then puttying is necessary. All imperfections will be visible on the painted surface, and color consumption will increase significantly.
The material used is “Rotband”. This is a gypsum mixture for universal use. It is used as a starting and finishing mixture in a complex.
Knauf is distinguished by high product quality indicators.
Stages of applying plaster:
- All walls finished with gypsum plasterboard are first prepared by applying deep penetration soil. This increases the adhesion (adhesion) of the plaster to the top layers of drywall. And also the soil “blocks the rapid and deep penetration of water from the plaster mixture.
Drywall should be primed carefully, without making any mistakes. Be sure to seal all joints between the sheets. They are glued with reinforcement tape (serpyanka) and plastered with a mixture for reinforcing joints. After drying, these lines are rubbed with a grater and sandpaper, removing minor defects and sagging.
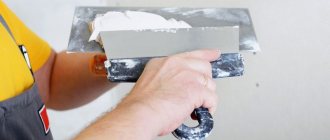
Correct reinforcement of plasterboard joints The plaster composition is applied with a wide spatula (width from 300 mm), placing it at an angle to the surface of 30–40 degrees. When applying, you do not need to press hard on the tool, otherwise the plaster will lie in waves, forming unnecessary sagging. The starting composition is laid until the desired layer thickness is obtained. On large defects, the mixture is applied in 2 approaches, in layers of 3–5 mm.
Plastering the walls is done without applying pressure to the tool. After the starting mixture has dried, it must be finally leveled with putty and a finishing compound. It is applied in a thin layer up to 1 millimeter, eliminating the smallest defects on surfaces.
The finishing putty is applied in a thin layer. Drying will last 1-2 days, the dry plastered wall will be snow-white. After this, using fine sandpaper with a grain size of 120–160, it is necessary to eliminate minor defects.
Removing defects using sandpaper
Plaster is used to prepare already mounted plasterboard walls with cracks or dented areas for painting or wallpapering. Moreover, the size of the damage does not exceed 10–15 mm.
The same technology is used to prepare drywall for tiles.
As a result, plastering plasterboard surfaces comes down to eliminating minor defects and defects; you can also level the level with differences of no more than 10–15 mm.
Coating a plasterboard wall with paint
If there is a very large difference in the levels of different areas, it is not advisable to use thick layers of plaster that the frame and its cladding cannot withstand.
Preparatory work
Preparation for puttying is carried out in the following sequence:
- Preparing the room where the work will be carried out. Free access to all working surfaces is provided, dirt and dust are removed.
- Creating a putty solution for sealing seams. If you are preparing ready-made putty, then you need to mix it thoroughly and fill the paint bath with it. It is important not to leave such a container open so that the solution retains its working qualities for as long as possible. If the dry mixture is diluted, the work must be done directly in the bath, from which the putty will then be removed with a spatula.
Note! Excess solution from the surface cannot be returned to the bath, as such actions will accelerate its setting.
Is it possible to prime drywall before puttying?
Drywall has become one of the most commonly used building materials. And it is not surprising that today many questions concern him. Traditionally, many questions arise around the process of priming and puttying plasterboard walls. Primer can hardly be called an expensive finishing component, so there is no point in skimping on it.
Choose the most famous manufacturers, such as Knauf
A high-quality primer intended for interior work will be safe for health, which is extremely important. After erecting a plasterboard wall, it is usually puttyed and then painted
Moreover, if the drywall is clean, then its surface quite successfully interacts with the layer of plaster, holding it quite firmly. However, companies that produce putty recommend carrying out preliminary work on priming the surface. The primed surface has greater strength and also interacts better with different types of putty. Well, if the plastered surface is painted, preliminary application of a primer will allow the paint to be less absorbed into the drywall, which has a high ability to absorb moisture. On the other hand, we have seams that are cut to an angle of 45 degrees so that the putty fits better on them.
As a rule, the seams are primed so that further finishing adheres to them as firmly as possible.
What is the point of filling drywall before painting?
To a person who is taking on this type of finishing for the first time, it may seem incomprehensible - “why do I still need to putty drywall if I have already paid money to get a flat surface?” There are several answers to this question. Moreover, some reasons “lie on the surface,” that is, quite obvious, while others have to be encountered during further finishing.
- It is almost impossible to perform plasterboard cladding (except for some completely miniature structures) with one sheet. This means that it is assumed that there will be joints on which there will be either a factory chamfer (sheets with a UK, PLC, PLUK edge) or one cut independently during the installation of the coating.
The technology of wall cladding with plasterboard assumes the presence of joints with factory or cut chamfers
This directly indicates the need to perform putty work to bring the surface to perfect evenness.
- It is not enough to simply fill the seams between sheets of drywall with putty. To avoid the appearance of cracks along the joint line, it is necessary to perform reinforcement, which should be covered on top with an even layer of leveling compound.
- When installing drywall on a frame structure, metal screws are used. Their caps must be recessed into the thickness of the material, and the resulting holes must be puttied.
The holes remaining from the heads of self-tapping screws recessed in the drywall must be carefully puttied
This ensures an even surface and creates a protective layer that will prevent rust stains from appearing through the finish due to corrosion of the metal caps.
These were the obvious reasons, but now let's look at the less noticeable ones.
- Most often, when carrying out repairs, budget options for drywall are used. And the perfect smoothness of their surface can be deceptive. Small irregularities, unnoticeable to the naked eye, and wavy level changes, literally a fraction of a millimeter, cannot be ruled out, but which then very well appear in the light after painting. Puttying allows you to bring the surface to almost perfection.
- Even if you purchased the highest quality material, in which the presence of manufacturing defects is practically excluded, there remains the possibility of leaving scratches, dents and other damage on the surface resulting from the transportation of drywall, its lifting to the floor or bringing it into the house during installation work. All these little things, if not puttied, can also appear immediately after applying the paint.
- Drywall is usually painted with water-based compounds. And the cardboard surface is capable of actively absorbing moisture, penetrating into the layer of gypsum located underneath it, which sometimes ends with its swelling and the appearance of irregularities.
It will be much easier to carry out absolutely even painting with minimal material consumption on a completely putty drywall surface
- The paint on the puttyed and remaining “bare” cardboard surface areas will be absorbed and dry unevenly, which will appear as unevenness and spots.
- As a consequence of the above reason, in order to achieve completely uniform painting of the wall, you will have to apply more layers, that is, paint consumption increases.
We recommend: Old brick at home and in the country: options for using used material
So, what conclusions do we come to:
A. If the renovation is carried out in the “front” room, where the quality and presentability of the finish comes to the fore, then it is better not to neglect completely filling the plasterboard surfaces. A similar approach would be a reasonable solution even if the quality of the drywall itself raises even slight doubts, or if expensive paints and varnishes are used for painting, the consumption of which should be minimized.
In a number of cases, depending on the quality of the drywall, the accuracy of the installation work, the type of room and the characteristics of the chosen paint, you can only get by by filling the seams, corners and holes from the screw heads
B. In the case where the quality of the drywall is guaranteed to be high, and no serious damage was caused during transportation and installation, you can limit yourself to only filling and reinforcing seams, internal and external corners, sealing holes from self-tapping screws and minor identified defects. In addition, you can limit yourself to the amount of preparatory work when painting will be done with thick textured paints - such a finish can in itself completely mask minor defects and uneven surfaces.
We will not consider the installation of drywall itself in this publication - there is enough information on this issue on our portal.
Using plasterboard for interior decoration
The wide popularity of drywall is due not only to the ease of working with it, but also to its extreme versatility. On the pages of our portal you can read articles-instructions on leveling walls with plasterboard , on remodeling rooms with the installation of lightweight partitions from this material, on installing suspended ceilings , including complex multi-tiered ceilings .
But with almost any use of drywall, it will not be possible to avoid puttingtying it to one extent or another.
Painting a plasterboard ceiling
Since plasterboard sheets are large, in a new house, which will shrink for some time, even very well-treated joints move apart and cracks appear at the joints of the plasterboard. Therefore, many craftsmen recommend that before painting a plasterboard ceiling, paste it with simple non-woven wallpaper 1 m wide, capable of stretching. It is necessary to putty the plasterboard; if this is not done, stains may form after painting, since plasterboard absorbs moisture well. Remove the dust with a brush or broom and start priming; if you skip this step, the paint may peel off in the future.
If the roller is attached to a telescopic extension, the rod of which extends up to 3 m, this will allow you to work while standing on the floor, and painting the suspended ceiling will be completed faster. Lightweight tools such as aluminum are easier to handle. New brushes and rollers are washed in warm water, and when finished, they are cleaned. Painting a gypsum plasterboard ceiling affects the appearance of the room, so this work must be approached responsibly: follow the steps of surface preparation, choose paintwork materials and apply them correctly. To paint the ceiling molding (cornice), gypsum or polyurethane stucco, use soft flat brushes.
To avoid leaving streaks, work with light intermittent movements. The tool corresponds to the width of the baguette. The primer impregnation procedure is necessary to improve the water-repellent properties of the material and high-quality adhesion with subsequent finishing. It is advisable that the mixture contains an antiseptic; it will provide protection against mold and mildew.
After the first layer has dried, the surface is sanded with medium-grit sandpaper; during this process it is important to remove spatula marks, sagging and other irregularities. Then the base needs to be cleaned of dust and primed again.
- angular and even spatulas (80 and 250 mm long);
- container for construction mixtures;
- electric drill with mixer attachment;
- roller or brushes for applying primer;
- construction knife and brushes;
- grinding float with abrasive mesh;
- stepladder and protective respirator.
When working, do not be zealous and wet the plasterboard too much, otherwise not only the outer paper layer will get wet, but also the internal plaster filling. This can cause the cardboard to peel off, resulting in bubbles and wrinkles on the surface of the sheet. Proper sealing of plasterboard joints and compliance with the technological nuances of puttying is the key to preparing and flawless coating for painting. The preparation process is similar to the process described above for wallpapering. We are responsible for quality: Do you urgently need high-quality preparation for finishing?
We are at your service in Moscow and the Moscow region! The highly qualified personnel of our company have sufficient experience and knowledge in the field of construction and services. This can result in hanging rags. All other types of primer compositions are more tolerant of cardboard, so you don’t have to worry. In some cases, it is recommended to dilute the primer with water, but it all depends on the brand of primer. Before use, read the manufacturer's recommendations, and also ensure that the layer thickness does not exceed 0.03 mm.
Additional information on the topic:
- Which cornice is better, ceiling or wall for plasterboard?
- Reinforcement of plasterboard partitions for hanging kitchen
- Two-level plasterboard ceiling with lighting in the hallway photo
- Shelves for a TV made of plasterboard photo in the living room of a private house
- Prices for guides and profiles for drywall
Recommendations for puttying
If you still doubt the need for puttying, then let us immediately note that this procedure is necessary. Moreover, you will have to adhere to all the subtleties of technology.
Recommendations:
- Pay special attention to the joint areas. Do not forget about the recesses that remain after installing the screws. Serpyanka tape is glued to the seams. Only after this do you start mixing the putty to treat the walls.
- Apply the mixture to the seams first. This area has the most unevenness. The putty is applied to the surface of the walls in even layers. Do not forget to carefully smooth the composition.
To achieve a smooth surface, finishing craftsmen recommend using ready-made putty compounds. The finished mixture has a consistency suitable for these purposes. There are no unwanted lumps in it, the presence of which spoils the appearance of the walls.
- After applying the composition, the putty is allowed to dry. When the layer is completely dry, grouting is done with sandpaper. Then a layer of putty is applied again.
- Grouting is carried out after the second layer has dried.
Serpyanka ribbon
- If the plasterboard frame has external corners, these areas are reinforced with perforated corners. Fastening is done with gypsum putty. Excess material that comes through the holes is removed using a spatula. To completely align the corners, another layer is applied on top, but only after the previous one has dried.
We recommend: Makroflex foam cement - features and scope of application
Do I need to prime drywall before applying putty?
The main property of a primer is to improve adhesion between the base and coating materials. If you plan to seal only corners, joints and mounting holes on drywall, the priming step can be neglected. But experts recommend priming ALL surfaces, down to the smallest defects.
Moreover, for reliable adhesion of all layers, it is advisable to apply a primer:
- before and after puttying seams and defects. It is convenient to work here with a small brush, thoroughly wetting the area of work;
- corners before and after installation of leveling and arch-forming elements;
- the entire surface to be finished before applying the finishing putty and after that - for painting, plaster or wallpaper. Here it is more convenient to work with a roller (for the ceiling - with a long handle).
To avoid a possible “conflict” between putty and primer, it is better to take products from the same manufacturer and pay attention to the labels: the primer must be intended specifically for drywall!
Tools and materials
To putty walls and other surfaces, you need to purchase a special mixture, primer and sickle for sealing joints.
In addition, you will need:
- drill with stirring attachment or mixer;
- construction knife;
- set of spatulas;
- container for mixing putty (if it is purchased in the form of a dry mixture);
- sanding float with a set of sandpaper;
- wide brush.
When preparing various surfaces for painting, the quality of pre-treatment with putty is important. The most noticeable flaws are when finishing the ceilings. To avoid them, it is advisable to provide additional lighting to the room using a spotlight.
Materials, tools for filling plasterboard surfaces
Now we are preparing the tools for puttingtying drywall for painting. You need special tools and auxiliary ones. Auxiliary equipment includes: ladders, scaffolding, stepladders, buckets, water supply hoses, film, goggles, gloves, respirators, clamping tools, room drying devices. Tool names may be added to the list depending on the specific location of the work being carried out. The table provides a detailed description of how to use the tool.
Before you start work, prepare all the necessary tools
| Name | Application area |
| Ladder | Indispensable in rooms with high ceilings, it is rarely used due to the need to attach it to the wall, in some specific cases it is impossible without a ladder. It is better to take a telescopic or folding one. |
| Scaffolding | The most convenient tool for finishing work on walls and ceilings. They have modifications in size and methods of securing the position. It is worth choosing based on the dimensions of the room. |
| Ladder | A device that can replace a ladder, with an excellent set of qualities. It is important to know that you are allowed to work while standing, maximum, on the third step from the top; the platform can be used as a podium for placing materials or tools. Selected based on the height of the room. |
| Bucket | Container for mixing the solution and moving bulk and liquid materials. The volume is selected as convenient as possible. |
| Hose | The most convenient means of supplying water is a hose. It must be equipped with clamping clamps, for convenience - a single-lever tap. |
| Film | Used to protect surfaces. |
| Clamping device | Clamping various objects may be necessary. |
| Room drying device | This could be a stove (electric or gas), an oil radiator, or even a spotlight. |
| Personal protective equipment, equipment | This section includes: goggles, gloves, helmet, knee pads, unloading, mounting belt, mounting boots. |
The list of tools indicated in the table is not definitive or exhaustive. It may vary. Puttying drywall for painting can be done with a minimal set of tools, but experts recommend using just such a set - with it the work goes quickly. Safety is also very important.
Puttying walls can be done with a minimum set of tools
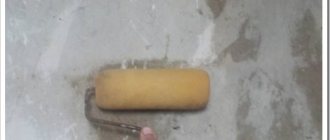
Primer coating
Before you putty the drywall, prime the surface. Any primer is applied to a dry, clean base. Therefore, we first remove dirt from the surface and remove dust (you can use a vacuum cleaner or a slightly damp cloth). After this, prepare the soil according to the instructions (sometimes you need to dilute it with water, sometimes you just need to stir it), pour it into a container and apply it with a brush or roller.
Applying a primer: choose a method convenient for you
Drywall primer is available for dry and wet areas. For the bathroom and kitchen, choose soil for wet rooms; for the rest, you can use any soil. When choosing soil, pay attention to the presence of antibacterial components. They prevent the development of mold and fungi. This is especially true for the kitchen and bathroom.
| Name | Consumption | Purpose | Drying time | Additional properties | Price |
| Penetrating primer Optimum (10 l) | 6-8 sq.m/l | For priming brick, concrete, plasterboard in dry rooms. | 30-40 min | 600 rub for 10 kg | |
| GLIMS Grunt (10 l) | 5 sq.m/l | For rooms with normal and high humidity | 30 minutes | Anti-fungal and anti-mold additives | 600 rubles for 10 l |
| Tex Universal acrylate primer | 5-14 sq.m/l | For priming porous surfaces, including plasterboard and putty surfaces | 30-40 min | For dry rooms and rooms with high humidity | 650 rubles for 10 l |
| Internal primer Prospector 10l | 5-10 sq.m/l | For priming porous surfaces, including plasterboard and putty surfaces | 60 min | Anti-fungal and anti-mold additives | 350-400 rubles per 10 l |
| Feidal Tiefgrund LF 10 l | 10 sq.m./l | For highly absorbent surfaces, including drywall | quick-drying | For indoor and outdoor use, frost-resistant | 850 rub for 10 l |
Usually, for priming drywall, it is enough to apply the composition in one layer, but in the kitchen or bathroom you can use two: to guarantee the result. After the soil has dried (the time indicated in the instructions), you can proceed to the next stage.
Do I need to putty drywall?
To hide unevenness on the walls, there is a proven method - covering with plasterboard. Delving into the details, you can understand that after installation, drywall putty is necessary. Puttying drywall is done with your own hands; step-by-step instructions will be mentioned below. It must be done with the help of a team of craftsmen. In fact, the work will not cause difficulties or much work. But if you are new to this industry, don't experiment.
Apply a thin layer of putty to the surface of the drywall, but avoid gaps. It is also necessary to plaster the joints, attaching drywall (gypsum board) to the frame, and various seams. Because of these small shortcomings, it is necessary to apply a thin layer of plaster before the finishing coat.
Drywall puttying process
Acrylic bark beetle is used as a silicone dye for interior decoration on old and new concrete surfaces, types of mineral plasters, and contains a water-based acrylic polymer.
Before you begin the main work, you need to choose the right material. Today, the construction market contains a selection of mixtures:
- To eliminate cracks.
- For decorative finishes.
- For finishing walls and coverings.
- For puttying joints and fastening points.
Ready-made mixtures are twice as expensive as dry mixtures. Therefore, it is more profitable to buy the second option, especially if there is a large number of works to be done. It has good qualities and characteristics: it remains open for a long time, responds well to temperature changes and humidity. There are three main types of putty base:
For processing plasterboard boards, putty on any base is perfect.
| Name of putty | Specifications |
| Cement | A good material option, it has moisture-resistant qualities and responds well to temperature changes. Will cope with any cracks, chips or other nuances. Compatible with dyes. Due to these qualities, cement putty is often used for kitchens and bathrooms. Can be used for painting throughout the apartment. Doesn't have high prices. |
| Polymer | It is a universal putty. It has such qualities as plasticity and low costs. The advantages of this material include excellent operating properties. You can do the work yourself. It is quick-drying and can be painted. Doesn't crack. |
| Plaster | Has one minus. Susceptible to humid environments. Therefore, it is not recommended to treat rooms such as the bathroom and balcony with this material. It is not advisable to paint. |
Recommendations from experts
There are situations where the amount of work can be reduced without treating the entire surface of the drywall. Instead, you can focus only on sealing seams, corners and recesses from screws.
Saving materials and time is possible in the following cases:
- Drywall is characterized by very high quality, it is perfectly smooth.
- The plasterboard sheet should be a light shade, and dark spots will be visible through the paint layer.
- It is planned to use thick or textured paints.
In most cases, preparation is indispensable before painting drywall. Despite the rather voluminous instructions, it is not so difficult to complete such work, since all the actions are written out and divided into stages. If you adhere to consistency in carrying out preparatory activities and strictly follow the recommendations of specialists, the plasterboard coatings will turn out smooth, and painting them will not be difficult.
Important nuances
When the ceiling in the house is already covered with plasterboard and you need to putty the coating, you need to remember the following nuances:
putty must be selected of high quality, because this directly determines how complete and durable the repair will be. And when it comes to the ceiling, special attention should be paid to the quality factor of the materials preparing for painting; It is worth considering in which room the renovation will be done
If this is a room with a high level of humidity in the air, for example, in the kitchen, bathroom, then you should buy waterproof putty; it is important not to miss a single microcrack or seam. Only a perfectly flat surface will look aesthetically pleasing and beautiful.. It is important to want to create a cozy and harmonious atmosphere in which high-quality repairs will be done in the best possible way
It is important to want to create a cozy and harmonious atmosphere in which high-quality repairs will be done in the best possible way