The larger the surface area to be painted, the more difficult the work. A careful approach is required. Unevenness will be visible, especially with a lot of light. Therefore, the stage of puttying the walls before painting is mandatory. To obtain an ideal result, you must, first of all, select the appropriate material, the necessary tools and follow the exact instructions for performing the work.
Types of putty mixtures
The choice of the right material directly affects the final result.
Leveling mixtures for interior and exterior work are divided into three types:
- Cement;
- Plaster;
- Polymer.
You should choose one or the other based on the purpose of your premises. So, when choosing materials for the bath and kitchen, the main criterion is moisture resistance, and for the bedroom and children's room - safety. The mixtures can be purchased dry or ready-made.
Cement putties are often used for finishing in rooms with high humidity, due to its moisture resistance. The cement base fits well on concrete and does an excellent job of leveling walls. But further tiling is limited to laying tiles, since cement putty is not suitable for painting.
Gypsum mixture is more versatile. It is more often used when renovating apartments. It comes in three types: starting, finishing or universal. The starting mixture is used for rough finishing for leveling. Depending on the unevenness of your wall, the thickness of the layer can reach 5 centimeters or even more.
The finishing putty is applied in a thin layer to the starting putty to mask all minor imperfections that could have formed during the application of the starting layer for leveling.
Universal putty is suitable for both types of work, but more often it is used to close joints on gypsum board sheets or seal cracks and holes. However, it can also be used instead of the starting and finishing mixture for further painting.
The most famous manufacturers of gypsum putties. They make any kind of mixtures. Other manufacturers provide specialized mixtures: Fugenfüller, Perlfix, Rotband and others. Polymer-based putty. The binder in such mixtures is polymer additives, such as acrylic resins or latex.
Most often they are sold ready-made, without the need to prepare them at home. Like gypsum mixtures, polymer mixtures come in three types. Putties of this type are of higher quality; they will strengthen your walls and create a moisture-resistant coating that will be suitable for painting later. But there are two significant disadvantages. First of all, this is the price.
Polymer putty will cost much more than its counterparts. And the composition cannot be stored for a long time. Ready-made mixtures do not have a long shelf life.
Rating of the best putty manufacturers
Today there is a large selection of finishing materials on the market, so before purchasing it is worth familiarizing yourself with those from the manufacturer that have proven themselves well.
- Knauf is a German company and a leader in the production of high-quality and affordable products. Putties are available in polymer, gypsum and cement compositions. The company also produces gypsum putties with X-ray protection.
- Tikkurila is a well-known Finnish manufacturer that offers a wide range of high-quality products and even putty without the need for sanding, that is, the surface itself becomes smooth.
- Volma is a domestic supplier that characterizes itself only on the good side. The company supplies various products, including polymer and gypsum putties with different particle fractions.
For reference! The ranking of the best manufacturers should also include Ceresit, Kreisel, Vetonit and Prospectors.
It is necessary to putty the base before painting, because only this way will the painted walls look beautiful and attractive. Therefore, it is important to know which putty is best suited for paintwork. Before purchasing, be sure to study the composition of the material, its shelf life, and it would not be amiss to ask the seller for a certificate of conformity.
Post Views: View statistics 788
Which putty to choose for walls for painting
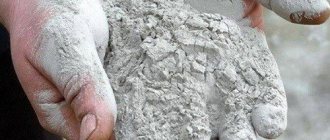
If you are going to cover the walls with a putty mixture, then the best option is gypsum. Its characteristics are significantly higher than those of other species. The gypsum mixture will cope with any task, without the need to purchase additional materials. It is combined with other finishing materials: be it tiles, wallpaper or wall paint.
The mixture can be stored for a long time, but only in dry rooms. Moisture can cause it to become damp and unusable. Working with gypsum plaster is easy, but you need to have some skill. It dries very quickly; if the work is slow, it may simply set before finishing the work. The gypsum mixture is not expensive.
The most popular product brands
On the market today, you can easily get lost among the huge assortment of putty compositions for finishing. To avoid making a mistake, you can pay attention to the most popular and popular brands of similar products.
- Finish Knauf N. R.
This dry gypsum-based mixture is affordable. With its help you can achieve a smooth and even surface. Knauf putty can be laid in layers. The thickness of the coating can reach three millimeters. It is perfect for treating ceilings in rooms with high humidity. The mixture has excellent adhesion to cement and concrete plaster. Drying time - 2 hours.
- Premium Eunice.
This dry material contains a polymer-based filler. It can be used to treat almost any room. Eunice putty allows you to create a very smooth and snow-white coating on which you can immediately apply paint. Complete polymerization time is from 3 to 6 hours.
- Vetonit LR+.
It is considered one of the best putties for finishing before painting. It is a polymer powder that can be used in dry residential areas. The thickness of the coating varies from one to five millimeters. The finished surface can be easily processed with sandpaper or other abrasive devices. It dries within one or two days.
- Shitrock.
Paste-like substance of universal action. It contains vinyl fibers. This brand of putty mixture is characterized by excellent adhesion to a wide variety of surfaces and smoothes out well. The resulting coating is very resistant to moisture. Dries in 4-6 hours.
Following the recommendations of professional repairmen and builders, you can choose the optimal material for finishing putty, which will meet technical standards and allow you to make a base for full painting.
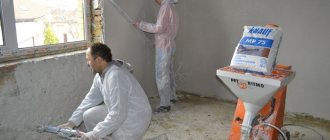
Necessary tools for work
Once you have decided on the mixture, you need to prepare the necessary tool:
- An electric drill with a mixer attachment is needed for mixing;
- To make the mixture you will need a bucket or any other deep container with a wide neck;
- For priming you will need a roller;
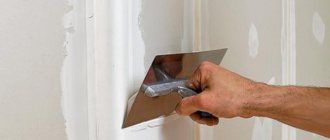
- The putty is applied to the wall using a spatula. With the small one you scoop up the mixture and apply it to the big one. Approximately the width of the large one is 50-60 cm, and the small one is 5-10 centimeters;
- For corners you will need a special corner spatula;
- A grinding machine is used to grout the walls after applying the composition. If you don't have it, you can use fine-grained sandpaper.
Here are some sample instructions:
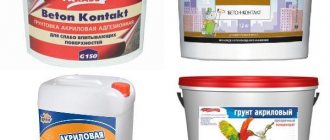
- Before starting work, it is imperative to prime the surface. Photo of a wall to be painted in the interior photo of a hallway? For these purposes, deep penetration primers should be used, specially designed for walls and other surfaces.
Today there are many brands of such primer, produced by almost all global brands. Primers for walls come in both regular and anti-fungal primers.
We prime the surface before filling.
- When asking: how to putty walls for painting, it is worth taking into account the specific case, since the surfaces are different, and to putty a wall with deep unevenness, a starting putty mixture is used, and for minor flaws and final putty, a finishing mixture is used.
Stir the starting putty composition.
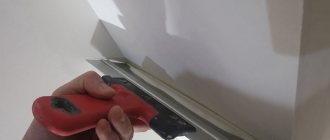
- When putting plasterboard walls, first of all it is necessary to close the seams between the sheets, as well as the recesses from the screws (photo). The primer solution can be applied using a roller or a wide brush.
- After the soil has completely dried, which is about 3-5 hours, you can begin applying putty.
Plastering of the plasterboard surface is completed.
We lay the serpyanka reinforcing mesh.
Please note: When sealing seams, it is important to prevent the formation of voids and gaps; a special “serpyanka” reinforcing mesh is inserted into the joints joining the plasterboard sheets, which is covered at the top with the next layer of putty. When sealing joints between sheets of drywall, a medium-sized spatula should be used to apply the putty mixture, and a special corner spatula should be used for corners.
Stage two. Let's get started
So, how to putty walls for painting. The first layer of putty mixture can be applied after 24 hours, when the joints are completely dry.
The process of applying the solution to the surface is as follows:
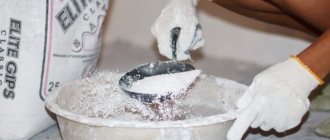
- First, prepare the putty mixture by mixing the dry mixture with water.
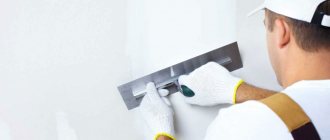
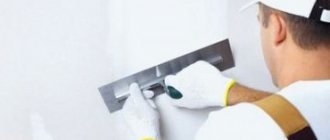
- Then, using a small spatula, it is applied to a large one, and applied evenly to the surface to be treated. When performing this work, the spatula used to apply the mixture to the wall must be held at an angle of 30 degrees. When applying, you need to take into account the force of pressing it, since the quality and evenness of the initial surface depends on this.
- Depending on the type of surface, in order to properly putty walls for painting, there may be a need for additional reinforcement. This reinforcement is carried out by inserting reinforcing mesh between layers of putty; it should also be taken into account that strips of reinforcing mesh must be laid overlapping.
- After applying and drying the first layer of putty, the surface is sanded. It is made using sandpaper or sanding mesh.
Advice! We check the evenness of the resulting surface using a bright lamp; under its light, all irregularities and defects will be visible. If necessary, apply a second layer of putty, similar to the first, while a primer must be applied to the first layer of putty.
We putty ourselves. What do we need
Sand with sandpaper.
It is quite possible to putty the walls yourself. Despite the apparent complexity of the process, even a beginner in construction and finishing can do it.
To do this you will need the following tools, devices and materials:
- putty mixture directly;
- mixing container;
- mixer and drill for mixing;
- sandpaper or mesh for sanding;
- a set of spatulas, including wide, narrow and angled spatulas.
Tools needed for puttying.
It is necessary to ensure the cleanliness of the instrument, namely:
- Do not leave any remaining mixture in the mixing container or on the spatulas;
- Carry out timely rinsing to remove any remaining putty mixture;
- The hardened putty residues form lumps, which leave streaks during the work process; they subsequently add unnecessary hassle when sanding the surface. When performing puttying, you need to take into account that the putty mixture tends to harden, as a result of which you need to have time to work out the putty before it sets, so it is not recommended to mix too large a volume;
- Also, when choosing a mixture for puttying, it is necessary to consider the conditions under which it will perform its functions.
Preparing walls before puttying
Before work, all surfaces must be cleaned of old finish. If your walls are covered with plasterboard, then the joints between the sheets should be sealed. Cracks, dents, and holes are covered with reinforcing mesh and puttied.
Priming the walls is an important stage of preparation. The mixture is applied using a long-haired roller. Use brushes in hard-to-reach places. The walls are primed several times. It all depends on your main wall covering. Concrete absorbs moisture very well, so it needs to be covered in several layers for better adhesion, followed by finishing.
A new layer can be applied only after the previous one has completely dried.
Manufacturers indicate the drying time in the instructions, but still make sure that the composition is dry. After the preparatory work, you can proceed directly to the puttying process.
Quality standards and main functions
Putty mixture for finishing is a ready-made solution or dry mixture with a snow-white color. The material is intended for leveling walls and masking defects. In addition, finishing putty makes it possible to increase the strength characteristics of the already applied leveling layer. In addition to the scope of use, the mixture for finishing putty differs from the main one in its greater plasticity, since it contains special plasticizer ingredients. High quality finishing mixture :
- has a high degree of adhesion;
- does not contain lumps;
- does not cause problems during application;
- effectively hides the imperfections of the treated base;
- does not slide down;
- does not become covered with small cracks after complete drying;
- has a uniform white color.
The snow-white putty composition ensures the brightness and absolute uniformity of the layer, so you need to pay attention to its color. Manufacturers today produce ready-made solutions or dry mixtures.
The choice depends on the tool used and skills. If you have to do the finishing yourself, and you do not have a drill or a construction mixer, then it is recommended to buy a ready-made putty mixture. It will be a little more expensive, but you can avoid the labor-intensive process of preparing the solution.
Technology of puttying walls for painting
The process of applying putty occurs in three stages: leveling the walls with the starting mixture, applying the finishing putty and grouting the surface.
Starting layer of putty
Leveling the walls with starting putty occurs by applying a thick layer. Beacons are installed on the surface using a level. Remember, the more beacons, the better the quality of future work. The mixture is prepared by diluting the powder in water. Mix the composition thoroughly and let it sit for about 15 minutes. And then mix again. If you use gypsum putty, do not spread it all at once. It dries quickly, so you need to make it little by little. But cement takes a long time to infuse, so it needs to be made as much as possible at once.
Work is carried out from top to bottom. The putty is applied with a wide spatula. Using a small spatula, scoop up a small amount of the mixture and apply to the larger one. The spatula should be held at an angle of 45 degrees, this way you will achieve the most even installation. On a very large depression the composition is laid in several layers. They are applied in several approaches. Before applying the first layer, you need to lay a fiberglass reinforcement mesh. Once the surface is completely covered, the wall should be left to dry completely. The time is indicated on the package.
Finishing putty
The technology for applying the finishing layer is similar to the starting layer. The same tools are needed. After work, they must be washed thoroughly so that no dried composition remains.
Unlike the starting putty, the finishing putty is laid in a less thick layer of 1-2 mm.
The layer must be perfectly smooth without visible flaws. After application, the surface must again be left to dry for several days.
Grout
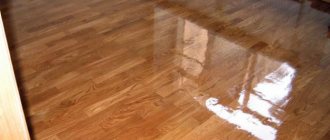
After the putty has completely dried, the surface needs to be sanded. You need to rub thoroughly, there should be no protrusions or roughness left. You can check for flaws using a lamp, point it at the walls and look at the shadows. Now the surface is ready for painting.
Depending on how carefully you treated the walls, it will be easier to work with when painting. The slightest irregularities and cracks will be visible after painting, so when puttingtying, proceed with caution and extreme care.
How to putty drywall?
Puttying plasterboard
To start puttingtying plasterboard sheets, you must first complete the preparation step by step. We seal the joints and screws. The primer is applied to the entire surface. We wait until it dries and start working with other material. Puttying plasterboard walls for painting is done with your own hands, as shown in the video. Gossamer adhesive tape is applied to the joints, and then covered with putty. It is better to putty the self-tapping screw crosswise, this will allow the material to lie down better. After completion, let the walls dry. Joints must be puttied twice.
The gypsum board must be sanded using a sanding mesh. You can proceed to the finishing layer. It should be thin. Thanks to it, the walls will become smooth, ready for painting. You can learn how to properly work with finishing putty on walls for painting with your own hands using a video lesson:
Features of working with putty
Specialists work with putty using a special tool - a spatula. It is very convenient for them to apply and rub the mixture, filling the necessary cracks and holes. If the surface to be treated is shallow, then only one layer of putty can be applied. But if the cracks or cracks are deep, it may be necessary to reapply the mixture. Wood putty is always applied to a clean and dry surface. After it dries, you need to sand it with sandpaper and paint or stain it. Sometimes the putty is not painted or covered with anything, but is selected to match the color of the product. This is generally done when processing any carved handicrafts.
Application technology step by step
Before applying putty to the wall with your own hands, you need to prime the surface. It is cleaned of fine dust, so the adhesion to the base will be more stable, of higher quality, and stronger. When carrying out work on priming walls, it is better to use a wide roller; for hard-to-reach places and joints - a brush. The applied layer of soil is thoroughly dried.
Next, the surface is sanded, for example, with sandpaper, then the first layer of starting putty is applied. The solution must be prepared before use. The dry mixture is poured into a container with water, mixed and water is slowly added until the solution reaches the desired consistency. The solution cannot be too thin or too thick. When applying putty, use a special spatula. The layer of starting putty is thoroughly dried and the primer is applied again. The dried primed coating of the wall surface is sanded again.
At the next stage, the finishing composition is applied. Sometimes the finishing solution is applied twice with an interval of 12 hours. After proper drying, the surface must be thoroughly sanded.
Applying putty is a very labor-intensive process that requires skills and experience.
To do the job better, it doesn’t hurt to remember some useful tips:
- You should not prepare a large amount of the mixture at once. It tends to dry out. Better little by little, but more often.
- To prepare the composition, you need to use only clean dishes and water.
- The solution should be taken with a small spatula, transferred to a larger spatula and only then onto the wall surface.
- You can putty using different methods: horizontally, vertically, as well as in such ways as “bouquet”, “herringbone”, “zigzag”.
- You can choose the angle of the spatula yourself; the most important thing is to cover up all the cracks, crevices, and visible defects.
- To check the level of coating, you can use a metal rule by applying it to the surface. All irregularities can be easily cut off with the angle of a spatula.
- When puttying, the tool used sometimes leaves barely noticeable grooves; after applying the last finishing layer of putty mixture, they will disappear.
- Sanding the surface of walls is much more convenient to do using a sanding machine.
- Be sure to sand the raised areas.
- To be on the safe side, you can finally coat the wall with water-based paint. This oil mixture will fix the composition.
- After finishing filling the wall surfaces, wash construction tools and utensils thoroughly with running water and wipe dry.
Ready-made putty mixtures
These types are used, as a rule, for finishing surface coating.
The main disadvantage of this type is that the solvents that are in the mixture evaporate when applied to the wall, which causes shrinkage.
Putty - finishing
Based on their composition, there are 3 types:
- specialized;
- finishing;
- universal.
To putty joints between drywall without using reinforcement tape with your own hands, leveling putties are required.
One of the most popular types of putty, thanks to which you can level the surface. Main requirements:
- so that it is compatible with the putty base;
- high adhesion to it;
- the defects in the base of the plaster were filled.