Completing of the work
Is it necessary to putty drywall before painting? This issue can be solved quite simply; we stretch the line diagonally across the room and use a level to see how much deviation we have. If it is more than two cm, then you need to not just putty, but first plaster. The surface must be leveled.
Attention: For leveling, use starting putty for drywall before painting. It has a larger fraction and is designed specifically for this job. If you use a cement composition, then it will cost much less.
If you have a layer of up to one cm, then you can immediately putty the finish. The first step when puttingtying plasterboard sheets is to check all the screws that secure these sheets to the profile structure.
Attention: It should be remembered that they must be screwed into the thickness of such a sheet no more than 5 mm. The head of the screw should not be allowed to be recessed deeper, but if this happens, you just need to unscrew it and screw in a new screw a few centimeters from the old hole.
To make your work easier, you can use a drill/screwdriver:
- The next step will be to widen the joints in places where the so-called “non-native” seams have formed, although there is a need for jointing standard seams. To perform this task, you need to use a sharp paint knife, thanks to which you cut about five millimeters from the edge at an angle of forty-five degrees.
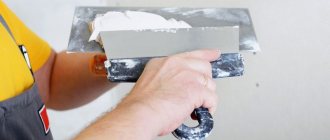
We putty the joints
- This procedure should be done with each sheet, this will improve the adhesion of putty and drywall and increase the area of contact with each other.
- The seams and the entire surface of the material used must be thoroughly primed. After this procedure, putty (see putty or putty - how to speak and write correctly) fits onto the sheets much better.
Attention: It should be remembered that it is necessary to use only the primer that is intended specifically for working with gypsum plasterboard. The primer must be applied thoroughly and evenly, without leaving untreated areas.
- After twelve hours, the composition dries, which gives the green light to seal the seams. For this type of work it is recommended to use gypsum plaster. You should not save on this material, so that in the future you will not be disappointed by cracks that form on the walls due to poor-quality composition.
- This plaster can be presented in dry form, which will need to be stirred with water. This task can be easily accomplished using a construction mixer.
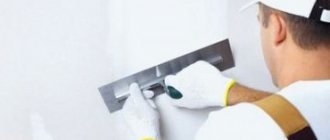
- At joints or seams, it is recommended to use a not very wide metal spatula. The putty is applied very carefully, completely filling all the seams without protruding onto the surface.
Attention: Do not forget that the seam should be immediately glued with sickle tape. Another thin layer of the building mixture is applied on top of it. During this procedure, it is recommended to guide the spatula in such a way that the serpyanka can be slightly pressed into the seam.
- If the seam is correct, then it is very easy to check: a large wide spatula is used for this, and if there is no clearance between the tool and the surface, you can be sure that the joints are sealed correctly.
- With the same spatula you can easily seal the heads of the screws or the holes that may remain from them. After completing this work, the putty is left to dry for about a day. Next, you should proceed to thorough sanding, after which the surface is primed again.
Tips for choosing materials
Depending on the materials, putties are based on cement, gypsum or polymers. Polymer putties are preferred because they are universal and flexible, suitable for any conditions and economical. Ready-made or dry mixture. It is more profitable to purchase the dry mixture; it is stored for a long time, and can be used in doses as needed.
The building materials market offers a large selection of primers and putties. Here you need to remember a good saying: The miser pays twice. If you want to get a wonderful result, you should not skimp on materials. No matter how good the paint is, it will not hide the errors in the pre-painting preparation of the surface.
- Sergei Pozharsky
It seems like he did the ceiling according to the rules. When it was daylight, everything seemed smooth, but I turned on a powerful lamp and saw so many flaws. Now I’m thinking, should I sand it again, or will paint hide the defects?
Tools and materials
Before starting work, you need to prepare the following devices:
- putty knife;
- paint bath;
- grater;
- sharp painting knife.
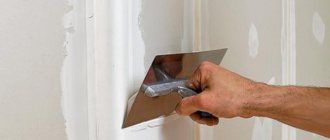
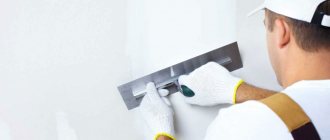
The main thing in this matter is the spatula. Without it, do-it-yourself drywall putty for painting is simply impossible. Its width should be 50-60 mm, then it will be possible to work out the joints and crevices, since a lot of putty will be required. To reinforce and putty seams, you need to take a wider tool. To apply the finishing putty, use the largest spatula up to 500 mm wide.
The tool must have a perfectly flat surface. Otherwise, the applied composition on drywall will form an uneven surface, making it visually unattractive.
Also, the spatula must be completely clean, free of dust and other contaminants. Preparing drywall for painting requires a certain order of work. Below we will consider this process in detail and step by step.
Application of primer
For better adhesion of the putty to the plasterboard surface, it is necessary to apply a primer. It is applied only to a dry and clean base, so all dirt and dust must be removed before preparatory work. You can use a vacuum cleaner and a slightly damp cloth.
The primer composition should be prepared according to the instructions, poured into a container and applied to the surface using a roller or brush.
There are two types of primer for treating drywall – for dry and wet rooms. If the treatment is carried out in the bathroom and kitchen, then you need to prime the drywall before painting using a product for rooms with high humidity. It is important that the primer contains antibacterial substances that will protect against the development of mold and fungi.
The following reasons for using a primer composition can be identified:
- Improves adhesion of materials.
- When removing wallpaper, a primer will allow you to do this without harming the gypsum board. If you glue wallpaper directly onto sheets of drywall, you won’t be able to replace them without damaging the material.
- The paint will be absorbed much less, making it possible to apply paints and varnishes to the surface evenly without causing stains.
Possible difficulties and useful tips
If you cover drywall with a layer of paint without observing technological nuances, problems will arise in the future. In the absence of putty, the application of water-based compounds is prohibited, since the top layer of the material will swell. Incorrect addition of color results in stains that are noticeably different from the main shade. Another problem is cracking of the paint layer after drying. This problem occurs due to improper preparation of the base, as well as the lack of gluing of joints between plasterboard sheets.
To avoid most problems, you need to prime the walls in the absence of drafts and temperature changes. The outer corners secure the reinforcing corner. Increased attention should be paid to joints. In addition, you can use the following recommendations:
- it is necessary to paint all places where sockets or switches are installed with a brush at some distance from them (3-5 cm);
- the decorative layer is applied from the ceiling to the floor;
- water-based paint is pre-diluted with water, and a solvent is added to the enamel;
- For rough processing of drywall, an acrylic primer is used.
Drywall is a universal material from which completely different designs can be made. All kinds of decorative materials are used for its cladding, but painting is the most popular. This type of finishing is easy to perform, but it requires adherence to technological nuances.
Tools
A paint roller is required to apply the primer.
To adjust the screws you need a screwdriver. It is a screwdriver, not a screwdriver, since it is necessary to carefully align the heads of the fasteners with the surface of the drywall.
Other items that may come in handy include: a sharp knife and fine-grained sandpaper.
Directly for puttying you need:
- putty knife;
- container for putty;
- sanding mesh or sandpaper;
- damp cloth or rags.
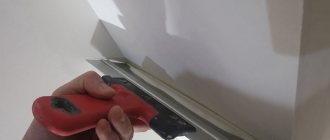
Puttying joints
When processing plasterboard walls, it is important to carefully work out the joints between the sheets. On the sides there are special chamfered recesses, which are used to fill the joints with putty and reinforcing tape. In this case, it is especially difficult to putty a plasterboard ceiling for painting. It is quite inconvenient to do such work with your arms raised above your head, when the material may fall on your face.
If, after cutting the sheets, the chamfered edges are cut off, and the joints are straight and without indentations, then you will need to create these indentations yourself, using a knife or a special finishing plane.
Procedure:
- Using a well-sharpened knife along the entire joint of the sheets, it is necessary to cut the extreme part at an angle.
- You can go over the gypsum base with a plane in advance so as not to do this work locally.
- After these steps, a small depression should form. It will go along the entire joint.
- You can use a simplified joint preparation scheme by cutting the edges of the sheets forming the seam at an acute angle. But then it will be impossible to use a reinforcing mesh, therefore, the sealing of the seam will not be so strong.
Stage – 3 grinding
The last step before painting the plasterboard ceiling is sanding the putty surface. This is necessary in order to make the ceiling perfectly even and smooth, as well as to remove all the defects formed during the application of plaster.
In order not to stain other surfaces with dust, they need to be covered with film. Grinding must be done using a special fine abrasive mesh inserted into the holder. This ceiling finishing is done in a circular motion without much pressure. In this case, you need to ensure that the excess putty is washed off equally over the entire surface of the ceiling. The main thing here is not to overdo it, otherwise you will have to apply the putty again.
Sand the ceiling before each application of a new layer of putty. The last time you need to treat the surface especially carefully, because painting a plasterboard ceiling will not hide the shortcomings of the putty work.
After all stages of preparation are completed, the ceiling must be covered again with a layer of primer and left to dry for 24 hours.
When sanding the ceiling, you must use a dust mask.
Base requirements
Next, you need to figure out what the coating should be in order to be suitable for painting:
- Drywall must have a perfectly flat surface, which will avoid the occurrence of unevenness that could damage the appearance.
- There should be no chips or cracks on the coating.
- The material must be exposed with primer, putty and sanded.
Sometimes fiberglass is also used in addition to this, but often this happens when creating a first-class coating for painting.
Seam reinforcement
Finishing drywall for painting includes the process of reinforcing the seams. To complete this job you will need sickle tape. It is made self-adhesive and is sold in narrow rolls. Seam reinforcement is carried out in two ways:
- Serpyanka tape (or fiberglass) is fixed right before puttying. You need to start gluing the serpyanka from the very top of the ceilings. It is carefully unwound and pressed tightly against the surface of adjacent plasterboard sheets. The joining seam should go straight down the middle of the tape.
- The mesh is embedded in the newly applied layer of putty using a narrow spatula. Experts consider this method preferable, since the reinforcing mesh will be located in the middle of the putty layer, so it will do its job more efficiently. As a result, puttying of drywall for painting will be done with the highest quality in all places.
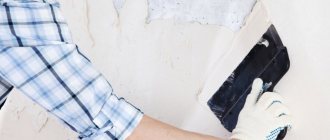
Surface preparation
You can’t just take and plaster plaster sheets. Without preliminary measures, low adhesion will be observed and the plaster will begin to crumble over time.
The master primes the wall with a roller Source ytimg.com
Preparing drywall for painting, work procedure:
- Removing dirt, dust, various foreign elements remaining on the surface of gypsum sheets.
- Make sure the fasteners are securely fastened. Drywall should not “walk”; when you try to move it, a well-installed material is more likely to crumble than move. This will ensure the stability of the entire structure after installation work.
- Primer treatment. A special mixture that is easily absorbed into the base and increases adhesion to the plaster mixture when applied.
- Drying. Make sure the primer is dry to achieve maximum performance. This process usually takes about a day.
Before work, make sure that there are no defects at the joints of the sheets. Loose screws are additionally checked and tightened if necessary. But do not overdo it, since the fastener should not be allowed to go deeper than 5 mm. If this happens, the old screw is removed and replaced with a new one.
Correctly sealed joint Source sdska.ru
If the manufacturer of the gypsum sheet does not provide this, the cut edges are cut at an angle of 45 degrees to a width of 3-5 mm, which will increase the adhesion area of the base to the finishing material. Afterwards you can putty the drywall.
Note! The cut areas are also treated with a primer, since otherwise the plaster here will begin to crumble.
Choosing putty for seams
For high-quality sealing of joints, it is important to buy a suitable putty composition. All mixtures can be divided into two large types - base and finishing products:
- Basic compounds are necessary for deep leveling of the surface and for repairing large defects on the wall: cracks, chips. Their main advantage is that when producing a putty mixture, coarse-grained components are used as filler. Thus, a strong bond is formed between the filler and the binder component. This will allow you to apply the composition in a thick layer of up to 5-7 mm. The surface to which the base coat has been applied will be rough and rough.
- Finishing mixtures are used for final leveling of the surface. They contain a fine filler, as a result of which the treated surface becomes smooth and is suitable for finishing decorative processing.
Is it necessary to putty drywall before painting with both types of putty? It is necessary, but only in the case of joints. For all other areas, finishing putty is suitable, since the gypsum board has already created a smooth coating for us.
To putty the joints between sheets of drywall, you only need basic putty compounds. This mixture has increased strength, so it is able to reliably seal the joints between individual sheets of material.
To make basic products, cement is used as a base, and coarse quartz sand is used as a filler. The resulting composition can be used in rooms with high humidity, since cement, after hardening, is not afraid of dampness.
You can purchase basic putties with polymer and gypsum base. They cannot be used in damp rooms, since gypsum is hydrophobic and swells, cracks and deforms when in contact with water. Polymer mixtures can be moisture-resistant, but there are some that can undergo deformation under the influence of moisture.
Proper priming of plasterboard walls
When starting to prime, remember that well-primed plasterboard copes better with excess moisture and is not affected by harmful microflora. The primer will also help level out the absorption level of the surface. This will prevent stains from appearing on the finish.
It is important to know that plasterboard sheets should never be treated with an alkyd primer. This type of primer mixture is not friendly with cardboard and will lead to swelling and cracking of the material.
After priming, the surfaces of the walls or ceiling are left to dry for a day or two.
The next stage is gluing the joints of the sheets with a special reinforced tape. This is required to ensure that the putty does not crack at the joints, and for better joining of the sheets. Internal corners, if any, are also treated with this tape.
Gypsum putty from Knauf
If we are talking about external corners, then it is necessary to add protection against impacts from large objects, which leads to the formation of dents. Therefore, external corners are treated with special plastic or metal corners. They are attached with glue or self-tapping screws. If the outer corners are shaped, then in a hardware store, look for corners that can be bent.
After sealing the joints and corners, proceed to the next stage - puttying the walls or ceiling.
Adviсe
Now you understand whether it is necessary to putty drywall before painting. The plane should be perfectly flat and therefore the processing will have to be done unambiguously. But on the topic of how to properly putty drywall for painting, there are some tips:
- It is best to apply the putty to the surface to be used with two spatulas, one of which should be narrow and the second wider. With a smaller spatula it is convenient to apply the putty onto a large spatula and, if necessary, remove excess from it.
- If roll coating is preferred, it is important to properly putty the drywall.
Attention: In fact, the quality of the selected wallpaper is a very important point. Heavy textile wallpaper for the ceiling requires a rough surface. This will promote better bonding.
- Thus, it is better to use a coarse mixture and do not use finishing putty. The surface is covered with rough putty and grouting is done only in clearly defective areas.
- If you decide to paint the surface, it is recommended to use special water-based compounds for painting plasterboard sheets. When decorating the walls of a bathroom or kitchen, it is best to give preference to a water-based solution that is not afraid of moisture. This type of paint is usually presented in white, which can subsequently be given any shade using special mixtures.
- Without a doubt, the best and most convenient tool for painting walls is a spray gun, when used, the paint lies perfectly evenly on the surface and the quality of the work done will be obvious. But using this tool requires certain operational skills. The most common roller can be considered a backup option. It can be either short-pile fur or a velor coat.
- It is advisable to paint walls or ceilings when the heating is turned off, so you should worry about this issue in advance. This is necessary for complete and uniform drying of the paint on the surface and will protect the material used from cracking.
- An important factor when carrying out such work is the exclusion of drafts.
If you follow these simple rules when preparing walls for painting, you can be sure of an excellent final result that will delight the owners for many years to come. Puttying drywall for painting is a rather sensitive issue. Here you will need to spend time. But in return you will get a perfectly flat surface.
Features of drywall
Drywall consists of two sheets of special cardboard and gypsum filler. Various substances are also added to it, which can give the material different properties. Despite the fact that gypsum board is a modernized cardboard, manufacturers have not yet been able to completely eliminate the fact that it absorbs all moisture. Therefore, before painting, careful preparation of the surface is necessary, otherwise a lot of paint will be needed. In addition, due to the fact that cardboard is capable of absorbing the composition at different rates, without a layer of putty you will not achieve a uniform result.
The material requires pre-treatment for another reason: if it is not done, any irregularities on the gypsum board will be very noticeable. Sheets that serve as a base and, for example, hide a sewer riser or very uneven walls, are rarely sanded in advance. It is often assumed that they will be covered with some kind of material: in a bathroom this could be tile. Therefore, the surface of the gypsum board is not very smooth.
Pixabay
Pixabay
Treating seams with putty
Before you properly putty the drywall for painting, you will need to finish the seams. To complete this work, you will need a container for diluting the composition and a spatula.
Procedure:
- Gypsum and cement compositions are sold in the form of dry mixtures, but polymer ones are ready for use. The reason is the very complex technology for diluting polymer drugs and the need for strict adherence to it.
- To obtain a solution of the required consistency, the dry mixture is combined with water in the proportion indicated in the instructions. Mix everything using a drill with a mixer attachment.
- To obtain a solution of the required consistency, you can add water to the container. It is important that the finished mixture resembles thick sour cream - it is plastic and at the same time viscous. Then you can avoid smudges after applying putty to the wall. It doesn’t matter how the drywall was prepared for painting, because the wrong consistency of the solution will ruin everything.
- Apply the solution using a spatula. Make sure that its width is wider than the groove formed by the edges of the drywall sheets (50 cm on each side).
- You need to start work from the floor, moving the tool from the bottom up. It should be pressed firmly against the sheets to avoid the appearance of lumps and sagging.
- If it was not possible to avoid their appearance, then you need to remove them urgently, otherwise the solution will harden and this will be much more difficult to do.
Selection of necessary materials
Putties from various manufacturers
Store shelves are filled with a variety of building mixtures. It is not surprising that among such a variety, finding a suitable composition for drywall is problematic.
Some of them are intended only for cracks, others for ceilings, and others are completely decorative. We also need to choose a primer, so we carefully compare the features of the materials and see what their price is.
putty
Having studied the assortment, I consider dry putty to be the best choice for finishing gypsum boards. It is very unpretentious for storage, and also costs a little less than ready-made mixtures. Let's take a look at its advantages:
- Has a long shelf life.
- Its quality is not affected by temperature conditions of storage.
- Can be used in parts, leaving a reserve for further work.
Dry putty is the best choice
Dry putty can be divided into three types:
- Cement.
- Plaster.
- Polymer.
Each of them suits certain room conditions. For example, for a kitchen or bathroom, it is best to choose a cement composition, since it is more moisture resistant than gypsum.
But in other situations, the cement mixture will not be able to cope with the task qualitatively. And then the polymer type, which has more universal properties for finishing home premises, is more suitable.
In the photo - polymer putty
Of course, universal putty is more expensive than other types, but it will save you time, nerves, and allow you to easily do everything yourself.
Primer
The primer is sold in containers of different sizes
Here the choice entirely depends on the size of your wallet. There are a lot of primers, and most of them are suitable for working with gypsum boards. The only important fact is that you cannot use alkyd primers, they destroy the top layer of drywall, causing it to crack.
This can result in hanging rags. All other types of primer compositions are more tolerant of cardboard, so you don’t have to worry.
Surface priming is a necessary operation
Sanding seams and corners
If the layer is well leveled when sealing seams on drywall, sanding can be kept to a minimum. Why is it better to sand less? Because firstly, it’s long, and secondly, it’s dusty. Moreover, the dust is very fine, floats in the air for a long time and rises again from any movement. To reduce the amount of flying dust, wet rags, wet sawdust, etc. can be placed on the floor. Doors leading out of the room are covered with a wet cloth; it should be larger than the size of the door - so that dust does not fly into other rooms.
To begin with, you can go over it with a sharp, even spatula and cut off all the most protruding irregularities. Next is the sanding process. Since corners and seams at this stage do not need to be sanded to perfect smoothness, take a sanding mesh with a mesh size of 180-200 and a wooden block. A mesh is attached to the block (you can use staples from a construction stapler, but the staples should not stick out). This device levels the surface. When working, it is advisable to highlight it with oblique light - this way all the irregularities are more visible. But you can’t putty plasterboard under wallpaper so carefully.
There are special holders for the mesh, but you can get by with a block
One thing - it’s better to grind in a respirator and safety glasses. Gloves will be a good idea. The dust is very fine and penetrates literally everywhere. After the seams and corners are sanded, the surface is primed again. Moreover, all of it, since dust has also settled on the untreated areas, and it worsens adhesion.
The most inconvenient places for puttying and sanding are the inner corners. For the secrets of fast, high-quality grinding of corners, watch the following video.
Drywall processing. Pasting without putty on primer
The first thing to think about is drywall primer. You can’t do without the mixture; it will close the pores of the gypsum board and improve adhesion. There is no need to skimp on quality. There are several factors to consider when purchasing:
- brand name (whether users buy it and whether the material has gained trust);
- price, it is better if it is above average;
- purpose – deep penetration primer;
- made on acrylic base.
To understand whether it is necessary to prime drywall before wallpapering, just pay attention to its actions. It will improve adhesion between materials, increase the strength of the seams thanks to which the gypsum boards are connected, and also improve the quality of fixing the wallpaper to the wall.
- Putty-adhesive, which can be used to fill joints of plasterboard sheets, recesses from self-tapping screws and deformed areas. Most often, specialists use the well-known brand Knauf Fugenfuller. There are craftsmen who replace this glue-putty with the usual starting one. This method is incorrect, since the starting putty does not have such strength.
- Serpyanka mesh on a self-adhesive base. It is made of fiberglass and is intended to strengthen (reinforce) corners and joints. It is sold in widths from 5 to 20 cm. In our case, we need a width of 10 cm, no more. And to protect the corners, metal or plastic corners are used.
- Finishing putty for interior finishing. Facade mixtures cannot be used, and their cost is much higher. The putty goes on sale in dry and ready-made form. In the first option, the powder is prepared before work by mixing with water and bringing to readiness. The second option is more convenient, since the mixture is already prepared, just open the container and start working. For beginners, the second option is preferable, although the price of the products is higher.
- The wallpaper itself is for finishing and glue for it. These can be non-woven fabrics, rubber, paper, two-layer, liquid, etc. It all depends on the desires and capabilities of the owner. It’s also better not to skimp on glue, so that the wallpaper doesn’t fall off over time.