It's good when a house or apartment is tastefully furnished. You come home from work and plunge into a cozy atmosphere. But there are feelings that something is missing, there are definitely places where you need to hang something. Maybe a cabinet, but it somehow doesn’t fit into the interior or isn’t the right size. Then the best option would be a shelf. It will fit perfectly into the overall decor of the house and, importantly, will help save a lot of space.
You can keep various items and literature on the shelves.
After it has completely hardened, a shelf is put on the pins.
You can keep various items and literature on the shelves. They are attached to absolutely any room. How to properly fix a shelf on the wall so that it fits perfectly into the interior? It's not difficult as it may seem. Anyone can do this work if they want to.
Mounting methods for wall shelves
When planning wall shelves, the type of fixation is decisive. Once you familiarize yourself with the mounting method, you can easily choose the option that suits you.
Using invisible fastening . By choosing this look, you will hide the fasteners, and the wall structure will look light and elegant, no matter what room it is hung in. It is desirable that the wall be concrete or brick. Wall partitions made of plasterboard less than 10 cm are not recommended.
How to properly fix a shelf on the wall so that it fits perfectly into the interior?
You can use a variety of materials for wall shelves.
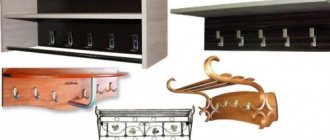
Using brackets . In this case, you cannot hide all the elements; they will always be visible. You can save money by purchasing metal or plastic corners. If you want to add beauty and originality to a piece of furniture, buy decorative fasteners, but always in pairs. It is necessary to take into account an important point - the brackets are not suitable for every interior.
They are attached to absolutely any room.
Working with it is not difficult, and its mass is small.
On holders for glass shelves . In such fasteners, rubber or silicone gaskets are used to protect the plane at the fastening site. Shelf holders can be of different sizes and shapes; there are options with suction cups. They are attached from below, and the upper surface remains open.
Anyone can do this work if they want to.
How to attach a shelf to a wall?
Using loops and corners . This is the most common method - easy, efficient, does not take much time, and will fit into any environment. The format of loops or corners allows for a decrease or increase in the load on the shelf. Attachment to guides or metal posts. Not all types can be put into practice on your own. In some cases, it is worth contacting specialists.
When planning wall shelves, the type of fixation is decisive.
To hang a shelf on a brick or concrete wall, you need to make markings using a level.
Non-standard methods
In addition to the standard, well-known methods for installing shelves, original options using various available materials are used. These details not only allow you to conveniently and easily fix the structure, but also act as decoration.
Rings with hooks
You can hang the shelf using rings with attached hooks. The rings are attached to the wall, and the hooks are attached to the loops that are screwed into the structure in advance.
Water pipes
The method is useful in any room. Holes are made in the furniture fabric slightly larger than the diameter of the water pipe. The shelf is “put on” and fixed with a flange in the desired position. The design may consist of a single panel, or it may be an open shelving unit.
Belts
Shelves suspended on belts look original. To do this, take two leather products of the same length, fold them in half and drill them towards the wall. A shelf is inserted into the resulting loops. To prevent the canvas from moving, the straps must be screwed to the shelf with small self-tapping screws.
Ropes
Shelves hung on ropes will look great. A thin rope is used for this. 4 holes are made in the tree through which the rope is threaded. Knots are tied on both sides, thus fixing the shelf. The ends of the ropes are tied together and attached to the wall.
Hidden fasteners in books
The shelf is an old book with a metal corner screwed into it. The second part of the fastening is fixed to the wall. This shelf will hold several more books.
Attaching shelves to the wall without visible fasteners
There are a number of points that you need to familiarize yourself with in order to hang a shelf in an invisible way.
- Wall thickness. The shelf should be mounted on an invisible mount if the thickness of the brick partition is 250 mm, and the concrete partition is 105 mm. If the dimensions are smaller than the given data, then additional parts will be needed. When the wall is made of plasterboard or cinder blocks, and the thickness does not exceed 100 mm, then invisible fasteners are acceptable if the shelf will be used as decoration and light objects will be placed on it.
- Shelf thickness. It should not be massive or, conversely, thin. It is desirable that the material does not sag, is dry and has a good finish. If there will be light items on the shelf, then the thickness of the shelf should be at least 30 mm; if you store literature or heavier utensils, it should not exceed 60 mm, but should not be less than 45 mm.
- Selection of fasteners. To choose the right mount, you need to take into account the second point, and also know what function is intended for the shelf. The invisible fastening consists of hanging loops and metal rods. The loops are attached to the back side of the shelf and markings are made. Using the necessary tool, holes are made in the wall and a plug is inserted there. Then screws are screwed in to a sufficient depth and hinges are placed on them.
If you use metal rods, you need to remember that the diameter of the fastening element should be 10-12. The first thing you will find out is the length and width of the shelf. Mark this data on the wall and drill holes. The same holes will need to be made on the shelf. Depending on the load, the required number of pins will be required. They are inserted into the wall half the length of the hole and fixed with glue. After it has completely hardened, a shelf is put on the pins.
Once you familiarize yourself with the mounting method, you can easily choose the option that suits you.
Use a hammer drill to make the required holes.
Where are shelves most often used?
The main place where you simply cannot do without a shelf is the bathroom. This is where shelves are a must-have attribute, as they allow you to conveniently store bathroom accessories. In most cases, even several shelves are used, but fixing a shelf in the bathroom is the most difficult, since the wall covering here is ceramic tiles, which must be handled very carefully.
You can’t do without a shelf in the kitchen, since it greatly increases practicality and you can place on it all the accessories that the housewife constantly needs at hand.
In the bedroom or living room, shelves mainly serve not a practical, but a decorative role and serve as a stand for souvenirs, jewelry or books.
Fastening for a shelf to a plasterboard wall
There are different types of fastenings to plasterboard walls. Here are some of them:
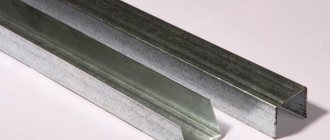
- Embedded beams are the optimal variation. Attached directly to the gypsum board when mounting to the wall. Beams of the required thickness are fixed in the place where you will attach shelves or equipment.
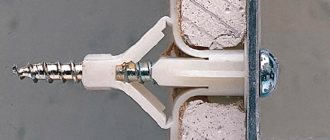
- Fastening is carried out to the gypsum board. This option is not difficult, since the fixing elements - butterfly dowels, umbrellas, Molly fasteners - easily pass through the plane and are screwed into the wall.
- Using profiles. In this case, you will need a magnet, preferably a powerful one, this will ensure fastening strength. In the place where the metal profile passes, make holes all the way through. The self-tapping screw should be 5-6 mm longer than the thickness of the gypsum board sheet. Then we fix the shelf to the plasterboard wall.
- Anchor fittings. Used to attach shelves that can support significant weight. Their diameter should be from 6 mm to 1 cm.
Using the necessary tool, holes are made in the wall and a plug is inserted there.
We make sure that the drill and hardware are the same size.
Complex cases
There are a number of cases when attaching shelves to the wall requires care, some effort, or the use of more durable materials.
How to hang a glass shelf
Glass shelves are installed on brackets. The fastenings are fixed to the wall with ordinary self-tapping screws and covered with decorative overlays on top. The glass is clamped between two parts of the bracket using a compression mechanism.
On a plasterboard wall
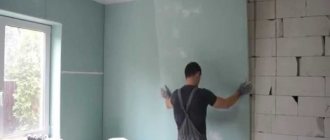
To firmly install shelves on a gypsum plasterboard wall, it is necessary to make embedded parts from metal or wood at the installation stage. In this case, the fasteners will be screwed to a durable material and hold the structure tightly. If the wall is hollow, it is better to install the shelf using umbrella dowels.
See also
Rules for finishing a balcony with stone with your own hands and how to choose the material
Concrete wall
A special feature of a concrete wall is its strength, so installing a shelf will require drilling. To do this, use a hammer drill and a durable drill of a slightly smaller diameter than the dowel-nails that will be used.
Necessary materials
For wall shelves you can use a variety of materials:
- GKL. Designers often use plasterboard in interior design, especially if shelves made of this material are assigned one of the main places in the room.
- Tree. Most often used for balcony shelves. Working with it is not difficult, and its mass is small. When used correctly, these shelves can last a very long time.
- Chipboard or chipboard. Moisture-resistant material, withstands temperature changes, wear-resistant.
- Glass. Very common in use. Glass shelves look very fashionable.
- Plastic. The publicly available material, since it is inexpensive, is not susceptible to mold.
- Metal. When working with it, you will definitely need a welding machine.
Then screws are screwed in to a sufficient depth and hinges are placed on them.
If necessary, we make adjustments.
Shelf in the bathroom
The bathroom has its own nuances when working with shelves. If the walls are covered with tiles, then you can fix the shelf only at the seams. After all, if you try to drill a tile in the middle, vibration may cause it to crack or even fall off. Of course, there is special equipment that allows you to drill tiles, but it is expensive and it is not economically profitable to buy it. Even at seams, you need to drill the tiles carefully, and it is not recommended to turn on the vibration function until the drill reaches the wall. Only when you get to the base, then you can drill like a regular wall.
If you have a corner version of the shelf, then, as for a straight one, you must first make markings. But in the bathroom it is not necessary to use a level, since the anchors will still be in the seam, and even if it is uneven, it will still not be possible to retreat.
Required Tools
The tools you will need are: a level, a drill, or better yet a hammer drill, a screwdriver, dowels, self-tapping screws, a jigsaw, wood glue, a fastening set, a set of drills, a pencil, a hammer, and a wrench for anchor bolts.
If you use metal rods, you need to remember that the diameter of the fastening element should be 10-12.
Upon completion of all stages of work, we attach the shelf.
How to hang a shelf on drywall
In conclusion of our article, let's look at how to hang a shelf on drywall
. Special butterfly anchors and similar ones used for drywall, when installed, can withstand a weight of about 15 kg each. But sometimes a reasonable question arises: how to hang a shelf on the wall if its weight is significantly greater than the indicated figures.
A good solution would be to place an additional support frame at the mounting location. An anchor drilled into such a structure will withstand a much greater load. The following fastening method can be used if, for example, a concrete or brick wall is sheathed with plasterboard. The smaller the gap between the main wall and the plasterboard sheathing, the better.
For fastenings we use tubular self-expanding anchors. When choosing the length of the anchor, take into account the distance from the wall to the drywall and add 5 cm, take the diameter of the anchor 1 -1.2 cm.
We drill a hole using a hammer drill directly through the drywall (here you need to act carefully so as not to gouge an excessively large hole in the weak plaster). The depth to which we immerse the drill into the wall structure must be 5-6mm greater than the length of the anchor. Having completely cleared the drilled hole from dust and other construction debris, we insert the anchor so that its edge is flush with the drywall. By tightening the anchor nuts, we achieve good fixation. Then unscrew the nuts completely. We put metal washers through the threads (the diameter of the internal holes of the washers must correspond to the size of the anchor thread). We put the loops on top and tighten them with nuts.
All our problem is solved. We described the question of how to hang a shelf on the wall in the most popular options, setting out general rules that will also allow you to find a solution in rarer cases, but if after reading you have more questions, you can ask them in the comments to the article.
Fastening process: step-by-step instructions
How to attach a shelf to a wall? Before you start installing the shelf, you need to remember that the holes in the shelf on the back side are made 5 mm lower, and also make sure that the holes on the shelf and on the wall completely coincide.
The first thing you will find out is the length and width of the shelf.
When positioning the shelf, align it with the fasteners.
To hang a shelf on a brick or concrete wall, you need to make markings using a level. Use a hammer drill to make the required holes. We carry out the work carefully, avoiding chips on the wall. We make sure that the drill and hardware are the same size. Then we attach the fastening elements and check with a building level. If necessary, we make adjustments.
Depending on the load, the required number of pins will be required.
Using bolts and nuts, self-tapping screws or self-tapping screws, secure the shelf.
Upon completion of all stages of work, we attach the shelf. If you did not make it yourself, but purchased it in a store, then all the necessary fastening elements are included. When positioning the shelf, align it with the fasteners. We make sure that there are no gaps between the shelf and the wall. Next, mark all the holes with a pencil. Using bolts and nuts, self-tapping screws or self-tapping screws, secure the shelf.
They are inserted into the wall half the length of the hole and fixed with glue.
If you did not make it yourself, but purchased it in a store, then all the necessary fastening elements are included.
If necessary, we make adjustments.
Useful tips
Here are some useful tips that will come in handy while working.
- If the wiring has not been changed for a long time, it will not be superfluous to determine its location before drilling. After all, if it is damaged, a short circuit may occur that can damage household appliances. The apartment may also be without power. The location of the wiring is determined using a special device that can be purchased at a hardware store. They are led along the wall. If there is wiring nearby, the LED on the device lights up. It is better to start your search from places where wiring is certain (sockets, switches).
- When it comes to a wooden wall, there is no better fixation than ordinary screws. Dowels will be completely unnecessary for them. Wood can hold even quite a lot of weight well without them.
- You can make a shelf with a hidden fastening with your own hands from an ordinary one. To do this, you need to purchase the fasteners themselves, and then drill holes for the pins in the piece of furniture using a drill.
- It is better to purchase dowels with antennae located on the sides. They hold up much better. This is especially true for concrete walls.
- To achieve the correct horizontal position of the shelf, it is better to use a building level. Of course, you can try to install it by eye. But then deviations are possible. And they don't look very nice.
- When using metal corners, they need to be decorated after finishing work. The best option is to stick a PVC film or a small piece of PVC plate onto the mount. However, for a high-tech interior, you can leave bare steel, in which case it will look organic.
