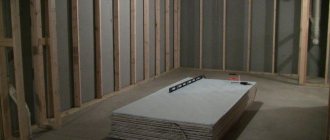
Leveling and covering walls with plasterboard is very often carried out during renovation work in an apartment. As a rule, this operation involves attaching gypsum boards to a metal or wooden frame. But there are cases when it is easier and more profitable to attach drywall to the wall without a metal profile and wooden sheathing.
When can you do without building a frame?
It is recommended to attach sheets of drywall directly to the wall if it is relatively flat and the differences in the plane are no more than 5 centimeters. This surface can be leveled using an adhesive. Installing drywall without sheathing has many advantages:
- GKL easily attaches to walls and partitions made of any material. It is only necessary to carry out appropriate surface preparation. Meanwhile, screwing the profile to a wall made of foam block or aerated concrete is quite problematic.
- This cladding method significantly saves free space in the room: a frame made of metal profiles or wooden beams “eats” at least 5 cm when finishing each wall. If you attach drywall to all 4 walls, then a small room will noticeably decrease in size.
- Savings: no need to buy profiles, as well as various connecting elements. Adhesives will be much cheaper.
- Installation of drywall without constructing a frame is done quickly and does not require special professional skills.
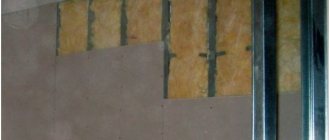
Note! If the wall is very crooked, you cannot do without a frame. This will be feasible both from a technical and economic point of view. Sheathing is also needed if you plan to insulate or soundproof a room, hide communications, or place lighting elements under sheets of drywall.
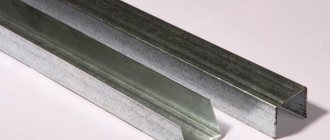
If lathing is still required, but for some reason it is not possible to use a profile, in some cases it can be made from wooden beams. All the pros and cons of a wooden frame, as well as the procedure for its installation, are described in this article.
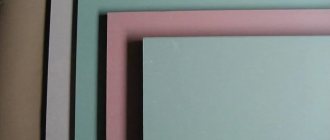
What brand of drywall do you use?
USEFUL INFORMATION: Installation of gypsum boards on the ceiling: technology, design, cost
Disadvantages of frameless fastening of gypsum boards
The strength of plasterboard is low, so a gypsum plasterboard partition will not support even a shelf attached to it. The strength of a plasterboard wall can be increased by installing a double partition, but any frameless method of attaching plasterboard does not involve installing sheets of material in 2 layers. For this purpose, a frame of guide and load-bearing profiles is always first installed.
Before choosing a method for installing gypsum boards without a profile, it is necessary to evaluate the curvature of the walls. If the level of this indicator is not too significant, then attaching the profile to the wall will not be necessary. It will be enough to use special glue or self-tapping screws to level the surface with drywall without the formation of enlarged cavities under the sheets.
It is good to strengthen gypsum boards in a frameless manner to walls with electrical wiring, but without communications such as pipes of heating, ventilation or plumbing systems. To hide them, you will need a ready-made profile frame. A significant disadvantage of frameless sheet installation technology is the need to prepare the surface before covering the wall with plasterboard. In rooms with freezing walls, leveling with this type of material is not carried out, since the formation of condensation on gypsum boards is unacceptable.
Preparing the base
In order for the plasterboard coating to last a long time, it is necessary to treat the surface of the walls. It will prevent not only peeling of the plasterboard, but also the appearance of fungus or mold underneath it.
- If there is a significant layer of plaster on the walls, then it is better to remove it. You can leave a thin and firmly adhering layer. Any fragments whose reliability is in doubt must be shot down. Here's how to do it in detail.
- Deep cracks must be widened using a chisel, cleaned of dust, primed and covered with a cement-based repair compound.
Advice. It is convenient to use a sealant to treat small cracks.
- Protruding areas are knocked down.
- The leveled surface is covered with a primer in two layers. Be sure to let each of them dry.
Having prepared the wall, you can proceed to marking its surface.
Frameless method of leveling walls using drywall
Scheme of plasterboard sheet.
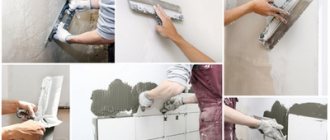
Laying drywall on a wall without using a frame can be done using glue. This method can be used if the walls do not have large flaws. The process should begin with surface preparation. To do this, the wall must be cleaned of dust and dirt, and then primed. Before starting work, it is necessary to analyze the surfaces for the degree of curvature. If it is equal to the limit of 4-7 mm, the drywall should be mounted after first applying glue to the entire surface of the walls. Afterwards, it must be evenly distributed using a notched spatula. For unevenness from 8 to 20 mm, the adhesive composition must be applied pointwise. If unevenness is more than 20 mm, leveling must be done using putty; as an alternative solution, you can use the frame method of attaching plasterboard to the walls.
If the walls are initially leveled with putty, the surfaces must be primed afterwards. Each layer must dry well before applying the next. Then you can start preparing the glue. It is not recommended to dilute a large volume of the composition, as it dries quite quickly. After 20 minutes the mixture will become hard. The glue must be applied to the surface of the wall where the sheet is supposed to be attached, on which the glue will also need to be applied. After the sheet is attached to the wall, it can be leveled using a rubber or wooden hammer to correct the position.
Linings should be laid on top and bottom, the thickness of which is 10-15 mm. These grooves will become temperature sensitive, so the sheet will be able to freely change its linear dimensions with variations in humidity and temperature levels. The linings can be scraps of drywall.
Marking, important points
This operation is carried out with a standard set of tools. You will need a level, plumb line, tape measure, rule and square. A laser level is very convenient, but it is not always possible to borrow it from acquaintances or friends, and buying it for one-time work is too expensive.
The following points must be taken into account:
- Gaps remain between the ceiling, floor and sheets of drywall. They are made in case of shrinkage of the house and prevent warping of the plasterboard. The gap between the sheet and the ceiling is 3–5 mm, the distance to the floor is 8–10. At the top it is enough to draw a line marking the boundary of the drywall, and at the bottom it is more convenient to use spacers of the required thickness made of chipboard or plywood. After attaching the drywall, they are removed and the gaps are filled with foam.
- One sheet may not be enough vertically to cover the wall. In this case, an additional line is drawn indicating the boundary of the entire gypsum board. As a rule, cut pieces are placed on top, although craftsmen advise fastening whole sheets and halves in a checkerboard pattern.
- To correctly install the first slab, use a plumb line to draw a vertical line in the corner of the room. All other fragments of drywall will appear in a single plane with the first sheet, which is why its correct installation is so important.
USEFUL INFORMATION: Moisture-resistant plasterboard ceiling in the bathroom
Installation instructions
Step-by-step instructions will help you understand how to attach drywall to a wall.
- Stage 1. Wall measurements are taken and the placement of plasterboard sheets is planned.
Avoid cross-shaped joints; sheets should be placed offset.
- Stage 2. Prepare the surface. If the wall is porous, it must be treated with a primer.
- Stage 3. GCR is cut out. In addition to solid sheets, pre-prepared inserts are also useful.
Straight cuts are best made with a sharp construction knife, while a jigsaw will help when making curves and radius lines.
- Stage 4. Glue is prepared. It is acceptable to use gypsum mixtures that harden slowly, such as starting putty.
In order to extend the hardening time of the mixtures, you can add wallpaper glue or PVA to the diluting water.
- Stage 5. Plasterboard sheets are glued to the wall.
How to attach gypsum board to glue correctly?
- The thickness of the adhesive layer is selected depending on the scale of surface irregularities. If it is fairly even, then the adhesive mixture is applied directly to the wall.
- To eliminate large curvature, it is necessary to install beacons made of plasterboard strips 10 cm wide. They are glued along the entire perimeter and vertically, at a distance of 40–50 cm.
- Using a plumb line, the left and right extreme beacons are installed, then, focusing on the fishing line that is stretched between them, the remaining vertical strips are attached.
- Beacons are aligned using a rule.
- Drywall sheets are also pressed using a rule that is set in different directions. Tapping with a rubber hammer corrects their position.
- After the glue has completely dried, the seams are sealed using putty.
If you are worried about how to securely fasten drywall, then know that this type of fastening does not require any additional actions.
It is important that seams 5–7 mm wide and gaps of 7–10 mm from the floor and 3–5 mm from the ceiling are left between the sheets. For this purpose, pre-prepared wooden wedges are used.
How to attach drywall to the wall?
There are several methods for fixing gypsum boards. The choice of a specific one depends on the condition and nature of the base surface.
- For a flat and smooth wall, you can choose any adhesive composition: a mixture based on gypsum or cement, foam or polymer mastic.
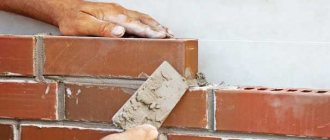
- For unplastered brick walls, too much foam or mastic will be required, and they may not provide reliable fastening. It is better to choose a composition based on gypsum or cement, which will fill all the depressions in the masonry.
- GKL is mounted on wooden walls using wood screws. It's as simple as hanging a shelf or a picture.
- The situation is more complicated if the wall surface needs adjustment in some plane. Here you will need beacons that set the correct position for the sheet of drywall. They can be made from gypsum board scraps or other available materials. The plate is fixed to the wall with screws, and with their help the necessary position adjustment is carried out. Subsequently, the cavity between the wall and the drywall is filled with polyurethane foam.
Pros and cons of drywall in repairs
Advantages of drywall:
- Ease. The material itself is quite light, but at the same time can withstand moderate loads (you can hang shelves).
- Quick wall finishing. When finishing a wall with plaster, a lot of dirt does not form, as, for example, with traditional finishing of concrete walls. Walls are processed quickly and easily.
- Smooth walls. Due to its geometric parameters, when installing a gypsum wall, a perfectly flat surface is obtained.
- Drywall is an environmentally friendly building material.
- Quick installation. To install drywall, you only need self-tapping screws. Depending on the material to which the fastening will be made, you select the appropriate screws. For fastening to wood you will need a plasterboard-wood self-tapping screw, and for metal you will need plasterboard-to-metal self-tapping screws.
- In plasterboard niches you can easily hide communication elements.
Cons of drywall:
- Hygroscopicity. From direct exposure to water, a sheet of drywall swells and becomes completely unusable.
- Does not withstand heavy loads. You can easily hang a shelf on a plasterboard wall, but nothing more. You cannot hang a TV bracket or heavy furniture; the structure may fall.
Fastening gypsum boards with glue
After completing all the preparatory work, marking and laying the necessary communications, the adhesive composition is diluted according to the instructions. This is the case if you do not use ready-made glue, usually supplied in tubes for a glue gun.
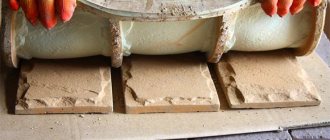
For reliable fixation, it is not at all necessary to cover the entire back surface of the drywall with the composition: this will only lead to unnecessary costs. The glue is applied in separate cakes, placing them in a checkerboard pattern, and always in a strip along the entire perimeter of the sheet. The second option is a grid of strips placed at a distance of 10–15 cm from each other.
The gypsum board is pressed tightly against the wall surface. To distribute the glue evenly, you can use a wide rule or a board: carefully move it over the area to be glued several times.
The setting time of the solution is about 30 minutes. During this period, you need to check the position of the fixed fragment and make the necessary adjustments. In the future, this will no longer be possible.
The adhesive composition can be applied directly to the wall surface. Some masters claim that this is much more convenient.
The adhesive installation method is described in more detail here.
Foam mounting
It is carried out in exactly the same way as with the adhesive composition.
An important point: the foam expands when hardening, so the sheet is fixed in the desired position for at least an hour. This can be done in two ways:
- using various supports;
- securing the gypsum board with dowel nails and placing strips of foam foam under its surface as shock absorbers.
USEFUL INFORMATION: What and how to cut drywall?
Mounting on polyurethane foam with void filling
Drywall can be attached to a curved wall using corrective underlays. But the presence of a void between it and the base surface is undesirable. To ensure secure fastening, it is better to fill this cavity with polyurethane foam. The algorithm of actions in this case will be as follows:
- Using markings, we position the sheet of drywall in the desired position.
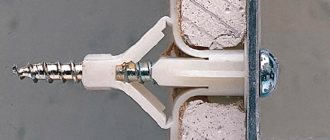
- We make 10–12 holes in it, spaced evenly over the entire area. In this case, the drill marks the recesses for the dowels in the wall.
- We remove the gypsum boards, expand and deepen the holes in the ceiling to the required size, and then hammer in plastic dowels.
- On the back side of the sheet we glue strips of foam rubber or penofol of the required thickness as shock absorbers.
- We carefully attach the gypsum board to the wall with screws with a wide head. Another option is to use washers with regular screws. By releasing or twisting them, we align the fragment in the required plane, controlling its position using a level and using the created markings.
- We make the required number of holes in the drywall intended for injection of foam. We place them between the screws, the diameter of the holes is 7–8 mm.
- In order not to overdo it with foam, it is better to pump it using a special gun, adjusting it so that when pressed, an amount is squeezed out that is enough for a circle with a diameter of 120–150 mm.
After the foam has dried, you can unscrew the screws securing the gypsum board. But professionals advise simply recessing them into its surface by 1–2 mm.
Wooden wall mounting
The easiest possible option. The gypsum board is secured with wood screws. To screw them in, it is recommended to use a screwdriver: this way the drywall crumbles less, and there is less chance of pushing it through if you correctly set the required force on the tool.
The position of the fixed sheet is corrected by loosening or tightening the screws. If there are no chamfers on the plasterboard, they are made using a painting knife or an edge plane.
After covering the wall, the standard treatment of the plasterboard surface is carried out: reinforcing the seams, sealing them and the holes for the screw heads with putty, grouting and priming the entire area of the new wall. After the coating has dried, the base is ready for further finishing.
Ask all questions about the installation process in the comments - a finishing expert will answer them.