One type of finishing work is plastering the surfaces of walls and ceilings. A process necessary to correct defects and make the base even and smooth.
Depending on the composition of the oil-adhesive putty, the use of the mixture involves a difference in base materials and division into groups. There are special, universal compositions designed to perform interior and exterior finishing work.
Main components
The main binder of the material is drying oil . The fillers are:
- Glue.
- Chalk or lime.
- Plasticizers for better adhesion and application.
- Dryers for quick drying of oils.
- Water.
Manufacturers strive to improve the characteristics of the substance, so everyone adds additives or additives at their own discretion. It also cannot do without thickeners and pigments. For these reasons, the color of oil putty may vary depending on the manufacturer.
Plasticizers and modifiers in the composition slightly change the technical characteristics depending on the quantity. Therefore, they are added to impart certain functional values to materials. Thanks to this, you can find compounds on the market that are considered fireproof or ultra-strong. There is putty that is specially white so that it does not need to be painted.
Homemade putty with your own hands
The cost of some industrial compounds may be prohibitive, especially when a large amount of work is planned. Wood putty is easy to make yourself. Homemade mixtures are not inferior in quality to products from various global manufacturers.
There are several simple recipes that are easy to implement on your own. In this case, the solutions are strong, reliable, and production costs are minimal.
A mixture of PVA and chalk
The solution is made according to the following sequence:
- The chalk needs to be crushed, then add PVA glue and stir until a homogeneous consistency is obtained (like sour cream).
- Add a little wood dust or sawdust. This mixture reliably seals cracks with pits.
After stirring, the solution is ready for use. Drying of the treated surfaces usually takes no more than 24 hours.
PVA glue is a good binder for putty
A mixture of chalk and water-soluble varnish
To prepare this composition you need to take chalk, as well as water-soluble acrylic varnish. Recipe:
- The chalk is ground and mixed with varnish until a paste-like mass is obtained.
- Wood dust and sawdust are used as fillers.
- Everything gets mixed up.
In order for the solution to gain the required strength, it is better to prepare it in the evening and start work in the morning. It is necessary to let the mixture brew for 6 to 8 hours. If the mass becomes too thick, it is diluted with water to the desired state. The solution dries within 12 hours.
Acrylic varnish will make the mixture elastic
A mixture of oil and drying oil
The solution is prepared according to the following recipe:
- Pumice powder (30 g) is mixed with linseed oil (280 g).
- Add water in the amount of 300 grams.
- The remaining components are gradually added - turpentine oil (60 g), 18% ammonia solution (18 g), casein (20 g), gelatin (20 g), borax (12 g).
- The solution must be heated in a water bath (up to 9 ºC).
- The mixture is stirred well until it becomes homogeneous.
The composition will be ready when the mass takes on a paste-like consistency. The prepared mixture of oil and drying oil can maintain its performance characteristics for 60 minutes.
Thanks to the presence of drying oil, wood putty is moisture resistant
A mixture of sawdust, chalk and nitro varnish
The combination of sawdust, nitro varnish with the inclusion of mala also allows you to get a good wood putty. But it is worth considering that only the façade parts of buildings and non-residential premises need to be treated with this solution. It's all about the specific smell that comes even from a long-dried surface.
The reason for the “aroma” lies in the nitro varnish. Therefore, it is impossible to prepare an odorless solution at home. The mixture is prepared according to the already familiar recipe until the mass takes on a creamy consistency.
Fine sawdust is an indispensable filler for wood mortar.
Specifications
The material is intended for interior finishing work - leveling before painting. Work can be carried out on concrete or wooden surfaces. The putty can be painted with enamel, water-dispersion and oil paints.
Oil-adhesive putty has the following technical characteristics:
- Consistency – paste-like mass with a homogeneous consistency. Foreign impurities are excluded.
- Consumption. For single-layer application with a thickness of no more than 1 mm - 0.8-1.5 kg per square meter. m.
- Dry residue. No higher than 70–80%.
- Drying time: Before applying the next layer – no more than 4 hours;
- Drying of the topcoat takes no more than a day.
Note! Each manufacturer can produce material according to technical regulations for a specific production. This leads to variability in the characteristics of products from different manufacturers.
Cons of oil putty
- Insufficiently high strength and resistance to intense external factors.
- Exposure to moisture.
- Short storage period. During prolonged storage, the composition loses its plastic properties, and at low temperatures it becomes unsuitable for further use.
- Insufficient compatibility of oil putty with other base coatings.
- Tiles and wooden panels cannot be glued to this putty.
- It is not used for finishing facades, since the substance is destroyed at temperatures below 0°C, as well as under the influence of strong wind and precipitation.
Advantages and disadvantages of the material
Based on their characteristics, it is possible to highlight the advantages and disadvantages of the material when used on construction sites. They should be used to determine where the use of adhesive putty will be relevant and will not cause harm.
Advantages of the composition:
- Easy to use. Most putties must be prepared before use. But the oil-adhesive leveling composition is sold ready-made, and it does not need to be mixed before applying to the surface.
- Relatively low cost. Pricing will please the customer. Moderate pricing for the composition allows it to be used over a large area of finishing work.
- High adhesion. This applies to all types of surfaces.
- Low consumption. It is about 1 kilogram per square meter.
- High plasticity. This makes the application process easier.
- Dries quickly. This allows you to speed up the pace of work, since technological breaks between finishing stages are reduced.
- Durability. The oil finish has a long service life.
- Environmentally friendly. The composition contains no harmful impurities.
The finishing material has enough advantages, but there are also disadvantages. They limit the use of oil putty when carrying out exterior finishing work, as well as for interior finishing of rooms with high levels of humidity. The material doesn’t like the mechanical impact either.
Flaws:
- Low resistance to mechanical stress.
- Does not tolerate moisture well.
- Short shelf life.
- Poor compatibility with other materials.
The material is made on the basis of drying oil, and this dictates its use only in cases where the finishing will be done with oil-based materials. Oil-based leveling base does not interact well with other materials. This is its main disadvantage.
With environmental friendliness and hygiene, not everything is simple either. Some manufacturers save money and use technical drying oil to add to putty . This drying oil has some toxicity, albeit minor. You can get rid of it by normal ventilation of the room. But this is not always possible due to weather conditions. There have been no cases of poisoning from this type of finishing coating.
Remember! In winter or in rainy weather, you should not ventilate the room with drying oil-adhesive putty, as it is afraid of moisture.
The shelf life also plays a role in the application of the coating. Over a long period of storage, the material will lose its main advantage - plasticity during application. When stored in an environment with a negative temperature, the material is unsuitable for work - this is also an important feature of adhesive putty.
Review of manufacturers
The putties on the market are manufactured by domestic enterprises. They are distinguished by their low price (less than 100 rubles/kg) and adhere well to different types of surfaces. Among the common brands :
- Olecolor from the Voronezh company ABC Farben is a composition containing drying oil and PVA glue. Suitable for various types of surfaces, including wood. When dry, it forms a matte surface that is resistant to dry abrasion.
- “Rainbow Magic” - adheres to walls made of different materials, provided that they have not been treated with other putties. It does not contain solvents and is easy to sand. Plastic, fills cracks.
- “Lakra” - used for leveling plastered walls. Also suitable for asbestos cement and aerated concrete blocks. It can be stored for only six months and has a high consumption - 3 kg/m² for a layer of 1 mm.
- “Expert” from LKP “Descartes” - used for working with wood and some materials based on it. Also suitable for sealing cracks in brick or concrete walls.
Cost of oil-adhesive putty
Dilution and application of putty
Note ! Oil-adhesive putty is demanding on the indoor microclimate during application. According to the instructions, work with the material should be carried out at a temperature not lower than +10 – +15 degrees. The optimal application temperature is about +20 degrees. Humidity should be at 70%.
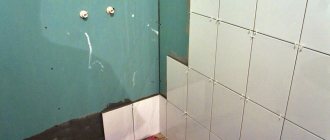
Preparing the surface for work
The surface for work should be prepared. This must be done before diluting the putty, otherwise there is a risk of the material drying out in the container. Surface preparation involves cleaning walls and ceilings from grease, dirt and dust . This will improve the adhesion of the material to the surface. The old coating also needs to be removed, as well as peeling parts of the wall, such as concrete chips, for example.
After cleaning the surface, a primer will be required. As additional protective measures, you can treat the surface with anti-fungal materials. The surfaces are allowed to dry after priming and only then they begin to prepare the putty for work.
Required Tools
To carry out the work you will need a tool. It's simple. In his absence, there will be a trip to the store, but you won’t have to pay a large amount for it. List of tools :
- Spatulas. It will take several. They should differ in shape and size. There are spatulas for mixing the material and for applying it. You will need one for mixing, and several for application. The latter should differ in size. To pre-apply the putty to the wall, you will need a wide spatula. But for straightening and processing hard-to-reach places, you should use a narrow tool.
- Mixer. It is needed to dilute the coating material. In its absence, you can use a hammer drill or a drill with various attachments.
- Sandpaper. Needed to level the surface after work. You can use a special grater.
- Capacity. It is necessary to dilute the material in it. There must be a suitable volume so that the putty is enough for work, but at the same time it does not have time to dry. You can use buckets or troughs.
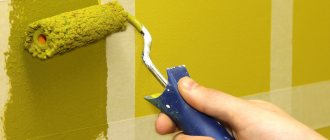
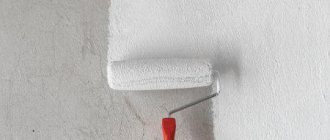
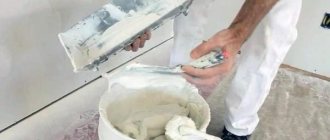
Application of the composition
If the putty is a paste that does not need to be diluted with water, it must be poured into a container and stirred thoroughly . If the mixture is dry, then dilution with water should be done in the proportion specified by the manufacturer. Stirring is required for 10–15 minutes in both cases.
Apply the material to the surface using a spatula. The layer thickness should not exceed 2.5 mm. However, on uneven surfaces it is permissible to exceed this parameter.
It is extremely important to observe the temperature conditions during application, which were indicated above. It is advisable to apply the second layer after a day, although manufacturers allow it to be applied after 4 hours. However, it is advisable to let the first layer settle and release excess moisture.
Sanding is carried out 12 hours after the finishing layer has completely dried. Therefore, this work can be done 36 hours after application.
How to choose the right putty
When choosing building materials in stores, consumers expect high quality of the goods offered. That is, the product must meet certain requirements, otherwise the desired result will not be achieved. In particular, mixtures must meet the following requirements:
- the composition must have a homogeneous structure;
- the finished coating must be submitted to the grinding operation;
- high adhesion to surfaces is required;
- no impurities in the putty;
- optimal drying time;
- ease of work;
- for a thin layer, only a dry mixture of fine fraction is suitable;
- environmental friendliness;
- the material is selected based on the type of finishing - interior or facade work;
- Only a breathable composition is suitable specifically for wood material.
There are no strict standards regarding the choice of putty color; here you should focus on the design project. In some cases, a tinted wooden surface does not need to be painted - it is enough to cover it with a clear varnish.
High quality material is not the only selection criterion. The specific type of finish matters – basic or finishing. The purpose of using mixtures also plays an important role. This is not only restoration; the compositions can cope with various defects, as well as prepare the surface for painting.
An important parameter for choosing a putty composition is resistance to heating, cooling and high humidity.
Scope of application of finishing material
The material in question is interesting for use in construction due to its composition. It has become widespread in the domestic market. After all, it can be applied not only to concrete or plaster, but also to a wooden surface.
Main areas of use:
- Leveling the surface before painting or wallpapering.
- Filling cracks or scratches.
- Restoration work of wooden window frames or doors.
The material lends itself well to sanding, and this allows it to be given any shape after drying. Therefore, designers often recommend material for decorative stucco.
This putty is recommended by experts for use due to its availability, environmentally friendly composition and durability. Manufacturers in most cases produce a ready-made mass that does not need to be diluted with water, but can be immediately applied to any surface after mixing. The only thing that limits the use of this material is the high humidity of the room being finished.
How long does wood putty take to dry?
Repair work may take longer due to waiting for finishing materials - paint, primer, putty, varnish - to dry. Knowing the duration is important for knowing when to start the next step. Perhaps the product or coating is already ready for further use.
It is worth noting that, regardless of the type of wood putty, drying takes at least a day. In some cases the process takes less time. The specific drying time of the putty after treating a wooden surface depends on a number of factors:
- Layer thickness - the thicker it is, the longer the composition will dry.
- Type of mixture - acrylic putties require less time, unlike solutions containing PVA glue. The latter require at least 24 hours.
- Humidity of the room or environment - the optimal humidity level for drying putty is 50-70%. If the air is too dry, the top layer will set faster, and the resulting crust will interfere with the bottom layer. In severe humidity (rain, snow), the putty will not dry.
- Temperature regime – the optimal range is strictly from +10 °C to +40 °C.
Attention!
Direct rays of the sun, as well as strong gusts of wind, negatively affect the drying of the putty.
Any wood putty dries for at least 24 hours
What putty to use to fill cracks
Minor cracks less than 3 mm wide are repaired using a standard mixture of the desired color or a white compound. When the surface is dry, it is primed with a product of a suitable tone.
Using acrylic putties, gaps measuring 3-4 mm can be successfully corrected. Neither cracks nor chips deeper than 4 mm can be repaired with such material, as there is a risk of cracking.
Solvent-based putties are suitable for eliminating defects no larger than 10 mm and unevenness in heated floors. Narrow cracks are sealed with oil compounds (to which crushed chalk is added). In the case of wide cracks, as well as tile joints, the same oil putty is used, but with the inclusion of wood dust.
A small gap is sealed with putty of a suitable color.
What is important to know
It is worth adding drying oil to the putty so that the finishing gives the best result. Some manufacturers impose restrictions on the possible number of additives. But most often they choose the option of up to 5 percent of additional components of the total mass. You don’t need to add drying oil, in which case it is recommended to use it as a primer. Drying oil is applied in a thin layer to the wood surface when its pre-treatment is completed.