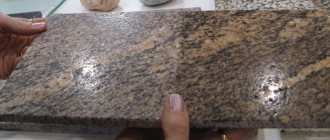
Artificial acrylic stone is a very durable and resistant material that is increasingly used in our homes. Beautiful countertops, window sills and sinks are made from it. But even such a durable material is subject to wear and tear in the form of abrasions, scratches and chips.
The service of polishing artificial stone may also be required after several years of operation of the object to give the surface a perfectly smooth state and eliminate dust particles that inevitably accumulate in the micropores of the stone.
To restore its original and attractive appearance, you need to know how to polish an artificial stone countertop at home.
How to polish an artificial countertop can be determined after diagnosing its condition. The deeper the damage, the larger the abrasive for artificial stone should be.
How to polish an artificial stone countertop
Polishing an artificial stone countertop and calling a specialist to your home is not a cheap procedure. Kitchen surfaces are quite often subject to scratches, which spoil the appearance of the entire room and the mood of the housewife.
An acrylic tabletop is good because it is almost impossible to ruin it, but cases vary. And therefore, if you have a master with golden hands in your family, restoring the original appearance of the surface is quite possible.
Polishing is carried out “wet”; the surface must be moistened to remove dust and reduce the heating temperature from friction of the abrasive.
With a little skill, you can sand and polish it at home. First you need to decide what tools and materials you will need. By following the necessary technological process and adhering to the recommendations of specialists, you will return the countertop to a smooth and beautiful surface.
Products made from quartz agglomerate are very difficult to grind. It is almost impossible to do it at home. Therefore, such work should be trusted to professionals.
Who to entrust polishing to?
Polishing an artificial stone countertop can be done by a professional. This can usually be found at the same company that polishes marble countertops.
Or you can do all the work yourself. In the second case, you will save on the cost of services from 2 thousand rubles, but for the work you will need a special tool - a grinding machine with abrasive discs of different grain sizes and polishing paste or polish.
Required Tools
Before starting work, first prepare the tools you will need and approximately calculate the set of consumables.
It is quite possible that it will not be possible to repair the working surface on site; dismantling and removal to a specially equipped workshop will be required.
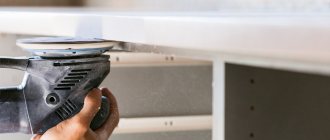
The main operation is grinding. We choose a tool for grinding - an angle grinder, an electric angle grinder, in common parlance we call it an angle grinder. In most cases, we install cutting wheels and cut metal with a grinder. But here we will use it for its original purpose.
Shallow scratches, chips and cracks can be completely restored independently, without contacting a specialist. The main thing is not to delay repairs and immediately respond to even small, barely noticeable damage.
A grinder will be necessary when sanding large areas, for example, completely sanding the entire countertop.
Restoring and processing stone requires accuracy, diligence and a sense of proportion, which comes with experience.
For polishing, grinding wheels should be used, which have different sizes: 115, 125, 150 and 180 mm. Don't make a mistake when choosing your diameter in the store.
Polishing is carried out “wet”; the surface must be moistened to remove dust and reduce the heating temperature from friction of the abrasive.
As an alternative to a grinder, you can use a regular electric drill. Grinding accessories are also sold for the drill, both individually and in whole sets of various configurations. But it is more difficult to maintain a grinding plane with a drill when working with large areas. However, in small areas, spot grinding with a drill can be done quite well.
Immediately before grinding, it is necessary to clean the surface of the countertop, since dirt causes the abrasive stone to deteriorate faster, which is why the polishing process will take longer and cost longer.
Depending on the type of damage, you may need wheel, whisk, or cup brushes. Abrasive wheels are hard or soft with abrasive from P120 (coarse) to P1500 (fine grinding). For subsequent polishing after grinding, diamond wheels, felt wheels and cotton wheels are used. Final polishing (to a mirror) is carried out with the addition of polishing wax or GOI paste.
You should work carefully, without pressing hard: try to grind with even pressure at all points.
If you have no grinding experience, you should consider water cooling the stone using a regular spray bottle of water.
As a finishing treatment, you need to use a special polyester composition, having previously degreased the surface.
Features of use
When working, you should always remember the speed. For example, if you alternately use AGShK 50 and AGShK 30, then in the first case the speed should always be higher, and in the second lower. To achieve the most mirror-like surface possible, step-by-step processing is necessary. You need to start with the largest grain and end with the smallest. It is also important to regulate the water supply. When working with a coarse grain disc, the water supply must be greater than when working with a fine grain disc. If the disc is intended for wet processing, it is strictly not recommended to use it dry. If you want to achieve a flawless appearance, finally treat the surface with a felt circle with diamond paste applied to it.
Don't know whether you need a 100 mm diamond flexible grinding wheel or a wheel of a different diameter? We recommend seeking advice from specialists. Errors in selection can lead to rapid failure of the diamond blade and poor quality of processing.
How to choose polishes
By gradually increasing the power, we get the desired effect: the paste and remaining water will be distributed over the countertop, filling in minor defects and making it uniform.
When choosing a polishing agent for artificial stone countertops, consider several parameters:
- The color of your countertop, the palette of artificial stone is very diverse and when you come to the store, you should know what color you need.
- The natural color of the stone implies a colorless polish.
- Consider what kind of surface you want as a result: matte, glossy or semi-matte.
A matte countertop has less glare, small defects are less noticeable and is easier to maintain.Semi-matte - implies a bright color with a slight shine, it does not require maintenance.
The gloss is a chic mirror surface, but all stains and abrasions are immediately visible, which needs to be polished regularly.
The more glossy the surface is expected after polishing, the finer the abrasive used.
Tabletop polishing process
Polishing the tabletop is carried out according to the principle from most to least. It is on this principle that an abrasive is selected for this type of work. In the first stages, coarse abrasive stone materials are used and reduced as needed.
Each stage of surface treatment lasts from ten minutes to one and a half hours. The time depends on the wear of the countertop, the number and depth of scratches. In addition, the time may vary depending on the type of surface required, and it can be matte, glossy or semi-matte. Accordingly, the final version of the abrasive is selected based on the type of surface required. The more glossy the surface is expected after polishing, the finer the abrasive used. For maximum gloss, use abrasive with numbers 1200-1500.
Kitchen countertops are rarely glossy, as they are often subject to mechanical stress from cutlery, knives, pots, plates and other kitchen utensils. As a result of such impacts, the glossy surface would quickly become covered with abrasions and scratches.
Matte countertops in light shades (such colors hide small scratches well) are much more practical in this regard, which is why they are more common. To polish a matte countertop, use abrasive number 240-260. For polishing semi-matte countertops, abrasive number 600-800 will be optimal.
Dark semi-matte countertops are also very popular and are considered quite practical.
Seam processing
If your countertop is not made of solid stone, then you need to process the seams and make them invisible. The main stages of seam repair:
- Clean and wash the seams with soapy water.
- Sand the seam with abrasive paper folded in half, a scraper or scraper and remove the dust.
- When working at home, it is better to choose a ready-made grout composition, focusing on the color of your countertop.
- Fill the joint with grout using a special gun or rubber spatula.
- Avoid getting the mixture on the stone; if necessary, remove excess with a damp cloth. Wait for it to dry completely according to the instructions on the package and you can start sanding.
One of the key advantages of artificial stone is the possibility of restoration: with the necessary skills and tools, you can eliminate even deep cracks and chips, and shallow scratches can be removed even easier by polishing.
Repair of large cracks
Restoration of kitchen countertops that have defects such as chips requires “patches” made from the same material as the countertop itself. After cutting out the problem area, a fragment of stone treated with glue is placed into the resulting niche. Then this part is polished and does not stand out from the general background.
Deep cracks and splits in decorative stone are repaired with pieces of a suitable material, glued in and then polished.
Applying glue into the cut slot Apply glue to the inserted fragment after hardening, cut off the excess Grind the surface
Selecting the material is quite difficult, since the color range has a huge difference, but it is approximately possible, and even after polishing, even a slightly different glued piece will not be very noticeable, since the stone, although artificial, does not have a uniform color.
Special stores sell repair kits with different colored crumbs and fillers and two-component colorless glue. Such restoration of a decorative tabletop is quite complex and requires certain skills.
Grinding steps
Assess the condition of the countertop surface:
- If there are chips, then it is necessary to grind to the base of the largest one, usually 3-4 mm.
- Large scratches are sanded down to 1-2 mm; if there are only small abrasions, the sanding steps can be shortened and the surface can simply be cleaned a little. The larger and deeper the scratches, the more sanding steps will need to be completed.
Gradual grinding of the surface of the tabletop with changing abrasive wheels is necessary to prepare for the next stage, namely polishing.
Important! When working with artificial stone, grind the entire surface as a whole, and not separately problem areas, otherwise you will not achieve the integrity of color and texture.
Each subsequent grit softens the surface, replacing large scratches with much smaller ones.
Grinding is carried out in several stages. Before starting the first stage, thoroughly rinse the surface from grease and dirt with a detergent, otherwise the grease will get into the pores of the stone and the polishing will turn out to be of poor quality.
During use, countertops acquire a certain layer of dirt and grease, which must be removed using special cleaning products.
Main grinding steps:
- Start sanding with a coarser abrasive, as if rubbing out the largest scratches and chips.
- When grinding, it is necessary to control the pressure on the stone so that notches do not form.
- Do not forget to wet the surface with water to make the abrasive glide over the stone more easily.
- Change the abrasive fraction to a finer one and sand the surface several times with decreasing fraction, usually from three to seven stages.
Each operation can take five to ten minutes or an hour and a half. It all depends on how deep the scratches and chips are on the product!
Upon completion of all stages of grinding, you should have a rough matte surface of the stone with small abrasions.
Among other things, artificial stone polishing is divided according to the type of surface: matte, glossy and semi-matte.
Restoration of chipboard facades
The front part of furniture made of chipboard can rarely be restored. Similar procedures for filling scratches, cracks and dents with furniture wax turn out to be ineffective. Because light hits the surface differently, it is impossible to make defects less noticeable. Usually they resort not to the restoration of damaged chipboard facades, but to the actual renovation of the entire facade part of the furniture:
- They are covered with wallpaper or covered with artificial leather. To do this, it is recommended to remove the facades and twist the handles - this will make it neater.
- They use photo printing, hand painting and decoupage techniques. The pattern can be applied exactly to the location of the defect, and not over the entire surface of the chipboard facade.
- The facade is decorated with self-adhesive moldings and various overlays. You can find out more about furniture decor here.
- Glue strips of melamine tape of a similar or contrasting shade. If you think through the concept, this disguise of damage can look like a design technique.
Features and stages of polishing
Glossy surfaces for kitchen countertops are very rare. Therefore, in the kitchen, matte countertops are most often used, which are not so susceptible to damage, and the color chosen for such countertops is white or light, which perfectly hides small scratches.
Polishing is a less labor-intensive process that you can do regularly to maintain the appearance of your DIY surface.
The powder must be rubbed in until the appropriate shine appears. You can also use a paste with water-repellent properties.
Product polishing stages:
- Before starting the process, it is necessary to thoroughly wash the tabletop from dust after sanding.
- Lightly moisten the surface of the stone and the polishing sponge with water and apply the polishing compound to the entire countertop using soft circular movements, a thin, uniform film should form.
- Wait until the composition dries a little, is absorbed into the stone, and begin to rub it evenly over the countertop.
- Repeat the procedure if necessary, but usually one or two rubs are enough.
As a result, you will get a smooth, shiny surface.
At the final stage, the marble countertop can be coated with liquid wax. It will protect the surface from mechanical influences. If you want to enhance the protective properties of the wax, apply a crystallizer, which, among other things, provides shine.
Repair method using epoxy putty
Repairing cracks on hard surfaces with two-part epoxy filler can be faster, easier and more reliable than using superglue, especially when repairing wide cracks.
Gather all the necessary tools and supplies:
- denatured alcohol;
- two-component epoxy adhesive;
- several paints that match the base shade and stains on the countertop;
- several wooden ice cream sticks;
- several brushes and brushes;
- sanding discs and a couple of rags and sponges.
If you have a piece of the original countertop material, sand it down with a file and save it for later mixing with the filler. Proceed in the following order:
- Clean and degrease cracks with alcohol solvent.
- Place two drops of epoxy glue and hardener on a disposable surface. Take enough to fill the cracks.
- With a drop of glue, mix paint and/or shavings from the original tabletop material, bringing it to the desired color. Then mix with hardener.
- Apply epoxy glue to the cracks, spreading it with a wooden stick, and leave the filler slightly convex in relation to the tabletop.
- Look at the applied glue. If the color isn't quite right or is too thick to blend into the pattern, add a few drops of paint to match the stains on the countertop. Be patient, don't overdo it. Take a step to the side to get the overall impression.
- Allow the filler to cure according to the manufacturer's instructions.
- Once the filler has completely cured, begin sanding the surface with fine sandpaper.
General recommendations for caring for countertops
Artificial stone is a very durable material, but it requires compliance with certain rules of use that will help maintain its integrity and beauty.
Do not allow hot pots or pans to come into direct contact with the countertop as this may damage the work surface.
To avoid a time-consuming repair process, it is best to prevent scratches, chips and stains.
After removing stains from the countertop, rinse the surface thoroughly with clean water and dry with a soft cloth or paper towel to prevent stains.
Follow the recommendations of specialists for use and care, and it will not disappoint you and will serve for a long time. There are several reasons for the polishing of the surface array to fail:
- Do not place hot pots and pans on the countertop; use special trivets for hot items.
- If liquid gets on the surface, remove it immediately, do not allow the stain to dry, which will then be difficult to remove.
- Do not use powders and pastes with abrasive substances that scratch the surface for cleaning; it is better to use special cleaning products for stone.
- Avoid contact with various acids on the surface of the countertop - a reaction will occur with the polish, the stain will be absorbed into the stone and then grinding will no longer be necessary.
- In case of normal contamination, wash the countertop immediately, do not let it dry. If this happens, soak the stain with soapy water and wash with warm water and ammonia - ten drops per liter of water.
- When cleaning, use only soft cloths and sponges to avoid damaging the coating.
- For minor scratches and obvious marks on the surface, you can get by with a special impregnation that will partially restore the integrity of the stone.
If the shine has decreased, scratches or stains have appeared on hard surfaces after prolonged use, this is NOT a manufacturing defect, but is considered normal wear and tear. The tabletop can be re-sanded and polished.
When making repairs, follow our advice, then the procedure for restoring the beauty of your countertop will not be very tedious. And the stone surface will always delight the owner of the house with its natural beauty and ease of use.
How to properly care
A kitchen made of synthetic stone can last more than 15 years. How beautiful and new it will look after this period depends on how to care for the countertop, sink and other surfaces made of this material.
General rules
To preserve the beauty of artificial stone, you need to adhere to the following general rules:
- Remove all contaminants immediately. This is especially true for greasy marks. Used tea bags, fruit and vegetable peelings should not be placed on a light-colored stone to avoid staining. Spilled drinks should be wiped up immediately. It will be difficult to wash away stubborn dirt.
- Use a cutting board. The reason is indicated in the previous paragraph. This is also necessary to avoid damage. Artificial stone is durable, but it will not withstand a sharp, accidental blow with a knife.
- Maintain temperature. Do not place hot dishes on the countertop without a special stand. This will leave unsightly marks on the surface. It is not recommended to expose stone sinks, both in the kitchen and in the bathroom, to sudden fluctuations in water temperature.
- Use special means. There are compositions developed specifically for acrylic stone. If there are none, you can clean the surface with a soap solution or dishwashing liquid.
- Provide protection. To resist scratches, you can coat the countertop with a protective composition without wax or silicones. Varnish or other wood care products will do.
- Wipe dry . Water and other liquids will leave unsightly marks on the surface of the table, so it is better to wipe everything off at once.
When choosing the color of your future kitchen, you need to take into account that care will depend on it. White artificial stone is easily soiled, dirt is absorbed into it, and marks from hot dishes are noticeable. Black and colored will indicate the slightest dust, scratches, signs of wear.
What can and cannot be washed
The best option for caring for such a countertop is regular washing with a soapy sponge. However, soap is not able to cope with stubborn stains. It’s easy to get confused in the variety of household chemicals.
Therefore, you need to know what means to wash synthetic stone:
- liquids and gels for washing dishes;
- non-abrasive chlorine cleaning pastes;
- fat-dissolving non-aggressive kitchen products.
When using them, you must follow all the manufacturer’s recommendations and not violate the specified exposure periods.
List of products that cannot be used to clean artificial stone:
- metal cleaning preparations;
- aggressive acid and alkaline compounds;
- products containing methylene chloride;
- paint solvents;
- products containing acetone.
In addition, coarse abrasives are prohibited. Cleaning powders with large particles, hard sponges, wire brushes and scourers leave scratches on the surface of the countertop that will have to be removed.
Important! When choosing a cleaning product for acrylic stone countertops, carefully read the composition! Aggressive chemical compounds can damage the surface.
Folk remedies for stubborn stains
Home remedies will help remove stubborn, stubborn dirt:
- white 5% wine vinegar, diluted twice with water, will remove grease, dirt, water stains, and limescale;
- dry mustard powder is suitable for daily washing and degreasing of surfaces;
- lemon juice and citric acid are used to clean the table from traces of rust and limescale, stains from coffee, tea, wine;
- a solution of table vinegar will remove stains from sweet soda, limescale and rust;
- a paste of baking soda and water will degrease and disinfect the table, lighten it and gently polish it;
- Toothpaste will remove small stubborn stains, grease and dirt.
Before using any folk remedy, you should test it on a small and inconspicuous area. The material may behave differently depending on the color, resin used, adhesive and other factors.
Vinegar and citric acid should not be applied and left on for a while. Acids are only suitable for wiping the stone and then washing it with clean water.
A few words about polishing
Even with impeccable care for an artificial stone countertop, it will fade over time, lose its glossy shine, and become rough and matte. This is natural wear and tear of the material. At the same time, the strength is maintained and the table performs all its functions.
To restore beauty and extend the life of the kitchen, artificial stone needs to be polished periodically.
Polishing is carried out using special pastes. These products contain abrasives, but without large and coarse particles. The composition is applied to the surface of the stone and rubbed in with soft circular movements. After this, the material returns to its gloss, shine, smoothness and original appearance.
Basic operating rules
In order for a quartz countertop to last as long as possible, you need to remember all the factors that can quickly destroy the integrity of the surface. Therefore, already when assembling the kitchen set, it is necessary to pay more attention to the processing of the ends next to the stove and sink, and all joints.
For high-quality installation, special protective strips are used, which are mounted on the countertop, especially where the surface will be subject to heavy loads and impacts.
As a preventative measure to increase the life of the countertop, you need to follow simple rules. There is no need to use the surface as a cutting board for cutting vegetables, meat and bread. No matter how durable this surface is, traces from the impact of a sharp knife, especially a ceramic one, will certainly appear, sooner or later. There is no need to allow the surface to come into contact with any dyes or objects. Also, hot surfaces of pots and kettles have a destructive effect when they come into contact with the countertop. Therefore, you should use special hot trays, and not place a pan that has just been removed from the stove directly on the surface of the quartz countertop.
These simple rules will help keep the work surface of the countertop safe and sound for a long time, and the kitchen will look perfect.
But, if the countertop is damaged and needs repair, then, of course, you should call specialists. Experience, special skills and tools are what masters have. It is very difficult to restore a perfect countertop surface on your own.
