If you are wondering how to paint a ceiling with a roller and do it efficiently, evenly and smoothly, then this article is for you. It is necessary to understand that the ceiling is the part of any room that first catches the eye and is always in sight. And it must be flawless. Therefore, before you begin repair work, carefully study how to properly paint the ceiling. But, of course, there is no need to be afraid. Because almost anyone can paint the ceiling. You just need to follow some recommendations from experts. It is important to prepare the necessary building materials and tools.
What you first need to pay attention to is the choice of paint, roller, brush, paint tray or tray.
Trick #1: roller
Refusal of a brush in favor of a roller is the very first trick that brings you closer to ideal painting of the ceiling surface, since this type of tool has the following distinctive advantages:
Main advantages
- Greater coverage of the processed plane . A wide roller covers a much larger area with paint in one roll than can be done with a brush. Thus, the effort and time required for facing work are saved;
- Reduces the likelihood of streaks or unevenly colored areas . Here, however, a lot still depends on the chosen fur coat, which I will tell you about in the next trick;
- The ability to do without a stepladder or scaffolding . Buy a tool with a telescopic retractable handle and forget about “indoor climbing”;
- Replaceable consumables . A used fur coat can be easily replaced, and the handle can be used as before, which allows you to spend your family budget more economically.
- Low consumption of paints and varnishes . A layer of paint extruded from a roller coating is applied thinly and evenly to the ceiling. This factor also helps protect your family budget.
Relative minus
The only negative thing is that it is inconvenient to use a regular roller to handle hard-to-reach places .
But, firstly, in this case we are considering the ceiling, and it is, as a rule, a flat, smooth plane. And secondly, in case of urgent need, it will be enough to simply buy a corner model, with which you can paint over even very narrow areas.
Coating the ceiling with water-based emulsion
The simplest option is to use water-based paint. Of course, such material will be more expensive than lime or chalk, but its covering ability is much greater.
Water-based paint
Water-based paint:
- does not emit odor;
- easy to apply;
- sold in ready-to-eat form;
- traditionally used in damp areas.
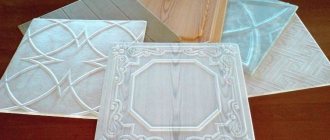
Trick #2: fur coat
The fur coat, that is, the working part of the roller, can be made of various materials, which I will briefly analyze:
- Natural fur . An ideal option for water-dispersed compositions, which today are most popular when performing interior finishing work. We will talk about them more in the appropriate section. As an example, I propose to consider a Russian product:
| Parameter | Description |
| Length | 20 cm |
| Section | 4.8 cm |
| Weight | 80 g |
| Price | 84 rubles |
Sample of the "SIBRTECH" model
- Faux fur , similar in tactile sensations to terry cloth. Works best with alkyd enamels. Here, as an example, I will give the Swedish brand “ANZA ELITE”:
| Parameter | Description |
| Length | 25 cm |
| Section | 3.8 cm |
| Pile | 0.5 cm |
| Weight | 70 g |
| Price | 261 rubles |
- Foam rubber . The low price of such “consumables” may tempt you, but I urge you not to succumb to temptation, since air accumulates inside such material, which, during the process of applying paint, forms bubbles in it, spoiling all your work.
You can find many other types of fur coats for rollers on sale, but I want to move on directly to the trick itself. And it lies in the fact that the best result will be when using products with reinforced pile , which practically does not deform during operation, thereby guaranteeing the creation of a uniform finishing layer.
Although such samples are somewhat more expensive, they fully pay for themselves during use with high-quality work and durability.
Advantages and disadvantages of painting the ceiling with a roller
Painting the ceiling with a roller is considered a convenient and economical finishing method.
Advantages
- paint consumption is less than when using alternative options (brush or spray);
- thanks to the long handle of the tool, close visual control of the process is achieved;
- the material is applied in an even layer, some errors can be corrected immediately;
- there are no splashes or drops of paint during operation;
- the work is progressing quickly, the condition of the surface is not satisfactory;
- There are a large number of models on sale, designed to work with different types of paint.
Flaws
- I can’t paint the corners, I have to finish the job with a brush;
- it is necessary to select the size and type of roller coating for a specific type of paint;
- you have to use additional devices (cuvettes, trays or shading boards).
Types of rollers for painting ceilings
The disadvantages of the tool are considered insignificant; the demand for it in stores is stable and constantly increasing.
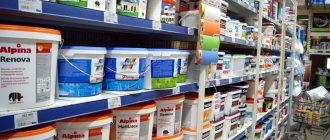
Trick #3: choosing paint
Previously, the most popular was whitewashing, which was a very short-lived way of finishing the ceiling surface, as a result of which over time it was successfully replaced by the more practical and even beautiful water-based paint.
Yes, it was emulsions that were able to “put on the shoulder” chalk solutions, since, unlike their oil and alkyd counterparts, they have such qualities as:
- Environmental Safety . The solvent medium here is ordinary water, which is also released during the paint hardening process, which, unlike solvents found in oil and alkyd compositions, does not pose any danger to the human body;
- High moisture resistance . The water-based emulsion perfectly withstands even the dampness typical of kitchens and bathrooms;
In rooms with high humidity and temperature changes, I recommend using a type of emulsion such as acrylic paints. Acrylates, which remain after the water evaporates, form a reliable polymer coating that can easily withstand moisture, heat, cold and even mechanical stress for a long time.
- The ability to create any shade by mixing different colors . Yes, of course, we shouldn’t forget that light colors visually raise the ceiling, while dark colors lower it. That is, you shouldn’t get too carried away in this area, but you can still move away from pure whiteness for a change, and with emulsions this will not be difficult at all;
To obtain the desired shade, I recommend using special tinting equipment. Although this will cause additional costs, you will get exactly the color spectrum you want and can repeat it if necessary. When mixing with your own hands, it is almost impossible to recreate the color once obtained.
Tinting water-based paint using special equipment: quickly and reliably
- Richness and durability . Does not peel, does not crack, does not fade.
The tricks for choosing paint don’t end there.
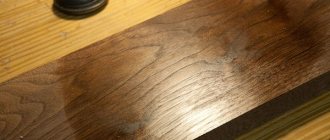
There is another important aspect that lies between matte and glossy finish:
- Glossy looks more presentable, giving the ceiling special beauty and volume. But it is also much more difficult to take care of it, since it gets dirty quickly and needs regular care;
The gloss is undoubtedly beautiful
- Matte, although not particularly pompous, is not so easily soiled and hides surface defects well.
Matte shade is more practical
Selection of materials and tools
Any paint can be used for the job - acrylic or latex. But to paint the ceiling it is better to use water-based enamel. Working with “water emulsion” is a real pleasure. It lays easily and evenly on the surface, has almost no odor, can be washed and washed off if necessary with plain water. It also has a matte finish, which is important for such a difficult area to paint as the ceiling. On a matte surface, blemishes and irregularities are less visible. Choose fresh paint; old paint may have an uneven consistency, which will have a bad effect on the painting process. After choosing materials, we select tools. These include:
- paint brush up to five centimeters wide;
- masking tape or tape;
- bath - cuvette or tray;
- lever;
- roller up to 30-50 centimeters wide.
Trick #3: surface preparation
Very often people underestimate the importance of this stage and try to cheat a little by skipping one or another point. You don't have to do that. In this case, the trick is that you need to do everything exactly:
Removing Old Finish
The first step is to thoroughly remove the old finish.
Depending on what you previously had on the ceiling, use one of the following methods:
- Whitewashing . Here it will be enough to wash off the entire chalk coating with plenty of water. A sponge will do a good job of this;
Removing whitewash with a sponge
- Wallpaper . First, we moisten it generously, then open the windows and doors to create a draft, as a result of which the paper sheets themselves will begin to peel off. We consolidate success with a spatula;
Removing wallpaper from the ceiling
- Dye . In this case, a spatula is also most often used. But if the layer does not yield, then you can use chemical reagents that turn the lining into a mushy substance, an angle grinder with a nozzle in the form of a metal brush, or a hair dryer.
Mechanical method of removing old paint from the ceiling
But that's not all you need to do before painting the ceiling with a roller. Let's move on.
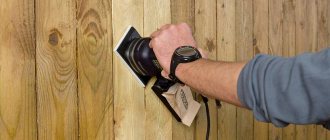
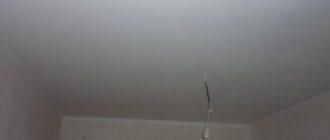
Alignment
Of course, if the ceiling surface has defects, then this is quite bad. As a result, ordinary painting of the ceiling with a roller will turn into a real major renovation. But it will be even worse if you completely ignore this aspect, since the applied paint will only emphasize and highlight all the irregularities.
It is worth highlighting two main alignment methods that are used today:
- "Wet method" . The surface is leveled by applying a plaster or putty layer. This is difficult and time-consuming, but it allows you to practically not “lower” the ceilings, and can be applied locally;
Plastering the ceiling
In order to check the quality of the finished result after the plaster has hardened, direct a light source along the ceiling. As a result, any flaws will cast shadows that will be easy to notice. They are removed by grinding.
This is how you can find even barely noticeable flaws
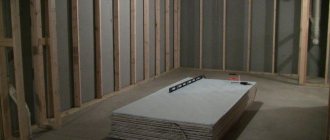
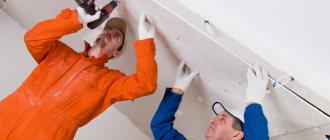
- "Dry method" . This option, on the one hand, is more radical, on the other hand, it’s even easier to implement, and I personally like it much more than the one described above, since with the right approach it allows you to solve many problems and change the room beyond recognition. We are talking about drywall, which is attached to a pre-installed frame. Yes, the ceiling will drop a few centimeters, which is not very pleasant for our already small rooms, but you will get:
- A perfectly flat and smooth surface that definitely won’t need to be checked with a flashlight;
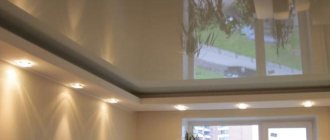
- The ability to implement multi-level, stunningly beautiful designs with built-in lighting;
- A place for masking communications , as well as placing insulating and soundproofing materials. All this easily fits in the cells of the frame.
Leveling the ceiling using gypsum plasterboard
Primer
And now you have removed the old finish and even leveled the ceiling. They looked at it and quietly said to themselves: “Yes, you can paint it!” No no and one more time no! This is a very common mistake: everyone wants to save time and money on an incomprehensible transparent solution that “does nothing anyway.”
In fact, the primer does a lot and abandoning it will most likely lead to completely opposite consequences.
Here's a look at the tasks it performs:
- Increased adhesion . During the priming process, the ceiling is covered with a thin polymer layer, which perfectly adheres to both the concrete surface and the paint that is subsequently applied;
- Reduce the amount of paint used . Polymers close the pores of the treated base, due to which the solution is not so intensely absorbed. And this also protects drywall from getting wet and premature destruction.
If you add white dye to the primer, you will also get an excellent neutral background for any emulsion. This will allow it to be used even more economically.
Features of acrylic paint for walls and ceilings
In construction, acrylic dyes are used for interior and exterior work.
The material is suitable for any ceiling surfaces.
Due to the water-dispersion structure, dyes are diluted with water, which is why the material is characterized by low toxicity.
The base is polymers of esters of acrylic, methacrylic, and cyanoacrylic acids. Such compositions are formed from two or more components. They do not enter into a chemical reaction and do not mix with each other. Substances are evenly distributed one within the other.
The composition creates an elastic, durable, chemically resistant film on the treated surface of walls and ceilings, which evens out and fills all defects.
Thanks to the water structure, the painted elements dry quickly, becoming moisture resistant. This paint is used when painting walls and ceilings in kitchens and bathrooms; it has bactericidal and antifungal properties.
Working with such material does not require high professionalism and is safe. When applied, they do not emit toxic substances due to the absence of organic solvents. The acrylic composition is well tinted with aqueous paste pigments, so it has many colors and shades.
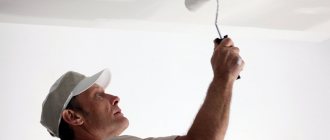
Trick number 4: proper use of the roller
So, how to properly paint a ceiling with a roller? Despite the fact that this process itself is very simple, it requires compliance with a whole lot of little things, if you, of course, want to get the perfect result.
The instructions, which will help you navigate all the intricacies of performing the task in question, look like this and, in fact, consist of only minor tricks:
- After opening the container, the paint must be thoroughly mixed . In some cases, this is also accompanied by the addition of water, which should be indicated on the can itself. To achieve the best result, you can use a drill or screwdriver with a specially designed whisk attachment. Just be sure to remember to set the instrument to low speed, otherwise the contents of the can will scatter throughout the room;
Mixing paint with a screwdriver
- Cover the floor with film or at least newspapers , cover the areas of the ceiling that do not need painting with masking tape, and put safety glasses on your eyes, because all the work will be carried out above you, and nothing else can prevent drops from getting on the mucous membrane;
This accessory will not be superfluous when finishing the ceiling.
- Pour some emulsion from the jar into a special tray with a ribbed wing . This is another important trick, since such containers are very convenient to use when painting various surfaces;
Paint tray with grooved wing
- The roller is dipped only halfway into the paint , after which it is rolled along the ribbed part of the paint cuvette until it is evenly saturated with the emulsion. If the fur coat starts to drip, squeeze it out a little;
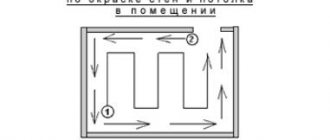
- The ceiling is conventionally divided into segments , which can be covered with a solution in one approach;
- Painting with a roller starts from the window , as this makes it easy to see the uncovered areas;
- So all the areas are filled one after another;
- After the first layer has dried, a second one is applied , thanks to which the boundaries that could appear between the segments are eliminated;
- If after finishing the work you notice stains on the ceiling, then it should be sanded and repainted .
How to paint
And now we start painting. It is necessary to pour some of the paint into the paint bath and thoroughly saturate the roller with it, rubbing the excess along the inclined surface of the tray. The surface of the instrument should be evenly saturated. In order to paint from the floor, we put on an extension handle. It is better to paint early in the morning and not take long breaks in work or work without a smoke break at all, so that the previous layer of paint does not have time to dry before applying the next one. It is better to start work from the door, parallel to the window opening, making parallel movements when applying paint and grabbing about eight centimeters of the previous strip.
As a rule, it is impossible to paint evenly in one layer. Therefore, each subsequent layer must be applied perpendicular to the previous one. Having finished painting one layer, you need to let it dry and only then apply the next layer. Painting should be done overlapping so that the transition is not visible and unpainted areas should not be missed, and the paint should be rubbed until an even, smooth coating is created. Please note that the penultimate layer is applied along the window, that is, parallel to it, and the last one is applied towards the window.
With proper organization of the work process and following simple recommendations from experienced specialists, painting the ceiling will be done correctly and will delight you with its quality and beauty.
How to prepare a roller for painting the ceiling?
First of all, you need to purchase a roller of the required size and degree of roughness. As a rule, wide samples with a fairly high pile are chosen for ceilings.
Before starting work, the tool must be prepared.
To do this you will have to perform the following steps:
- Wrap it with adhesive tape (scotch tape), press it with your palms along the entire length, then remove the tape. This is done in order to remove all loose fluff that will remain on the painted surface in the form of grains.
- Soak the roller in water, rinse it, and then carefully roll it out on a shading board. The purpose of this event is also to remove excess particles from thick pile.
These steps can be shortened a little if you carefully choose a roller when purchasing. They are usually sold in plastic packaging, which will not be opened if the item has not yet been paid for. However, some flaws can be seen through transparent polyethylene.