Table 1 shows the type of priming
for each type of wall (
plaster, concrete or brick
), type of primer (
adhesive or lime
), as well as
the consumption of materials for priming work
.
TABLE 1: PRIMER CONSUMPTION PER 100 M2 OF THE SURFACE OF WALLS AND CEILINGS (IN KG).
| P/P | MATERIAL | TYPE OF PRIMING | ||||||
| GLUE | LIMEMEAL | |||||||
| soap maker | vitriol | |||||||
| FOR PLASTER AND CONCRETE | FOR PLASTER AND CONCRETE | BY BRICK | ||||||
| 1 | 2 | 3 | 4 | 5 | 6 | 7 | 8 | 9 |
| 1 | Primer soap maker | 16,1 | 17,9 | X | X | X | X | X |
| including - soap-making soil concentrate (KMG) | 1,46 | 1,63 | X | X | X | X | X | |
| 2 | Vitriol primer | X | X | 16,7 | 18,4 | X | X | X |
| including - | X | X | X | X | X | X | X | |
| - copper sulfate | X | X | 0,23 | 0,25 | X | X | X | |
| — laundry soap 40% | X | X | 0,27 | 0,30 | X | X | X | |
| - hard animal glue | X | X | 0,23 | 0,25 | X | X | X | |
| - drying oil | X | X | 0,03 | 0,03 | X | X | X | |
| - chalk | X | X | 2,5 | 2,75 | X | X | X | |
| - chalk paste | X | X | 4,15 | 4,57 | X | X | X | |
| 3 | Lime primer | X | X | X | X | 16,4 | 18,0 | 20,0 |
| incl. - quicklime | X | X | X | X | 7,8 | 8,6 | 9,5 | |
Depending on the type of walls and ceilings
Using Table 2 you can select the desired primer. As can be seen from Table 2, each type of wall or ceiling requires a primer in different proportions.
TABLE 2: PRIMER CONSUMPTION PER 100M2 OF WALL AND CEILING SURFACE TO BE TREATED.
| P/P | MATERIAL | TYPE OF PRIMING | |||||||||
| casein | silicate | water-based | |||||||||
| FOR PLASTER AND CONCRETE | BY BRICK | FOR PLASTER AND CONCRETE | BY BRICK | FOR PLASTER AND CONCRETE | |||||||
| walls | ceilings | walls | ceilings | walls | ceilings | walls | ceilings | walls | ceilings | ||
| 1 | 2 | 3 | 4 | 5 | 6 | 7 | 8 | 9 | 10 | 11 | 12 |
| 1 | Casein primer | 21,7 | 18,0 | 10,9 | 12,0 | X | X | X | X | X | X |
| incl. - drying oil | 0,28 | 0,31 | 0,18 | 0,2 | X | X | X | X | X | X | |
| - casein paint | 9,4 | 10,3 | 6,0 | 6,6 | X | X | X | X | X | X | |
| 2 | Silicate primer | X | X | X | X | 21,4 | 23,5 | 14,3 | 15,7 | X | X |
| incl. silicate paint | X | X | X | X | 12,6 | 13,9 | 8,4 | 9,2 | X | X | |
| 3 | Polyvinyl acetate aqueous primer 7% concentration | X | X | X | X | X | X | X | X | 28,6 | 31,5 |
| incl. PVA dispersion 50% | X | X | X | X | X | X | X | X | 4,0 | 4,4 | |
READ ALSO: Sandstone stone: properties and applications
NOTE: After drying
The ceiling is cleaned with fine sandpaper and primed again.
And so on in several layers with each layer drying for at least a day. Until you get a smooth, uniform surface. Painting should be done after the primer has dried
.
Now you can paint the ceilings
lime milk or water-based paint.
When painting
The quality of the prepared bases must meet the following requirements:
- surfaces
when painted with oil, adhesive, and water-based compositions must be smooth, without roughness; - surface cracks
are opened, primed, filled with putty to a depth of
at least 2 mm
and sanded; - shells and irregularities
are primed, puttied and smoothed; - peelings,
mortar drips, traces of processing by trowelling machines have been removed; - the seams between sheets
of dry gypsum plaster and the areas adjacent to them are primed, puttied, sanded flush with the surface or treated with rustication (in accordance with the project), and when wallpapering, they are additionally covered with strips of paper, gauze, etc.; - Before wallpapering the surfaces, painting of the ceilings and other painting work must be completed.
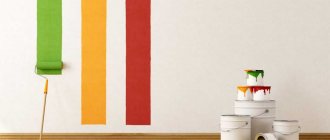
Painting compounds
must be applied in a continuous layer.
The application of each paint composition should begin after the previous one has completely dried
.
It is also necessary to paint in several layers, allowing each layer to dry for at least a day
. The sequence of work on painting the ceiling and walls is shown in Fig. 3.
If the ceilings have not been primed, then they are pre-moistened with water (primed ceilings do not need to be moistened with water). Chalk for water-based paints is sifted, and lime milk is filtered through a sieve.
ATTENTION! Lime for lime paints should be greasy and slaked 10-12 days before use (so that there are no “dumbs” after the whitewash dries).
Pigments
, used in lime paints, as well as in adhesive colors applied over a primer with a lime soap maker, must be alkali-resistant.
ATTENTION! Glue painting
Wall surfaces with old oil paint are done after priming it
with a solution of copper sulfate
.
Composition of adhesive color
It is imperative to check with a test paint to determine the optimal number of components, as well as to prevent chalking and other defects.
NOTE: Finishing and protective coatings on substrates that have rust, efflorescence, grease and bitumen stains are not allowed
.
Preparing for painting
In order for self-painting of the ceiling with water-based paint to be high-quality and uniform, preliminary preparation of the ceiling is necessary. Uniform coloring can only be achieved on a flat, puttied surface. Therefore, before starting work, you need to clean the ceiling from any previous coating (with the exception of water-based emulsion, which holds up very well).
How to remove whitewash
If you have whitewash on the ceiling - chalk or lime - you need to moisten the ceiling with water and remove the coating with a spatula. They clean everything down to concrete. Even the smallest fragments must be removed. Sometimes it is very inconvenient to scrape small areas with a spatula; it is easier to do this with a wet cloth.
It is easier to remove whitewash by wetting it with water.
In any case, after removing the whitewash, the ceiling must be washed with water and detergent. After complete drying, prime and putty with gypsum or cement (preferably white) putty until smooth, which is also called “egg-like.”
How to remove old water emulsion
If the ceiling has already been painted with water-based emulsion, you won’t be able to simply remove it. The procedure depends on how the paint adheres to the ceiling. If it just changed color and you need to renew the ceiling, there are no swelling, cracks or other similar problems, you can get by with a little blood. First, remove the dust (with a cloth and water), dry it, then prime it. After the primer has dried, you can paint it. But once again we draw attention to the fact that this procedure is used only if the water-based emulsion holds well and there are no defects.
Cleaning waterproof emulsion from the ceiling is still a pleasure
If there are cracks or swellings on the surface of the water-based emulsion, it must be cleaned off. There are two ways - dry and wet. Dry means cleaning with sandpaper (manually or using an angle grinder), wet means rinsing off. This method must be used for paint that is not afraid of water. But it is very difficult to remove such paint. If water-based paint holds up well, no tricks help, but there are surface defects and putty is needed, take sandpaper with coarse grain and make the surface rough. After this you can putty. Next - according to technology: we prime and then paint.
Wash off the ceiling painted with water-based emulsion by moistening it twice with plenty of hot water. The water should be almost boiling water - about 70°C. After wetting part of the ceiling, wait 10 minutes, then wet the same area again with hot water. After about five minutes you can remove the paint with a spatula.
Removing old paint is a lengthy process
You can repeat this procedure several times, gradually removing loose paint from the ceiling. Small residues can be sanded off, and then the ceiling can be washed, dried and primed. You can putty and sand over the primer, smoothing out imperfections.
Preparing to finish a whitewashed ceiling
Before you begin, it is important to think about your own protection. In your work you should use:
- Glasses
- Rubber gloves for hands
- Respirator
It is necessary that no one in the household is allergic to the new coating.
We take the furniture out of the room and cover the floor with plastic wrap so as not to stain it. Doors and windows must be kept closed, otherwise streaks may appear after the ceiling dries.
If the old coating has peeled off in some places, it must be scraped off in those places with a spatula, and then sealed with chalk putty (if the ceiling is chalk) or lime mortar with PVA glue mixed into it (if it is covered with lime). We also treat existing chips and cracks in the ceiling.
If the ceiling is smooth, wipe it with a rag to remove dust before refinishing. A yellowed ceiling can be treated with “Whiteness”, applying it either with a rag or with a roller.
To ensure that the new coating adheres better, it is recommended to prime it using a deep penetration acrylic primer. After this, scratch the surface; if it does not crumble, you can paint it. But in the case of applying water-based paint to chalk, a primer is not necessary, since the water-based paint itself will bind the old whitewash and will adhere well.
How to choose and prepare water-based paint to paint the ceiling
There are a huge number of water-based materials on sale from a variety of manufacturers, from domestic chemical plants to foreign brand companies. For a person unfamiliar with the process of painting with water-based paints, selecting a material can be a real problem. It’s not enough to be able to properly whitewash the ceiling with water-based paint; you also need to choose the material wisely. The easiest and worst way to learn more about paint is to listen to the manager - the salesperson in the salon. If you have patience, then it’s better to read the instructions on the can, the manufacturer’s recommendations, or talk to professional painters.
Cons of painting the ceiling
- The surface cannot be washed frequently, as the paint is not waterproof. You can simply wipe it gently with a damp cloth.
- All lighting fixtures and communications will be visible. If the ceiling leaks, repairs will be required immediately.
- If the surface is uneven, there are flaws and cracks, it will take a very long time to prepare the ceiling for painting.
To paint the ceiling, you need to choose water-based paint designed specifically for this coating, since such a painting material does not drip and adheres well to the surface.
Advantages and disadvantages of whitewashing
Painting the ceiling with water-based paint has its pros and cons. The advantages include:
- no unpleasant stench;
- the smell of dampness disappears after airing;
- whitewash components are non-toxic;
- easy to use (easy to dilute, stir, tint and apply);
- the ability to get any color after adding color;
- easily washed off from the body, clothes, floor;
- can be done by non-professionals - it is possible to whitewash the ceiling with water-based paint yourself;
- low cost of finishing;
- combination with various types and types of interior.
The disadvantage is:
- inability to withstand low temperatures - when exposed to frost, the paint surface may crack;
- large labor costs in preparing the ceiling for whitewashing;
- the painted surface quickly becomes dirty and loses its original appearance.
Removing old coating
What else needs to be taken into account when preparing the ceiling for painting? It is important to understand that not every coating can be applied with fresh paint. Some finishing materials are not “friendly” with each other. This is especially true for whitewashing. Do not apply paint to ordinary chalk whitewash, as it is not absorbed into it. In addition, you probably don’t want to see your old wallpaper under a layer of paint. Both materials should be removed before you move on to refinishing the ceiling.
There are two ways to get rid of whitewash: wash it off and scrape it off. The second option is more preferable, as it is easier to implement. To work, you will need a narrow painting spatula (about 10 cm) and a container into which the whitewash will fall and a spray bottle to wet the finishing material. Wallpaper is removed in exactly the same way as whitewash: moistened and scraped off.
Advantages and disadvantages
Water-based paint has been and remains a fairly popular material, there is an explanation for this. Among the advantages of this design option are:
- low price of the coloring composition;
- simple preparation and application technology;
- Record-breaking fast drying of paint—several hours;
- safety for household members, no suffocating odor;
- the ability to change the color by adding a special color that has the same water-based base;
- easy cleaning of the tool after completion of work;
- combination with any types of finishing of other surfaces of the room.
The disadvantages include:
- mandatory knowledge of the nuances of the process, otherwise spots and streaks may appear;
- relatively rapid loss of the original appearance;
- the need for high-quality ceiling preparation.
It is this last requirement that scares off some owners, but work done conscientiously once will give you a chance to not worry about major ceiling repairs for a long time.
Advantages of water-based paint
Water-based paint is based on water, an emulsion and a non-aqueous composition (varnish, resin, drying oil). The huge advantage of this material in comparison with various oil paints and emulsions is that it is not at all toxic. Another advantage of water-based paint is that when painting with your own hands after finishing work, both your hands and tools do not need to be rubbed with solvents for a long time. They can simply be washed off with water. There is a wide variety of water-based paints. They can be:
- acrylic;
- latex;
- silicone;
- silicate.
There is no fundamental difference between these types.
First of all, you should pay attention to such properties of paints as the environment of application and coverage. Concealability is the ability to cover even a very dark background with a solid white color.
The higher the coverage, the better the paint and the lower its consumption. If there is high humidity in the room, it is necessary to use a material designed specifically for wet rooms. Can also be used as a washable one. In ordinary premises this option is not necessary.
Typically, the color of water-based paint is white. To get the desired shade, color is added to it, after which everything is thoroughly mixed. By adding color to the paint and constantly stirring it, you can achieve the desired color. It should be taken into account that after application the paint dries becomes two or three shades lighter.
Water-based paint comes in glossy, matte and semi-matte. Which one to choose depends only on the client’s preferences. However, you should know that if the surface is uneven, it is better not to use a glossy one. It will only highlight all his shortcomings. Conversely, matte can partially hide its defects.
Preparing for painting
Whitewashing the ceiling using old paint or wallpaper is possible, which is why many people do it. However, the result of such a decision will be visible literally the next day: the snow-white surface of the ceiling with a different structure of applied paint immediately catches the eye and neutralizes the entire effect of the repairs.
In order for a matte or glossy ceiling to look aesthetically pleasing, it must first be prepared for painting. The entire process of preparatory work step by step is as follows:
- walls, floors, windows and doors are protected from dust with plastic film;
- previous finishing materials (paint, wallpaper, tiles) are removed;
- the surface of the ceiling is repaired and, if necessary, reinforced with fiberglass;
- the ceiling is treated with a primer and then puttied.
The entire preparation process is described in detail in the article “How to prepare a ceiling for painting with water-based paint?”
How to get rid of old coating?
Cleaning of the coating will not be required if interior finishing is being carried out on the territory of a new house. In other cases, this stage becomes one of the main ones. However, there are various solutions for cleaning work. The choice depends on what materials were previously used.
Any preparation of the ceiling for painting has its own characteristics:
- Cleaning whitewash. Involves the use of adhesives, water and alkaline solutions. The finish is simply moistened with one or another product. Use a spatula to remove everything from the ceiling as soon as the composition swells.
- Getting rid of old wallpaper. It is enough to use a sprayer to generously cover such a ceiling surface before painting with a liquid at a sufficiently high temperature. When all the material is wet, use a spatula to remove it. A foam sponge, also soaked in water, gets rid of glue residue.
- Removing the old layer of acrylic paint. The process is carried out either with a special wash or dry. At the final stage, the metal is scraped with a brush.
- Removing ceiling slabs. The material is knocked off the ceilings using a hammer. This is a long procedure that requires some effort. The expanded polystyrene type of material is easier to process. It is enough to use a spatula and then remove any remaining glue.
- Removing oil paint. This stage is the easiest. The surface is simply degreased using alcohol and enamel remover. When performing this work, harmful fumes are released, so the room must have good ventilation.
After cleaning is completed, all remaining dust and dirt are removed from the ceiling. All that remains is to assess the condition of the surface before moving on to further work.
On video: removing old whitewash.
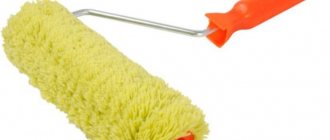
Which roller to paint the ceiling with water-based paint
To paint the ceiling, it makes no sense to purchase a spray gun or compressor: they are too expensive for one-time use. But the roller will fit just right. In construction markets and hardware stores you can see a huge number of these simple devices. You need to figure out which one is best.
Velor
This material will help create an even coating without side stripes or streaks. The only problem is that its absorbency is poor - you have to constantly dip it into the tray. As a result, the process may take longer than you expected.
Foam rubber
There will be no problems with a tool made of foam rubber. It is believed that it can be used to paint any surface, and it absorbs much better than rollers made from other materials. But at the same time, the foam rubber leaves a lot of small bubbles. As a result, the coating will have to be further leveled with something.
Faux fur
Faux fur rollers with short pile are also good in their own way. However, when working, they splash a lot and some of the paint is wasted. Perhaps the best option is a tool with the same artificial fur base, but with medium and long pile (12-22 mm): the coating will lay down softly and evenly, without splashing, drips and unevenness.
Before making a purchase, check the quality of the product. Make sure the pile is thick and free of bald spots. To understand how strong it is, tug on it. The threads should not come out at the first effort. Try to find the seam: with high-quality rollers it is located obliquely and is made in such a way that it is very difficult to see. It's good if it's not there at all.
Nuances of puttying gypsum boards
Plastering a plasterboard ceiling for painting has its own characteristics.
They consist in the fact that after installing the sheets, the initial surface is smooth and exactly horizontal. Therefore, application of starting leveling layers is not required. You just need to seal the joining seams and cover the screw heads with the same compound. For the primer (we wrote about gypsum board priming here), you need to choose a waterproof, deeply penetrating composition to protect the metal screws from corrosion. Given the high absorbency of gypsum, the primer should be applied at least 3 times. After this, you can immediately begin finishing putty.
What primer to use
A primer is necessary for better adhesion of the paint to the surface being painted. It allows you to avoid the appearance of cracks and blisters after the paint dries. If there is no primer, this can happen. You'll have to clean everything off and putty again. Because in order for painting the ceiling with water-based paint to be of high quality, the surface must be well primed.
The base of the primer should match the base paint. Acrylic water-based paint requires the same primer; silicone paint requires a silicone-based primer, etc. Moreover, it is advisable not to save: the quality of this composition determines how smoothly the water-based emulsion will lie on the ceiling.
Acrylic primer for the same water-based paint
There is an economical method of priming: the base paint is diluted with water (1 to 2) and the surfaces are painted with this mixture a couple of times. It's certainly better than nothing, but the primer gives a better grip.
Primer
Acrylic primer is recognized as the most universal. She performs several tasks at the same time.
- Absorbing deeply inside, it binds and makes layers of plaster and putty stronger;
- Levels the coating;
- Reduces paint consumption;
- Improves adhesion, that is, the adhesion of paint to the ceiling surface.
The primer layer is applied with a roller or spray gun. A roller for work should be chosen with high-quality bristles; you should not use rollers in which the bristles fall off. Foam rollers form bubbles on the surface, so their use in work is not advisable.
And only after the primer layer has completely dried can you use water-based paint.
It is important to know that the primer layer is applied only to a completely dry putty surface. The rollers must be completely dry. The slightest ingress of water will cause the primer layer to peel off.
On a note
- With gloss and semi-gloss paints the result is more unpredictable. With them, more often than with matte paint, obvious stains remain.
- On a snow-white ceiling, any nuances are much more noticeable than on a cream or beige one. If you doubt your capabilities, lightly tint the paint.
- Know that the larger the surface, the higher the likelihood of getting a questionable result. Therefore, do not be surprised if in a small bedroom the ceiling turns out like in the picture, but in a large living room you cannot look at it without tears.
- Paint quality matters! You can save money on wall paint, but you need to buy the best for the ceiling! After all, he is much more picky.
- Don't strive for absolute perfection. Painted surfaces are almost never flawless. The main thing is that in bright light, stripes, stains, smudges and stains are not noticeable.
See also:
What is better for walls: wallpaper or painting?
Which bathroom ceiling to choose?
How to paint the walls in a room?
How to repair a hole in a wall?
Elimination of surface defects
The need to repair various damages with a 100% guarantee arises after removing the finishing material.
As a rule, you need to address the following defects:
- Seams between floor slabs;
- Cracks on the surface of the suspended ceiling;
- Joints between sheets of drywall;
- Surface grinding.
Sealing slab joints
To seal such areas you will need universal gypsum putty, serpyanka tape in the form of a fiberglass mesh, spatulas, and deep penetration soil. The seams between the slabs must be thoroughly cleaned of finishing residues and dust. Using a regular brush, the gaps and areas around them are primed, applying the composition 2-3 times with breaks for drying (up to 30 minutes).
Having mixed the putty mixture, it is applied in a thin layer along the entire length of the joint, and the serpyanka is immediately glued on top, recessed into the plaster. Another layer of putty is applied on top, leveling and stretching the composition over the surface. After drying, when the putty becomes snow-white, it is sanded with fine (120-160) grain sandpaper, eliminating minor irregularities.
Cracks and joints on plasterboard surfaces
The set of necessary materials and tools is similar to the previous one, but you will also need a construction or stationery knife. The crack needs to be widened by carefully cutting off the edges of the drywall with a blade at an angle of 45°.
Next, you should prime the resulting surfaces in 2-3 layers, taking breaks of 30 minutes. The prepared putty mixture is applied with a spatula into the crack cavity, and the serpyanka is immediately sunk into it. Then another layer of plaster is placed on top of the pasted tape, leveling it along the plane of the ceiling.
The dry putty is cleaned with sandpaper, rubbing out minor defects. Another option for damage to a plasterboard ceiling is holes and dented areas. They are eliminated in this way.
All damaged material around the hole must be cut off. A mortgage made from a board, batten or piece of plywood (OSB) is mounted into the resulting opening. The ideal option is a piece of timber that will rest against the load-bearing surface of the floor. The main thing is that the size of such a part should be slightly larger than the hole itself.
Self-tapping screws are screwed in along the edges, securing the mortgage to the ceiling, or pulling it to the finishing surface. A piece of drywall is cut to the size of the hole and fixed to the wooden base with several screws. The joints are processed using the methods described above.
Surface grinding
Ceiling grout eliminates unevenness and minor defects not only in places where cracks are plastered on the ceiling, but also over the entire surface. As the main tool, you need a grinding machine with a supply of sandpaper (grain 120-160). A grinder is not suitable, as too high speeds will only do harm. You can also use a hand grater with the same sandpaper or mesh for cleaning.
To see even minor flaws, you additionally need a lamp with an extension cord, illuminating it to easily see the defect. The grater or grinder is moved in a circular spiral, gradually moving from one wall to another across the room.
It is important to maintain uniform pressure on the instrument without pinching it in certain areas.
If the surface of the ceiling after the final inspection is smooth and without defects, proceed to applying primer.
How long does it take for water-based paint to dry on a ceiling?
On average, the water-based emulsion on the ceiling dries in 2.5-3 hours at room temperature. The drying speed largely depends on the temperature and humidity of the air. Typically, the manufacturer indicates the average for standard conditions on the packaging.
You should not try to speed up the drying process of the ceiling using drafts, hair dryers or the heating system turned on at full power. The layer must dry naturally, this is the only way to achieve good quality coating.
Concrete ceiling primer
To get started, you need to read the instructions on the primer package, following the manufacturer's recommendations. Basically, this product is sold ready-made and you just need to pour it into a special container into which the roller is immersed. The work must be carried out in special safety glasses, and clothing must be for protective purposes.
If there are cracks on the wall, they need to be cleaned, a primer applied, then covered with putty and smoothed using a special mesh. When this surface is dry, you need to paint the entire ceiling with a primer.
For these purposes, a deep penetration primer will be required. It will ensure good interaction between the old surface and the applied paint. The secret of applying the primer: when working in the room, the air temperature should be 5-30 oC; if the temperature is too high, the primer will crack, and if it is too low, it hardens, this reduces its effectiveness.
If the ceiling is very uneven, then you need to prime it twice, using a roller and a brush, which will paint all hard-to-reach places. After this work is completed, you can begin to putty the entire surface.
How to tint water-based paint to paint a ceiling
There are two options for tinting the mixture. Firstly, water-based material can be tinted using special equipment upon purchase. In this case, dry fillers are used that are highly stable, color stable, and do not wash out or settle to the bottom of the container.
If you tint the material yourself, you will need to buy a toner in liquid form, always from the same manufacturer as the water-based emulsion. In addition, you need to take into account that the real color of the ceiling will be slightly different from what happened in the container. The evaporation of water during the drying process makes the coating less bright and rich. Therefore, many craftsmen take control measurements in the process of preparing for painting. To do this, a small amount of the finished material is applied to ordinary glass. After the water-based emulsion has dried, from the back through the glass surface you can see the approximate shade of the ceiling after drying.
Sanding tips: how to sand a ceiling correctly
The final stage in this work is sanding the ceiling. You can carry out this process yourself. For this you will need a special grater. If you do this on your own, protect your eyes and respiratory system with goggles and a respirator.
In order to choose the right grater, pay attention to the following nuances:
- Do not use solid graters with a notch;
- Try to choose those graters that have a sanding mesh or sandpaper;
- When choosing between sandpaper and mesh, choose sandpaper, it is much stronger and does not wear out as quickly;
- Sandpaper should be made from cloth materials;
- Consider the grain size of the sandpaper.
As for using a grinding machine, heat-insulating isolon should be glued to its sole. Its thickness must be at least 3 mm. This way you will protect the device from rapid wear.
Painting defects and their causes
Sometimes it is difficult not only to paint the ceiling evenly and smoothly, but also to find the cause of some unevenness. Let's look at this issue point by point.
Stripes of paint
They appear due to insufficient paint rolling. Also, due to this error, smudges may appear, because the paint flows down and drops form. To prevent this from happening, it is necessary to thoroughly roll the roller over the surface after each application until there is no paint left on it.
Another reason for this defect is the uneven distribution of the load on the roller, that is, a person puts more pressure on one side than the other. Try to press the roller as tightly as possible to the ceiling so that such a problem does not happen.
To prevent the paint from being applied in stripes of different colors, you need to evenly distribute the load on the roller and roll it evenly over the surface after each application.
Different shade of stripes
It happens that after painting you begin to notice that the wide stripes on the ceiling are almost different in color. The reason for this situation is that the water-based paint is not mixed well enough. Another reason for such stripes is constant gaps during painting.
Spots and highlights
This defect occurs most often and its cause is sometimes really difficult to identify. One of the possible reasons is an insufficiently leveled ceiling surface or the presence of depressions. It is not possible to eliminate such glare using paint; to get rid of them, you need to repeat the putty.
Spots and highlights may appear after painting on an uneven ceiling
And so that you don’t have to repaint everything again at one point, try to follow the rules and recommendations when painting. There is no need to rush; this process cannot be rushed. Constant lunch breaks will be inappropriate, it is better to do all the work at once. As a result, you will get a perfectly painted ceiling.
Identifying and sealing cracks
After getting rid of the old coating, you will probably find problem areas in the form of small cracks on the ceiling. If they are left as is, they will ruin the appearance of the ceiling, since the paint will not be able to disguise them. But putty can easily cope with this if you use it to fill the cracks.
So, your task comes down to this. Carefully open any gaps using the edge of a paint spatula. This will remove all weak layers and deepen the cracks. Next, dilute a small amount of putty and fill the cracks with it. Wait until it is completely dry and sand it with fine sandpaper. Thus, the surface of your ceiling will be a single whole.
Recommendations for ideal ceiling painting
Professional craftsmen share with beginners the following tricks for painting a ceiling with a roller:
- It is better to apply the last layer of paint from the window, then the joints will remain invisible, since the light will fall along the stripes;
- If even a small area remains unpainted, it will not be possible to correct the defect. You will have to apply a new layer of emulsion to the ceiling;
- Evaluate the results periodically. To do this, look at the painted ceiling from different corners of the room;
- Prime the ceiling surface before painting. The primer will improve the adhesion properties of the dye, the composition will lie more evenly;
- work quickly to ensure a streak-free surface.
Painting the ceiling with a roller will be easy and quick if you carefully prepare the ceiling for work, purchase high-quality tools and paint, and also follow the sequence when applying the composition.
Removing dust and dirt
The paint should be applied to a perfectly clean surface. Therefore, special attention should be paid to removing dust and dirt from the ceiling. Their presence will not allow the paint to fully absorb into the material. As a result, it will very soon begin to move away, thereby spoiling the appearance of the renovated apartment.
Dust is removed from the ceiling with an ordinary rag. You just need to gently brush it away so that it no longer bothers you. It is unlikely that dirt will be removed using this method. Dry cleaning will not help here. You will have to dampen the rag and go over the entire ceiling again. Dirt usually responds well to water and soapy water.
How to avoid stains
The headache of any painter is the appearance of streaks. This problem is especially acute for beginners in the painting business. How to paint a ceiling with water-based paint without streaks? Firstly, strictly follow the painting process. Secondly, follow these tips:
- remove all heating devices (this especially applies to lighting on the ceiling), turn off the batteries or cover them up during work;
- prevent drafts;
- conduct constant monitoring of the quality of painting either with the help of light or move to the side, changing the viewing angle;
- do not interrupt work for smoke breaks and respites;
- do not paint directly above your head;
- do not jump from place to place.
Following the technology allows even a beginner to get a perfectly painted ceiling surface.
How to paint a whitewashed ceiling
To the question of how to paint the ceiling after whitewashing, there is only one answer - painting is quite possible, although not easy. Painting the ceiling after whitewashing is desirable when the whitewash is still strong and it is applied with a thin ball and a flat surface, and without cracks. In this case, no preliminary work on preparing the surface is required; you can immediately decide what to paint the ceiling with after whitewashing and get to work.
But in other cases, before painting the ceiling over whitewash, you need to clean the whitewash in advance. In order to get rid of the initial layer of lime on the ceiling surface, you will need the following tools:
- putty knife;
- respirator;
- roller;
- brush;
- spray;
- container with water;
- sandpaper;
- Sander.
Why does the putty fall off when painting the ceiling?
After a certain period of time, cracks and other defects begin to appear on the old plaster.
The influence of temperature, humidity and other negative factors lead to the fact that the plaster becomes unusable, so even after painting, such a surface will deteriorate.
Professionals say that it makes no sense to put fresh material on old material, as well as to level the old layer. It would be more rational to simply remove the plaster and apply new paint or plaster mixture. If you believe in practice, even in a new house it is necessary to apply a topcoat before starting painting work.
And there are reasons for this:
- In a new house, even after complete shrinkage of the walls occurs, the structure will still succumb to deformation for some time. As a result, you will observe the constant appearance of cracks that cannot be smoothed out with putty.
- In any case, the ceiling in a new building will be finished using ordinary cement plaster. This surface is unsuitable for any type of coating. It can be even worse when there is only a concrete slab as the ceiling and here the question of whether putty is needed disappears by itself.
That is, in order to ensure that you do not get a disastrous result after carrying out the work, be sure to pay attention to what the old coating is made of and what condition it is in. In any case, it is better to spend the extra time and do a better job.
You can prepare the surface of a concrete ceiling for painting using gesso. Here you will need to sand it, prime each of the surfaces, and only then the finishing begins and you can use paint. If this is not done, then there is no point in asking why the putty falls off after finishing the work. You can see how to properly prepare in the video.
In conclusion, we would like to add that the preparatory work is not as difficult as it may seem to many beginners. The most important thing is to eliminate all defects on the ceiling so that they do not affect the quality of further work. In addition, choose the right material. But, if your ceiling leaves much to be desired, then you will have to thoroughly clean it and prepare it for painting.
Source: hendmeid24.ru
Features of painting with water-based emulsion
We will start, however, with the advantages and disadvantages of choosing a water-based emulsion. Is it really worth stopping at this one?
Advantages
- Painting is an easy way to tidy up your ceiling at minimal cost . Painting the surface is much easier than assembling a complex suspended structure (see How to paint a ceiling without streaks, stripes and unevenness).
A caveat: this statement is only true when the ceiling is relatively flat. If it is affected by fungus, the plaster holds weakly and is ready to fall off, and the ceiling has large differences in height, preparation for painting will not be quick and easy.
- This method of finishing the ceiling will not steal a few centimeters of height from the room. Any suspended structure, on the contrary, will lower the ceiling by at least 4-5 centimeters. More often - by 10-15.