Whitewashing with a vacuum cleaner, how to whiten, how to choose a nozzle
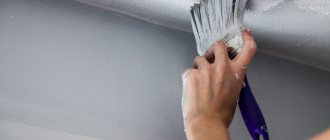
Applying whitewash to the ceiling is a very labor-intensive and time-consuming process, especially if a brush or roller is used. However, many people know that you can save a lot of time by whitewashing the ceiling with a vacuum cleaner. This household appliance is found in almost every family and, under certain conditions, can even replace a professional spray gun.
Features of using a vacuum cleaner as a sprayer
In order to apply whitewash or water-based paint to the ceiling by spraying, you need a special device called a spray gun or spray gun. Its operating principle is based on the fact that air, pumped by a third-party device, comes out under pressure from the spray nozzle and draws out paint particles that settle in a thin layer on the surface of the ceiling.
The spray gun can be either an independent element equipped with an air blower, or it can be made in the form of an attachment that fits onto a third-party device, such as a compressor, vacuum cleaner or hand sprayer. However, using some models of vacuum cleaners as a spray gun will not be possible if:
- The vacuum cleaner cannot generate backdraft or there is no blowout hole in its body to connect the hose. Many modern vacuum cleaners are simply not designed to generate outgoing air flow.
- The unit must be powerful enough to provide uniform spraying. Considering the design features of many vacuum cleaners, their reverse draft power is usually less than that of forward draft.
- In this regard, whitewashing with a vacuum cleaner is usually carried out using old “Soviet” equipment, or using more modern models, but with a modified engine connection diagram.
Types of vacuum cleaner attachments used for whitewashing
Professional sprayers that are used to apply whitewash can have different designs and features. In hardware stores you can find a fairly wide range of spray guns, which differ in the method of air supply, operating principle, location of the paint tank, and also in the amount of operating pressure. However, in the absence of a powerful compressor, a special attachment for the vacuum cleaner is used, which you can either buy or make yourself.
Three main types of attachments are most often used for applying whitewash:
- A spray gun with a vacuum cleaner attachment (for example, Intertool PT 0303). This device is equipped with a 200 ml paint tank with a top location. From the tank, the whitewash falls onto the spray head with a nozzle diameter of 0.5 mm and is pushed out by a stream of air.
- Attachment in the form of a lid for a glass jar. Previously, domestically produced vacuum cleaners were equipped with similar devices, but in some cases they can be found on sale separately. This nozzle has a hole for connecting a hose with a diameter of 30 mm and is placed on an ordinary glass jar into which the whitewash solution is poured.
- Homemade sprayer. The attachment for a vacuum cleaner in the form of a lid on a jar has a simple design, so it can be made independently. To do this, two thin tubes are inserted into the nylon cover, one is long, which should reach almost to the very bottom, the other is slightly shorter. A short tube is connected to the funnel-shaped attachment on the vacuum cleaner hose.
Features of whitewashing the ceiling using a vacuum cleaner
If you have a vacuum cleaner of a suitable model and find a special attachment, you can assemble a homemade spray gun and start whitewashing. It is important that all parts of the sprayer, especially if a homemade device is used, are tightly connected to each other. When applying the solution, the sprayer must be kept at a distance of 50 - 80 cm from the ceiling, perpendicular to its surface.
The optimal distance is selected experimentally and depends on the density of the solution and the pressure of the injected air.
A pressure of 3 - 4 atmospheres is considered close to ideal with an average density of the solution. If the whitewash is thick enough, then the pressure should be increased, and for a solution that is too thin, on the contrary, reduced. The distance to the surface to be treated should not exceed 1 meter to avoid excessive dispersion of the solution, and should not be less than 0.5 meter to prevent the formation of drips.
Applying the solution to the ceiling using a sprayer, as shown in the video, is carried out in an even thin layer in small areas. To achieve the best result, it is recommended to apply several layers of whitewash, with each subsequent layer being sprayed onto a dry surface.
kakpotolok.ru
Preparing for painting
The sequence of creating a pattern on a plasterboard ceiling
In order for self-painting of the ceiling with water-based paint to be high-quality and uniform, preliminary preparation of the ceiling is necessary. Uniform coloring can only be achieved on a flat, puttied surface. Therefore, before starting work, you need to clean the ceiling from any previous coating (with the exception of water-based emulsion, which holds up very well).
How to remove whitewash
If you have whitewash on the ceiling - chalk or lime - you need to moisten the ceiling with water and remove the coating with a spatula. They clean everything down to concrete. Even the smallest fragments must be removed. Sometimes it is very inconvenient to scrape small areas with a spatula; it is easier to do this with a wet cloth.
It is easier to remove whitewash by wetting it with water.
In any case, after removing the whitewash, the ceiling must be washed with water and detergent. After complete drying, prime and putty with gypsum or cement (preferably white) putty until smooth, which is also called “egg-like.”
How to remove old water emulsion
If the ceiling has already been painted with water-based emulsion, you won’t be able to simply remove it. The procedure depends on how the paint adheres to the ceiling. If it just changed color and you need to renew the ceiling, there are no swelling, cracks or other similar problems, you can get by with a little blood. First, remove the dust (with a cloth and water), dry it, then prime it. After the primer has dried, you can paint it
But once again we draw attention to the fact that this procedure is used only if the water-based emulsion holds well and there are no defects
Cleaning waterproof emulsion from the ceiling is still a pleasure
If there are cracks or swellings on the surface of the water-based emulsion, it must be cleaned off. There are two ways - dry and wet. Dry means cleaning with sandpaper (manually or using an angle grinder), wet means rinsing off. This method must be used for paint that is not afraid of water. But it is very difficult to remove such paint. If water-based paint holds up well, no tricks help, but there are surface defects and putty is needed, take sandpaper with coarse grain and make the surface rough. After this you can putty. Next - according to technology: we prime and then paint.
Wash off the ceiling painted with water-based emulsion by moistening it twice with plenty of hot water. The water should be almost boiling water - about 70°C. After wetting part of the ceiling, wait 10 minutes, then wet the same area again with hot water. After about five minutes you can remove the paint with a spatula.
Removing old paint is a lengthy process
You can repeat this procedure several times, gradually removing loose paint from the ceiling. Small residues can be sanded off, and then the ceiling can be washed, dried and primed. You can putty and sand over the primer, smoothing out imperfections.
How to whitewash a ceiling correctly The builder is an inventor
≡ 9 August 2013 Category: Ceilings
A A A
Today, whitewashing is considered one of the very common and economical ways to repair a ceiling. In most cases, slaked lime or chalk is used for whitewashing.
By the way, the most difficult part of whitewashing is found in the preliminary stage, when the surface of the ceiling is cleaned for painting. To do this, you first need to scrape off the outdated farb or wash it off with water. Then you should repair any possible cracks in the ceiling and smooth the plaster.
Before sealing all the cracks, use a hammer to beat off the plaster that is falling off the surface and widen it with a spatula. And after that, cover it with solvent.
How to whitewash a ceiling with water-based paint
Whitewashing the ceiling with water-based paint is the simplest way to give the ceiling a fresh look. But even here there will be specific differences that need to be followed very carefully.
Water-based paints can be of different types: mineral, acrylic, silicone and silicate, among which acrylic is the most budget-friendly type for whitewashing. Just don’t whitewash it quickly, otherwise the ceiling will look bad.
Dilute the emulsion with water only if the manufacturer advises doing so in the instructions. Working with a ceiling surface is great with a paint roller, and a vessel with water-based paint is good with a large surface.
The whitewashing technique is simple: place the farb equally on the roller and apply it to the ceiling surface in parallel strips, slowly moving to the side of the unpainted plane. After this, apply a layer of paint perpendicular to the past.
How to whitewash a ceiling with chalk
Another type of whitewash is found in the independent preparation of a chalk solution. To do this, you need to have: chalk, water, a vessel for the future solution, gauze, oilcloth, blue and plastic film.
First, purchase chalk paste or powder from the market. Determine the required amount of chalk to repair the ceiling (approximately 0.5 liters of a thin composition of chalk and water per square meter). Before you start whitening, test the whitewash test. This way you can determine the consumption of the chalk solution you made.
A mixture of chalk and water is made in the following proportions: for three liters of water, from 1.5 to two kilograms of chalk. Stir the solution well so that there are no lumps, then strain through a double layer of gauze. The resulting mixture looks like sour cream. Add blue if, for example, you want to give the solution a light blue tone.
How to whitewash a ceiling with a vacuum cleaner
Painting the ceiling with a roller or brush is a common option, but there are more sophisticated methods, such as, for example, whitewashing the ceiling with a vacuum cleaner. A good option is to use outdated Soviet vacuum cleaners “Whirlwind” or “Raketa”, but it is quite possible to use a current vacuum cleaner. In most cases, the package includes a nozzle consisting of a polyethylene cap with 2 tubes. This nozzle can be used as a sprinkler.
So how do you whiten the ceiling with a vacuum cleaner? The scheme is different: we add a hose into the hole through which air is blown, and at its end we attach the nozzle discussed above. Fill the jar two-thirds with paint and cover the jar with this nozzle (the lid-nozzle has the same dimensions as a simple plastic lid for glass jars). That's it, after that you can paint the ceiling! Move along the surface of the ceiling with soft circular movements and carefully watch the intensity of the color.
Try to buy an outdated Soviet-era vacuum cleaner, since it actually comes with such an attachment - new and modern vacuum cleaners, Unfortunately, there are others.
We honestly hope that our video post could help you answer the question of how to properly whitewash a ceiling.
Similar articles
vynahidnyk.org.ua
Defects in painted ceilings
Stains and stains
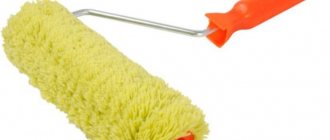
They can darken not only the surface of the ceiling, but also the beauty of any interior. The reason for the appearance of stains is a violation of the painting technology. And the point is not even that you chose domestically produced paint rather than foreign - there is not much difference, the main thing is not to buy an outright fake. It probably depends more on the roller. As practice shows, you can whiten a ceiling without streaks using a roller with long threads (usually yellow). In this case, it is better not to use velor - it absorbs little paint, work with its use is very slow, and foam rubber leaves bubbles.
Stripes
If you didn’t know how to whitewash a ceiling with a roller, but decided to do it anyway, get ready to face streaks of paint. They are formed due to a slight rolling of paint with a roller. To avoid this, you need to roll the roller over the painted surface when there is practically no paint on it.
Another reason for the appearance of streaks: uneven distribution of paint on the sides of the roller, try to dip it evenly into the paint and apply pressure evenly.
To ensure that the paint evenly covers the roller, use a special container
Wide stripes that are slightly different in color indicate that you have not mixed the water-based paint well.
Remember that you won’t be able to whitewash the ceiling with your own hands without flaws if the surface is not smooth. Therefore, before you start whitewashing, you need to make sure that the base is level and prepare it correctly.
video instructions on how to make it yourself and photos
This simple device can make your work much easier.
Today, whitewashing is the most attractive option for finishing the ceiling in terms of availability. It involves applying a layer of lime to the ceiling, which can be safely classified as an environmentally friendly material. There are several ways to apply whitewash to the ceiling, and this article will discuss how to whitewash the ceiling surface with a vacuum cleaner. Literally until recently, applying whitewash with a brush was the only option, but thanks to elementary human laziness, a faster and more practical method was developed - spraying with a vacuum cleaner. This device is called a spray gun and requires two people (one maintains the necessary pressure in the vacuum cleaner, and the second directly whitens) . Below this process will be discussed step by step.
Surface preparation
Before whitewashing the ceiling surface with a vacuum cleaner, you must first prepare it. It’s worth saying right away that this process is the dirtiest and most labor-intensive (see How to clean whitewash from a ceiling: effective options). First, you need to remove everything that is possible from the room, and what could not be removed needs to be covered with polyethylene.
Note: whitewash is easier to wash off than limewash
In order to remove the old layer of whitewash you will need a spatula (scraper) and a bucket of warm water . You need to immediately add citric acid or vinegar to it. You should not treat the entire area of the ceiling at once, as it will dry out quite quickly, which will significantly complicate the work.
When carrying out work, do not forget about protective measures - wear a respirator
After the whitewash has absorbed moisture, you need to carefully remove it with a spatula. In order not to pollute the floor too much, you can hold in one hand a small container (for example, a glass), into which you will need to put the removed pieces of whitewash (see How to whitewash a ceiling with water-based paint efficiently and economically). This measure will significantly reduce the level of contamination, which will eliminate the need for general cleaning.
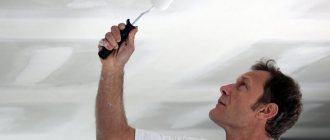
You need to prime no less carefully than whitewash.
Small whitewash residues should be removed with a wet sponge . A completely cleaned surface must be treated with an antifungal solution (this will prevent the formation of mold and mildew). At the end, the ceiling must be treated with a primer, allowed to dry for 24 hours, and only then begin whitewashing.
Preparation of the solution
While the ceiling is drying, you can begin to study the whitewash solution. In this article we will look at three different preparation options (see How to wash whitewash from the ceiling: surface preparation).
Option one - economy
The first option can be classified as economical. To prepare such a solution you will need:
- Chalk;
- Blue;
- Capacity;
- Water;
- Gauze;
- Oilcloth;
- Polyethylene film.
So:
- You need to buy chalk in the store in the form of a dry powder or thick paste. It will be the fundamental material for whitewashing . If the purchased paste turns out to be gray in color, then do not be embarrassed, since after whitewashing and complete drying the surface will certainly become perfectly white.
Despite the fact that the chalk paste is initially gray, the future ceiling will still become crystal white
- The amount of chalk required must be correlated with the area of the ceiling that will be processed. It is worth saying right away that it is better to take the material “with a reserve”, since it practically does not lose its properties. Therefore, you can take quite a lot of it, because it will also be useful for subsequent whitewashing .
For example: from 3 kg of chalk you need to get 5 liters of whitewash solution, which is enough to process 10 square meters. m. surface.
- Then you need to calculate the required amount of solution . To do this, you need to assume that half a liter of finished whitewash is enough to treat one square meter of ceiling. It is recommended to do a little training first to gain skills. This is due to the fact that whitening the ceiling surface with a vacuum cleaner does not seem to be a very simple process.
- Before preparing the solution, you must sift the chalk to remove large pieces and foreign, unground impurities. Then you need to mix the resulting chalk with water in a ratio of 1:1.5 (for example, 2 kg of chalk and 3 liters of water) . The resulting mixture must be mixed very thoroughly to eliminate the possibility of lumps appearing that will worsen the appearance of the ceiling.
You will need to achieve approximately this consistency
- Next, you need to strain the resulting solution through several layers of gauze, while periodically rinsing the fabric with water to free the pores. The result should be a thick mass, the consistency reminiscent of country sour cream (see Is it possible to glue ceiling tiles to whitewash?). To obtain a perfectly white color, you need to add a little blue to the resulting solution.
- If there is more solution than required, then you should not throw it away . You need to leave the whitewash in the same container for several days. As a result, the chalk will settle to the bottom and acquire the consistency of a paste. This substance will need to be put into a bag and stored until the next whitewash.
Option two - lime
Now let's look at a simpler, but at the same time more expensive option - a lime solution. This material has become popular due to its bactericidal properties, as well as its ability to hide small cracks.
Calculations will be as follows: for whitewashing 10 sq. m of ceiling should be diluted in warm water with 1.7 to lime and about 40 g of blue. It is very important to achieve the correct consistency; to check it you need to do the following:
- Lower the knife or other metal object and then stick it out.
- If the whitewash of glass from an object leaves no trace, then the solution has the correct consistency.
- Otherwise, you will need to gradually add lime until the solution reaches the required consistency.
Option three - alternative
Water-based paint allows you to give the ceiling a glossy tint, which looks very attractive
If a person does not want to spend his time preparing solutions, but is willing to pay a more impressive amount, there is an alternative option for him. In particular, water-based paint can be used for whitewashing. Thanks to its properties, it will give the ceiling a more beautiful appearance, but the preparatory work must be carried out more carefully, since this paint is not able to hide minor surface irregularities.
Do-it-yourself whitewashing: instructions
After the solution is prepared, you can begin whitewashing. Before using a vacuum cleaner to whiten the ceiling surface, it must be prepared. A special nozzle is used to spray the solution. If we are talking about a “Soviet” type vacuum cleaner, then it must be included in the kit, otherwise it will need to be purchased at the store.
Spray gun operation diagram
The nozzle is a plastic cover that fits onto the end of the vacuum cleaner. It has two tubes: one reaches the bottom of the container with whitewash, and the second is a sprayer. Standard nozzles are designed for a half-liter jar and have a short tube; if the container is larger, you can purchase a more impressive nozzle.
- After thoroughly mixing the solution in a bucket, it must be poured into a jar. Then attach the nozzle to the hose of the vacuum cleaner (the hose must be secured in the opening of the vacuum cleaner from which air is distributed). When the nozzle is fixed, you need to turn on the vacuum cleaner.
Important: the nozzles have an additional hole that stops the sprayer from working at any time.
- Next, you need to climb onto a stepladder and point the sprayer towards the ceiling, while the distance between the device and the surface should be at least 30 cm. The hole on the nozzle must be closed with your finger so that air does not escape from it, thereby starting to spray the whitewash.
During whitewashing, a large amount of substance is sprayed, so we must not forget about a protective suit
- You need to whiten in a circular motion, as this will ensure the most uniform application of the substance over the entire surface area. In this case, it is very important to adjust the distance so that the final layer is without streaks and circles. If you bring the device too close, drops will appear, which will be very noticeable after drying.
- It is best to start spraying from any corner of the ceiling, gradually moving towards the opposite end of the room, and the most important thing is smooth movements and accuracy. In this case, you cannot skip areas, since the solution must be applied in one layer. Do not be alarmed if different parts of the ceiling have different shades, because after complete drying the surface will take on a uniform color.
That's all that could be said about whitewashing the ceiling with a vacuum cleaner. We hope that our article was useful to the reader. If you still have any questions, you can watch the training video at the end of this article, which can answer all your questions, because as they say, it is better to see once than to hear a hundred times.
Did you like the article? Subscribe to our Yandex.Zen channel
potolokspec.ru
How much does it cost to paint a ceiling per m2?
| Name of service | Cost in rubles per m2 |
| Painting in 1 layer | 100 |
| Painting in 2-3 layers | 150 and 200, respectively |
| Cleaning the ceiling from whitewash | 90 |
| Removing old wallpaper | 60 |
| Ceiling preparation | 340 |
On average, the tariffs for painting ceilings are as follows:
- Primer and painting in two layers – 400 rubles per m2.
- Cleaning, priming and painting the surface in two layers – 700 rubles per m2.
- Cleaning the ceiling with primer, putty, painting in two layers and leveling the surface - 950 rubles per m2.
It is worth noting that the cost of services may vary depending on the painting method: manual painting is cheaper than high-quality machine painting.
Now let's look at some of the features of paints, as well as painting tariffs.
If we talk about the ceiling, the most used types here are the following:
- Water-based (the most popular, which are most often used in dry rooms).
- Silicate (usually used where it is necessary to create a vapor-tight effect). Well suited for brick, concrete and wood. Since they are produced with the addition of liquid glass, they provide a porous, breathable and water-resistant coating.
- Acrylic latex (used for treating concrete, brick and plastered surfaces). They are resistant to abrasion, fading in the sun, and create a “breathable” coating.
It is important to prepare the ceiling surface well before painting, because the quality of painting and the overall appearance of the ceiling depend on this.
What is important to consider before performing work:
- Remove everything from the surface: chalk whitewash, wallpaper, etc.
- Cracked rusts and cracks are embroidered and the surface is primed using a deep penetration primer. When leveling the ceiling, concrete contact is used.
- Deep rusts need to be filled with tile adhesive or polyurethane foam. Next we glue it with serpyanka.
- Level the ceiling with gypsum plaster (if necessary).
- Before painting, you need to do a final sanding and wait until everything dries.
Contact experienced specialists who will qualitatively carry out all work related to priming, water-based painting, acrylic or textured painting of ceilings, taking into account your wishes within a pre-agreed time frame.
surface preparation, solution preparation options, whitewash instructions
Today, whitewashing is considered one of the very common and economical ways to repair a ceiling. In most cases, slaked lime or chalk is used for whitewashing.
By the way, the most difficult part of whitewashing is found in the preliminary stage, when the surface of the ceiling is cleaned for painting. To do this, you first need to scrape off the outdated farb or wash it off with water. Then you should repair any possible cracks in the ceiling and smooth the plaster.
Before sealing all the cracks, use a hammer to beat off the plaster that is falling off the surface and widen it with a spatula. And after that, cover it with solvent.
How to whitewash a ceiling with water-based paint
Whitewashing the ceiling with water-based paint is the simplest way to give the ceiling a fresh look. But even here there will be specific differences that need to be followed very carefully.
Water-based paints can be of different types: mineral, acrylic, silicone and silicate, among which acrylic is the most budget-friendly type for whitewashing. Just don’t whitewash it quickly, otherwise the ceiling will look bad.
Dilute the emulsion with water only if the manufacturer advises doing so in the instructions. Working with a ceiling surface is great with a paint roller, and a vessel with water-based paint is good with a large surface.
The whitewashing technique is simple: place the farb equally on the roller and apply it to the ceiling surface in parallel strips, slowly moving to the side of the unpainted plane. After this, apply a layer of paint perpendicular to the past.
How to whitewash a ceiling with chalk
Another type of whitewash is found in the independent preparation of a chalk solution. To do this, you need to have: chalk, water, a vessel for the future solution, gauze, oilcloth, blue and plastic film.
First, purchase chalk paste or powder from the market. Determine the required amount of chalk to repair the ceiling (approximately 0.5 liters of a thin composition of chalk and water per square meter). Before you start whitening, test the whitewash test. This way you can determine the consumption of the chalk solution you made.
A mixture of chalk and water is made in the following proportions: for three liters of water, from 1.5 to two kilograms of chalk. Stir the solution well so that there are no lumps, then strain through a double layer of gauze. The resulting mixture looks like sour cream. Add blue if, for example, you want to give the solution a light blue tone.
How to whitewash a ceiling with a vacuum cleaner
Painting the ceiling with a roller or brush is a common option, but there are more sophisticated methods, such as, for example, whitewashing the ceiling with a vacuum cleaner. A good option is to use outdated Soviet vacuum cleaners “Whirlwind” or “Raketa”, but it is quite possible to use a current vacuum cleaner. In most cases, the package includes a nozzle consisting of a polyethylene cap with 2 tubes. This nozzle can be used as a sprinkler.
So how do you whiten the ceiling with a vacuum cleaner? The scheme is different: we add a hose into the hole through which air is blown, and at its end we attach the nozzle discussed above. Fill the jar two-thirds with paint and cover the jar with this nozzle (the lid-nozzle has the same dimensions as a simple plastic lid for glass jars). That's it, after that you can paint the ceiling! Move along the surface of the ceiling with soft circular movements and carefully watch the intensity of the color.
Try to buy an outdated Soviet-era vacuum cleaner, since it actually comes with such an attachment - new and modern vacuum cleaners, Unfortunately, there are others.
We honestly hope that our video post could help you answer the question of how to properly whitewash a ceiling.
The ceiling in each room is one of the main components of the overall interior. If you decorate its surface correctly, you can visually enlarge the room and create a romantic atmosphere in it. In this case, you should take into account the functional purpose of the room, how it is illuminated during daylight hours and in the evening. You can satisfy all the above wishes, while improving the appearance of the surface, by using the most common and practical design method - whitewashing the ceiling with water-based paint.
Even the most inexperienced builder will cope with the task quickly and easily. In order to whitewash the ceiling yourself, you do not need great skills. Select the desired shade of water-based paint, familiarize yourself with its characteristics, prepare the surface for painting and begin applying the coloring composition.
Today there are several types of water-based paint: mineral, silicate, acrylic and silicone. Let's look at the characteristics of each composition:
- The mineral dye contains slaked lime and cement. The low price of such paint is available to a wide range of consumers. The product is suitable for concrete and brick surfaces, but its service life is short. In a couple of years you will have to renew the surface.
- Silicate paint consists of liquid glass with the addition of a tint pigment. This composition is not suitable if the room has high humidity (kitchen or bathroom). At the mother's
mebelrion.ru
How to whitewash a ceiling
For whitewashing, chalk, slaked lime and water-based paint are used. Each option has its own advantages, so to decide, you need to learn about the basic properties of these materials.
Chalk
Chalk
Chalk for whitewashing
The chalk solution is easy to apply, has good covering power, and is almost odorless. Chalk is a very cheap material, and therefore whitewashing will cost pennies. But at the same time, the chalk gets very dirty, preparing the solution takes time, and the surface may acquire a yellowish tint. To prevent this from happening, blue is added to the solution.
Blue
Lime
Lime
Lime has bactericidal properties, covers small cracks well, lasts a long time, and has a low cost. The disadvantages include the sharp unpleasant odor that appears when diluting the solution and the caustic nature of the material. When whitening with lime, you must wear gloves, otherwise it will corrode the skin on your hands.
Water-based paint
Water-based paint
Water-based paint is the best option. Its cost is higher than that of chalk or lime, but its covering capacity is much greater. It does not smell, is easy to apply, is sold ready for application, and the painted surface does not get dirty. There is a washable paint that is especially suitable for wet areas.
How to whitewash a ceiling with a vacuum cleaner? |
Whitewashing the ceiling is still considered one of the safest finishing methods for human health. Unlike tension, suspended, metal and plastic structures, this surface can always “breathe”.
Content:
Stages of applying whitewash to the ceiling What material is best to use for whitewashing? How to whitewash a ceiling correctly?
The whitewash is based on only natural materials and raw materials. All this eliminates the possibility of any negative effects on the body. However, all this makes sense only if the condition of updating the coverage once or twice a year is met.
Stages of applying whitewash to the ceiling
Any repair or construction process begins with the preparation of the working area. It includes removing the old coating from the surface, be it the previous whitewash or some other finishing material. If we are talking about the first option, then you can get rid of it with water. Simply apply it to the lime or chalk coating and after a while remove it using a rag and a spatula.
It is worth paying attention to the fact that it is much easier to get rid of chalky whitewash, unlike a composition that contains lime.
After the previous coating has been completely removed from the ceiling, you need to examine the surface for any flaws or defects. If they exist, they must be disposed of. For this purpose, the surface must be treated with a deep penetration primer solution. In this way, you will not only ensure the required degree of adhesion, but also, in addition, strengthen the top layer of the concrete floor.
After the ceiling has been processed, you can begin to repair existing defects. This is done using putty, which contains cement in its base.
It is important to know that in the process of removing the previous finish you will in any case damage the joints of the concrete slabs. What to do in such a situation? One solution to this issue is the usual priming of the joints and its subsequent putty. Another method is to cover the required areas with sickle tape and only after that apply putty.
If there is a need to level the entire ceiling, then be sure to do this. For this, it is best to use a putty solution. After it has dried, sand the surface with sandpaper. Only after completing the above steps can you proceed to the primer.
The main thing is to ensure that each layer laid on a plane is sufficiently dry, regardless of whether it is a primer or putty.
What material is best to use for whitewashing?
Whitewashing the ceiling surface is done with only two solutions. One of them is based on chalk, while the other is made from lime. We can say about the first material that it has bactericidal properties, while the second is capable of imparting deep whiteness to the surface.
In the event that the previous coating was created using lime whitewash, then the new finish should be done in the same way. Don't put chalk on it.
To prepare a chalk solution you will need the following components:
- five liters of water;
- thirty grams of wood glue;
- twenty grams of blue;
- three kilograms of chalk (it must be well sifted).
All ingredients must be thoroughly mixed and the resulting mixture stirred. The amount of whitewash you get is enough for a surface of ten to twelve square meters.
The lime mortar contains more components:
- one liter of water;
- two or three kilograms of slaked lime;
- from fifty to one hundred grams of salt;
- two hundred grams of aluminum alum;
- half a kilogram of dye (if necessary).
After all the ingredients are mixed, another ten liters of warm water should be added to the resulting mixture.
It is worth knowing that lime whitewash will be better applied to a surface that has been previously moistened.
How to whitewash a ceiling correctly?
To carry out this process, a brush, roller, or sprayer and vacuum cleaner are used.
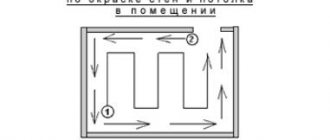
Working with a brush is not so easy, so for those who do not have sufficient experience, it is better to give their preference to a roller. The well-mixed mixture is applied to the ceiling in two layers. It is recommended to apply whitewash perpendicular to the wall on which the window is located and along the entire room.
However, if you use a sprayer and a vacuum cleaner during the finishing process, you will be able to achieve a uniform coating.
Let's take a closer look at what a sprayer for ceiling whitewash is. It looks like a polyethylene lid that covers a glass jar with a liquid solution.
Two holes must be made in the lid to allow the tube to pass through them. It is connected to a hose from a vacuum cleaner, and at the end there is a special nozzle. Air comes out of the device under pressure, and as it passes past the tube, it sucks in the solution contained in the jar with associated pressure. Subsequently, it is supplied through a tube to the nozzle.
Spray gun diagram
The second hole in the lid is needed to regulate the flow of whitewash from the can. By closing it, the supply of material decreases, while at the same time, if you open it, it increases.
It will be possible to whitewash the ceiling with a vacuum cleaner at the highest level only when all the nuances are met:
- spraying chalk or lime is done in a circular motion;
- it is necessary to maintain a minimum distance of seventy centimeters from the nozzle to the ceiling surface, but it should not exceed one hundred centimeters;
- The best option is to apply whitewash in three or four layers, since this allows you to hide small defects on the surface.
With all this, it is important to pay attention to safety precautions.
After applying this finishing material to the ceiling, pores form on the surface, allowing it to “breathe”. Plus, the coating itself can absorb vapors. Whitewash prepared strictly according to the recipe can last at least three years.
vodaidom.com
How much does it cost to paint a ceiling per m2?
When carrying out renovations in an apartment, you are unlikely to be able to do without such a process as painting the ceiling.
It makes the room more comfortable and beautiful. Unlike whitewash, paint adheres well to any surface: drywall, concrete or plaster. It dries quite quickly and can be easily treated with detergent. Any craftsman who works with this material every day will say: a wide selection of colors and modern technologies will turn any ceiling into a real work of art. In addition, when you find out how much it costs to paint a ceiling per m2, you are unlikely to want to do it yourself. The main stages of painting the ceiling
You've probably seen how beautiful painted ceilings can be. Achieving such an effect is not easy, especially if you do not have the appropriate skills. To do this, you need to follow some steps, namely:
- Preparing the surface for painting.
This work is carried out even if you have been living in an apartment for many years and want to refresh the surface. The preparatory stage includes: dismantling old coatings (decorative boards, previous layers of paint, wallpaper), sanding, puttying, priming. All this will contribute to good adhesion of the paint to the ceiling.
- Buying paint.
Nowadays, water-based paints are increasingly used for painting ceilings. They are non-toxic and are well suited for any room, including children's rooms. If necessary, you can choose waterproof options. First of all, this applies to kitchens and bathrooms.
- Coloring.
Painting the ceiling is not difficult for specialists, as they have extensive experience in this field. They are very familiar with the technology of applying paint and adhere to the deadlines for drying ceilings so that the result is impeccable.
Which vacuum cleaner to use
When choosing a vacuum cleaner that is suitable for painting work as an air blower, first of all, we focus on power. If there is not enough power, then the spraying will not work well enough. Also, the vacuum cleaner must have a special channel; if it is missing, they resort to closing all existing holes in the device so that suction occurs only from one place where the hose will be attached.
Options for vacuum cleaners that already have the necessary hole are the old Soviet models “Ural”, “Pioneer” and others. Among the new models we can note the Samsung SC4140.
But you can make do with the available equipment; this will be discussed later.
When choosing a vacuum cleaner that is suitable for painting work as an air blower, first of all, we focus on power.
Types of spray guns for vacuum cleaners
In Soviet times, special sprayers for vacuum cleaners were sold; such a convenient rarity is almost impossible to find on sale at the moment. But modern analogues have appeared on the market.
So you need to purchase a spray nozzle for the vacuum cleaner. You can find such a spare part on sale. a part that is intended for an electric spray gun with a remote compressor.
In total such app. parts go on sale from two brands “ZUBRA” and “WAGNER”. Apart from these companies, no one else produces ready-made versions of sprayers separately.
You will need to purchase a spray nozzle for your vacuum cleaner.
How to make
If you happen to have a special attachment at hand that came with Soviet vacuum cleaner models, then this is the fastest and easiest option. It is simply put on a liter jar. Next, the outlet hole is adjusted to the desired parameters. And the edge of the hose from the vacuum cleaner is adjusted to the air inlet to the sprayer; if necessary, an adapter is used to adjust the holes to each other. Other manufacturing options are described below.
The edge of the hose from the vacuum cleaner is adjusted to the air inlet to the sprayer.
Preparing the vacuum cleaner
First you need to remove the dust collectors in the device, no matter what they are. The remaining parts of the device need to be wiped and cleaned of dirt. Also, in the room where the paint sprayer for the vacuum cleaner will be assembled, wet cleaning should be carried out.
Paint sprayer from a vacuum cleaner
There are several options on how to save money and make a spray gun for home use with your own hands. One of the interesting and most convenient methods is a compressor from a vacuum cleaner. A special nozzle for a spray gun is put on its hose, through which paint will be sprayed under pressure.
Experts highly appreciate the useful qualities of such devices. It is believed that if you use a vacuum cleaner correctly as a paint sprayer, you can achieve excellent results and quickly process even complex surfaces. Craftsmen sometimes use such devices to paint a car, which is considered the height of difficulty in painting work. In addition, a spray gun from a vacuum cleaner is perfect for applying water-based emulsion to walls or whitewash to the ceiling.
This device is based on a regular vacuum cleaner. It must have a blowing mode. Experts recommend using those models that have powerful traction, which will make it possible to create high pressure.
If the household has an old Soviet vacuum cleaner, such as a Whirlwind or a Rocket, it can be used for painting work even without making or purchasing special attachments. The device itself is a compressor, to which a container of paint is attached and one of the nozzles is put on. This creates a powerful electric spray gun, with which you can get an even coating quickly and without much hassle.
Nozzle for a vacuum cleaner from the USSR. Do you remember what it is for?
The Soviet Union gave us many interesting things, this is one of them. But I don’t understand why many people don’t remember her? When buying a vacuum cleaner, it is either thrown away, or it lies around unused, but does not find proper use.
Soviet vacuum cleaners were mostly equipped with a large number of attachments, some of which even helped with washing.
By the way, we also had one like this, it lay idle for a long time, but one fine day I saw my father mixing something with chemicals
.
I took this nozzle, a half-liter jar, poured something into it, it was already bad, but I remember, the main thing is I know what he did then. He whitewashed the walls.
So this part of the vacuum cleaner is needed for
: whitewashing, disinfection, air humidification, just painting, you can spray dry substances, and also in one of the instructions I read that with its help you can destroy moths and other insects.
The nozzle itself is referred to as a spray gun
.
The hose is connected to the nozzle, on the other hand, to the blowout hole of the vacuum cleaner
, the main thing is that it is
sealed
, voila, everything is ready to go.
There is a hole at the top with which you can adjust the power of the supplied flow with your finger.
Agree, in principle it’s a good idea
, but in life it was not realized very often. Few people wanted to dirty the vacuum cleaner. Therefore, when my father whitewashed, he always used an old vacuum cleaner.
Well, the whitewashing itself, in principle, left much to be desired; in order to achieve a good result it was necessary to whitewash several times.
Source
Whitewashing tools
Before starting work, you will need to prepare everything you need. You probably yourself understand that in the process of applying chalk mortar to the ceiling, it would be rude to interrupt the work due to the lack of any tools. So:
It is recommended to purchase a roller with a long handle just in case. It will help you reach the ceiling without a stepladder. Of course, by doing this, you will protect yourself from the risk of falling, and also add a few mobility points (moving around the room) to your work arsenal.