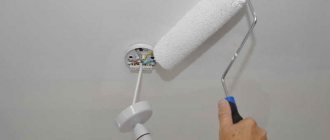
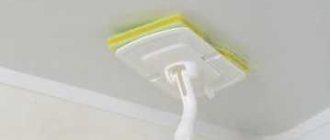
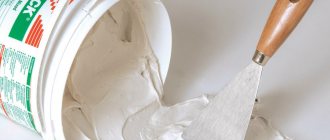
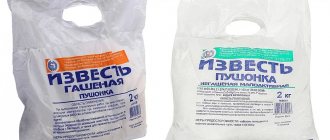
One of the most inexpensive and easiest to use materials for finishing the ceiling is whitewash. Whitewashing the surface will not be particularly difficult, and you can cope with this task yourself, without involving professionals. In order to obtain a high-quality coating as a result of your work, you need to know some of the subtleties of working with such material.
Features and types
Whitewash is a solution of a certain substance that is used to whiten the surface. Chalk or lime is mainly used as the basis for such a solution. Most often, this material is used in repair work for finishing the ceiling. There is also a type of medicinal whitewash for garden plants. The term “whitewashing” also refers to the process of finishing work itself.
As noted earlier, lime, chalk, and water-based paint are used to whiten the ceiling. Each material has its own advantages and disadvantages, as well as differences in finishing work.
Whitening the ceiling with a chalk-based solution is one of the cheapest ways to finish ceilings, since the price of chalk is quite low. However, a low price does not mean poor quality of the material. The chalk mixture is easy to apply and adheres well to the surface. In addition, the mixture has excellent covering ability.
Chalk gets quite dirty, which is a disadvantage of this material. This coating has one more disadvantage - the material may turn yellow. To prevent the appearance of a yellowish tint, when making the solution, you need to add a little blue paint to tint fabrics.
Lime
Lime is produced by burning carbonate rocks. The material has bactericidal properties. Lime mortar covers small cracks on the surface well. This mixture, like the chalk mixture, has a low price.
Lime mortar has a strong unpleasant odor, which is a disadvantage of this composition. Finishing work must be carried out with gloves, since lime can corrode it upon contact with skin.
Water emulsion
Finishing with water-based paint will cost more than using lime or chalk. Despite this, this type of whitewashing is the best option. The paint coating is more convenient to use and is sold ready for application, in contrast to dry mixtures, from which it is necessary to make a solution.
The covering ability of water-based paint is much higher than that of chalk and lime solutions. The paint and varnish material has no odor and adheres well to the surface. On the construction market you can find water-resistant, water-based paint, which will allow you to use it for work in wet areas.
What are the benefits of whitewashing with lime?
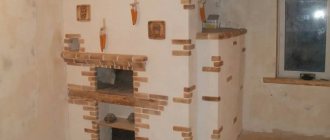
What is lime (lime)? This is a white finishing material that can be used for cosmetic repairs. Whitewashing is used both for internal (ceiling finishing, interior partitions, stove walls) and external work (processing the facades of a private house, residential and outbuildings). Treated surfaces, after whitewashing, look fresh and attractive.
In addition, lime has such advantages as:
- Availability. It will be difficult to find more affordable and, at the same time, high-quality material on the modern market. On average, one kg of quicklime costs 8-9 rubles.
- Moisture and heat resistance. When moisture gets on the surface or the air temperature rises, the lime does not crack or bubble.
- Resistance to fungus and mold. Lime has antimicrobial properties. Therefore, in the spring, tree trunks are often treated with lime.
- Environmental Safety. Lime is produced by burning sedimentary mountain limestone. Therefore, it is safe for human health and the environment (does not emit carcinogenic substances). Garden lime is even used to fertilize plants.
- No odor upon application.
- Good miscibility with other dyes. The finished whitewash solution is often diluted with a color (preferably natural) to change its color.
In addition, whitewashing serves as surface protection: the film that appears after applying whitewashing increases the resistance of walls to abrasion and prevents them from fading.
Surface preparation
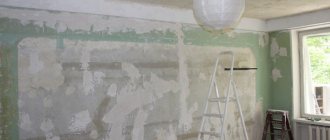
Before finishing work, special attention must be paid to surface preparation. Without going through this stage, it will not be possible to obtain a high-quality coating: the whitewash will not adhere well, and after a while it may crumble.
If there is no old finishing coating on the ceiling, then you just need to wash off the dirt and dust from the surface. It is advisable to putty the plastered surface before applying whitewash, since the plaster has a granular structure and the finishing coat may turn out uneven.
Plaster is also used to eliminate defects on the surface and level the ceiling. After plastering, you need to go over the surface well with sandpaper to form an even and smooth coating.
If the base was previously whitened, the previous layer of material must be removed. The surface cleaning process occurs as follows:
- Furniture and equipment must be removed from the room. The remaining items, as well as the floors, must be protected from contamination. To do this you will need plastic film and masking tape.
- To clean the surface, you will need a solution of water and soap, a foam sponge or brush, a metal spatula and a paint bath.
- A small area of the ceiling is moistened with a soap solution. Remove the soaked whitewash with a metal spatula, placing a paint bath so that pieces of material do not fall on the floor.
- Anything that could not be removed with a spatula is washed off with a damp foam sponge.
Whitewashing with chalk - Application
Chalk whitewashing of walls and ceilings is often done over old chalk whitewash in order to “refresh” the room and breathe new life into it. Whitewashing is also perfectly applied to surfaces such as concrete, plaster, brick, and putty. When whitewashing large areas over old whitewash, it is recommended to use a sprayer, since the roller can pull (“undermine”) the old layer of chalk.
Chalk whitewash is widespread. Chalk is used for whitewashing in crowded places: kindergartens, schools, hospitals, administrative offices, entrances of residential buildings, warehouses, workshops, industrial premises, service stations, etc. However, whitewashing with chalk cannot be used in rooms with a high percentage of humidity (baths, saunas, basements, etc.)!
How can I find out what the walls or ceiling were previously whitewashed with? Chalk or Lime? Moisten a small area of the surface with plain water and run your finger over it: if the whitewash smears significantly, then it’s chalk! If not, lime!
If the old whitewash is in poor condition: significant peeling, swelling, or high-quality painting is planned, then the old whitewash must be completely removed.
See in more detail: Cleaning the ceiling from old whitewash
How to dilute and what is glue used for?
The water-based mixture is sold in stores ready for application. If necessary, the paint can be diluted with clean water to obtain the desired consistency. Compositions based on chalk and lime must be prepared independently immediately before finishing work. The technology for preparing the solution depends on its main component.
Chalk solution
To prepare chalk whitewash you will need warm water, an adhesive mixture, blue paint for tinting the fabric (blue) and the chalk itself. The process of making the solution is as follows:
- in a five-liter bucket of warm water you need to dilute PVA or wallpaper glue in the amount of thirty grams;
- a small piece of laundry soap (50 grams) is grated on a coarse grater and added to water mixed with glue;
- three kilograms of chalk must be sifted to remove debris;
- chalk is slowly poured into the water, constantly stirring the solution to avoid the formation of lumps;
- In order for the coating to turn out snow-white and not turn yellow over time, about twenty grams of blue must be added to the solution.
Some recommendations
To improve the performance characteristics of the produced whitening solution, it is necessary to add some additional components to the mixture: wallpaper glue or laundry soap. Instead of wallpaper glue or PVA, you can add a carpenter's adhesive mixture to the composition, which you can make yourself at home. This material is added to the solution in order to improve the quality of the coating and increase its service life.
If lime whitewash will be used to finish the facade, then drying oil must be added to the solution. Drying oil will improve the quality of the coating, making it more reliable and resistant to moisture.
Whitewashed walls are susceptible to various stains. To prevent the coating from becoming so easily soiled, you need to add regular table salt to the whitewash solution. When introducing additional components into the mixture, the correct proportions must be observed:
- drying oil is added in the amount of one hundred milliliters per bucket of whitewash solution;
- to get a perfectly white lime coating, you need to take one kilogram of salt per ten liters of solution.
Tools and consumption
There are several ways to whitewash the ceiling in an apartment. The difference between whitening methods lies primarily in the tools used. To carry out finishing work, you may need the following equipment:
- paint brush;
- roller;
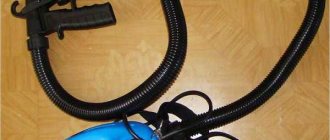
- manual spray gun KRDP-3;
- container for preparing the solution;
- construction mixer for mixing the mixture;
- ladder;
- surface cleaning brush;
- bucket of soapy water:
- masking tape and polyethylene;
- plastic cuvette;
- metal spatula;
- sandpaper.
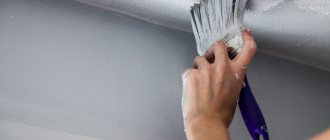
To apply the mixture to the ceiling, a roller or paint brush is usually used. To prevent the new brush from falling off during bleaching, it must be soaked in hot water for a while. Initially, it is better to choose a tool with natural hard bristles.
Whitening using a spray gun is a very labor-intensive process. It is more convenient to use such a device for whitewashing walls rather than ceilings. Before working with such a tool, the prepared solution of chalk or slaked lime must be passed through gauze.
When preparing the mixture, it should be remembered that per square meter of surface the rate of the finished solution is approximately 0.5 liters. However, the consumption of chalk per 1 m2 exceeds the consumption of lime per 1 m2. To make a solution, it is customary to take the number of components based on the consumption per ten square meters.
Whitewashing walls with lime - instructions for DIY budget repairs
A huge variety of finishing materials is replacing old methods of repair, and lime whitewash is no longer used as widely as it was 50 years ago. But this method, proven by generations, fully corresponds to the expression “cheap and cheerful.” If you are planning to whitewash walls, ceilings or borders in the garden, learn what properties slaked lime has, how to prepare it correctly, calculate the solution consumption and apply it to various surfaces.
Content
Functions and scope of use of lime in repairs ↑
Lime is not the easiest material to use. However, it occupies its niche in the building materials market quite firmly and is very reluctant to give up its position. Considering all the advantages and disadvantages, in certain cases the use of lime whitewash is advisable, and sometimes it is more appropriate to choose another method.
Important properties of lime whitewash ↑
The lime known to everyone from school is called calcium oxide in chemistry textbooks. For whitewashing, slaked lime is used, that is, it has reacted with water. Chemically speaking, slaked lime is a strong base - an alkali. It has good disinfectant properties, because an aggressive alkaline environment has a detrimental effect on fungus, insect pests and other unwanted living creatures.
Lime whitewash is not afraid of humid air, does not crack or bubble. In addition to resistance to high humidity, walls treated with this substance are resistant to temperature changes.
For whitewashing it is not necessary to wash off the existing coating; it can be applied to the old finish. Moreover, if a network of small cracks has formed on the surface of the walls or ceiling, treatment with slaked lime solution will strengthen the finish and extend its service life.
The cost of lime for whitewashing in stores cannot be compared with the price of other finishing materials. This is due to the fact that the production process is very simple - it is a simple firing of limestone in a kiln. Raw materials cost pennies, so the price of the product is low. A thirty-kilogram bag costs about $2.
Where and why is it advisable to use lime ↑
The properties of an antiseptic and fungicide make slaked lime a leader among finishing materials for damp and cold rooms: cellar, barn, garage, basement and the like. It is used for walls and ceilings. The weather resistance of the substance allows it to be used for whitewashing facades.
The record holders for using lime for whitewashing and other tasks are summer residents. Here it is applied in full swing. It is customary to whitewash walls both inside and outside, add quicklime to the soil to change its acid-base balance, treat tree trunks to protect them from insects and animals, and borders for beauty.
In those rooms where practicality rather than aesthetics comes to the fore, and where the financial side of the issue is also important, lime solution is also used to cover walls and ceilings. This can be observed in entrances, on staircases, in common corridors, and in the foyer.
It is quite appropriate to whitewash the ceiling in any living space in this way. In schools, hospitals and other institutions, lime mortar is still used for wall finishing. After drying, calcium hydroxide becomes safe and does not release any harmful substances into the air.
Buying lime - which one to buy and how much ↑
Before going to the store, you need to find out what kind of lime to buy for whitewashing - slaked or quicklime, how much of it is required and what other components will be needed. This will save you from going to the construction market again if suddenly the solution is not enough or its properties do not meet your requirements.
How to make slaked lime with your own hands ↑
As you already understand, slaked and quicklime are completely different substances, which are united only by the consonant name and the presence of calcium in the composition. For household repair work, slaked lime is used. It is sold by weight in any hardware store or agricultural department.
However, there are often situations when the farm has a fairly large supply of quicklime and it is advisable to use it rather than buy slaked lime. In this case, you can extinguish it yourself, especially since this chemical process does not require the skills to conduct such experiments in the laboratory.
So, how to prepare lime for whitewashing from lumpy quicklime. First you need to worry about personal protection. Since you will be dealing with a rather aggressive alkali, take care to protect your eyes (goggles), respiratory organs (respirator), and exposed skin (closed clothing and gloves). This must be done in the air.
Video: How to prepare a whitewash solution
You will need a deep container, such as a bucket, and a mixing tool - traditionally a stick. The list of ingredients is also short:
- lump quicklime;
- water.
The water must be cold, this is the only condition. Even a first-grader will remember the proportion – 1:1.
- For 1 kg of calcium oxide, take 1 liter of cold water.
- Combine all this in a container and mix. Almost instantly you will be able to observe the beginning of a powerful chemical reaction with the release of a large amount of heat. When extinguishing, the mixture sometimes heats up to 150 degrees; it is not for nothing that the substance is popularly called boiling water - the solution literally boils.
- When the reaction stops, heat and gas cease to be released, the lime can be considered “fluffy”, that is, slaked. However, it is not yet suitable for whitewashing.
- The solution should ripen for 2-3 weeks under a lid in a cool, dark place.
Solution proportions and consumption per square ↑
To start whitewashing with lime yourself, you need to prepare at least the following set of materials:
- powdered fluff or lime paste;
- water.
In addition, various auxiliary substances are often added to whitewashing, which give it certain properties. The base solution is prepared in a ratio of 1:3. For every kilogram of fluff, take 3 liters of water. As a result, 4 liters of solution can be prepared from 1 kg of substance.
The consumption of lime per 1 m2 during whitewashing directly depends on the type of surface on which it is applied:
- The largest consumption - about 1 liter of ready-made mortar per square - will be used when whitewashing untreated brickwork.
- A flat prepared surface requires approximately 0.5 liters per square meter of area.
Another criterion that affects consumption is painting tools. More often they use a regular flat brush or a round brush. These tools are wasteful, the mass is applied in a thick layer, and drips and drops can form. The spray gun can significantly reduce material consumption and operating time. Often, instead of a spray gun, a vacuum cleaner with reverse airflow and even hand-held tree sprayers are used.
How to calculate the amount of fluff and water ↑
Before diluting slaked lime for whitewashing, you need to perform some calculations. An approximate calculation of consumption is as follows.
First you need to calculate the area of the walls and ceiling that you plan to whitewash. For example: a room 3 by 5 m, ceiling height 2.5 m. It was decided to treat the ceiling and part of the walls from mid-height to the ceiling with lime whitewash.
Wall area: (3*2.5+5*2.5+3*2.5+5*2.5)/2=20 m2.
Ceiling area: 3*5=15 m2.
Total area: 35 m2.
Based on the average consumption of 1 liter of solution per 2 m2 of surface, it is easy to calculate the required amount for whitewashing - 17.5 liters of lime mortar. You can round up to 18, or better yet, to 20, because average consumption is a fairly flexible concept.
That is, 20 liters of solution are required, and this is 5 kg of slaked lime powder. It is worth noting that ready-made lime dough, which is sold in construction stores, is diluted in the same proportion, which means the calculation is correct for it as well.
Supplements to increase durability and combat deficiencies ↑
Since lime has been used in construction for a very long time, there are many “folk recipes” and methods that improve the properties of this substance. After all, modern water-based paints appeared not so long ago, and craftsmen were forced to practice chemistry right in their dacha or home.
The first problem that is solved by adding a secret ingredient to the lime whitewash solution is shallowing. A dried surface tends to stain everything and everyone who touches it. What to add to lime to prevent it from smearing? This ingredient is found in every home - table salt. It has a good bonding effect. Add 100 g of salt per liter of solution.
Another problem, especially when using whitewash for exterior work, is that the composition is quickly washed off with water. It has long been known what to add to lime so that it does not wash off - a fatty component is introduced into it - drying oil. Drying oil repels water and allows whitewash to last longer. Proportion 1:10, 100 ml per liter of solution.
They practice adding laundry soap, grated on a coarse grater, PVA glue, wallpaper glue, and acrylic primer. All this is done in order to ensure maximum adhesion of the whitewash to the wall, to prevent its swelling and bubbling.
White is not the only possible color ↑
To prevent the lime coating from becoming yellowish, an ordinary blue dye is added to it - methylene blue. You will need 10-20 g per liter. The whitewashed ceiling will become snow-white. But sometimes it becomes necessary to obtain lime mortar of other colors. This mass can no longer be called whitewash, and not every dye is suitable. Only those pigments that are resistant to an alkaline environment are used - mineral, but in no case organic.
Pigments used for lime paints:
- ocher (yellow tint);
- umber (greenish brown);
- red lead (orange);
- mummy (red-brown);
- chromium oxide (green);
- titanium dioxide (white);
- lithopone (white);
- ultramarine (blue).
To prepare good quality lime paints, it is not recommended to add pigment in its pure form - powder. It is first diluted with water to obtain a paste. Then the pigment paste is allowed to infuse for about 24 hours. And only after this the dye can be added to the solution. This is because grains of pigments often do not dissolve well and can drag on the brush, forming unsightly streaks of color.
How to apply the composition to a surface according to all the rules ↑
Instructions on how to whitewash walls with lime vary widely. The thing is that each master has his own recipe for a lime mixture, his own tool, and therefore his own technique. But you can try to combine the fundamental points into one algorithm. The result is a universal method, which everyone has the right to supplement or slightly adjust depending on the situation.
Is surface preparation necessary? ↑
If the task is to quickly whitewash the walls and the decorative side of the issue does not really concern you, you can skip the preparation stage altogether. In fact, you can whitewash directly on top of other coatings without worrying that the result will not live up to expectations. But if the walls are covered with adhesive paint, then you need to remove it first.
If speed is not your priority, then it is better to prepare the surface for applying lime mortar. This way the result will be more accurate. The old whitewash is washed off, the swollen areas on the plaster are removed, sanded, and puttied. The same applies to cracks, if any.
Plain water is used as a primer. The surface is slightly wetted for better contact. And if the mixture contains one or more of the additives listed above, then adhesion will be even better.
It is important to protect all other surfaces from accidental contact with lime. All furniture, if it cannot be removed from the room, the floors and walls are covered with plastic film. The worker must wear a protective suit, gloves, goggles and a mask for personal protection.
A few secrets for uniform application ↑
The application process is not particularly difficult. A brush or paint brush is dipped into a container of whitewash and the solution is applied to the walls or ceiling in a thin layer. For ceilings, it is better to use a tool with a long handle. You can make it yourself. This will make your work easier and eliminate the need to climb on unstable structures made from tables and chairs.
Apply whitewash in several layers - 2-3. Each layer must be applied perpendicular to the previous one. This way the coating will be more uniform and there will be no streaks or thickening. There are often unbleached areas in the corners. In these places it is better to go through the brush again.
It is necessary to maintain a time interval between applying layers. The previous layer must dry completely. This will happen much faster if the layers are thin. The thinnest and most uniform layer will be obtained when using an electric spray gun. The lime mixture is poured into the tank and sprayed onto the surface in tiny drops. This eliminates the occurrence of divorces.
Despite the fact that the process of whitewashing walls and ceilings with lime is not difficult, for those who are faced with this for the first time, it may seem like an impossible task. Especially when it comes to high ceilings or extensive work over large areas. It's never too late to turn to a master - a professional in his field. He can easily do this job efficiently and much faster than a beginner.
Work order
If the surface was leveled and well washed before finishing work, it will be enough to apply whitewash only in two layers. The ceiling must be mentally divided into small sections. Applying whitewash should start from the corner of the room; it will be more convenient to move from the window to the door. Before applying each subsequent layer of material, you need to wait until the previous layer dries.
To whiten the joints of the ceiling and walls, it is best to use a paint brush. It is more convenient to cover the rest of the surface with whitewash using a roller. There is no need to dip the roller too much into the paint ditch, as excess mixture on the tool can lead to the formation of smudges and streaks. The solution is applied to the ceiling in neat parallel strokes.
One layer is not enough to create a high-quality coating. The first layer may show through the shade of the surface, and may also have streaks from the roller. The finishing layer is applied perpendicular to the previous one. Do not forget to stir the solution regularly, as particles of chalk or lime may settle to the bottom of the container.
Water-based paint is easier to apply and goes on more evenly. Water-based emulsion can also be used to apply whitewash to an old layer without first cleaning the surface.
Preparations for whitewashing
The finished whitewash should be diluted with water, strictly adhering to the requirements specified in the instructions. Then the mixture is mixed well to obtain a homogeneous plastic substance.
A similar composition is applied to the ceiling in approximately 1-2 layers. Naturally, a larger number of layers will require an increase in whitewash consumption.
Precautionary measures
For personal protection and precautions, you should wear special glasses, gloves, and a tarpaulin suit.
Adviсe
Before purchasing material for whitening the ceiling, you need to calculate the approximate amount of solution that will be required for finishing. To do this, you need to take into account the area of the surface being treated and the consumption of one or another composition per square meter. It is advisable to buy material with a reserve.
When purchasing a mixture, pay attention not only to the manufacturer and characteristics of the product, but also to its expiration date. Expired material loses its performance qualities and is not suitable for creating a reliable coating.
How to remove whitewash
All finishing activities are accompanied by preparing the surface for painting. First you need to free the surface of the walls from old whitewash. For this you will need:
- water container;
- foam sponge or rag;
- scraper or spatula;
- ladder.
Clear the room of furniture in advance. If some items cannot be taken out, you need to protect them with a special film. It will protect them from contamination. To free the walls from the old coating, you need to start from the top, moving down.
To make chalk whitewash easily washed off, dissolve 1 kg of table salt in a bucket of hot water.
Removing old whitewash from walls: a – moistening with a roller; b – removing the whitewash layer with a spatula.
Let the liquid cool to 35-40 degrees and begin treating the walls with the prepared solution. Do not use all the water at once to prevent it from becoming contaminated. Gradually pour the prepared liquid into another container, then you won’t have to change the water often. Wipe the surface with a wet cloth. Repeat the procedure until the wall is clean.
To remove a layer of lime whitewash, you need to walk over the surface in several steps with a wet sponge. Then take a break for 10 minutes, allowing the old whitewash to soak. Use a spatula or scraper to remove the old coating layer. If in some places the whitewash is applied in a thick layer and is difficult to remove, tap the area with a hammer and remove it with a spatula.
An example of calculating consumables for whitewashing
For example, there is a need to whitewash the walls of a room measuring 4*5 m and 2.5 m high. It will not be difficult to calculate the whitewash area. To do this, multiply the height of the room by the perimeter.
2*2.5*(5+4) =45 sq. m.
If there is a need to whitewash the ceiling, then 5*4=20. sq. m
As a result, 20+45=65 sq. m
0.5*65=32.5 l of solution.
To obtain a similar amount of solution, you should dilute about 8-10 kg of lime, because from 1 kg of lime on average you will get 3.5-4 liters of solution.
Removing stains from walls
Removing whitewash from the ceiling.
Often, traces of various origins remain on cleaned surfaces. They get rid of them. Otherwise, after a while they will make themselves felt on the newly whitewashed walls. If traces of rust are found, they must be washed using water. Treat with copper sulfate diluted in water (take 50 g of sulfate for 1 liter of boiling water). The mixture is applied with a brush.
If the rusty stain is of impressive size, prepare a primer based on copper sulfate. Consumption of vitriol is 100-150 g per bucket of water (10 l), 250 g of laundry soap, animal glue 200 g, drying oil 30 g, sifted chalk 2-3 kg. Vitriol is diluted in a liter of water, grated soap and glue are dissolved in another container and drying oil is added. In the third bowl, chalk is combined with water. Finally, all the mixtures are mixed and the output is a primer.
Remove greasy marks with a solution of soda ash. In a liter of water (hot) dilute 3 tbsp. l. soda Soak a white, clean rag in the hot solution and apply it to the greasy stain. Repeat the procedure until the mark is removed. For 1 sq. m usually 1 liter of prepared lye is sufficient. Wipe the cleaned area well with a damp cloth.
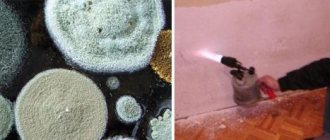
To remove soot from walls, use a 3% solution of hydrochloric acid. If mold is detected, you can use bleach or copper sulfate solution. Any of the ingredients is diluted in water.
Filling minor flaws and priming the surface
Cracks in the walls will require repair. Remove any fragile particles to prevent them from falling off later. Prime the cracks and begin to putty them. For putty you will need:
30-50 grams of glue are diluted in a liter of water. Dry plaster and chalk are added to this mixture. To properly prepare putty, the ingredient consumption is: 1 share of gypsum, 2 shares of chalk and the same amount of diluted glue. Having combined all the ingredients, the mixture is thoroughly mixed until a dough-like mass is obtained. Using prepared putty, use a spatula to seal cracks and cracks.
Having got rid of all minor defects, they begin to prime the working base for chalk whitewash. The primer mixture is prepared using:
- laundry soap (40%) 200 g;
- drying oils 50-100 g;
- slaked lime 3 kg.
The soap is grated and diluted in hot water (3 l). Add drying oil there. In a separate container, dilute lime in water (4 l). Mix the resulting mixtures. Finally, dilute everything with water to 10 liters. Prime the walls with the prepared solution using a roller, brush or spray.
Whitewashing with chalk - Prices 2021
| Name of service | Price* (UAH/m²) | |
| from 300m² | from 1000m² | |
| Whitewashing the ceiling and walls with chalk | 18 | 16 |
| Washing (cleaning) old whitewash | 30 | 25 |
The “Price” includes: work + material
- “work” includes: dust removal of the surface, whitewashing (white color)
- “material” includes: glue, blue, chalk
* +2 UAH. when performing work at a height of 4 m to 10 m. * +3 UAH. when using an aerial platform or picaniski (at a height h > 10 m) * +2 UAH. if additional surface preparation is necessary locally (cleaning off poorly adhering whitewash, plaster, paint, putty)
Note We carry out whitewashing of more than 300 sq.m of industrial, industrial and commercial premises. We do not take on rooms, apartments, or private houses.
We work not only in Kiev and the Kyiv region, we are ready to travel to any city in Ukraine.
