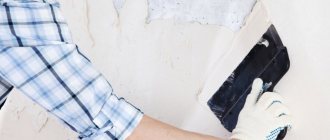
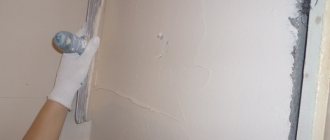
Initial stage of puttying
All stages of repair are very important. You can't miss a single detail. One detail that may not seem unimportant at first glance can lead to the need to renovate the entire apartment.
Or endure the shortcoming and cling to it with your eyes every day. And for everyone who comes, come up with a new explanation about the flight of design ideas, justifying why this particular wall looks different from all the others in the house.
An important role in the successful completion of repairs is played by the selection of quality materials. There is a wide selection on store shelves from a large number of manufacturers.
The German company Knauf has been producing various building mixtures for a long time and occupies a separate place among other manufacturers, having won the respect of not only renovation professionals, but also those who like to disturb the quiet rest of their neighbors by conducting experiments on the walls of their own home.
Types of putty
Putty is divided into several types according to purpose and composition. The main difference in composition is the binding element. Gypsum, cement or polymer can act as a binder.
Starting putty from Starateli company
So, the composition is:
Gypsum-based putty is intended strictly for interior work; it applies well, holds tightly, and does not crack or shrink when dry. Does not tolerate moisture at all.
The cement base is capable of creating a very hard layer, is practically not afraid of moisture and is most suitable for outdoor work. But it shrinks the most when drying, cracking at the same time.
Polymer putties are suitable for all types of work, but they are much more expensive than others. What material is the binding element determines not only where it can be used, but also for what.
And according to their purpose, basic, finishing and universal putties differ.
Knauf base or starting putty is intended for application to walls or ceilings after plastering and serves as the basis for the finishing putty to ultimately give a perfectly flat and smooth surface.
The main difference between the base putty and the finishing putty is the size of the fractions that make up the mixture. This is especially noticeable if the solution is rubbed between your fingers.
The starting putty consists of larger fragments; after drying, this gives a stronger structure.
When rubbing the finishing putty, on the contrary, no lumps should be felt between your fingers.
Universal putty tries to combine the qualities of both putty mixtures.
Types of starting putty compositions
All starting putty compositions are divided into three large groups depending on their composition and into two groups depending on the method of application.
Mixture composition
Polymer putties are the most durable.
By and large, the composition of both base and finishing plasters is largely identical.
They differ only in the size of the filler fractions and the type of binding components. Both solutions are:
- Cement. They use various types of cement as a binder. They have a gray color of varying saturation. Among their distinctive qualities, mention should be made of their high resistance to dampness. But at the same time, when drying, cement compositions shrink strongly, which can lead to cracking if an excessively thick layer is applied. Such mixtures are well suited for finishing building facades, treating walls and ceilings in bathrooms, kitchens, saunas, baths, etc. Using cement mixtures, you can putty door and window slopes.
- Plaster. They are distinguished by their bright white color. They are created on the basis of gypsum, as a result of which they are not sufficiently resistant to moisture. At the same time, gypsum starting putty is elastic and does not shrink when dried. The drying time of the treated surface is much shorter than that of cement compositions.
- Polymer. The most high-tech version of putty
compositions created on the basis of polymer compounds. They can be either white or light gray. They have a long service life, are flexible and easy to use. Among the main disadvantages of polymer mixtures is their high cost compared to cement and gypsum compositions. They are universal in application - they can be used for both external and internal work.
Cement compositions in some cases have a dark gray color, so they can be visible through a thin layer of finishing putty or light paint. If you plan to apply a light-colored finish to the wall, it is better to use gypsum solutions as a base.
Application area
According to their purpose, starting putty compositions can be:
- for outdoor work;
- for interior work.
Facade compositions must withstand atmospheric conditions well.
For external work, special compositions that are resistant to aggressive external influences are used. First of all, they must tolerate high humidity well, which is why they mainly use cement and polymer putty for finishing facades. The same mixtures are also used when working in rooms with difficult operating conditions.
For interior work, you can use any of all types of starting mixtures - cement, gypsum, polymer.
But provided that the room being finished has normal air humidity, not exceeding 65 - 70%. Otherwise, the use of gypsum compositions is contraindicated.
Putty stages
ILMAX starter putty
It is very important to use high-quality mixtures from a trusted manufacturer, for example, the German company Knauf. After applying each layer, be sure to check how evenly it lies on the wall.
And you need to start with the fact that the plaster should lie flat. The thickness of the applied layer depends on what type of putty is used.
If you immediately start working not carefully and hope that by applying subsequent layers everything can be corrected, then...
Firstly, the work time will increase, because there is a minimum and maximum thickness of the putty layer, and several layers may have to be applied. After applying each layer, you must wait until it dries completely before applying the next layer.
Secondly, this will increase the consumption of putty mixture, and, accordingly, the cost of the entire repair.
After the plaster has dried, it must be treated with a primer. This will increase the adhesion of materials. The entire area of the plaster must be covered with primer, avoiding any missed spots.
The starting putty is applied when the soil is completely dry. In this case, it is advisable to use a painting net. It is applied to the wall and completely covered with putty.
Knauf start putty is applied to the plaster in a layer of no more than 5 cm. If this thickness is not enough, you need to apply one or two more layers of putty. After all the work with the base putty is completed, the finishing putty is applied. Its purpose is to create a surface ready for the application of decorating materials: wallpaper, various types of paint, any types of decorative panels.
Purpose
Many people have heard about such a building mixture as putty start. It is also sometimes called putty. But at the same time, only a few know what it is and what it is intended for. Usually these are professional builders who have carried out more than one repair with their own hands. But for people who are new to this business, such knowledge will help not only to correctly apply the solution for its intended purpose, but also to use it to make high-quality finishing of walls and ceilings.
In terms of its composition and purpose, starting-type putty is somewhere in the middle between mixtures used for finishing leveling of various surfaces (walls and ceilings) and plaster. But the structure of such putty will be somewhat finer than that of plaster, but larger than its other names. Today, the most popular manufacturer of building mixtures, including this mortar, is the German company Knauf.
At the same time, if during the repair one Knauf mixture was used, then in choosing the rest it is also worth giving preference to this brand. In such a situation, there will definitely be no problems with the quality of the finish.
The main purpose of any starting putty (Knauf or other manufacturer) is to level rough surfaces. These include the following types of surfaces:
- brick walls;
- concrete floors;
- plastered walls and ceilings;
- surfaces that have a significant deviation from level;
- surfaces with obvious defects in the form of cracks, chips and potholes.
There are situations when starting putty is applied to a reinforced layer (fiberglass mesh). This approach is used for severe unevenness. In case of minor deviations in level, the putty is applied in several layers. At the same time, its consumption increases significantly compared to the method with fiberglass mesh. You should always remember that the consumption of any brand of mixture (Knauf, etc.) will be determined by the thickness of the applied layer. Consumption is usually determined per 1 m2 of treated surface. Therefore, the mixture must be purchased taking this parameter into account.
Related article: How to put iron on a roof with your own hands
Starter type putty is suitable for the following types of work:
- filling the grooves;
- finishing door and window openings around the frame;
- sealing joints formed between ceiling and wall reinforced concrete panels;
- alignment of window slopes.
Please note that for interior and exterior work, you should use different types of mixtures, the characteristics of which correspond to certain operating conditions. For example, when working on a façade or finishing seams on balconies, you should only use putty that is intended for exterior work.
Manufacturer Knauf
Putty start-finish company TYPHOON
The company was founded in Germany back in 1932 by the Knauf brothers, Alfons and Karl. At first they specialized in the production of only dry gypsum-based mixtures; in 1949, the first plant for the production of gypsum building mixtures was founded.
Over time, new enterprises were built or acquired, and the range of materials produced expanded significantly. Now these are not only dry building mixtures, plasters and putties, but also other building materials. Such as primers, gypsum-based sheets for various applications, finishing cement boards, thermal insulation boards, various fasteners, waterproofing materials, adhesives.
Knauf also produces electric and hand tools. These include drills with hammer drills, spatulas of various sizes and purposes, and tools for processing putty after drying. More complex mechanisms are also produced. Plastering and puttying machines designed for preparing, mixing, feeding and applying plastering and finishing solutions to surfaces. And also mortar pumps and pneumatic conveying units.
In general, everything that is necessary for high-quality preparation of walls for the application of decorating materials. And for everyone. From large teams of professional builders, to people who just need to make minor repairs in their apartment or house.
Video “Applying starting putty”
This video will teach you how to do the starting putty when preparing walls for wallpaper.
We recommend that you read
What is good about latex putty and where can it be used?
Which finishing putty is best and how to apply it?
What is acrylic primer: types and applications
Features of Knauf starting putty
Starting putty KNAUF
Starting putty HP Start from Knauf is produced on a gypsum and lime base.
Having a medium coarse dispersion with a grind of up to 80 microns, it is a coarser grind compared to the grind of finishing putty, but finer when compared to plaster.
HP Start can be used as a plaster. It is applied to walls in layers of up to 15 mm, which allows you to hide all visible defects. If necessary, several layers can be applied.
The substances included in its composition do not have toxic properties and are harmless not only to humans, but also to other inhabitants of the home. Among other things, it has excellent soundproofing properties. What is especially valuable when decorating walls in apartments.
Preparing a ready-made solution from a dry mixture does not present any difficulties. For 2 kg of dry mixture you need 1 liter of water. To avoid trouble, add the mixture to water when mixing. It is best to stir using a mixer attachment, this will ensure uniform mixing and prevent the formation of lumps.
Don't mix too much. Once dry, the putty becomes unsuitable for further use. The technology of application to any surface is simple and does not require any special skills.
Depending on the thickness of the applied layer, the gypsum putty dries completely in 4-6 hours.
Then you can start sanding. This procedure is carried out either manually, using coarse sandpaper, or with a grinding machine. Each layer must be sanded.
If everything is done correctly, with the right materials, the right tools, and most importantly with the right hands, then the result of the repairs will only please, and not irritate, both builders and customers.
source: //vidyotdelki.ru/shtuk/startovaya-shpatlevka.html
Manufacturers of leveling mixtures have simply bombarded the modern market with their products. Here are Sheetrock and Knauf putties, and Vetonit and Yunis compositions. There are quite a few of them, and each has its own advantages, and understanding them is not always easy.
The variety is so huge that the question constantly hovers among consumers, which putty for drywall is better? To understand this, it is necessary to consider the proposed types.
High quality starting putties
Starting (basic) putties are used as an independent material or applied to plaster. If you need perfectly smooth walls for painting, it is better to apply putty in two layers. The work is done with a large spatula from 40 cm, and it is better to take the material with a second spatula with smaller dimensions. The building rule is used in cases where the walls, in addition to small defects, have a vertical deviation.
Applying base putty
Thus, the main purpose of the starting putty is to level the walls. If necessary, you can use a special plastic mesh for reinforcement and better adhesion to the surface. Depending on the condition of the premises (dry or wet), the type of work (internal or external), we select a mixture for putty. Affordable and reasonable prices are another plus for starting putty.
Starting putty "Rusean"
The basic dry building mixture "Rusean TT" has proven itself excellent both for facade work and for interior decoration in rooms with any microclimate. It is quite possible to use it in bathrooms, swimming pools, basements, and entrances. The putty is characterized by high adhesion, vapor permeability, moisture resistance, but its main trump card is plasticity.
Sealing grooves for electrical wiring in the wall
The solution adheres well to ceilings and walls; it is often used to seal various cracks and cracks, including electrical wiring grooves. The “Rusean TT” mixture can be applied in several layers up to 5 mm thick after each previous layer has dried. By strictly following the manufacturer's instructions, finishing fairly even walls with a 1 mm layer of putty, you can achieve economical material consumption: 1.1 kg per 1 m2.
Basic putty “Prospectors”
One of the best starting putties - from the Russian one - initially has a light beige color. Its base is white cement, so it is suitable for any type of basic finishing.
Working with basic putty Prospectors
The main property is the preservation of strength at any level of humidity in the room. The consistency of the resulting solution from the dry mixture “Starateli” allows you to obtain a smooth finish surface in the second layer that does not require grinding.
Starter putty PUFAS
The composition of the dry mixture of PUFAS leveling putty includes gypsum as a base, as well as methylcellulose. The material is characterized by high density and ductility. In this regard, it is used as a thick-layer base putty with the ability to eliminate differences of up to 15 cm.
Putties PUFAS
The putty was originally developed by the German company PUFAS, founded in 1928. Putty and paint and varnish products from this manufacturer are in a high position in the global construction market. PUFAS putties, which have the highest adhesion, are produced on gypsum, cement and polymer bases.
Putty from Sheetrock
Shitrok putty is a leveling material based on high quality polymers. And if we talk about surface finishing, this material has no equal. The composition can be based on vinyl fibers, marble chips, and other fillers. That is, it can be both a leveling material and decorative plaster.
We are interested in the first sample, because we are considering the topic of how best to putty drywall. So, why is Shitrock so popular?
- Firstly, it is an opportunity to purchase ready-made putty. It is sold in plastic containers. Or buy semi-finished material - this is a dry mixture that will have to be diluted with water in certain proportions. The first one is more expensive than the second one, and it also has a shorter shelf life.
- Secondly, the solution is polymer-based, which means that Sheetrock putty applied to the surface will never crack. At least for the warranty period.
Characteristics
- Density – 1.65 kg/l.
- Drying time – 5 hours.
- Consumption – 150 g/m².
- The shelf life of the finished putty is 1 year.
- The color of the material is white.
- It is usually packaged in plastic buckets of 5-28 kg.
- The recommended thickness of the applied layer is 3 mm.
Leveling compounds from Knauf
To the delight of a large number of consumers, the Knauf company, a leader in the production of drywall, is also a leader in the production of leveling mixtures. In this regard, the company tries to offer Knauf putties that are exactly suitable for plasterboard sheets from this manufacturer. Therefore, when you purchase gypsum board from this brand, immediately ask the sellers for putty mixtures. Their combined use is the highest guarantee of quality.
Knauf has a whole range of putties. Here are the main ones:
- Fugen GV. This gypsum and polymer based solution is used to seal seams and sheet surfaces. It has amazing properties: it does not crack or shrink, it is 100% environmentally friendly. It is produced as a dry mixture, which is brought to readiness by diluting with water.
- Knauf Rotband. This is also a gypsum mixture with polymer additives. Its main purpose is the finishing leveling of not only plasterboard sheets, but also concrete and plastered bases. It has increased strength and does not crack. Also dry.
- Uniflot. This dry gypsum putty is made from high-strength gypsum with the addition of polymer components. Used only for sealing seams. But please note that if Uniflot is used, then there is no need to use reinforcing paper tape or sickle tape. This type of Knauf putty is so durable.
Division of compounds according to purpose
All types of compositions described above are further divided depending on their purpose. A mixture for puttying walls, within one type, may vary in the size of the component fraction and the type of plasticizer. As a result, starting, finishing and universal putties are produced.
Composition leveling.
Starting lineups
This type of putty in the specialized literature may also be called a leveling or initial composition. It is used to cover plaster, as well as for rough filling of various kinds of seams and cracks on the surface of walls. Starting putties are distinguished by a large fraction of components and, as a result, high adhesion and serious strength.
They can be used not only for treating large areas on walls, but also as a leveling compound under door or window slopes. In addition, it is these solutions that are used to level walls for tiling. In the vast majority of cases, these are cement-based putties, although gypsum modifications are sometimes found.
Repairing the wall with the starting crew.
Advice: when choosing a starting composition, you should pay attention to the maximum permissible thickness of the applied layer; the higher this value, the naturally stronger the coating will be. Often this characteristic fluctuates within 25 mm.
Finishing lineups
Finishing putty for walls has the finest fraction. These mixtures are designed to perfectly level the surface. They are usually applied on top of the starting putty, the only exception being drywall. Here, both seams and irregularities, as well as the sheets themselves, are covered only with finishing compounds.
Plasterboard putty.
This covering material is used in cases where the wall is being prepared for painting or wallpapering. Its strength is not so high, but in this case it is more of a plus than a minus. Indeed, according to technology, after application the wall must be sanded with a paint mesh or emery, and high strength will be clearly inappropriate here.
Domestic finishing composition.
Important: many authors classify finishing putties as decorative. This is not entirely true, decorative mixtures are a separate direction; in addition to a wide palette of colors, they may have inclusions of particles of different fractions, which is incompatible with the classic definition of finishing putty.
Universal formulations
Universal multi-component materials for wall putty, the vast majority have a polymer base. It is convenient to work with them, since the same material is used for both rough leveling and fine surface treatment. They are especially suitable for beginners and inexperienced craftsmen. As you probably already understand, the price for them is more than serious.
Tip: it makes sense to buy universal materials if you need to fill a large number of small cracks in walls or ceilings. They are also excellent for installing decorative gypsum blocks.
Vetonit mixtures
Vetonit putty is quite well known - it is a finishing solution after which you can apply paint or glue wallpaper. In addition to gypsum, the composition also includes polymer glue. It is this that sets the tone for high performance, especially with regard to the strength of the applied layer. By the way, its thickness is 1-5 mm. Material consumption is 1.2 kg/m² with an applied layer thickness of 1 mm.
Please note that Vetonit putty can only be used in dry rooms and only for interior work. Packaged in 25 kg paper bags, shelf life 18 months. The prepared solution can be used within 24 hours, after which it sets and cannot be used.
Eunice
Eunice Slade putty is used only for sealing seams. Some inexperienced craftsmen use it to level the surfaces of gypsum board sheets. And this is a big mistake. Even a primed surface cannot guarantee good adhesion of this solution to the smooth surface of plasterboard sheets. Someone might recommend this option - apply notches with a knife or other sharp instrument, and after that use this type of putty. In principle, this is possible, but is it worth it? After all, there are mixtures on the market that are designed specifically for these purposes. There are universal options. Therefore, you should not experiment.
Making your own starting putty
On the modern market of finishing materials there is a huge range of different putty compositions, including basic varieties. However, in some cases large hardware stores may not be available.
For example, when a house located somewhere in the countryside is being renovated. The table below provides recipes for preparing starting putties at home.
| № | Name | Application area | Preparation |
| 1 | Gypsum-chalk | Leveling walls made of concrete and gypsum plasterboard in dry rooms | Mix 1 part plaster and 3 parts chalk in a dry bowl. Gradually, while stirring, pour the mixture into a container with a 5% solution of wood glue and stir until smooth. Use immediately - the solution hardens quickly. |
| 2 | Oily | Wooden surfaces exposed to temperature changes (wooden façade cladding, window frames). | Mix 2 kg of chalk with 1 kg of drying oil, add 0.1 kg of drier and put the mixture on fire. Bring carefully to a boil and cool. Use warm. |
Dry mixture or ready-made putty?
Let's figure out which putty to choose: semi-finished or ready-made? Firstly, let's start with the fact that the technical and operational characteristics of the two options are no different. It's the same material. It’s just that one is sold dry, the second ready-made. Ease of use is the basis here.
Ready-made putties can be used immediately. True, there is one “BUT” in this scenario. In the factory, the material is effectively diluted with water. It is one hundred percent correct, because it is controlled by the manufacturer. The semi-finished mixture will have to be stirred with water manually. And there is a possibility that the proportions may not be maintained.
Plus, the ready-made mixture is more expensive. This is understandable, because an additional technological operation is performed, and plastic containers are more expensive. True, the shelf life of the finished solution is shorter.
As you can see, not all solutions can be universal. Each has its own purpose. Therefore, when purchasing, pay attention to their technical characteristics and scope of application. The best option is a universal type. We invite you to discuss the topic of the article and decide which putty is better.
source: //ogipse.ru/201-harakteristiki-luchshih-shpaklevok-ot-shitrok-knauf-yunis-i-vetonit/
Polymer putty
The construction market is replete with new products. Manufacturers are trying to make the lives of their customers simpler and their products more in demand. It was for this purpose that polymer putty was developed.
This material is used for processing walls and ceilings at the penultimate stage of finishing, followed by decorating the surfaces - painting them or wallpapering them.
Finishing gypsum putty
This material is applied to an already prepared surface, namely to a layer of starting putty. This composition is dominated by gypsum and is softer than the starting one, so it is very easy to sand.
After completing the work with the final layer, the wall is ready for further work and is perfectly level (subject to technology and high-quality work).
What is the difference between polymer putty and any other?
The composition of the material is a combination of polymers and plasticizers. Due to its structure, the product has increased elasticity and strength. Among polymer putties, two types can be distinguished: acrylic and latex.
The first type is best suited for performing various types of work - acrylic putties are universal. They are based on an acrylate-siloxane mixture.
Using this material, you can finish both the internal surfaces and the facade of the building. There is no need to worry about the durability of the result, because a significant advantage of acrylic putties is their resistance to moisture, that is, the coating does not collapse upon contact with water. The basis for applying the product can be cement, plaster, brick.
The drying speed of this material is higher than that of its competitors. After processing, you will receive a flat, smooth surface that is highly reliable. Also, due to its elastic structure, this mixture is ideal for sealing small cracks and joints that are sensitive to changes in temperature. Acrylic putty is often used both as a starting and finishing coating, which is also a big advantage.
And for interior finishing, latex putty is good. It is easy to use and requires almost no special skills. This type of material has a neutral odor and a long service life, which significantly distinguishes it in the finishing materials market.
What is the difference between start and finish?
First, let's look at what criteria for dividing putty exist.
By composition:
- Plaster;
- Polymer;
- Cement;
- Glue-oil.
By degree of readiness :
- Ready-made solutions used for direct application to the wall;
- Dry mixtures to be diluted in water and subsequently used.
By fraction and grain size of the base material:
- Starters;
- finishing;
- universal.
All putties are divided into starting and finishing. This division is somewhat arbitrary, since starting putty can sometimes be used as a textured base before applying paint. And the finishing mixture is the opposite, before gluing complex wallpaper.
The division of putty into starting and finishing is determined, first of all, by the size of the base aggregate fraction.
Starter putties have larger sand grains, which allows you to apply a thicker layer and not be afraid of shrinkage and cracks. The relief of the walls after applying such mixtures turns out to be quite rough and grainy and requires subsequent finishing.
Such surfaces cannot be sanded to a perfectly smooth state.
The main purpose of starting putties is to create a base layer for finishing. Such mixtures can be applied in a layer of up to 5 cm . They perfectly cover all the depressions and small tubercles.
Finishing putties look like a paste-like mass with small filler particles. There are no large grains of sand in it. Its creamy consistency spreads in a thin layer on the walls and fills all the smallest flaws and irregularities. Such walls are easily sanded and become perfectly smooth. Paint and decorative plaster fit well on them.
Read our article about the difference between putty and plaster.
Most often, starting and finishing putties are used together. The first layer, depending on the degree of unevenness of the walls, is the starting mixture. Second, after proper drying and sanding, finishing putty is applied.
What should you consider when choosing putty?
Latex putty
First of all, you need to pay attention to the scope of its application.
To eliminate gross surface defects during rough finishing, leveling putties are used. They fit well on any base and do not wash out when priming.
For work on less significant details - microcracks, small pits, there is a finishing putty. It is recognized as a material harmless to humans and the environment, since, even when drying, it does not emit any hazardous substances into the air.
Despite the seemingly smooth surface, the finishing putty contains micropores that allow the surfaces to “breathe”. Most often it is used for interior work. The special putty has a small range of applications. As the name implies, it is designed for highly specialized tasks.
There are also universal putties - they combine the features of each type.
It is worth noting the cost-effectiveness of this material. Despite the rather high price, when used correctly, these mixtures are very profitable. Thanks to its structure, the putty applies evenly and can significantly reduce costs.
In addition, the shelf life of dry polymer putty after opening the package can be up to a year. However, the container in which the product is located must be tightly closed to prevent moisture from entering.
When working with polymer putty, it is worth remembering a few points:
- The base for putty must be prepared in advance. It should be free of dirt, grease and any foreign substances. The appropriate type of primer must be applied on top.
- The putty should be mixed in a separate container in three stages. First you need to mix the powder with water until smooth. Next, let the mixture sit for ten minutes. And at the final stage, mix again. If you want to save your time, pay attention to ready-made solutions. They are used for both internal and external surfaces.
- The tool for applying putty can be a trowel or spatula.
The thickness of the material layer is at least three millimeters. After completing all the preparatory work, we proceed to application.
consistency of prepared putty
A small portion of the solution is transferred from the container to a spatula using a trowel. Next, you need to apply the spatula to the surface to be treated at an angle of 30 degrees and evenly “stretch” the material over it. Before starting work, be sure to make sure that your tools and container are not contaminated in any way.
To further level the plane, you must wait from four to six hours, depending on the individual characteristics of a particular brand. The air temperature during drying is +5C to +35C.
Use sandpaper to smooth out minor imperfections. If you feel that one layer of putty is not enough and there are still uneven spots on the walls or ceiling, you can repeat the application. However, the previous layer must dry thoroughly. After the treatment is completed, you must wait another 24 hours until it dries completely.
Tools should be washed immediately with warm water. Otherwise, the solution will harden and it will be extremely difficult to remove it. Try to avoid getting the composition on your skin; use special gloves during all finishing work. Although the material is not dangerous, minor irritation may occur.
Tie the opened package of the mixture carefully to avoid contact of the product with water or air. If you purchased a ready-made solution, simply close the lid tightly. If the prepared putty has not been completely used up, the remainder can also be stored in a sealed container. Some mixtures at this content remain usable for up to seven days.
The best universal putties
In some cases, when you have to finish interior spaces, dry and wet, as well as work outside the house, it is beneficial to buy a universal puttying material.
There are universal putties that are immediately suitable for leveling and finishing. In dry and damp rooms, during interior and exterior work, they can be used to level walls with only minor defects and differences. Therefore, in case of significant unevenness, you will have to use the traditional two types of putty: starting and decorative.
Knauf Fugen putty based on gypsum
The universal composition of Knauf Fugen putty allows you to work with completely different types of surfaces. The dry mixture is available in convenient bags weighing 5, 10 and 25 kg. Depending on the additives, the putty can be specialized: Knauf Fugen GV - for the surfaces of gypsum fiber sheets, Knauf Fugen Hydro - for the surfaces of moisture-resistant plasterboards.
Universal putty Knauf Fugen
Knauf Fugen putty is a durable, non-shrinking material that creates a monolithic surface without cracks. Its versatility is expressed in its use for fastening wall panels, as well as gluing gypsum elements to each other and to walls and ceilings. The environmentally friendly mixture dries quickly after application and is used sparingly, since the layer should not be thicker than 5 mm.
VGT acrylic universal putty
VGT acrylic-based putty is universal and is considered the most convenient to use. Acrylic today is one of the materials used, which is part of many construction finishing products. Thanks to acrylic, VGT acrylic putty is moisture and frost resistant, perfectly masks seams and cracks in concrete, plaster, brick, wood, and particle boards.
VGT acrylic universal putty
It is used inside and outside buildings with a layer thickness of 1 to 7 mm. Builders like VGT acrylic putty because it has high adhesion and easily lays on the surface in an even layer. Professionals skillfully use it not only for starting, but also for finishing.
Puttying the surfaces of the walls and ceiling of your home will be a quick and uncomplicated process if you become familiar with the sequence of actions and correctly select high-quality dry mixtures, which Russian and European manufacturers succeed in creating. In our online store of building materials "Kuzmich24" you will find most of the best putty products from well-known manufacturers at an affordable price.
Your Kuzmich.
How to determine that you have chosen a good polymer putty?
Drying time should not exceed that indicated on the packaging. During work and after the coating has “set,” the putty should not crumble or crack. If the product is chosen correctly, you will get a film that is smooth to the touch.
After the layer dries, the putty remains soft for some time. The consistency of the product is uniform; when working with a spatula, the material does not stick to the tool and does not spread over it.
At the mixing stage, it is worth paying attention to how much water is required to obtain the solution. If the material swells before your eyes, absorbing a huge amount of it, you should discard it. Most likely, you bought a low-quality product. The other extreme is no less dangerous - if the powder does not “want” to mix with water, but repels it, its use is unlikely to give the desired result. The norm is to combine powder and water in a ratio of one to three.
It is also important to take into account that high-quality putty does not create barriers to the use of other paints and varnishes. When subsequently painting the walls and ceiling, the color is uniform, and “dips” in its intensity due to incompatibility with putty are completely eliminated. There should also be no peeling or rolling.
And the main thing when performing any work is to strictly follow the instructions. We must not forget that the finishing of the internal surfaces of buildings will differ from the finishing of facades in some technical aspects. For an experienced specialist, it will not be difficult to understand all the intricacies of the matter.
source: //vidyotdelki.ru/shtuk/polimernaya-shpaklevka-vybor.html
Oil-adhesive putty is not a new product on the market in the line of leveling and finishing compounds, but it has proven effective and practical due to its relatively low price and good properties. It is widely used when working with concrete, brick and wooden bases, plasterboard, window sills, chipboard, MDF and fiberboard. This putty allows you to get rid of uneven walls/ceilings, old holes, cutouts, cracks and similar “troubles” without much effort and expense. If you need to carry out a quick renovation of a living space without any special demands on quality and on a limited budget, this putty is for you.
Ready-made oil-adhesive putty
A few words about brands
- Knauf HP (Start) has established itself as a very high-quality product for dry residential and industrial premises. Intended for initial cladding of walls and ceilings with a layer thickness ranging from 4 to 15 mm. Packaged in bags with a maximum weight of 30 kg.
A standard bag is enough to cover a surface of 4 m², provided that the layer thickness is 10 mm. Be careful, this material begins to set within 15 minutes, and dries within a day at room temperature;
Knauf HP (Starter).
- Knauf HP (Finish). The material has a relatively affordable price and is intended for arranging dry walls for painting or wallpapering. Not suitable for wet rooms and façade work. The quality of the finishing coating is quite high, but most professionals note the presence of solid particles in the bags, which seriously interferes with work;
Knauf HP (Finish).
- Ceresit ST 29 (Start). The mixture is quite expensive, intended for processing concrete, brick, lime and sand-cement plaster. This composition is also designed for dry rooms, but unlike the previous version, it retains plasticity for 50 minutes after mixing and dries in 15 hours. Additional strength is provided by inclusions of reinforcing fibers;
Ceresit ST 29 (Start).
- Ceresit ST 225 (Finish). Like its starting analogue, the mixture is highly expensive. But it is unpretentious in choosing a base; this finishing cladding can be successfully used on most surfaces. Sold in 25kg bags, working life is about 60 minutes;
Ceresit ST 225 (Finish).
- Kreisel 662 (Station wagon). Cement-lime fine-grained putty, which can be used on all types of plaster, as well as on concrete or brick. It is considered environmentally safe, therefore it is allowed not only for exterior, facade, but also for any interior work. Packaged in 25kg bags;
Kreisel 662 (Station wagon).
- As you understand, it is impossible to describe all building mixtures on the market within the framework of this article. Let’s just say that our compositions are in no way inferior to foreign analogues from the most famous ones, “Starateli”, “Ural Construction Mixes”, “Yunis” and “Volma”.
The Poles are represented by the Atlas brand. In addition to the above-mentioned Knauf and Kreisel, the Germans also sell Henkel. The Swedes are Beckers, the Finns are Tikkurila, and the USA is represented by the USG brand.
Important: no matter what brand you choose, all materials, both the main ones, meaning the starting and finishing putty, and the accompanying ones, which primarily include primer, must be taken from one manufacturer. Here, saving can lead to disastrous consequences.
Primer for Ceresit.
Composition and properties
In appearance, it is a viscous, thick paste-like homogeneous oil-adhesive mass, which includes acrylates, drying oil, glue, and plasticizers. The putty is white and odorless. To obtain the specified technical characteristics, it is supplemented with ingredients and additives. The putty is supplied ready-made or in the form of a dry mixture. There are types for fire and explosion hazardous areas. There is also putty of increased whiteness, often used for decoration.
Why professionals value putty:
- Plasticity is considered the main advantage of oil-adhesive putty. It lies down, penetrating into all cavities and grooves.
- High adhesion composition. Before use, the surface should be treated with a primer.
- Oil-adhesive putty is distinguished by its versatility and high technical characteristics. It is good for concrete and wooden surfaces.
- Dries quickly.
- After hardening, the composition is perfectly polished and can withstand the application of several layers of decorative finishing. But you have to work carefully - she doesn’t like strong mechanical influences.
- Highly environmentally friendly if the composition does not contain technical drying oil, which is widely used for the production of oil-based adhesive putty for wood.
Dry adhesive mixture
Disadvantages include:
- The putty is not suitable for external work, since the technical specifications are not designed for environments with high humidity.
- It is sensitive to conditions: they work with it at temperatures above 10-15 degrees (optimally 20-22 degrees) and humidity less than 65-70%.
- Oil-adhesive putty is useful where oil paints are used for final finishing. Low compatibility of the finish with other types is the main drawback.
When purchasing ready-made adhesive putty, take into account the expiration date. An expired mixture dries poorly and quickly loses its plasticity. During storage, freezing of the composition is not allowed, otherwise it will become unusable.
You can prepare the putty yourself. For this you will need: 1 kg of natural drying oil, 400 ml of solvent, 2 liters of bone glue (10%), ground chalk. The glue dissolves, drying oil is poured into it and quickly mixed. Then solvent and chalk are added, which is needed to create the required consistency. If you add grated laundry soap, the solution will lie more evenly.
Where to begin
Start by studying the instructions for use, including safety requirements. You should work in a room with sufficient ventilation, wearing rubber gloves and a hat. Do not allow the mixture to get into your eyes. If this does happen, rinse immediately with clean water. We must remember: the putty contains oil, which is a highly flammable substance, and they should not be kept near an open flame.
Before application, it is necessary to clean the working surface from dust, dirt and grease. When the coating peels off, it must be removed. For better adhesion, treat the surface with a primer and antifungal compound.
Required Tool
What is useful and stages of work
For finishing you will need:
- Metal, rubber spatula (for dry mixture - only metal),
- Drill with stirring attachment,
- Construction float or sandpaper.
The putty is mixed before use. If it is excessively thick, dilution with water is allowed. When there are large defects on the surface, it is first plastered and, after drying, primed. Experience has proven that putty adheres better to plastered surfaces. After thorough drying, adhesion increases.
When working with the ceiling, moisten the whitewash generously and allow it to soak for 15-20 minutes, after which the layer is removed with a spatula and the surface is wiped dry. When the surface is covered with water-based emulsion, it is softened with a composition prepared from a bottle of iodine in a bucket of water and removed with a spatula.
If the base is damaged by a fungus, you should use an antiseptic antifungal drug or a solution of copper sulfate (5 grams/liter).
If the working surface is covered with oil paint, pry it up with a spatula and remove everything that rises, clean it with sandpaper and prime it. This can be done with pure drying oil, as well as latex diluted with water in a ratio of 6 to 1.
Oil-adhesive putty is applied in a layer of less than 2 mm. Masters do this in 1-2 approaches. At the same time, it is as if rubbed into the surface. The next layer is applied no earlier than after 3-4 hours or after complete hardening. Some recommend waiting 24 hours. It lies perpendicular to the first. There can be as many layers as required to completely level the surface. The thinner the layers, the stronger the putty will hold.
Applying plaster
How to use
Starter type putty is applied in a certain way. Each manufacturer describes in its product instructions how to use the product in a given situation. Typically, the application for different types of putties differs only at the first stage - preparation.
Cement and gypsum mixtures must be diluted with water in the required proportions, but polymer mixtures should simply be opened and mixed. They are initially ready for use. Remember that the prepared mixtures harden quite quickly after being diluted. Therefore, they need to be prepared only before the immediate start of finishing work.
All types of putty must be applied to a dry, stable and pre-primed surface.
Article on the topic: Cross stitch: how to do it correctly, videos and photos, how to learn to sew, how to make aspen, the importance of processes from scratch
For relatively flat surfaces, putty is used as follows:
- Use a spatula to scoop up the solution in large portions and apply it to the wall with sweeping, wide strokes;
- all movements must be fast and confident;
- When applying, the spatula should be pressed tightly against the finishing surface, while it is held to the surface at the same angle;
- Spread the resulting sagging with an empty spatula or remove it.
If there are strong irregularities, then first apply the solution to them according to the scheme described above and let it harden. After this, we are engaged in the final leveling of the entire surface.
When the solution has completely hardened, it is necessary to sand it using sandpaper. The result should be a flat and smooth surface, free of sagging, spatula marks and other minor defects.
Professionals can easily and quickly get a smooth surface, but beginners will have to try hard for this.
As you can see, in order to get a perfectly flat surface, you need not only to understand the types of starting putty, but also to be able to apply it. Only in such a situation will the surface be perfectly leveled. After this, you can safely begin the final finishing.
Final stage
It is recommended to carry out sanding 8 hours after applying the last, finishing coat. It is better to let it dry for at least a day. For grouting, a tool with replaceable abrasive attachments is used. After work, all tools are washed, since after complete hardening the putty can only be removed mechanically or with the help of a solvent.
Each stage of work is accompanied by subsequent cleaning from dust, degreasing and priming. To prevent oil stains from appearing through the decor upon completion of work, the surface is treated with any deep penetration primer.
This putty is ideal for leveling surfaces on which paint or wallpaper will be applied. This mixture requires a smooth and clean surface; it is better to use it when working with drywall.
In the video you can see how to putty surfaces:
How to choose putty
For home repairs, buy universal putty. It is suitable for everyone and for any work. To avoid unexpected surprises, you should read the manufacturer's instructions. Advice - choose proven brands. Don't save too much. It may turn out that effort and money are wasted, and the work will have to be redone. It is advisable to test the putty on a small area of the surface. To select the appropriate mixture, several parameters are taken into account:
source: //gipsohouse.ru/decoration/plaster/3583-shpaklevka-maslyano-kleevaya.html
