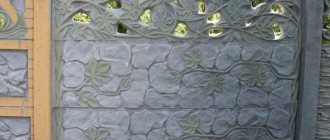
Plastering internal corners
Beacons are most often used to level corners with plaster.
If it is necessary to lay a thick layer of building mixture, the husks are first reinforced with metal profiles with mesh. The same applies to those joints that are formed by surfaces made of different materials. As for a thin layer, you can get by with a serpyanka and an angled spatula. To level husks with significant unevenness, plasterboard sheets (GKL) are an effective solution. The material is mounted on a frame that corrects any curvature (even 0.5 m). Then you will need to putty the corners of the drywall, but such work is easy to do. Then you will need to putty the corners of the drywall, and such work is easy to do. However, this leveling method takes up centimeters, or even meters, of usable space.
Using perforated profiles
Aligning corners with the use of counters is justified in the case when the walls are smooth. Gypsum plaster is used for work. Installation of perforated profiles is carried out after attaching the beacon profiles at a distance of 200-250 mm from the joint. The entire procedure is performed in the following order:
- The internal joint is covered with a layer of mortar, either chiseled (every 150-250 mm) or in the form of a solid line.
- The profile of the required length is applied to the husk, then pressed one by one against the wall (horizontally). This must be done carefully, as the material is easily deformed.
- When the rule is applied along the profile, you must immediately check its verticality using a level. If the internal joint is straight, a square will be suitable for further pressing of the profile. It should be carefully supported on the walls.
- Excess mixture is removed with a spatula from the joint to the side (thereby the mesh is smoothed out).
- When the laid mixture has set, plaster is applied and then leveled using the rule.
The corners treated with plaster are sanded with fine sandpaper after complete drying, removing bubbles and small irregularities.
With the help of serpyanka
The use of serpyanka is a technologically advanced and effective method for reinforcing the joints of walls made of plasterboard sheets. Work on leveling corners is carried out in the following sequence:
Apply the solution in a thin layer so that it covers 10 cm on both sides of the husk. A roll of reinforcing tape is unwound, starting from the ceiling down to an outstretched arm. You need to make sure that the serpyanka lies along the inner corner and in its center. Gently and easily press the tape with a wooden block, avoiding its displacement and avoiding folds
Completely cover the entire joint with sickle tape. Excess mixture is removed with a spatula, and the tape is carefully ironed. The excess part of the serpyanka is cut off at the very bottom of the wall.
When the mixture dries, apply plaster; the corner is formed with a suitable spatula.
Sealing gypsum board joints on corners and walls using serpyanka
Types of materials for performing work
The most common and effective leveling methods are those that use dry mixes and sheets of drywall. The method of eliminating defects using a perforated corner has also proven itself to be quite effective.
To find out which method will be effective in each specific case, you need to consider each of them in detail.
Using putty or plaster
For the correction of angles to be successful, you need to use high quality mixtures produced by trusted manufacturers.
Perhaps the price tag for these mixtures will be slightly higher than unknown brands, but there will be no doubt about the quality of the work done.
The most convenient way to work involves gypsum plaster or starting putty . This option will allow you to make corrections using the thinnest layers and without subsidence.
To perform this type of work you will need the following tools:
- Roller or brush for priming the base;
- Spirit level of any type, as well as a plumb line;
- A container in which the plaster will be mixed;
- Drill mixer;
- Rule;
- Wide and narrow spatula;
- Primer for the base;
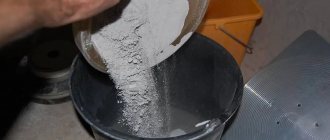
- Dry mixture for leveling.
Before starting work, it is necessary to prime the wall joints using a deep penetration solution. Next, you need to calculate the required amount of plaster mixture.
Leveling must be done when the surface will be finished with tiles of any kind. In the case of painting or wallpapering, leveling on a plane is sufficient.
The choice of mixture depends on whether finishing work will be carried out outside or inside If you plan to finish corners located outdoors or in rooms with high humidity, you should choose a mixture based on cement, lime mixtures and polymers.
In cases where it is necessary to correct internal joints, you can use plasters based on a gypsum mixture.
The work order consists of the following stages:
- The walls are cleaned of previous coating and various contaminants;
- After this, a cement mortar is prepared to level the walls;
- The next stage is priming the corners using deep penetration compounds;
- The next step is to install beacons, after which spraying is carried out. Using the rule, excess mixture is removed;
- Next, the layer must be dried and re-primed;
- Next, another layer is applied for leveling. Often adjustments are made in two layers. After drying, the layer must be rubbed off.
In the case when the walls are erected evenly, the angle after alignment is obtained by itself. To make work more convenient, you can use a counter-shultz - a special metal corner with perforation.
The plastering method is used when the angle misalignment is insignificant and does not exceed a few centimeters.
If the distortion turns out to be significant, it is better to use plasterboard sheets.
Video instructions on how to properly putty corners:
Plasterboard sheet as a means of achieving an even joint
Plasterboard sheets for leveling corners are a very effective means. They are used when leveling with plaster cannot give a high-quality result and have many advantages over plastering:
- GCRs do not require removal of old wall coverings;
- They do not require mixing dry mixtures and the entire process proceeds without dirt;
- Plasterboard can be puttyed immediately after installation.
The disadvantages of this type of finishing include the relative fragility of the material and its instability to serious mechanical damage. In addition, gypsum board is not used in rooms with constantly high levels of humidity.
If the walls of the room were originally lined with gypsum boards, adjustment of the corners is not required. If there is a need to level the walls with plasterboard, you must:
- Install guides that will serve as the basis for sheets of drywall;
- Sew up the gypsum board frame using self-tapping screws or self-tapping screws;
- Apply reinforcing tape to strengthen internal corners;
- Place perforated aluminum corners for the outer corners;
- Putty the joints.
A heavily littered wall requires the use of a combined method, which includes both finishing with plasterboard and leveling with a plaster layer.
Perforated corner with mesh for perfect 90º
Metal leveling corner is used where it is necessary to strengthen external and external corners. In addition, this material greatly facilitates the work of setting up ideal corner joints . In any case, the corner in which the perforated corner with mesh is mounted will turn out to be perfectly even.
In order to set such a corner, you need:
- Cut the material to the required length;
- Prepare the mixture for plastering;
- Set the angle;
- Apply a layer of putty on it;
- Check the level using a spirit level;
- In case of level installation, remove excess mixture;
- Let the corner dry and clean it.
To ensure that the transition to the corner from the wall remains unnoticeable, you should plaster it overlapping the wall and smooth it out using a wide spatula.
Leveling corners with plaster
Aligning the corners will not cause you any difficulties if you can plaster the walls level and in the same plane. Main stages of work:
- surface cleaning;
- plaster;
- putty.
To level the walls, use plaster beacons. To make the corner even, you should plaster one wall and wait for the plaster layer to dry completely. Then the beacons are installed on the second wall and a layer of plaster is applied. Putty will hide minor errors.
After the two walls forming the corner have been plastered, all you have to do is lightly touch up the corner with putty.
It is more difficult to align the corners if you do not plan to plaster the entire wall. Aligning internal corners is more painstaking work than external ones. This is due to the fact that when working with external corners, you can plaster both walls at once. When leveling the inner corner, you must wait until one wall is completely dry, then proceed to the second.
Tools and materials
- brush and roller for priming;
- level - laser or water, plumb;
- container for mixing plaster mixture;
- drill with mixer;
- rule;
- spatula - wide 45 cm and narrow - 20 cm;
- primer;
- dry plaster mixture;
- perforated corners;
- putty.
It is more convenient to work with a gypsum plaster mixture - it sets faster and does not slip. This allows you to reduce work time. Rotband from Knauf will do.
Internal corners are aligned in two ways. The surface preparation method is the same.
- Cleaning of old coatings - removal of old wallpaper and whitewash, dismantling of ceramic tiles.
- Surface priming.
- When working with cement plaster mortars, corners should be cleaned of dust. Moisten before applying plaster.
Leveling using a counter-shoulder - a perforated aluminum corner
The corner alignment angle is used for working with internal and external corners. Such a corner is necessary for external corners in order to protect against mechanical damage. In addition, it makes work easier. Even if you do not install the corner strictly vertically, the corner will turn out smooth, without bends.
Cut the corners to length. Prepare the plaster mixture. Apply to the corner. The inner corner is filled completely with the mixture
Apply the mixture with slaps to the outer corner. Install the corner, checking its verticality with a level. Carefully remove excess plaster mixture and leave to dry.
After the corners are installed, all you have to do is align their edges with the wall. To avoid creating a sharp transition, apply the plaster mixture starting from the corner by 50-80 cm. Smooth it with a wide spatula, gradually reducing it to nothing. After the plaster layer has dried, treat the surface with a primer. Further leveling is carried out using putty. Putty can hide minor imperfections and irregularities.
Alignment to a mark made using a plumb line or level
This method is suitable for aligning internal corners.
- Mark a level or plumb line on one wall.
- Prepare the mixture.
- Fill the corner with plaster mixture according to the mark.
- Level the mixture with a wide spatula.
- After the plaster has dried on the first wall, proceed to the second according to the same scheme.
It is not always possible to make a strictly right angle. Opposite walls sometimes differ in length by 5-10 cm. A large amount of plaster will be required to make a strictly rectangular room. Such precision is only needed when preparing corners and walls for tiling. The main requirement is to achieve vertical angles.
Walls
0 votes
+
Vote for!
—
Vote against!
Each repair process requires completion, which consists of leveling the corners in the room. In the article we will consider the main methods, features and sequence of work with different materials, and also provide a list of necessary tools and devices.
Table of contents:
- Principles and methods of alignment
- Preparing the wall surface
- Leveling method using plaster
- Leveling method using drywall
- Mark Alignment Method
- Method using a contraschultz
- Features of alignment of external corners
- Features of alignment of internal corners
Principles and methods of alignment
Smooth corners and walls are the subject of professional and high-quality repairs in an apartment or house. All errors and defects are very easy to notice, especially a curved surface that you cannot cover with furniture or fill with decorated elements. To remove all imperfections, it is important to pay special attention to aligning the corners at the initial stage.
The process of performing work requires certain skills and abilities, and therefore it will be quite difficult for beginners to do everything efficiently. There are different ways to level corners, each requiring an individual approach and implementation, a list of necessary devices, and so on. So, the main alignment methods are:
- work using drywall;
- leveling using plaster;
- with the assistance of a counter-shaft, which is a perforated aluminum corner;
- using marks, which is determined by a level or plumb line.
Preparing the wall surface
Before approaching the issue of aligning the corners of the walls, it is important to prepare the workspace area. To do this, you should do the following procedures:
1. We clean the wall surface from various coatings, for example, tear off old wallpaper, remove whitewash, knock down tiles, and so on.
2. Cover the base with primer.
3. To work with cement mortars, it is recommended to thoroughly clean the corners, and before applying it is important to moisten them with water.
Leveling method using plaster
For specialists in this field, the process of leveling corners does not cause difficulties, especially if the walls were evenly plastered. For high-quality work, it is recommended to use the following devices:
- laser or water level, can be replaced with a plumb line;
- roller and brush for applying primer;
- drill and construction mixer;
- container in which the solution is prepared;
- primer;
- rule;
- dry plaster mixture;
- putty;
- perforated corners;
- It is recommended to use a low and wide spatula.
Work on leveling corners with plaster is carried out one by one, and you need to remember the sequence of applying layers and treating the wall:
- clean and prepare the base for work;
- we determine the vertical level using plaster beacons;
- apply the first layer of plaster to the surface;
- we putty the walls;
- We level the corners in the room using putty.
To facilitate the leveling process, certain beacons are used, which are attached to the surface being treated with plaster mortar. In this case, the use of fasteners is inappropriate.
1. The wall must be divided into parts approximately 1 or 1.5 meters vertically.
2. First, the construction beacon is fixed in size and a small layer of plaster is applied to it, which will allow the object to stay on the surface.
3. The first mark should be 10 cm from the corner alignment with putty, and in the other area the mark is located in the same position. All beacons must be level checked.
4. The next step is driving nails into the holes of the beacons. A cord is pulled between them in the upper corner and in the lower corner, along which marks will then be installed along the entire width of the wall. After installing the beacons, all additional elements are removed.
5. We plaster the walls to finally align the corners.
The peculiarities of the work consist in alternating processing of the walls. After this, you need to wait until everything dries. Beacons are applied to another wall in the same way, and then it is plastered. If errors are made during the work, the next stage of coating with putty will eliminate all defects.
Having plastered the surface, you can approach the correct formation of corners. The work is more difficult to complete if you are not plastering the walls, then the process of completing the work seems more painstaking, especially for internal corners. Some experts recommend using a special mixture of plaster, which dries faster and does not fall off the walls, which reduces work time.
Leveling method using drywall
In most cases, the DIY method of leveling wall corners using drywall is suitable for builders who do not process walls. In this case, a technology is used that will allow you to accurately align the corners without large-scale repair work. Drywall is dry plaster in gypsum form. The sheets are attached using special glue or dowels to the surface to be treated.
During the work you will need the following equipment:
- construction level, which is called a spirit level;
- sheets of drywall in the required quantity;
- spatula for puttying joints of material;
- special gypsum glue that fixes the position of the sheet;
- tape measure for measuring the required pieces of drywall;
- a knife that will be used for cutting sheets.
This method has its advantages over using plaster:
- it is no longer possible to prepare mixtures and solutions of plaster mass;
- when installing sheets of drywall, it is not necessary to clean the old surface of wallpaper or whitewash;
- After attaching the gypsum board, the wall can be puttyed immediately, rather than waiting for the plaster to dry.
This method also has some disadvantages, for example, it is unacceptable to use this technology in rooms where there is a significant level of humidity. At the same time, drywall is fragile in structure and is easily susceptible to mechanical damage. If the gypsum board is installed correctly, there is no need for additional alignment of the corners.
After installing the drywall, the workspace is puttied, and it is necessary to use reinforcing tape. When leveling external corners, it is recommended to use special perforated corners that can be easily puttied. In case of a high level of unevenness of the wall surface, it is recommended to use two methods. To do this, drywall is installed on the wall, and after it dries, the necessary layer of plaster is applied to level the base.
Important! When you glue drywall to the wall, you need to make sure that cross-shaped seams do not appear at the joints. In any case, before the material hardens, the plasterboard can be leveled using a hammer or level.
Mark Alignment Method
This method requires the mandatory use of a plumb line or level, which is recommended when leveling an internal corner. The sequence of work is as follows:
1. Place marks on the walls, preferably evenly and using a level.
2. Carefully prepare the mixture for application.
3. According to the established mark, carefully apply a layer of plaster to the corner.
4. Using a spatula, level the solution and distribute it evenly over the surface.
5. After the corner has dried, the same actions are carried out on the next working area.
It is worth noting that the procedure for perfectly aligning the corners is quite labor-intensive, and therefore it can be difficult to achieve a good result. In most houses and apartments, opposite walls can deviate from the level by 5 or even 10 cm, but in order for the room to have a truly rectangular shape, a significant amount of putty must be used. It is especially important to achieve alignment when laying tiles in the bathroom or kitchen, where any errors will stand out.
Method using a contraschultz
An angle for leveling corners is one of the ways to carry out repair work. Counter-shultz is a special perforated corner with an aluminum base. It is used both for leveling internal and external corners. It is recommended to attach the device to the outer corners, which will protect them from various damages, including mechanical ones. If you do not accurately align the corner vertically, the corner will still come out even.
The work process consists of the following steps:
1. Prepare the corners and cut them to the required length.
2. Mix the plaster until smooth.
3. Apply the solution to the corner. When leveling the internal area, the mixture is applied completely along the entire length. When applying the solution to an outer corner, the amount of plaster is reduced as necessary.
4. We install the corner, and it is important to monitor its vertical position, which should be level.
5. Excessive plaster is removed using a spatula.
6. When counters are installed, it is important to align them with the wall.
To ensure that the corners do not differ from the wall, it is recommended to apply the mixture approximately 50 or 80 cm from the corner. Using a wide spatula, the entire solution should be evenly distributed and smoothed over the surface. After the plaster has dried, the wall is treated with a primer. For greater effect, you should use putty, which will cover all the errors.
Features of alignment of external corners
This work is not difficult, the main thing is to follow the instructions correctly and follow all the recommendations. To perform this technology, you should use a special corner with a reinforced mesh on it. The peculiarities of its attachment are made using self-tapping screws, after which the surface is covered with a layer of plaster.
The corner alignment profile in another method involves applying a layer of plaster, which is important to distribute evenly over the surface. You should put a corner on it. To securely fasten it, twist it with self-tapping screws and press it into the applied solution. The plaster that has come out is carefully smeared. If necessary, you can add more mixture to completely seal the corner and mesh.
Important! Aluminum corners are used to prevent the metal from rusting, while they are very convenient and flexible to use. Always check all work with a level to avoid unevenness.
Features of alignment of internal corners
The technology for leveling external corners does not present certain difficulties, which cannot be said when forming internal ones. In this case, specialists will need precision and skill, but for beginners this is not at all a feasible amount of work. In essence, the method should begin with leveling the walls and checking them with a level in order. If at the beginning of the work all measurements were correct, then at the end an angle of 90 degrees should appear.
To understand the technology, we suggest watching the corner alignment video at the end of this article. When working with special corners, it is not always possible to create sharp symmetry, since the corner most often turns out to be slightly rounded. This is formed as a result of the use of an aluminum profile.
Some experts recommend using a special method, which involves the use of two spatulas placed parallel at right angles. In such cases, the result justifies the unusual method. This allows you to correct all errors and work when using plaster mortar. After this, you should continue to putty the wall.
When finishing corners, it is worth remembering the characteristics of the plaster mixture that you buy. Pay attention to its characteristics and scope of application.
For example, for bathrooms it is preferable to choose solutions based on a cement component, and for ordinary rooms with a uniform temperature it is recommended to buy gypsum mixtures. In the first case, it is important to putty the surface, but in the second this is not required.
In fact, all the jobs are not difficult, but require practical skills. After all, if this is your first time aligning the corners, you need to remember that the end result may not be justified. If you have extra finances, it is still recommended to seek the help of specialists, especially if you are not confident in your capabilities.
Plastering internal corners
The application of plaster, carried out with the aim of leveling the junctions of uneven structures, is most often carried out using beacons. When creating a thick plaster layer, and also if the husk is formed by walls made of dissimilar materials, the plaster layer is reinforced with metal corners with a mesh. If the layer of applied mortar is thin, then plastering is used using corner spatulas, reinforcing the corners with serpentine.
Using perforated profiles
The use of contra-shuls for plastering husks is rational, if the walls are sufficiently smooth, leveling is carried out with a gypsum compound. Perforated corners are installed together with beacon profiles, which are already installed and fixed 0.2-0.25 m from the corner.
How to properly plaster with counters?
- For installation, the mixture is applied pointwise (every 15-25 centimeters) or in a continuous line deep into the husk.
- A corner, pre-cut to length, is placed in the husk, pressing with a rule, alternately leaning horizontally on the walls.
- Applying the rule along the profile, check its verticality according to the level. If the husk made up by the walls is straight, you can press the corner with a square, resting it on the walls.
- After the solution has set, plaster is applied to the husk and leveled using the rule.
- When the laid mortar has set, the surface is rubbed and adjusted to ideal geometry using a metal template.
With the help of serpyanka
To plaster the internal joint formed by sheet materials, for example, sheets of plasterboard, serpyanka is used for strengthening.
Sequencing:
- The solution is applied to the husk in a thin layer so as to cover a strip 10 cm from the rib.
- From the ceiling itself, a ribbon of serpyanka is lowered down to an outstretched arm, unwinding the roll, making sure that it lies strictly along the husk.
- Using a wooden block, carefully press the tape to the corner, avoiding its displacement and the appearance of folds.
- The excess plaster mass released on top of the serpyanka is removed with a spatula. They also level the tape and surface.
- They go down below and perform the same operations.
- The excess tape is cut off along the bottom of the wall.
The same joint is made if a straight wall adjoins a straight partition.
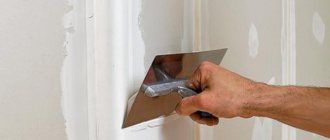
How to putty the inside corners of drywall
Puttying internal corners is a labor-intensive process. The difficulty is associated with the small space for maneuver and high requirements for the gypsum board connection. Serpyanka, putty, corner and flat spatulas are prepared in advance from the mandatory ones. Before puttingty the inner corners of drywall, carefully study the technological features of the process.
Finishing the inner corner is carried out in several steps:
| 1. The joint is covered with a small volume of the starting composition. Excess is immediately removed with a trowel or rag. | |
| 2. A serpyanka is attached to the fresh solution. The center of the tape is placed exactly at the junction of the sheets. A special holder (similar to that used for adhesive tape) allows for easier fastening. | |
| 3. The tape is pressed in using a trowel. If some areas are poorly glued, they are coated with PVA glue. The formation of folds is unacceptable. The corners should be as smooth as possible. | |
| 4. Putty is applied over the serpyanka. The mass is placed in the center, evenly distributing it on each side of the corner in turn. |
After drying, the corner is sanded and treated with a deep penetration primer. After this, they proceed to applying the finishing composition.
Plaster corner and its varieties
Metal corner
Each owner, when undertaking renovations in his premises, very often faces the problem of leveling the walls and creating a high-quality cover for organizing the finishing. Paying attention to the corners in the room where the renovation will be done, many people do not know how to properly align them.
Modern developers involved in the production of various construction products have created and introduced into the “construction world” such an invention as a corner for plaster,
which is grateful not only to professional finishers, but also to ordinary people who independently carry out repairs in their apartment.
Plastic corner
This item is used to form an even internal or external corner. Despite its simple design, it requires certain skills to install it.
Today there are 2 types of design:
- metal profiled corner;
- plastic corner.
Metal corners for plaster
Aluminum fittings are lightweight and more reliable than the galvanized version
Plaster corners made of metal are classified according to the shape of the structure and material.
The materials used for the production of this type of plaster corners are galvanized steel and aluminum.
Despite the fact that aluminum can be classified as a rather soft metal that requires careful handling, corners made from it are widely used, since the material is slightly susceptible to corrosion, and products made from it can last for many years. In addition, the aluminum corner is lightweight, which subsequently does not place additional load on the surface.
A corner made of galvanized steel is more susceptible to atmospheric influences than its aluminum counterpart, but at the same time has greater reliability.
According to the shape of the structure, all metal corners for plastering work are divided into 3 types:
- Regular angle. It looks like a metal strip, bent at 90 0, up to 0.5 mm thick. Usually, depending on the manufacturer, there are perforations on the sides of the product, which lighten the weight of the product and give it additional adhesive properties.
- Plaster corner with mesh. Metal corners of this sample are widely used in wet plastering. The design feature of this product is that a metal mesh 2-4 cm wide is attached to the corner using special pads. Using this design, you can level a wide variety of surfaces.
- Combined angle. This is a type of metal structure consisting of aluminum or galvanized corner and fiberglass mesh. With its help, clear angle shapes are created on the surface, and the joint is formed correctly using a mesh. To find out which option is better to choose, watch this video:
Plastic plaster corners
Plastic structures for plastering corners create quite a lot of competition with metal analogues in the building materials market. There are several types of plastic linings installed in the corners:
- Standard plastic corner. Similar to metal structures. Its main difference is that it does not corrode. Its main drawback is the thickness of the product, which can exceed 1-1.5 mm, and makes its use impossible when putting surfaces, but it is excellent for plastering work.
- Arched plastic corners. The structures help to create a high-quality arched opening in the room. Due to the segmentally divided 1 edge of the corner, its surface can be bent to different radii, thereby creating an even angle even in a difficult situation.
- Corners with overlay mesh. Such products are used in places where a thick layer of plaster will be applied. Mesh extensions create an additional fixing base. This results in a high-quality angle even in the most difficult conditions.
- Universal angle. It has a mesh design and can be used to create non-standard angles (other than 90 0) due to the high-quality plastic used and a specially created fold line.
What is an ideal angle and how to measure it
Ideal wall angles
The places where two walls meet, the joints, are a rather difficult area in terms of finishing work. This is, as a rule, the final stage of work, which requires special care and scrupulousness in its implementation.
The alignment of the corners is done before the finishing of the wall surface begins, so that unevenness does not spoil the overall picture of the work performed, because When wallpapering or after laying tiles, the crooked linearity of the corners will appear very significantly.
The ideal angle is a 90* angle between two walls located perpendicular to each other along the entire vertical plane of the interface. To determine the skew, it is necessary to use a building level, a square and a plumb line, with which to determine the deviation of the junction of two walls from the required values.
Before starting work, old finishing elements (wallpaper, tiles, finishing boards) are removed from the surface of the walls, including in the corners, and the necessary tools and finishing materials are prepared.
How to align the internal corners of the walls in a room with your own hands
To align the internal joints, it is necessary to carry out preparatory work.
- The cleaned surface of tiles or wallpaper is checked for the presence of voids under the plaster. It is necessary to tap the adjacent walls from the ceiling to the bottom. If the sound changes (empty), it is better to roll off the plaster. Otherwise, it may fall off on its own along with the topcoat. Another sign of emptiness is small cracks running horizontally on the floor.
- After the coating has been collapsed, all debris is removed. This is dusty work, but it will not interfere with subsequent work.
- Clean everything from dust and small pebbles with a dry brush. To reduce dust, you can spray the area with water from a sprayer.
- Next, the surface is coated with a primer, preferably 2 times.
- A plumb line is lowered from the ceiling to the floor to determine the curvature. When large deviations are identified, drywall is the best option. Otherwise, the plaster layer will have to be applied several times, each dried layer being primed.
The internal corner can be aligned using several methods. In addition to drywall, ordinary gypsum or cement plaster, beacons, and corner spatulas are applicable.
How to level previously plastered walls in an apartment
If the wall is crooked, then leveling the joint will be a waste of work. Curved plastered walls must be identified by the percentage of curvature. This can be done by a level, a plumb line, a rule. The walls are aligned in a circle.
Materials used for leveling walls:
- Drywall. For large differences, a metal frame base is used. If the walls have a slight curvature, then gypsum boards are glued to the surface.
- Chipboard. Plates are suitable for leveling not very curved surfaces.
- Panels. When leveling the walls, use a frame base.
Depending on the room, humidity and temperature changes, the desired material is selected.
How to display a 90 degree angle on walls
When plastering walls yourself and leveling joints, use a plaster corner profile. It can be metal or plastic. On the sides of the corner there is a reinforced mesh. The profile is applied to the wet plaster and leveled using a level. The reinforced mesh is covered with a plaster mixture.
The joining surface can also be made smooth using an angle spatula. It has a perfectly even shape. Without any effort, it can be used to create a 90-degree joint between walls.
It’s difficult to get 90 degrees on your own. This is only possible with small differences, where putty is applicable.
What materials are used to level wood?
The wooden surface also needs pre-treatment followed by leveling. You can level a wooden surface using the following materials:
- Drywall. For installation, you must first measure the degree of curvature, then take measurements and calculate the materials. The frame base is created from wooden slats or metal profiles. For a strong frame, transverse stiffeners are made. Fixing gypsum boards in the corners is done using several technologies. The joints of the walls are smooth at 90 degrees.
- Chipboard. They are also mounted on a frame base made of wood. All elements are treated with drying oil or antiseptic agents.
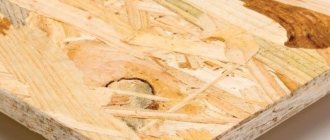
- Plywood 6-9 mm. It needs to be processed. The material is mainly used for leveling surfaces in the garage, pantry, and country house. A wooden frame is also created for fastening.
Afterwards, the created surface with even corners is puttied, primed and covered with finishing material - wallpaper, paint, tiles.
And also the walls and their joints of a wooden house are leveled with materials:
- putty – layer of applied mixture 2 mm. Before applying putty, you need to treat the walls;
- cement mortars - applied to a rough surface or pre-filled with shingles or large mesh;
- use of corners. If the walls are smooth or have slight differences, metal or plastic corners are attached to the putty solution. In this case, after a second layer of putty, the angle is 90 degrees.
Cement mortar shrinks. When applying a thick layer, care should be taken to ensure that the created plane does not flow down.
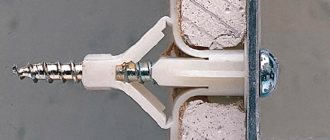
Selecting corners for gypsum boards
Corner profiles for drywall differ in technical characteristics and features of use. To make the right choice, you should familiarize yourself with the basic parameters of popular types.
Using a plastic corner like AquaBead
AquaBead is a classic plastic corner. An adhesive layer is applied to the inside, which allows you to secure the element without the use of adhesives.
To activate the adhesive base, the inside is moistened with water using a brush or a spray bottle.
Installation is simple. Working with AquaBead is carried out in several stages:
- The base is checked for deviations using a laser level.
- The inside of the profile is moistened with water.
- The corner is applied to the joint of the gypsum board and pressed lightly.
- 20 minutes after fixation, leveling with the starting mixture begins.
AquaBead can be purchased on the construction market or in specialized stores. They are sold by fixed meter. When repairing, the plastic is cut to the required size.
Classic plastic corner
Metal perforated corner
Metal corners differ from plastic ones only in the material of manufacture. Galvanized steel is used to create them. Such products are highly reliable. The installation sequence is no different from working with plastic:
- The quality of the walls is checked using a laser level.
- The metal profile is cut to size.
- Mix the solution to fix the structure.
- The mixture is applied in a thin layer to both sides of the joint.
- The product is pressed into the solution and leveled using a building level.
The mass that is squeezed out of the perforation is distributed over the entire height with a spatula.
An alternative to attaching reinforcing elements is to use liquid nails or a construction stapler.
Galvanized steel is used to create metal corners
Semicircular corner made of plastic
Semicircular profiles have a number of advantages over classic metal and plastic ones. They do not have sharp corners and are suitable for rooms where maximum mechanical impact is expected. High-strength ABS plastic is used for their manufacture.
Installation is carried out in several stages:
- GCR is cut in height by 1.5-2 centimeters at an angle of 45 degrees.
- A thick layer of putty is applied to the end.
- The corner is installed in the cut, pressing deep.
- The position of the product is checked with a laser level.
- Excess solution is removed with a sponge or rag.
For additional fixation, an industrial stapler is used.
Semicircular corners are suitable for rooms where maximum mechanical impact is expected
Methods for leveling room corners with plaster
The issue of smooth walls is one of the most important when it comes to finishing work.
But it is equally important that the corners in the rooms are even at 90º. Therefore, the question of how to level the corner of a wall with plaster is one of the most frequently asked questions on the pages of construction forums.
Rooms always have both internal and external corners. Therefore, it is necessary to understand two alignment processes, which are slightly different from each other.
Please note that leveling with plaster is best done if the size deviation from straight is not very large (87º-92º). If this indicator exceeds the standards, then it is best to use drywall for leveling
Aligning an outside corner
How to remove defects in corners and walls?
Without proper experience, lining up corners for the first time can be difficult. But don’t be upset if the alignment of the corners is not as perfect as expected. It is also worth considering that in panel houses there is often a slight curvature and a difference in the height of opposite walls.
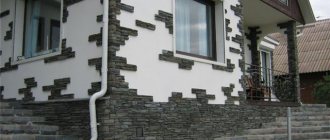
It is difficult to achieve an ideal result, so in the most hopeless cases, interior designers use additional decor for corners and walls. This is an imitation of wild stone, textured plaster, wooden panels and plastic corners. With this approach, all the problems of crooked corners can be eliminated, and effective decor can hide all the shortcomings.
Leveling with plaster
List of required materials and tools:
- lighthouses (metal or wooden);
- grinder for cutting beacons or metal scissors;
- dowels (wood screws);
- primer;
- construction mixer (drill);
- a clean container for mixing the mixture;
- gypsum dry plaster;
- rule;
- plumb line (level);
- roulette;
- gloves;
- abrasive mesh (sandpaper);
- spatulas (straight, wide, angled).
- First, you need to prepare the walls for plastering, and before applying the solution, the entire surface must be primed. This is done to remove dust and increase the adhesion of materials.
- The next stage involves fastening the beacons to the walls using fasteners at a distance of the width of the rule. In this case, it is necessary to make an indentation from the corners at a distance of 6–8 cm.
- Next, you need to use a plumb line (level) to determine all vertical deviations and make marks on the ceiling and floor, which will later guide you during the alignment process.
- Start applying plaster on one side, filling the space between the fixed beacons (wooden blocks, metal profile). Distribute the solution evenly, and after it has dried, you can proceed to leveling the second wall.
- At the stage of forming corner joints, after completely filling all surfaces using an internal (external) corner spatula, you can obtain even corners. To do this, you need to run a tool soaked in water over the applied putty, forming a clear right angle of 90 degrees. Then it is necessary to remove the excess plaster mixture with a wide metal spatula, moving in different directions and thereby forming a smooth transition.
- The final stage of leveling is to remove the beacons and fill the void with putty.
- After the corners and walls have completely dried, they must be sanded with a special abrasive mesh or fine-grained sandpaper.
- Next, you need to prime all wall surfaces (preferably with a deep penetration primer).
External corner of walls - how to achieve an even joint?
Drywall is not used for external leveling work . Only dry building mixtures are suitable for external corners.
- First you need to check the outer corners for evenness. All protruding irregularities must be removed with a hammer.
- The next step is to prime the walls using special deep impregnation compounds.
- To strengthen external corner joints, it is necessary to use perforated metal corners , which will strengthen the joint and help avoid damage. They are pressed into the gypsum solution and subsequently leveled with putty.
- Excess mixture must be removed using a spatula. Then you need to make sure that the metal profile is installed accurately vertically.
- Using gypsum beacons on both sides, the corner is leveled and puttied.
Different ways to align external corners are discussed in the video below:
How to align wall corners: materials, tools, technology
If you want the renovation of your apartment or house to be of the highest quality, then it will be necessary to level all surfaces in the premises, including ceilings, floors and walls. These works involve the need to level the corners, and anyone can do this on their own, but only if they have not first become familiar with the technology for carrying out the work.
It is important to prepare the entire set of tools and select materials. These manipulations may involve the use of plaster mixtures or drywall, as well as special corners
If you do not have certain skills, then the angle should be drawn only visually so that it does not go in waves along the height of the wall.
Leveling walls with your own hands - myth or reality?
It is generally accepted that decorating walls with your own hands is much easier than correcting the ceiling, but this statement is only partially true. Often the reason why corner irregularities may occur is poor quality plastering .
If certain deviations of the corner surfaces are detected before finishing the walls, they should be eliminated.
This is especially true in cases where you plan to stick wallpaper with a pattern in the room or install ceramic tiles - with such finishing options, defects in the corner surfaces will be obvious .
Depending on the type of finishing, the leveling method is selected - it can be done either using gypsum plasterboard or using dry mixtures. Irregularities in corner spaces are corrected using the protrusion or level alignment method.
The first option is most preferable when it is planned to paint the walls or finish with a decorative layer of plaster. The second option is acceptable when subsequent wallpapering is expected.
Leveling corner spaces on your own may seem like a very troublesome and almost impossible task, but this is not so.
If you follow certain rules and have the necessary tools, even a beginner can correct wall joints.
You can level the corner surfaces using plaster or putty, sheets of plasterboard and a perforated corner with a mesh.
At the same time leveling with gypsum plasterboard is not recommended if the final finishing is laying ceramic tiles or porcelain stoneware: a surface that is too smooth will not provide strong adhesion of the finishing material to the base.
Leveling with plasterboard
This method is the most convenient and acceptable for those who want to level corners without significant repair work. Sheet plasterboard is attached to the wall with dowels or an adhesive mixture, or fastening is carried out to a specially prepared frame. It all depends on the degree of unevenness of the walls.
Required tools:
- drywall,
- metallic profile,
- building level, tape measure, ruler, square,
- dowels, self-tapping screws,
- mounting knife, spatulas, reinforcing tape,
- hammer drill, screwdriver,
- primer and putty.
This type of corner alignment has a number of advantages:
- does not require the use of plaster solutions,
- minimal preparatory work,
- Drywall can be puttyed immediately after installation and priming.
But there are also disadvantages:
- not recommended for use in rooms with high humidity,
- Drywall is fragile and susceptible to mechanical damage.
After installing the drywall and its primer, reinforcing tape is used. It is recommended to further strengthen the external corners using a special perforated corner, since they are most often subject to shock and mechanical stress in the household process. If you are confident in the evenness and plan to subsequently finish the external corners, then the use of a perforated corner is not required. This is followed by complete wall putty, sanding and priming.
Important: when gluing drywall to the wall with an adhesive mixture, do not allow cross-shaped seams to form!
Alignment using gypsum board
If there are significant vertical deviations in the walls in the rooms, it is recommended to level them using gypsum plasterboard. This method allows you to quickly correct all surface irregularities. Moreover, if all the work is done correctly, the corner joints will be almost perfectly straight.
To level walls and corners using plasterboard, you will need the following tools and materials:
- laser level;
- gypsum board sheets;
- guide profiles;
- self-tapping screws;
- construction knife;
- fixing adhesive for gypsum boards;
- putty knife;
- serpyanka;
- metal corner;
- putty mixture.
If the vertical deviations are more than 50 mm, it is recommended to install guide profiles, which are the basis for fixing the sheets to the wall. For less significant deviations, it is possible to install drywall using special adhesive solutions.
It is possible to use plasterboard exclusively for leveling slopes near windows or doorways; in this case, the sheets are cut to size and secured with a non-adhesive solution.
Before installing drywall, you should take into account that this material is afraid of moisture, so installing even moisture-resistant gypsum boards in a bathroom or toilet is not recommended.
Evenly installed sheets of drywall do not require special finishing in the corners, but since this material is quite fragile, it is necessary to install metal corners on the outer corners.
In order not to disturb the horizontal, a groove is chosen along the height of the place where the walls touch on both sides, with a thickness equal to the thickness of the metal corner. The corner is mounted using an adhesive solution, and after installation, it is masked with putty.
To strengthen internal joints, serpyanka is used, which is attached to the plaster mortar, after which it is also masked with putty.
This technology is applicable in rooms with a large area, since the installation of drywall “eats” significant volumes. Leveling walls using plasterboard in old panel houses will leave very little living space, so for such rooms it is best to use plaster.
Necessary materials
The first thing you will need is a mixture for plastering. A gypsum-based material is ideal for this. The main advantages of this choice are:
- Durability.
- Strength.
- Possibility of application in a thick layer.
- Suitable for almost any surface: concrete, brick, plaster.
To dilute the putty you will need water. It is just not recommended to use technical ones, which may contain various impurities.
You also need to purchase a primer for the walls. Surface treatment is necessary before leveling it. This will protect against the appearance of mold and mildew in the future.
Operations with internal corners
What exactly can be done with the internal joints of walls is not familiar to everyone. But if you follow the instructions, even a beginner will be able to cope with such work. Several technologies are available:
- using beacons;
- option with perforated profile;
- Serpyanka's help.
Before leveling the corners of the walls with plaster, it is recommended to treat the surfaces with a primer. Moreover, it is recommended to choose a composition with deep penetration. As a result, the adhesion of walls to plaster will improve.
Each of these methods has its own characteristics, which we will discuss below.
Beacon technology
This technique is applicable to cases where the corners are aligned with the walls. Metal or wooden guides, which should be fixed to the walls, serve as beacons. They should be placed at a distance equal to the length of the rule. In this case, the beacons should be located approximately 10 cm from the wall. This applies to both surfaces forming the joint.
The mixture itself is first applied to one wall, then the other. All free space between the beacons is filled, and then everything is aligned by the rule. Excess solution is removed using a wide spatula. Plastering the corners along the beacons of the next section of the wall begins only when the solution has completely dried.
Using an angle spatula, it is easy to give the desired shape to the joints. From time to time it needs to be moistened with water. When using a straight spatula, make jerky movements starting from the angle.
After everything has dried, the beacons should be removed, and the recesses remaining in their place are filled with the same solution.
Perforated profile
This technology is applicable to surfaces that have gone through the plastering stage. Before making wall joints, a profile is cut using metal scissors, taking into account the length of the angle. It is worth considering that the material itself is quite soft, and therefore it is subject to deformation. Therefore, when working with it, extreme care and caution must be observed.
When the profile is prepared, it’s time to start applying the selected solution to the joint. There is no need to be overzealous, a moderate amount is enough. Next, the section of the contra-shultz is placed in a corner, pressing down with a rule. You need to act carefully, the material is easily damaged. The leaked solution is removed with a spatula, and movements should be made from the joint.
After the surface has dried, it is sanded. If necessary, leveling is carried out with a thin layer of finishing.
Serpyanka
This method can be used when there is no need to carry out large-scale work. In other words, just give the joints an even right angle. How to make 90 degree angles when plastering? To work here you will need the following:
- reinforcing tape;
- wooden block up to 60 cm long;
- solution (it is advisable to choose a gypsum-based mixture).
The construction level is an important tool that determines how correct the lines will be. Therefore, before leveling the corners of the walls with plaster, you need to make sure that there are no errors.
The essence of the test is this: the tool is applied to the wall and a line is drawn. Then the level must be turned over and applied again to the drawn line. If the “readings” indicate that the line is level, as before, the device is working, otherwise you should buy a new one.
When the preparation of the wall surfaces is completed, plastering of the joint begins. To do this, the mixture is applied to the joint in a small amount, covering 10 cm in each direction. Then the serpyanka is applied to the very top of the joint, after which the roll is stretched to an outstretched arm. In this case, you need to make sure that the lower part of the tape lies correctly and does not move to the side.
Next, a block is applied to the tape with moderate pressure, and thus an angle is formed. Excess mortar is removed with a spatula, and the sickle itself is leveled. In this case, movements are made carefully to avoid deformation of the tape and its displacement to the side.
Tools and materials
It is more convenient to level the corners with a building mixture using conventional tools that are used for plastering surfaces. The work itself will not take much time. It is advisable to prepare the following set of tools:
- spatulas of different widths - they are easy to apply and level the mixture;
- trowel (grater) – for grouting;
- brush or roller - they are convenient for priming;
- mixer, container - for preparing the working mixture;
- kontrashultsy or serpyanka - for reinforcement;
- sandpaper (sander) – for the grinding operation;
- malka - to level slopes;
- steel brush – suitable for high-quality cleaning of brick walls.
To align the corners of walls with your own hands, you can use masking tape. Marking cannot be done without a pencil (marker), square, rule, level. Instead of the latter, a cord or laser level is suitable. When using beacons, you need fasteners for fixing the profiles (screws) and a screwdriver.
In addition, you will need a film to cover the floor, a stepladder or scaffolding. And to increase labor productivity, you can use specialized tools.
What tools may be needed when plastering corners
Plaster plane
In appearance, plastering planes are similar to the tools used to process aerated concrete blocks. The base of the gun can be solid or a frame with crossbars. Based on the scope of application, planes are manufactured in two types:
- flat products - they can easily remove unevenness from coatings based on cement-sand compositions;
- a plane for removing excess building mixture from slopes and cutting corners.
An inexperienced master leaves behind waves and bumps on the walls, which can easily be removed with a plaster plane. To cut off protruding areas, just run the tool over the surface with defects and all of them will be cut off.
Angle trowel
The specific use of corner trowels is plastering corners. The working surface is made at a right angle. The only difference lies in the way the handle is attached, which determines which corners the tool fits to - internal or external.
Corner trowel for plastering external corners
But often such a tool is used to align internal corners. As for external ones, perforated profiles are used. There is an alternative in the form of an angle spatula. It is also used, but differs in how the handle is attached - it is on the side.
Drywall when finishing corners
The use of gypsum plasterboard sheets allows you to level even the most crooked corners. There are two methods for installing drywall sheets: frameless and framed.
Method 1 Frameless installation of plasterboard sheets is used on both internal and external corners:
- surface preparation is carried out;
- a sheet of drywall is applied to the surface and marked;
- on the other side of the corner a sheet is also applied and marked;
- blanks are cut out with a knife and cuts are made with a plane to the mating corners of the drywall;
- the prepared blanks of plasterboard sheets are again applied to the corner and adjusted;
- polyurethane foam is applied to the sheets;
- both blanks are applied to the wall and pressed;
- the sheets are removed, leaving traces of polyurethane foam on the wall;
- polyurethane foam is reapplied to the sheets;
- the foam should be allowed to dry a little and the sheets should be put in place;
- All that remains is to adjust the angle using a wooden lath or a building level.
Learn more about slopes on windows.
90 angle between walls
Good day to all! Tell me or describe the method for making a 90-degree angle between walls using the Rotband leveling technology? I’m self-taught, but I haven’t found a clear explanation of the technique anywhere: I’m interested in how to measure this angle, and then how to attach the beacons (which wall to start with).
Laser plotter of 3 mutually perpendicular planes
In the bathtub I leveled the walls 1.7 x 2.6. I used a square made from three rules. First, I adjusted one of the long walls, then I adjusted the second long one so that it was parallel to the first, and using a square, I adjusted the remaining two. It turned out well. The bathtub and large corner sink fit together without any gaps.
It’s easier with a builder, but it didn’t exist at that time.
the diagonal can be made shorter than 210 cm, the main thing is that between the edges of the triangle at the moment of attaching the last screw there is exactly 210
If necessary, I'll take a photo over the weekend.
Which wall to align with which - see the location. I only needed one perfect corner in my kitchen. I adjusted the short wall to fit the long one (this means less material is needed for leveling). Those. First I drew a vertical plane on a large wall (I tightened the screws using a laser and threads - in principle, it will be more convenient to rub the beacons right away - the square will dangle less.) Then I attached a square to the beacons on the large wall and fit 2 screws under it on the short wall. Then, for each of them, I raised 2 vertical beacons, double-checked the plane with diagonals, and at the end, double-checked the right angle at different levels.
It is convenient to work with an assistant - he holds the square horizontally, pressing it against the long wall, but (IMPORTANT.) leaving you the freedom to press - move it towards / away from the short wall while you twist the screws
It is convenient to adjust the self-tapping screw farthest from the corner and “pump” the square so that it rests against the one closest to the wall, and the head of the farthest one “scrapes” a little.
Denken, I don’t consider myself a pro, so you can do it too. If you need details, ask, I’ll try to tell you if I missed anything
How to mark a right angle with a tape measure
The marking can be based both on the general Pythagorean theorem and on the principle of the “Egyptian triangle”. However, this is only in theory, lines are simply drawn on paper, but “catching” all selected sizes with stretched cords or lines on the floor is a more difficult task.
Therefore, I propose a simplified method based on the diagonal of 141.4 cm for a triangle with sides of 100 cm. The entire marking sequence is shown in the pictures below. It is important not to forget: the diagonal of 141.4 cm must be multiplied by the number of meters in segment A-B. Segments A-B and A-C must be equal and correspond to a whole number in meters. Pictures enlarge by clicking!