Features of homemade and purchased mixtures
Ready-made plaster compositions cost quite a lot of money. This is explained by the carefully selected proportions of the quality components included in their composition. In addition to high-grade cement and carefully sifted sand of a certain fraction, such mixtures can contain a variety of improving additives, thanks to which the plaster acquires special characteristics. For example, increased plasticity, frost resistance or an extended hardening period.
Working with ready-made mixtures is easier and faster, which is why finishing craftsmen always prefer them to homemade ones. However, for the customer, price is of no small importance, and if the scale of work is large, he will choose the second option, since preparing a solution for plastering walls from individual components will definitely cost less.
The solution can be made directly on site Source kraski-net.ru
As for the special properties, they can also be imparted to homemade plaster using special components introduced into it, which will be discussed below.
In a word, its main advantage is the reduction in the cost of rough finishing for a large volume of work. Moreover, even taking into account the fact that all components will have to be delivered to the construction site separately and a mortar mixer will have to be purchased or rented.
A homemade solution is more profitable if you need to plaster all the facades or all the internal walls in the house. A concrete mixer will also serve in the manufacture of concrete screed on the floor. But such work will take more time, so in each case you need to decide what is a priority.
A concrete mixer will significantly speed up work Source www.chipmaker.ru
Another disadvantage is the risk of producing a low-quality mixture that will not stick to the surface, crack during the shrinkage process, or crumble later. Therefore, before preparing cement mortar for plastering walls, the proportions of all components must be accurately determined. Moreover, they all must be of proper quality.
Types of mixtures for plaster
Any plaster solution includes three main components - binder, water and filler. The binders are cement, clay, lime and gypsum, and they are often combined in different proportions. The filler is most often ordinary sand, but in ready-made factory mixtures it can be replaced with quartz and perlite sand, marble and granite flour, and stone chips. Additionally, plaster mixtures include modifying additives - coloring pigments, plasticizers and others.
Types and composition of plaster solutions
Depending on the type of binder, there are several types of plaster compositions:
- cement;
- clay;
- limestone;
- gypsum;
- cement-lime;
- cement-clay;
- clay-lime;
- lime-gypsum.
Types of plasters and their application
Mixtures with two or three binders are called complex. In addition to the composition, the ratio of components also plays an important role - based on this, solutions are divided into fatty, lean and normal.
A solution with a predominance of the astringent component is considered greasy. During the drying process, such plaster shrinks and cracks, as a result, re-treatment of the walls is required. It is not difficult to determine the fat content of the working mixture: when stirred, it sticks to the trowel and remains on the walls of the container in a thick layer.
If there is an excess of filler in the mixture, it is a lean solution. It is almost not subject to shrinkage, does not crack after drying, but does not adhere well to the surface and has too low strength. It is enough to lightly hit the wall for such plaster to fall off. When stirred, the thin solution easily slides off the trowel, leaving virtually no trace.
“Fat” and “skinny” plaster, which is better?
A normal solution is moderately plastic, it is easy to mix, and if you put a little mass on a trowel and let it slide, a thin, uniform layer will remain on the surface. It is this composition that ensures maximum adhesion to the surface being treated and creates a durable, reliable coating.
Normal plaster mortar
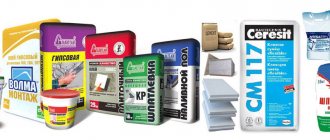
Popular ready-mixes
| Blend name | Characteristics | Price |
| UNIS plaster | Moisture- and frost-resistant, does not shrink, and withstands weathering well. Can be applied in layers up to 30 mm without reinforcement. Solution proportions: 0.16-0.2 liters of water per 1 kg of dry mixture. The solution consumption for a layer thickness of 5 mm is 6-8 kg/m2. The viability of the finished solution is 2 hours. Packaged in 25 kg bags. | From 280 rub. |
Cement plaster OSNOVIT Flywell | Frost-resistant, easy to apply, can be used for external and internal walls. Solution proportions: 0.3-0.42 l of water per 1 kg of mixture. With a layer thickness of 5 mm, the consumption is 9-10 kg/m2. The viability of the solution is 3 hours. Packing – 25 kg bag. | From 240 rub. |
Cement plaster Weber Vetonit | It has increased resistance to low temperatures, is moisture resistant, very plastic and easy to apply. The proportions for mixing the solution are 1 liter of water per 4 kg of mixture. Consumption for a thickness of 2 mm – 2.5 kg/m2. The viability of the solution is 3 hours. Drying time is from 2 to 7 days. | From 360 rub. |
Cement plaster "Starateli" | Waterproof, flexible, easy to apply. Forms a durable coating that is not prone to cracking and shrinkage. Mixing proportions: 0.26-0.28 liters of water per 1 kg of mixture. Solution consumption – up to 2 kg/m2. The viability of the solution is 1.5 hours. Packaged in 25 kg bags. | From 188 rub. |
| Decorative plaster UNIS Shuba-Decor | The base is white cement, the filler is marble chips. It is resistant to moisture, low temperatures, does not shrink, and is easy to apply. Mixing proportions: 0.18-0.2 l/kg. The viability of the solution is 1 hour. Packaged in 25 kg bags. | From 423 rub. |
Decorative plaster Knauf Diamant | Colored mixture on a cement base, filler – quartz sand. It has water-repellent properties, tolerates low temperatures well, and does not fade for a long time. Mixing proportions: 7.5 liters of water per 25 kg of mixture. The viability of the solution is 1.5 hours. Packaged in 25 kg bags. | From 340 rub. |
If you have no experience in plastering, it is recommended to choose ready-made mixtures - this way you will be sure of the correct ratio of components.
Prices for popular types of plaster
Plaster
What are the types of cement mortars?
Before starting work, you need to decide what kind of solution is needed for plastering the walls. There are not many types and they differ in the presence of a certain amount of additional ingredients that give the mixture special characteristics.
Sand-cement
A simple cement-sand mixture is the most versatile. It applies:
- for finishing interior spaces and facades;
- for initial and final alignment;
- for rooms of any purpose.
Sand and cement combined with water form a monolithic stone-like mass that is resistant to both moisture and mechanical stress. This makes it possible to decorate walls with a wide variety of operating conditions. These include facades that are in constant contact with the atmosphere with all its climatic factors, living rooms, and rooms with high air humidity.
Plastering the facade by machine Source i.ytimg.com
The difference between leveling and finishing mortar is the use of sand with a specific grain size. If coarse sand with a certain amount of impurities is suitable for rough finishing, then for finishing you need clean filler of the smallest fraction.
Note! Before preparing cement mortar for plastering smooth concrete or painted walls, they need to be roughened by applying a special primer or making notches, since this mixture does not adhere well to such substrates.
Primer Concrete contact with abrasive additives will improve surface adhesion Source stroy-podskazka.ru
Sand-cement with lime
This type of plaster differs little from the previous one, but has additional properties:
- Plastic. Lime increases plasticity and makes it easier to apply the solution to the surface.
- Better vapor permeability.
- Extended hardening period: if a cement-sand mortar “lives” no more than an hour after preparation, then you can work with a cement-lime mortar for 3 hours.
- Good adhesion to smooth substrates.
- Bactericidal properties - lime prevents mold from forming on the walls.
Plaster with the addition of lime is an excellent leveler for facades and walls in wet rooms Source otdelka-expert.ru
See also: Contacts of companies that specialize in finishing materials
But you need to know how to properly prepare a mortar for plaster from cement, sand and lime, because a violation of the proportions can cause the appearance of limescale efflorescence on the surface, which is incompatible with some types of finishing materials.
Sand-cement with gypsum
The addition of gypsum makes the solution stronger, and the finished surface is easy to sand. But this plaster hardens very quickly, so it requires skill in working or preparing the mixture in small volumes.
It is important! Unlike the two previous types, cement-gypsum plaster is afraid of moisture, so it is used only for interior decoration and exclusively in rooms with dry air.
Due to better plasticity, such plaster is more convenient to apply Source gid-str.ru
The characteristics of any plaster can be “adjusted” to the conditions in a particular room using various additives.
With their help, they increase the strength, moisture resistance, frost resistance of the finished coating, increase the plasticity of the solution, its adhesion to the leveled surface, extend the “survival” period, etc.
Which sand is preferable for plaster?
In the construction environment, there is no clear opinion about sand: which is better for plaster mortar, quarry sand or river sand?
- River sand is cleaner. Water washes away foreign, soluble impurities from its thickness. For example, clay. However, as it rolls over with the current, it wears away. Its particles are more rounded.
- Quarry sand has sharp, uneven edges. This increases its reinforcing properties. But quarry soil may contain clay impurities, which reduce the hardness of the final petrification.
In fact, the percentage ratio (clay and sand) in the quarry is not important. Except for special options, when the sand even has a reddish, brownish tint.
And reinforcing abilities make up for losses due to impurities.
Brownish, bright yellow, red sand is not suitable for mixing cement mortars. An unusual shade indicates alumina impurities, which do not sufficiently affect the strength characteristics of the plaster.
True, it is more convenient to work with a solution mixed with clay - it is more flexible and pleasant. This is important to know when negotiating with a hired builder. It often happens that workers hide the true state of affairs and insist on importing “dirty” sand in order to make their work easier.
Coarse sand or fine sand?
The absence of small particles in the sand allows the latter to easily sink into the thickness, to the bottom.
It settles. This solution must be stirred periodically. However, you should not trust the workers who allow themselves to add to the clay. It is better to bring unwashed sand. A natural plasticizer for plaster that does not reduce the quality of the cement mortar is lime.
Selection of quality components
Before preparing cement mortar for plastering walls, you need to prepare all the components.
Binder
Cement is the main ingredient of the mixture, binding all other components into a monolith, giving the surface strength, hardness, and resistance to moisture. It comes in different origins, different strength grades, with or without additives.
The choice of proportions depends on the brand of cement: the higher it is, the less cement and more sand is required. Knowing the proportions and simple calculations allows you to find out what is more profitable to buy for preparing a certain brand of mortar: inexpensive, low-grade cement in large quantities or high-strength and expensive cement, but in smaller quantities.
Concrete mixers.
It is easier to mix plaster mortar in a concrete mixer. But you need to pay attention to the features of the model and study the safety rules.
Plastering walls with cement mortar yourself, especially at first, may seem like hard work.
Hand kneading is very labor intensive. Therefore, for large volumes of work (for example, building your own house), it is advisable to consider purchasing your own concrete mixer. When repairing, it is a question of renting it.
Pickling cement plaster with a neutralizing solution is necessary. To protect cement plaster, pickles are used - liquids with a high content of acids. They strengthen the surface of the plaster layer. An additional advantage is disinfection of the coating.
Etching mixtures are hazardous to health (at the time of application).
Therefore, it is important to follow the safety precautions indicated on the packaging. data-matched-content-ui-type=”image_stacked” data-matched-content-rows-num=”2″ data-matched-content-columns-num=”3″ data-ad-format=”autorelaxed”>
Video description
When choosing this product, it is important to pay attention to its expiration date, packaging, and storage conditions. More details about this in the video:
Filler
Sand is a filler of the mixture, on which its strength, density and other characteristics depend. The quality of the sand and the grain size are important:
- Cheaper quarry sand, which may contain clay and organic impurities, is only suitable for rough leveling even after preliminary screening.
- Improved compositions for final leveling are made from clean river or washed quarry sand of a fine fraction.
On a note! For plastering ceilings, it is recommended to add lime to the solution, which improves the adhesion of the leveler to the surface.
Ready-made dry mixes
Basic information about the dry mixture is located on the back of the pack. The main criteria include:
- Type, in other words, composition (cement, cement-lime, acrylic, etc.)
- Application - for what surfaces is it intended: brick, wood and others)
- Bag volume - weight of the package with the mixture
- Consumption - on the packaging there are indications in kg/m/ per layer thickness of one cm or 1 ml. Thanks to this data, you can easily calculate the number of packs that are needed.
- Temperature is the permissible temperature regime in which the mixture can be stored and used.
- Adhesion is the level of adhesion strength of the base coating to the plaster.
- Coating thickness – parameters of maximum and minimum layer thickness and complete coating are shown
In addition, other parameters may be indicated, it depends on the type of plaster.
There are two fundamental rules that you should rely on when buying plaster:
- The thickness of the plaster layer is much less than that of the base surface.
- The vapor permeability of the composition is a level higher than that of the base.
This also applies to cases where the base is a layer of plaster of a different type.
Cooking technology
When buying ready-made plaster, you don’t need to think about the proportions and technology of its preparation, because all the components in it have already been selected and mixed, and all that remains is to pour in water and knead according to the instructions printed on the bag.
Another thing is a homemade solution, the quality of which depends entirely on the master. And one of the most important points is determining the proportions of all components.
Proportions of materials
It was already mentioned above how to make a mortar for plaster from cement and sand: the proportions of these components depend on the brand of binder and the desired strength of the finished mixture. As a rule, these proportions are determined in volumetric units or parts, since weighing bulk substances at a construction site is much more difficult than measuring with buckets or other containers of equal volume.
Compliance with proportions is a guarantee of the quality of the solution Source i.ibb.co
Below is a table of the ratio of the main components indicating the brand of cement used and the brand of the finished mortar. The proportions for lime are given as a guide; adding it is not necessary and does not change the ratio of the main parts.
Table for determining proportions Source i.ibb.co
Recommendations from experts
The preparation of plaster with a cement binder always begins with bringing the dry components to a homogeneous state. Only after this liquid additives are gradually added, then water.
It is better to mix the solution in small portions using a construction mixer. You can also take a hammer drill or a drill with a special attachment. This way the working mass will be prepared quickly and with the highest quality possible.
Reinforcement is carried out in three ways. The first and simplest is to add fiber fiber to the solution at the preparation stage.
Fiber fiber as an additive in CPSI source ivbb.ru
This technique is acceptable for forming a coating of small thickness. In other cases, it is necessary to use a plaster mesh made of galvanized wire.
Video description
The procedure for preparing the plaster is described and shown in this video:
Mix all the components in a concrete mixer or in a container with a construction mixer. At the end of the kneading, dip the trowel into the solution:
- If the mixture sticks to the spatula and does not flow well, you should add a little sand to it - the greasy solution will be difficult to distribute over the surface.
- If it is glassy, leaving almost no trace, add cement - the thin solution will not stick to the base.
- A normal mixture will leave behind an even, thin layer without lumps.
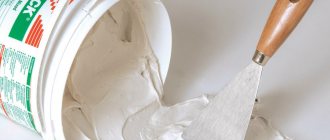
Consistency of high-quality freshly prepared mortar Source 1beton.info
Preparing the walls
At this stage it is necessary:
- Clean the wall from dirt, dust, resin and grease. If you are carrying out work in a new building, then you also need to get rid of all remnants of formwork compound, sagging and protruding fragments. To do this, you can use both improvised materials and specialized equipment for processing with compressed air or a strong jet of water.
- Straighten out the channels if you plan to conduct communications.
- Apply notches to the base for better adhesion of the plaster and the surface. To do this, use a chisel, hatchet, hammer or any other tool.
- Protect electrical installations with special plastic plugs.
- Check the stability of the base. To do this, “knock” the wall - if the sound is dull, then everything is in order, if not, then it is necessary to remove the peeling elements.
Healthy! If you don’t want to suffer with notches, purchase a special primer - concrete contact. After applying it, even on a perfectly smooth surface a layer resembling sandpaper will appear.
After this, the base is primed. This layer increases the strength of the wall and improves the adhesion of the plaster. In addition, the primer prevents the appearance of mold, corrosion and other unpleasant formations.
Healthy! It is recommended to use a specialized adhesion primer for external and internal work - Beton Kontakt.
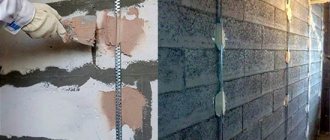
Next, a special mounting fiberglass mesh with 5 x 5 mm cells is attached to the wall, which is fixed with dowels and washers. For more information on preparing walls, watch the video.
Briefly about the main thing
If you need to plaster the outside of the house or level all the walls inside, the most economical solution will be a homemade solution of sand and cement. It may consist only of these components and water, or it may contain various additives. What mortar to make for plastering walls in a house yourself depends on the conditions under which it will have to “work.” But in any case, it should be prepared from high-quality materials and in compliance with proportions. And if it is necessary to improve its properties, it is recommended to use special modifiers. A high-quality solution should be homogeneous, without excess water.
Ratings 0
Necessary tools and materials for work
To prepare mortar for plaster, you need the appropriate tools and equipment. You can mix the plaster manually (with a shovel in a trough) or in a mortar mixer (mechanically). It all depends on the amount of work and capabilities. To mix a small portion, you can use a mixer.
To get started, you should purchase the appropriate materials in advance with a reserve (about 20%):
- individual components or dry mixtures ready for mixing;
- color or pigments;
- prepare clean water (tap or rain);
- additives (available in hardware stores);
- containers;
- a shovel is useful for pouring filler into the mortar mixer;
- To open the packages you will need a knife;
- trowel (and other tools for applying compounds).
Choosing plaster based on wall material
When the customer decides to level the walls with plaster, it is necessary to decide what is better to plaster the walls inside the house, what type of plaster mixture to use in the bathroom and toilet, in the kitchen or in living rooms. The type of mixture depends on the material of the surface that is decided to be plastered.
How can you plaster the walls in the bathroom and toilet? It should be remembered that for rooms with high humidity, solutions based on cement and lime are used, and there should be twice as much lime in this mixture as cement.
Before plastering wooden walls inside a house, for example, made of timber, it is necessary to strengthen a metal mesh on the surface, which will serve as a frame for plastering and will allow adhesion, since in its normal state the solution does not adhere to wood.
If the surface has significant vertical differences , it is recommended to eliminate uneven areas using shingles or installing special removable beacons. In dachas and country houses that are not intended for permanent residence, the best option for preparing walls is plaster, since drywall is destroyed under conditions of temperature and humidity changes.
To level wooden bases, mixtures with a predominance of cement and gypsum are used; it is possible to use clay solutions with a high content of plasticizers and the addition of fiber.
How to plaster the walls inside the house if the masonry is made of aerated blocks or gas silicate blocks, which are fixed with special glue? In this case, you will have to fix the plaster mesh to the surface, and plaster the aerated concrete with cement and gypsum mortars.
To figure out how to plaster walls made of foam blocks inside a house, you need to remember that the usual rough finishing with cement mortars will not work in this case due to the complete lack of adhesion. A good option for leveling foam concrete and foam block walls, mixtures with a predominance of gypsum. For working with foam concrete surfaces, lightweight mixtures of Pobedit or Glims Velur gypsum are recommended.
For leveling brick or concrete walls, cement-based mixtures are best suited, which will ensure reliable adhesion of the mortar to obtain an ideal surface for painting, wallpapering or tiling.
Sand to cement ratio
The proportion of mixing ingredients depends on the purpose. Before diluting cement with sand, you should clarify the purpose of the solution, the presence of filler and the brand of cement.
Most often, sand plaster is mixed in the following ratio:
- standard mixture: 1 part cement to 3 parts sand;
- the use of cement grade M400 or M500 is 1 to 4 or 5, respectively.
It is important to consider the labeling of building materials and the recommended brands of final compositions. For brickwork, M100-M150 mortar is used, the consumption of cement mixtures is 0.062 m3/m2
For laying M350 facing bricks, use M115 mortar. Plasticizers are added to increase viscosity. Similar compositions are used in the plastering process for better adhesion.
Proportions are calculated depending on the desired result and the purpose of using the mixture
Plastering brick walls
First of all, we prepare the surface.
- Mandatory process: priming the walls. Without primer (it is also sold in stores), no plaster will stick. There is no need to knock down excess mortar between the bricks. The plaster will cover it. If the walls are uneven, then a reinforcing mesh is used to level them
- The walls are also checked for the presence of nails, driven dowels or other metal fasteners. We remove everything from the walls.
- If the surface is very uneven, or you are not sure that independent work will be of high quality, you can use reinforcing mesh to make the work easier.
- The mesh is cut to the required dimensions and then attached to the wall using alabaster or heavily mixed plaster (for quick drying).
- The first layer is applied using a trowel and then the mesh is pressed into it. The plaster mixture is leveled. After it dries, apply a second layer.
Clay and lime mortars for plasters
For interior work, you can use a plaster mixture made from clay and lime paste, in a 1:1 ratio, with a small addition of wood dust or shavings. Clay and lime must first be soaked in water in a ratio of 1 part clay or lime to 1.5 parts water. After absorbing the water, both components are thoroughly kneaded and crushed in order to find and remove all the smallest inclusions of stones or foreign inclusions. The plaster components are thoroughly mixed and applied to the wall.
If only clay and sand are used for plastering work, it is necessary to carefully select their proportions in the mixture. Clay is a very complex material in composition; its properties strongly depend on the content of hydrated silicon and aluminum compounds. Sometimes craftsmen use pottery techniques to increase the plasticity of clay. The clay mass is cut into strips with a shovel, transferred and mixed. After 5-10 such cuts, the clay becomes very viscous and durable.
Typically, such solutions are used to seal walls made of wooden slats, panel structures with insulation and a waterproofing layer. Mixtures of lime, sand and gypsum are often used to plaster walls made from gypsum blocks, prefabricated structures made from plasterboard and galvanized profiles.
The clay-lime mortar can be stored for several days; it dries very slowly, which is why thick layers of plaster can become deformed, especially in a draft or in cold, damp weather. In the most urgent cases, in order to speed up the drying of the intermediate layer, sheets of newspaper are placed on the wet surface of the clay plaster. They slowly remove water from the plaster and help it dry evenly without deformation.