Plastering the surface is the most effective way to prepare the base for the finishing coat, as well as one of the decorative finishing options. To give the plaster layer the desired texture, it must be processed, in other words, grouted. The grouting process itself is simple, but it has its own subtleties and secrets, without which a high-quality result cannot be achieved.
Grouting plaster - photo
What is surface grouting with floats?
Many people are interested in what grinding interior plaster is.
Grouting of plaster is necessary if it contains:
- marks from a spatula;
- transitions between layers;
- unevenness;
- tubercles and depressions.
Problem areas on the wall can also appear in cases where the work is carried out by a sufficiently experienced craftsman.
Grouting becomes important because... It is almost impossible to perform leveling immediately during the preparatory stages.
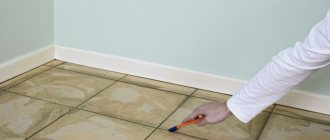
All existing defects become especially visible when illuminated from the side, including cracks and protruding tubercles. If the walls are covered with wallpaper in the future, all the shortcomings will become obvious. Therefore, it is necessary to take time to eliminate existing problems.
Grinding of the plaster is carried out immediately after the wall has set and stops getting your hands dirty. The work can be done either manually or with the help of special mechanical devices. Grinding most often occurs in a circle or in a continuous motion. This stage can be abandoned if the treatment of the walls is carried out in rooms that will subsequently be assigned an auxiliary role. Grouting of plastered surfaces is not carried out in basements. In this case, only severe deficiencies are removed.
Also, walls on which ceramic tiles are subsequently planned to be laid do not need such treatment. The result of grouting is smooth surfaces, completely ready for painting.
At the same time, not all experienced craftsmen know how to grout gypsum plaster correctly and make mistakes, which result in low quality of work. And the main secret lies in the features of gypsum plaster.
Tool
For work, a special tool is used - a grater. There are different types of this device:
- Wooden. The simplest option that you can make yourself. Excellent for working with standard gypsum or cement based mixtures.
- Foam. Due to its low strength, it is used exclusively for final leveling of solutions that do not contain a large fraction.
- Metal. It compacts the applied mixture well and helps to achieve perfect evenness.
- Polyurethane. A modern variety that is lightweight.
- Spongy. For production, materials of different densities are used, which helps to obtain different textures of the decorative surface.
The tool is prepared in advance. If a used grater is used, it should be thoroughly cleaned of all contaminants. When purchasing a new tool - especially one made from fragile materials - it is advisable to make sure that the base is perfectly flat and free of damage.
Tools for work and prices for various types of plaster floats
It is worth finding out about grinding plaster, what type of work it is and what its purpose is, how to grind plaster correctly. All these questions are of interest to beginners who are doing home decoration for the first time on their own. When performing this type of work, a coating is used - a material similar in composition to putties. Therefore, to work with it you need to use the same tools as when putting putty.
This list can include:
- spatulas;
- rule;
- grater;
- trowel;
- a brush that is comfortable enough to easily remove the solution from the grater;
- ironing board;
- mixer.
When choosing devices, you need to pay attention to how convenient it is to work with them. The material from which the tool is made is not critical. For example, the types of graters can be very different, ranging from plastic to wooden and made of foam. Both rubber and felt can be placed on the working surface.
The quality of grout primarily depends on the type of surface being treated. Grinding concrete plaster requires a special approach. The service life of the tool also depends on the type of walls. The devices may be called differently, but they are all necessary when preparing the walls for final finishing.
Mechanical grouting
The work is completed after the surface has first dried. At least 2-5 hours must pass before the next stage. The surface is moistened with a sufficient amount of moisture, and only then proceed to using the machine. The device simplifies control.
The screed is smoothed out in several approaches. Their number depends on how flat the base is used. In the case of vertical surfaces, the work is performed in the same way as for the screed. Periodically moisten the cement surface using a DIY sprayer.
The work is completed after the surface has first dried.
Grouting the walls is a stage that many people find tedious due to the fact that it is the last one. But don't rush. It is better to spend some time to get a quality result that can last for many years. After this, all costs are covered.
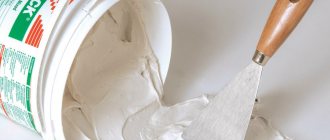
Preparation of mortar for covering and prices for various types of cement
The process of making a coating solution is simple. But when breeding it, you should remember some of the features of this material. The finished coating is very similar to the primer, but unlike the latter, it contains very fine sand. This choice is justified, because small particles of sand fit better into a denser layer.
As for the remaining components, they are completely similar to those contained in the composition. Upon completion of the work, you should end up with a mixture that is less viscous than the soil. To make a high-quality covering, it is necessary to strictly observe the proportions of the components.
The procedure for preparing the mixture for this type of work is as follows:
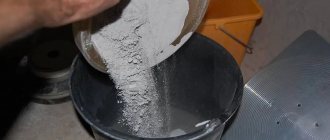
- The required volume of water is poured into the prepared container.
- A dry mixture is poured into it, which can be easily found in any hardware store.
- All components are thoroughly mixed. The resulting mass should be homogeneous.
- Before starting work, it should stand for about 15 minutes, and then be well mixed again.
If there is no ready-made mixture, make it yourself, carefully measuring the required volumes. In this case, the order of preparing the covering is preserved. The cost of covering is primarily influenced by the price of concrete. M500 cement is mainly used to make the mixture. Before mixing, it is advisable to pass the cement composition through a sieve. The cost of this component can reach up to 300 rubles. Experts do not recommend using gypsum when making covers, because... the quality of such a layer will be low.
The composition of the covering is selected the same as in previous work. Portions of the mixture for application should not be large. How much is needed per pass depends on the master and his method of work.
Mix the solution
In its preparation, proportions of materials are used that are similar to those for the base base.
For cement mixture:
- cement - one part;
- sand - three parts.
For cement-lime:
- cement material and slaked lime - one part each;
- clean sand - 3 parts.
There is one peculiarity - under the covering they use washed, fine sand, the grain size of which does not exceed one and a half millimeters. The coarse-grained component is allowed when the base is prepared before tiling with ceramic tiles.
In order for the grout to turn out to be of high quality, it is necessary to prepare a mortar mass of suitable fat content - a “lean” mixture does not have the necessary strength, it crumbles during the work, a very fatty mass is difficult to level, and after using a tool, stripes form on its surface. The mortar mixture should be plastic and stick slightly to the spatula blade.
It is easy to select the fat content of the solution being prepared - if it sticks strongly to the tool, add sand; if the mixture does not stick at all, add cement.
The normal mass is easy to stir, has a uniform consistency, and leaves an even, thin mark on the surface of the trowel.
How to prepare the solution correctly? It is best to act according to the following algorithm:
- the sand is sifted on a sieve, the cell size of which does not exceed 1.5 by 1.5 mm;
- the required amount of cement is poured into the container for preparing the solution, sifted sand is added, the components are mixed until smooth;
- Add water portionwise, stir the mixture constantly, achieving the required consistency.
If a solution is prepared based on cement and slaked lime, then the latter is also passed through a sieve - even small grains can leave marks on a smooth surface.
Procedure for grouting and leveling the wall
The grouting procedure is as follows:
- The covering is applied.
- Grout dry or using a solution.
- Grout in a circular or scattered manner.
Grinding of plaster can be carried out using one of several methods; each method has its own advantages and it is necessary to choose the one that in a given situation will be optimal in terms of price, completion time and quality.
For example, when grouting with a solution, a small consumption of the prepared material is required, but it takes a lot of time, because The process is quite painstaking. Therefore, if possible, choose another, more economical method. For example, grouting the plaster layer with a trowel allows you to well preserve the existing relief, but requires effort.
How to apply the coating correctly
The purpose of the overlay is to create another nearly even layer of additional plaster. This mixture must be applied to a moistened base. You can lightly wet the surface using wide paint brushes. After moisturizing, at least 20 minutes must pass, only after that it is allowed to use a special mixture.
You only need to spray the first 2 areas with water, there is no point in further, because... the surface will dry quickly. Apply the mixture to the wall using a spatula. The movements are linear or arcuate. It is most convenient to level the covering with a wide spatula. Some masters prefer to use the rule the old fashioned way. The maximum thickness of this layer is no more than 3 mm. Such a thin coating dries much faster.
Dry grout for plaster - when is it best to use
This method is used in a situation where the layer has already been slightly strengthened. Then the surface is rubbed, before that it is moistened and only then they pass over it with a grater. Throughout the entire area, the walls make sliding movements with slight pressure, especially in convex places.
When processing depressions, the pressure on the grater should be reduced; on a flat surface, the pressure intensity should be medium. A small amount of material may collect on the tool during application; this can be removed with a brush. Grinding plaster requires care, and the pressure must be constantly monitored so as not to spoil all the previous work.
Grout with mortar
This processing method is chosen in cases where there are many gaps on the surface and it is impossible to do without additional material. There are different methods for grouting plaster. This option allows you to eliminate numerous defects without much expense. The solution completely covers the entire working surface of the grater used.
The important point is that in this case very little mixture is taken. But the process itself is long, unlike simple grouting, which takes less time. A new layer should be applied to a slightly moistened surface.
When using this method, you should also follow one rule, according to which the time interval between processing adjacent areas of the surface should be minimal. Experienced specialists advise not to interrupt for rest while performing work. When moistening a new place, you should slightly moisten the already finished part of the wall. In this case, the grip will be stronger.
Grouting in a circular and continuous manner
Grouting plaster in a circular manner is the most popular way to level the surface. The best result when grouting can be obtained if the movements are carried out according to the scheme. For example, circular movements make it possible to better eliminate defects and make plastering much easier.
If the movements are performed with acceleration, the movement of the tool is cyclic-rectilinear in nature. This method is often used immediately after performing a circular exercise. After such movements, all traces of existing defects are completely removed. The work will be of high quality with constant pressure on the tool.
Thanks to this, transitions between sections are not visible. The smoothest wall possible is obtained if you use the stretching method. The quality of workmanship in this case depends on the cleanliness of the instrument and how smooth its working surface is.
Smoothing and troweling the surface
Smoothing is not a mandatory action. In some cases, they replace mashing. This work is performed using trowels, which most often have a metal surface, less often a rubber or felt surface. These tools can be convex or smooth.
Convex models are used for corners. In addition to the tool, the quality of work is affected by the composition of the mixture. The peculiarity of smoothing is that at first the movements are made in one direction, for example vertical, and at the next stage - horizontal. Most often it is customary to apply the mixture and level it at the same time. With this approach to the process, it is possible to gain time.
Design and scope of application
For thousands of years, all plastering tools, including trowels, were made from wood. A handle was attached to a piece of board with slightly rounded edges - and the simplest device was ready.
There were two main disadvantages of such tools:
- the grater absorbed the plaster solution and became heavy, making work difficult;
- When dried, the instrument dried out and cracked.
The polyurethane grater is similar in design to its wooden predecessor, differing from it in low hygroscopicity and increased wear resistance.
The tool is a rectangular structure cast from polyurethane. The length of the platform is 120-360 mm, width – 120-180 mm, thickness – 20-25 mm. The closed handle, reminiscent of a wooden door handle, is molded integrally with the base.
The base of the platform has edges rounded with a radius of 5 mm.
Why do you need a polyurethane grater? It is used in the following types of plastering work:
- leveling plaster during exterior finishing;
- applying a decorative plaster layer.
What does a polyurethane grater look like? The polyurethane grater is easy to learn and use. It is used by both professional plasterers and novice home craftsmen.
What is grouting decorative plaster and how to do it yourself
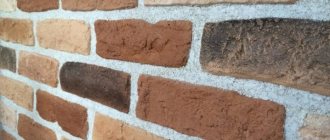
Plaster grouting is mainly intended for the final formation of the wall relief. The process of grouting decorative plaster differs from standard work with surfaces. The main difficulty is that such a layer initially has unevenness. Many types of plaster contain stone grains.
If the mixture has not hardened, they can be removed during grouting. In this case, experts recommend using graters with an abrasive mesh. It is necessary to work with them without strong pressure. Moroccan decorative plaster does not require grouting. In this case, the layer is polished using a special stone. Tadelakt is processed with circular movements until shine appears.
Another type of plaster, Venetian, is smoothed with a trowel or spatula made only of stainless steel. It is necessary to obtain a mirror effect. It is recommended to level decorative travertine plaster approximately 15-20 minutes after creating the relief. In this case, a moistened trowel is necessary.
The tool is moved in different directions. In the case of decorative plasters with deep relief, use a sponge.
Before you start working with plaster, you need to see what effect will be obtained in a small area that is not conspicuous. Only after having trained your hand well can you move on to the central sections of the wall.
Making the cover
The work is performed in the following sequence:
- the surface intended for plastering is moistened to enhance the adhesion of the covering to the soil layer. Humidification is carried out evenly, without missed or very wet areas. Simply put, streams of water should not flow from the surface. This should be done fifteen to twenty minutes before applying the mortar mass. When working over a large area, divide it into working sections and moisten only the one that is to be treated. You can use a spray bottle or a wide brush;
- the coating is applied with a trowel, leveled with a rule or a spatula with a wide blade. The mixture is poured in small portions, starting from the top section, and generally stretched along the plane. At this moment, the tool must be pressed firmly so that the solution tightly hammers all uneven places. The excess mixture is removed, the covering layer should not exceed two millimeters;
- As soon as the covering layer has set, the surface is rubbed with a grater.
The use of a trowel for grouting plaster
Grouting walls after plastering is a process that takes quite a lot of time if done well. It is almost impossible to carry out this work on large surfaces manually. It is much more efficient to perform it using special mechanisms that have 1 or 2 grinding discs in their design, which are used for processing. With 2 discs, the performance of the trowel is much higher.
The procedure for working with the device is as follows:
- The mechanism is connected to the network.
- Then the water supply to the treated area is organized.
- Before starting grinding, the unit must run for some time at idle speed.
- Then the device is applied to the wall and moved parallel to it.
- The surface must be wetted periodically.
- Due to friction, the discs wear out over time and need to be replaced.
- Upon completion of the process, first turn off the power and only then the water supply.
- At the end of the working day or after finishing the grouting, all parts are cleaned.
The device may be used no earlier than 2 hours after applying the mixture. If there are defects on the surface, apply a coating solution. At the last stage of work, a felt disk is used. Grouting cement plaster allows for further finishing work related to painting or wallpapering.
This method of surface treatment has one significant drawback. All mechanized devices of this type have a high cost, so it makes sense to purchase them only in cases where work is carried out over very large areas. Because The grouting stage indicates the imminent completion of the repair; the desire to speed up the completion of the work is understandable, but in this case the quality suffers. Therefore, you need to be patient and perform the processing carefully and carefully.
Technology of plastering walls using dry gypsum mixture
In order to make the finishing layer, a dry gypsum mixture is often chosen, for example, Rotband. It is attractive because the base will be white, which means it can be painted or wallpapered in any color.
Before preparing the solution, be sure to read the instructions. Manufacturers indicate in what quantities the components should be mixed to obtain a solution of the required consistency.
The application technology requires compliance with special environmental conditions:
- The air temperature, as well as the base, should be between 5 and 25 O C.
- Gypsum putty is afraid of moisture, so open bags with the mixture should be stored in a dry room. This plaster is not suitable for finishing facades and rooms with high humidity.
- The solution sets quickly, so it is prepared in small quantities.
How to apply gypsum plaster?
Regardless of whether the mortar is cement-sand or with the addition of gypsum, it is applied in the same way. First, a small amount of the substance is thrown on, and then leveled with a spatula or rule. If the gypsum composition is chosen for finishing plaster, then the solution is scooped up onto a wide spatula and rubbed into the base, which should be slightly damp.
You need to work quickly with gypsum mortar because it sets quickly. After hardening, it cannot be diluted with water or other liquids, as its properties are lost. After the applied layer has set, it is rubbed with a special tool dipped in gypsum milk. This will give the plaster strength and smoothness.
Puttying or smoothing the wall
For grouting, choose a special grater. For narrow places (near door and window openings) you need to take a grater or a smaller grater. The hand moves counterclockwise in a circle. You need to work confidently, but you shouldn’t overdo it so as not to tear off the applied layer.
Smoothing is also done with a grater, only with a rubber or metal pad. Now the movements are only vertical and horizontal. First, the wall is smoothed from the ceiling to the floor, and then horizontal movements begin. The ceiling is smoothed first along the window opening, and then across.
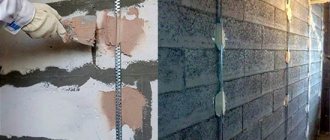
Splash
First of all, a layer of plaster, called “spray,” is applied. The solution for spraying should be more liquid than the composition for subsequent layers and resemble sour cream in consistency.
Spray thickness:
- for wooden surfaces - 10 mm,
- for concrete and stone surfaces - 4-5 mm.
Using a trowel, lay the mortar in the center of the falcon's shield. To save consumables, carefully remove excess mass.
Bring the falcon to the prepared surface, easily tilting it towards the base, and begin to throw the mortar onto the wall or ceiling using a trowel.
Gradually spread the plaster mixture over the entire surface of the wall, trying to throw the solution from the same distance.
Once you have finished spraying, do not try to level the coating - this is not necessary. Remove only excessively protruding areas of plaster.