Features of penoplex
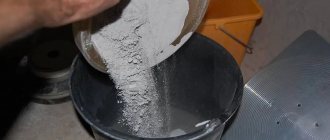
Synthetic foam products from polystyrene have been made for a long time, for more than 70 years. Penoplex differs from traditional boards in its production technology, which uses extrusion. Blowing agents are initially added to the polymer, which ensures uniform distribution of cavities throughout the mass. As a result, after extrusion, a structure with closed microscopic cells is formed, the size of which does not exceed 0.2 mm.
The main qualities of the slabs are as follows:
- low density;
- light weight;
- well-defined ability to retain heat;
- minimal tendency to absorb moisture.
Despite all its advantages, the material requires increased attention due to its high flammability and poor vapor permeability. Penoplex must be used correctly, taking into account the need to ensure good ventilation of the walls and the need for particularly strict adherence to fire safety rules. To protect from external influences, plaster is applied to the penoplex.
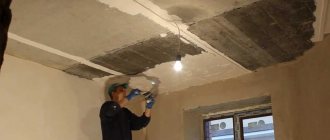
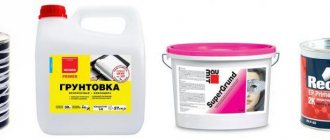
Surface priming
Compared to classic plastering, the thickness of the soil when finishing penoplex is 2-3 mm. Its main purpose is to disguise the results of reinforcement on the surface and prepare the surface for final cladding.
The primer should be applied to the penoplex after the first layer has set and the wall has been roughly sanded with sandpaper. Although stripping is not a necessary procedure, it helps reduce the amount of adhesive needed to treat the surface. At a temperature of 20 degrees and average humidity, the leveling primer layer is distributed after 6-12 hours. The rate of hardening depends on the absorption of the material by the walls. The primer must be applied with a thicker consistency than when attaching the reinforcing layer.
Why plaster
Plastering is a necessary part of the finishing work, allowing you to safely invest in thermal insulation without fear of its destruction in the future.
External plaster protects the facade from wind and precipitation that can cause damage to the material. The inner plaster layer on extruded polystyrene foam can serve as an additional decorative finish.
Penoplex is a durable polymer, however, under strong local mechanical loads, dents can form on it, which can lead to cracking on the sheets. If the coating is plastered, its resistance to impacts will increase, and an additional layer of protection for the synthetic board from UV rays will appear.
Thermal insulating coating made from foam sheets has joints that are usually sealed with polyurethane foam. To form a perfectly flat surface and protect the seams from aging, plaster must be applied on top of the sheets and seams.
Step-by-step instruction
After the penoplex is glued and secured with dowels, you can begin applying facade plaster. When a person is applying plaster for the first time, he needs to try it on some surface. For example, on the remaining sheet of penoplex. Then you can understand how comfortable it is to hold the instrument.
Kneading the mixture
It is very important to approach the first stage responsibly. You need to prepare the mixture according to the instructions, which must be on the package.
If you are doing this kind of finishing for the first time, do not prepare a large volume at once. The solution hardens quite quickly, and if you don’t have time to handle it, you’ll just have to throw it away.
To secure the reinforcing mesh, professionals recommend preparing the solution a little thinner than indicated on the package. Then you can slightly reduce the material consumption, and the mesh will be fixed much easier.
Installation of reinforcing mesh
First you need to cut the mesh into small pieces 30 cm wide. I fold them in half. These pieces will be used for laying on the corner, or you can buy ready-made corners with a mesh at a hardware store. It is from the corner of the house that they begin to install the reinforcing mesh on the penoplex.
After this, you can begin finishing. On both sides of the corner, at a distance of 15 cm, apply a plaster solution. The thickness should not exceed 3 mm. Then the bent reinforcing mesh is laid. It needs to be smoothed with a spatula and pressed a little into the solution. You need to move from the corner, starting from the top. The slopes of windows and doors are processed in the same way.
Then they work on the surface of the wall. A layer of solution is also applied that will correspond to the width of the mesh. Then the reinforcing layer is laid. Each piece should overlap the previous one, by 5–8 cm. Smooth the surface with a spatula and press the mesh. On a flat surface, move from the center of the piece.
How to align a layer
To create a final even layer you need to do a few more manipulations.
- About a day after completing the installation of the reinforcing mesh, you need to sand the surface. This is exactly how long it takes for the layer of plaster to dry well.
- A grater with sandpaper removes unevenness that could have formed when smoothing the mesh with a spatula. You need to rub in a circular motion with slight pressure.
- Then you need to apply a layer of primer. There is no need to skip this step. The primer will help the dried layer of plaster and the finishing layer adhere more firmly. In addition, if you choose antibacterial and antifungal properties, you can protect the coating from the effects of microorganisms.
- Now apply a leveling layer. The mixture is prepared according to the instructions. Apply with a large spatula, no more than 3 mm thick. Individual sections should not coincide with the joints of the reinforcing mesh.
- Then the layer is left to dry for 1–3 days. Drying time depends on the mixture itself and weather conditions. If the ambient temperature is high, it will dry out faster.
- Then you need to use the grater again. Remove small bumps and depressions.
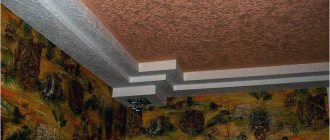
Finishing
If you get a perfectly smooth wall surface and this texture suits the owner of the house, then you can leave this façade. To give it a more attractive look, you can use acrylic paint. A wide color palette will allow you to turn your wildest ideas into reality. But you can create a more original surface of the facade walls. Special decorative plasters are sold for this purpose. They are applied in a thin layer, and the texture is created by small inclusions.
You can also use a regular plaster mixture and special texture tools (roller, sponge, spatula or improvised materials). The texture is created from the raw surface, both with decorative compositions and with ordinary ones. After hardening, it will no longer be possible to create a drawing.
Required tools and materials
In order for the matter to proceed easily and quickly, you need to think through everything in advance, collect the necessary materials, aids, and tools.
There are different brands of plaster mixtures and priming agents that have a similar basic composition, which does not exclude the presence of small features in the nature of impurities. To decorate a wall or a room as a whole, it is advisable to stock up on a sufficient amount of material from one manufacturer. This will eliminate the possibility of incompatibility of mixtures; they will work perfectly with each other.
Advice! Prepare equipment for mixing the plaster mixture in advance. There are many options: from an ordinary long wooden spatula or spatula to a drill with a special attachment. Choose good, comfortable spatulas with an ergonomic handle that allows you to easily move them along the plane.
To improve the adhesion of penoplex to the paste-like mass of plaster, the surface is treated with a metal brush or a needle roller. Roughness will improve adhesion and ensure reliable adhesion of the composition to the insulation.
Finishing outside corners requires special perforated corners and levels to ensure proper installation. You definitely need to buy a reinforcing mesh, without which all the work becomes meaningless. In some places you will need glue to fix it. Study the composition and recommendations for use in advance. To grout the surface, you need to purchase a plastic grater with sandpaper. It is convenient to carry out the final finishing with a roller with a small dense pile.
Plastering technology
The process of plastering penoplex includes the following steps:
- surface preparation;
- reinforcement;
- applying decorative plaster and painting.
Below we will take a look at all these stages.
Foam for sealing cracks
Preparation
So, before plastering the penoplex, you must perform the following steps:
- First of all, it is necessary to fill the gaps between the insulation boards that may appear during its installation. To do this, you can use polyurethane foam or special foam for insulation systems, for example, Ceresit CT-84. The cost of a can (850 ml) is ~ 600 rubles;
- Next, you need to make sure that the surface covered with penoplex is smooth. To do this, you can use a long rule and a building level. All protruding areas should be rubbed with a special grater.
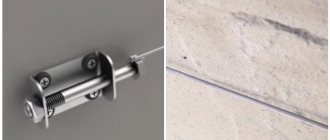
At this stage, it is often necessary to deepen some of the caps of the umbrella dowels below the surface of the insulation. If you can’t hammer them in, you need to cut off the cap with a utility knife and drive in another dowel next to it, having previously drilled a hole for it;
Adhesive primer concrete contact
- At the end of the work, the surface of the insulation must be primed with the “Betonkontakt” composition, for example, from manufacturers such as Ceresit, VIOLUX, Feidal or others. On average, the price of a primer is 700-1000 rubles per 15 liters.
Before application, the composition must be shaken and poured into a flat container. Then you need to moisten the paint roller in the liquid, squeeze it out slightly and apply the primer to the surface in an even layer, avoiding drips and accumulation of liquids in certain areas;
- After the surface has dried, the primer is applied again.
This completes the process of preparing penoplex for plastering.
Fiberglass reinforcement mesh
Reinforcement
The next step is reinforcement, which is performed in this order:
- before plastering the penoplex, you should cover the dowel heads and other recesses in the heat insulator;
- then you need to glue aluminum perforated corners to the outer corners. The glue used is the same as for gluing the mesh - Ceresit ST 83, Glims KF, KREISEL 210 or others. The cost of the compositions averages 350-600 rubles per 25 kg bag;
- Next, you need to cut the fiberglass reinforcing mesh, taking into account the fact that the sheets are glued overlapping each other by about 10 cm, and also with a turn at the corners of about 10 cm;
In the photo - gluing the mesh to the insulation
- Next, an adhesive composition with a thickness of about 3 mm is applied to the surface. The consistency should be a little thinner than the manufacturer recommends. The fiberglass mesh is immediately glued to the treated area using a wide spatula or chalk.
It is more convenient to carry out work from top to bottom. In this case, you need to treat a small section of the wall with glue so that it does not have time to set before gluing the mesh;
- After gluing the mesh, another layer of glue is applied to the surface, which is leveled with a wide spatula. Essentially, it performs the function of rough plaster.
Scheme for rubbing decorative plaster with powder
Finishing
As a rule, wall insulation is carried out from the outside, so the instructions for finishing penoplex look like this:
- first of all, two layers of primer are applied to the surface again;
- then, using a wide spatula or trowel, after the soil has dried, decorative plaster is applied;
- when the plaster begins to set, it is rubbed with sandpaper;
- After the decorative plaster has dried, most often the surface is covered with water-dispersion facade paint.
This completes the process of plastering penoplex with your own hands. It must be said that sometimes insulation is carried out indoors. In this case, after reinforcement, ordinary putty is applied to the surface, and then decorative finishing is performed, for example, wallpaper is pasted or walls are painted.
Types of mixtures
Penoplex plaster for the facade requires strength; it should not change under the influence of precipitation. There are compositions for universal and specific purposes. When choosing, you should take into account all possible types of loads on the coating.
Multifunctional tools
The universal composition can be used at several stages of finishing work. With this plaster you can attach penoplex to the wall, then fix the reinforcing mesh on the outside on the sheets. The universal mixture can not only be used for plastering, but also for pre-priming surfaces. The product costs a little more than formulations with strictly targeted action. The higher price is compensated by the possibility of multifunctional use.
Mineral products
A cement mixture that contains sand and a small amount of polymer filler, which improves the fixation of the material on the surface, is popular among craftsmen. Often such plaster is called mineral due to the predominant amount of inorganic components. The mixture must be prepared in accordance with the manufacturers' recommendations, which often contain instructions on the need to add PVA glue to the mixture. If the accompanying documents do not specify the introduction of additional components, there is no need to do this yourself. Some plasters contain gypsum and stabilizers. Such mixtures are very plastic and stick to the penoplex more slowly.
If you don’t have enough money to purchase ready-made plaster, you can make your own compositions from two components:
- cement and lime;
- clay and lime;
- clay and cement;
- clay and gypsum.
This is not the best solution, especially since the type of clay is fundamental to the quality of the plaster. If you have suitable clay, high-quality cement and slaked lime, the mixture can turn out quite successful. Mineral compositions can be used to plaster facade insulation on the outside and putty penoplex indoors.
Acrylic
Mixtures based on acrylic polymers are intended primarily for finishing areas located in areas of high humidity and high mechanical loads. The cost of polymer plasters is higher than that of mineral compounds, but their greater resistance to external influences justifies the difference in price. Acrylic plaster masses have great elasticity, which makes them easier to work with.
Silicate
A successful combination of properties is demonstrated by silicate plasters, which do not contain polymer additives and therefore do not become electrified. Silicates allow steam to pass through well, are not destroyed by atmospheric moisture, and are not subject to microbiological destruction. This is the most acceptable mixture that can be used to plaster both external and internal walls. It is enough to properly treat the surfaces once and you won’t have problems for many years. Silicate material is environmentally friendly, does not contain harmful impurities, and guarantees the cleanliness of the surrounding airspace.
Decorating the coating
After grouting, plastering of penoplex is easy and relatively quick. To decorate the coating, you can use a sponge with large pores or a special grater.
There are ready-made decorative plaster compositions that create an unusual texture on the outer surface.
Bark beetle plaster, in addition to the usual basic components, contains white powder and small pebbles with a diameter of up to 2.5 mm. With certain skills, the master can make different designs from the same mixture by directing the movements of the spatula in a certain way. The work of a plasterer thus turns into the work of a decorator.
If the mixture contains larger stones, up to 4 mm in size, the relief will be completely different. Granules are crumbs made from natural raw materials: granite, marble. Pebble plaster gives the facade an unusual, beautiful look and provides shine in the rays of sunlight. White cement plaster mixtures with the addition of large granules of quartz, dolomite, and marble are available for sale. For some unknown reason, it was called the lamb. Perhaps the appearance of the facade reminded someone of the wool of sheep.
An interesting decorative option is created by mosaic plaster based on polymer acrylic interspersed with natural colored chips.
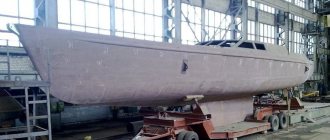
Penoplex is a high-quality insulation material, the initial installation of which requires an investment of money. The costs will quickly pay off thanks to savings on heating costs. They will be protected from bad weather at any time. Practical considerations about the advisability of using penoplex are complemented by aesthetic ones. Using decorative mixtures and painting surfaces, you can create a unique look for each home.
A prerequisite for the effectiveness of energy-saving measures for individual housing is protection of the insulation belt from atmospheric influences, the function of which is performed by facade plaster on polystyrene foam, applied by yourself. Such finishing of the building will best prevent freezing of load-bearing structures in winter and will create conditions for reducing the cost of maintaining the desired temperature inside the room using heating devices or air conditioning. A seamless plastered wall is suitable for installing any finishing coating on it.
Famous manufacturers
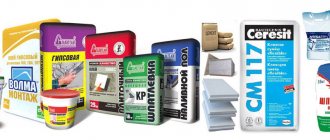
The domestic market of plastering materials offers products from different manufacturers. The following three brands are most widespread:
- "Ceresit";
- "Ekomix";
- "Stolit."
There are imported products and mixtures of other domestic companies, the characteristics of which are always indicated in the attached instructions.
Ceresit products are presented in a large assortment, including all types of plaster: silicate, silicone, acrylic, cement. The product has good performance characteristics, is easy to use due to its elasticity, and is durable.
Ecomix plasters can be used for exterior work or to decorate interior walls. The compositions are characterized by environmental safety and resistance to moisture. Work on finishing facades using plaster from this company must be carried out in the warm season, at temperatures of at least +7 °C. Mixtures can also be used to eliminate defects: chips, cracks, deformations on old surfaces covered with plaster long ago.
The range is represented by compositions based on cement, to which stabilizers and modifiers are added. Thanks to this, the plaster has high heat resistance, does not react to high and low temperatures, and attaches well to penoplex.
Preparation of the solution
Recommendations for the preparation of commercially available mixtures are contained on the packaging and in accompanying documents. When purchasing, you can get additional advice about the features of the products and the specifics of their preparation.
When making plasters yourself, you should remember the main points. The components taken in accordance with a specific recipe must be sifted and mixed well. It is advisable to check the stickiness of the mass before starting work. If the plaster sticks too much to the spatula, it will be difficult to apply. In this case, you should increase the amount of filler. If the mixture does not stick at all, you need to increase the amount of binder additives. Using the sampling method, you should select the average fat content of the mixture, because if the viscosity is excessive, the layer of plaster may crack after drying. An insufficiently sticky mixture is not very convenient to work with and forms a layer with little strength.
Let's sum it up
Penoplex is laid between the base and the cladding
Each reader was personally convinced that penoplex is easy to putty - it is unlikely that anyone will have any difficulties here. However, you need to be able to handle a hammer, spatula and other similar tools, or at least have some experience in interacting with them. It is also recommended to follow the sequence described above - if you want to get quality and not repeated repairs.
The process of penoplex plastering is described in more detail in the thematic video:
If, after studying the article, there are still some unclear places or questions arise, the video material will definitely give the answer and help in solving difficulties. The main thing is to believe in your own strength and everything will definitely work out!
Rating: 4.9 / 5, total ratings: 9
Source
Installation of reinforcing mesh
Before applying a layer of plaster, penoplex needs to be reinforced with special nets. Polymer cellular fabrics with a density of at least 140 g/m2 and no more than 160 g/m2 are best suited for reinforcement. The general rule is that the smaller the cells, the better the reinforcing properties. A high-quality mesh with suitable characteristics helps to level and strengthen the surface of the penoplex.
Note! If you plan to use cement-based plaster, the mesh must be inert to an alkaline environment.
Reinforcement should start from the corners. To do this, cut strips from the mesh, the width of which should not be more than 35 cm, and the length is determined by the length of the corner. The strip is folded in half lengthwise, a fixing compound is applied to the penoplex and the mesh is pressed against it.
The entire wall is reinforced in a similar way. First, lay a layer of fixing mixture (plaster), then press the mesh against it, smooth it out and make sure it is fixed. The reinforcing fabric should be overlapped, because areas not covered with a polymer mesh will stand out noticeably against the general background. A thin layer of fixing mixture is applied on top of the cellular coating, which ensures a tight fit and strong fastening.
Thermal panels with polymer cement plaster
It would seem that it couldn’t be simpler by strengthening penoplex - plastering on a mesh can be done at any free time. Unfortunately, the creation of a high-quality and reliable reinforced layer requires a certain temperature, since the adhesive mixture must dry completely. But do not stop work during the cold season, especially since the installation of penoplex can be carried out at any time of the year. It is for these purposes that the manufacturer created thermal panels with a polymer cement coating (penoplex with a reinforced mesh, which is already plastered with a special polymer cement composition).
Such building panels, having all the characteristics of high-quality insulation, allow you to quickly install penoplex with plaster mesh, regardless of the weather. This significantly reduces the work time, and applying the finishing layer of plaster is not difficult, since there is a prepared surface. In addition, these panels, prepared in the factory, are used to create decorative columns, arches and other finishing works. The thermal panels offered by PENOPLEX SPb LLC are high quality and reliable.
Grouting and leveling
High-quality wall finishing cannot be done hastily. The reinforcing layer must dry completely before starting the next stage of work. For final drying in winter, knocking may be necessary; in summer, 4 to 6 hours is enough. When the coating is completely dry, the surface must be thoroughly grouted before it can be plastered.
This physically demanding job is done using a plastic float with an emery coating. Grouting is carried out in a circular motion over the entire area until the surface becomes evenly rough.