Carrying out installation work
Sheet materials can be installed in different ways. Two methods are commonly used.
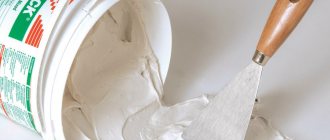
On glue
With this installation method, drywall is fixed to the base using adhesives. You can purchase a special mixture, it is diluted in water. Manufacturers usually indicate proportions on packaging. The result should be a homogeneous and fairly thick material that can be easily applied to the base.
Drywall has a significant weight, so you should not carry out installation work alone. It is recommended to install such material with an assistant.
Installation on adhesives is carried out as follows:
- First, clean the base where the plaster will be applied. You can do this using a sander or sandpaper.
- Apply primer to the ceiling or walls. Thanks to this, the surface and the adhesive will adhere better to each other.
- Wait for the primer to dry and use glue, apply it in the center of the wall and around the perimeter. There should be quite a lot of adhesive on the surface. The glue can also be applied to the drywall itself.
- Place the sheet against the surface. Using a building level, you can check whether it is installed correctly.
On the frame
Installation on the frame is not similar to the previous method. You will first need to prepare the aluminum frame: then dry plaster is attached to it using self-tapping screws.
Installation work is carried out in the following order:
- Clean the surface and prepare it for installation of the structure. It is necessary to remove potholes and get rid of irregularities. Otherwise, the frame will not hold well.
- Install a horizontal profile at the bottom of the wall. The design is based precisely on this element. Using a building level, you will need to mark the base in advance.
- Then the top profile is installed on the ceiling.
- Then you should install the vertical racks. They will connect the lower and upper elements. To ensure that there are no gaps when installing drywall, maintain a step of 40 cm. Using a building level, check whether the vertical elements are level.
- Using a screwdriver and self-tapping screws, secure the drywall to the frame. Make sure that there are no gaps between the sheets: they should be placed end-to-end.
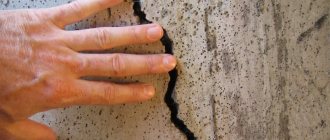
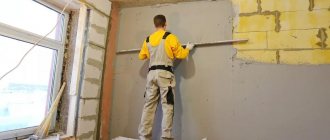
Preparing the work surface
An important stage in the high-quality application of ready-made lime mortar is the preparation of the working surface, which consists of several mandatory steps.
- First of all, the old layer of plaster is removed.
- The walls are primed. If necessary, they are initially leveled.
- For surfaces with weak adhesion, a chain-link mesh made of thin wire is used. Fastening is done with self-tapping screws. Rarely, but still, dowels are used. The mesh is fixed around the perimeter with possible control in the center.
- Instead of “chain-link”, shingles can be used: this is a kind of mesh of thin wooden planks. The work is painstaking, requiring certain dexterity and practical skills.
- Beacons are installed last, although this is not a prerequisite. Installing beacons helps monitor the evenness of the working surface.
Lighthouses can be made from wooden blocks, aluminum profiles, or a mixture of plaster. It is important that the distances between them are no wider than the rule.
Types of mixtures
If we talk about plasters that are diluted with water, it can be noted that there are several main types of such solutions. Mixtures can be lime, cement or gypsum.
Plaster
These materials are very popular because they can be worked with very quickly. They contain not only gypsum, but also polymer fillers. Such mixtures are purchased for interior finishing work. The main advantage of gypsum plasters is that there is no need for finishing, because the base is very smooth. The disadvantages of such materials are low strength and instability to liquids.
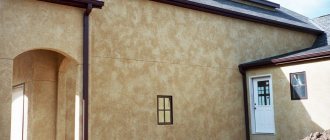
Limestone
This is the most traditional option, which has been used by consumers for many years. The composition of such materials includes cement, sand, lime. This plaster is used for finishing internal surfaces: it is not resistant to liquids, so it is not suitable for external walls.
Cement
Cement dry plasters are universal: they can be used for both interior and exterior decoration. The main components are sand and cement, additional components are polymer fillers that increase adhesion and make the material more viscous.
Such coatings are not suitable for wet substrates. For this reason, the surface will need to be thoroughly dried before applying the plaster. It is also necessary to use a special deep-penetrating primer material. The coating dries in three days (however, this can happen faster), and completely hardens in a week.
If you cannot decide which type of plaster is better, gypsum or cement, then we suggest you watch the following video.
Material requirements
In order to increase the service life of the plaster coating and increase its performance indicators, it is necessary to ensure compliance with the following basic rules:
- When making a composition with your own hands, all components should initially be cleaned of foreign impurities in the form of stones, debris, and shells. It is advisable to strain the material and the finished solution through a sieve. In this case, for certain operations it is necessary to use a sieve of different densities;
- the introduction of additional components into the solution must be justified, otherwise it will lead to an unjustified increase in the cost of the plaster.
If during operation the solution is difficult to stretch and begins to tear, you should add a little liquid to it. If it turns out to be excessively liquid and begins to spread over the work surface, then you should thicken the mass with dry ingredients.
How to plaster walls inside a house
The technology for applying plaster to the walls of a log house, frame or wooden partitions is the same. The process is not fast, it is performed in several stages.
Preparing the walls
Electrical communications are de-energized during plastering; contact of an aqueous solution with exposed electricity can cause injury due to electric shock. If lighting is necessary, use a tripod with a lamp and an extension cord.
The adhesion of the mortar to the base depends on the quality of the preparation of wooden surfaces. Fatty deposits repel the applied solution; it simply flows down the wall. Remove all stains with a solvent or grind off with a suitable tool (chisel, plane).
Remove foreign objects that interfere with alignment. Seal large cracks with foam or other insulation. Install a compensation tape to prevent cracks in the plaster. Treat traces of mold with a special agent, otherwise they will come out.
Compensation tape
If you prepare the wall poorly, the surface will soon crack or even peel off. The final step is to prime the base with a deep penetration compound to remove dust, dirt, and increase adhesion to the solution.
Fastening shingles
Wooden surfaces have poor contact with the mortar and require additional reinforcement. A tried and true method for strengthening and leveling wood using plaster is to hammer a wooden mesh into the cross. Thin slats are used, no more than 5 mm thick, otherwise a layer of plaster will grow, and at the same time the consumption of materials. The first layer is stuffed from the corner with smaller nails, diagonally, keeping the distance between the shingles 4-5 cm. The lath is attached only at the edges. On top of the first layer, the shingles material is stuffed perpendicularly with large nails into the crosshairs. The optimal cell size is 40x40 mm.
Fastening shingles
Installation of beacons
If the walls are smooth and the shingles have not added any curvature, they are plastered without beacons. Significant deviations from the geometry of the walls require their installation. There are several installation techniques, the main thing is to understand the principle:
- Marking: in the upper corner of the surface, 10-15 cm away from the adjacent wall and the same amount from the ceiling, the 1st self-tapping screw is not screwed in completely. A plumb line is suspended from it. The 2nd one is twisted along the thread in the center of the wall, and the 3rd one is twisted at a distance of 20 cm from the floor, bringing them into the same plane, focusing on a plumb line. The same actions are carried out with a different angle.
- Identification of the “zero” point: all self-tapping screws are connected with twine horizontally, and the upper and lower ones are also diagonally connected. The most protruding part of the wall towards the threads is point “0” - the installation site of the first beacon.
- Installation of the strip: install it with self-tapping screws. The following are set at a distance less than the length of the rule, adjusting the screws by tightening or tightening.
Installation of beacons
There are many types of beacons, as well as methods for attaching them. After placing the beacons, they begin plastering.
Splash
Take a solution with the consistency required for this stage. He throws it over the mesh cells with his hands, because using a trowel is not convenient. Start spraying from bottom to top from the corner. Layer no more than 1 cm.
Priming
The primer solution is made thick and applied with a trowel onto the spray that has not yet dried completely. The layer does not exceed 2 cm. If the beacons are not closed, the process is repeated until the solution goes beyond the limits. The plaster is leveled according to the beacons using the following rule: go from bottom to top, removing excess. Places where there is not enough solution are abandoned and leveled again.
Grout
After the rough soil has set, use a trowel to smooth the surface of the plaster with careful rotational movements. The surface is leveled as much as possible. If you rub counterclockwise, the solution thickens.
Advantages and disadvantages
Like any other building material, gypsum plaster mixtures have their advantages and disadvantages.
Among the advantages are the following:
- The low weight of the composition does not increase the load on the foundation and reduces labor costs during work, especially making it easier to level ceilings.
- Due to its good plasticity, it is easily spread over all vertical and horizontal surfaces, even in a thin layer.
- It consists of 95% natural ingredients and is not harmful to health. It does not emit toxic substances even when in contact with water and high temperatures.
- The plaster has good adhesion to almost all surfaces.
- It is characterized by high vapor permeability, due to which moisture does not accumulate under the gypsum layer, and natural air circulation occurs in the room.
- It is not subject to shrinkage, therefore, if the technology is followed correctly, cracks will not form on the surface.
- Completely fireproof. The material is not subject to fire at any temperature.
- Recovers independently after flooding. If the neighbors from above flood it, after a few days the stain will dry out and disappear on its own.
- Not susceptible to fungi and mold.
- You can get a smooth or textured surface with the desired shade without resorting to additional decoration.
- Unlike cement plaster, the consumption of gypsum mixture is 1.5-3 times less. The minimum layer thickness for cement is 20 mm, for gypsum - 5-10 mm.
Gypsum plaster also has several disadvantages:
- It is not protected from moisture. In damp rooms and when it gets very wet, the plaster layer may erode or sag.
- Low impact resistance. Mechanical stress may cause chips and scratches.
- Under a layer of gypsum plaster, metals are susceptible to corrosion, as the gypsum constantly absorbs moisture.
- All work must be carried out before the solution begins to set.
- The cost of gypsum plaster mixtures is approximately 20% higher than cement ones.
Making your own quicklime
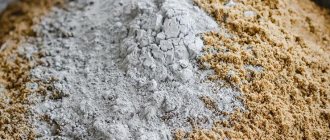
It should be said right away that it is easier and faster to purchase burnt lime, but if you want to carry out the entire process from start to finish, then you need to buy ordinary lime. The material is used in many industries, so if there are factories nearby that produce building mixtures or bricks, you can find out there. Otherwise, you will have to look for a supplier online.
Construction quicklime
The next operation will require a furnace. It needs to be melted with coal, after the temperature rises, add a little more coal and spread it in an even layer in the oven. Lime is spread on it as quickly as possible, a small amount of coal dust is sprinkled on top, the stove is closed and left overnight. In the morning, the lime is removed from the kiln into a metal container. The temperature of the material will still be high, so pliers, protective gloves and goggles must be used. After the lime has cooled, you need to crush it with a hammer and begin slaking.
Features of sheet materials
Sheet plaster has many advantages.
Consumers are particularly attracted to the following advantages:
- Ease of installation. If you install sheet material, you will not have to wait a while before finishing. It is also worth noting that the installation itself is much faster and easier than applying conventional plaster.
- Soundproofing. Such material is a barrier to sound waves.
- Fire resistance. This coating will not spread or support flames. Only the cardboard or paper top layer will be affected.
- Safety for human health. Sheet plasters are created without the use of harmful components. When heated, such materials do not emit harmful substances.
Dry sheet plaster has not only advantages, but also disadvantages:
- Insufficient resistance to liquids. Even if you apply a special waterproof coating to drywall, it will not be able to withstand exposure to water for long. If your apartment is flooded, you will need to refinish the ceiling or walls.
- Insufficient strength. It is not recommended to hang heavy pieces of furniture or equipment on plasterboard walls.
Repair or construction costs.
The project estimate is a headache not only for the designer, but also for the customer. The price of materials creates a dead end, from which it is difficult to find a way out. Payment per m2 of coverage varies depending on many factors.
The most important of these is region. It affects the cost of delivery of plaster, and the lime-sand plaster itself in the east or north of the country differs from the capital in its quality, as well as in its costs.
It is much easier to buy building materials in the city than in the outback, but some of them can be obtained literally under your feet, for example, sand. Craftsmen can be ordered, but their prices are per square meter. m. of laid plaster vary, and not only in comparison with competitors. Within one company there are different prices per square meter according to the price list or price list.
Elaborate work done during the construction season will be more expensive than the same processes done in a hurry, or when the company has very few orders.
But in this case, you will have to abandon the idea of making cement-lime plaster on the walls with your own hands. data-matched-content-ui-type=”image_stacked” data-matched-content-rows-num=”2″ data-matched-content-columns-num=”3″ data-ad-format=”autorelaxed”>
Nuances of installation work
To achieve excellent installation results and get the most durable coating, you should consider some recommendations:
- Lay all necessary communications before installing plasterboard sheets.
- In rooms where the risk of fire is quite high, it is better to use plasterboard coverings that have a fire-resistant layer.
- Installation should not be carried out in the cold (the temperature during operation should be at least +5 degrees). Otherwise, it is quite possible that the cardboard or paper covering will separate from the plasterboard sheet.
- You should not use ordinary plasterboard sheets in rooms where the humidity is quite high. It is better to choose coatings for this that have a layer that is resistant to liquids.
- Dry plaster materials in sheet form should not be used for external walls.
Types of mixtures, depending on additional components
Lime mortar can be strengthened and given better characteristics by adding sand, cement, gypsum and clay to the composition. Each of the plaster options has its own characteristics.
Lime-sand mixture
Typically used for treating garages and utility rooms where appearance is not so important. Inexpensive analogue of cement mixture. Lime-sand plaster can be prepared in different proportions:
- To make a soil solution, use a 1:2 ratio (lime/sand).
- To make the spray mixture, the proportion is the same - 1:2.
- The limestone-sand covering layer is made with a ratio of 1:5.
Preparation features: the components are mixed dry, after which water is gradually added to them. Ideally, use clean river sand. It is sifted through a sieve to avoid lumps and impurities. Hardening occurs slowly, so the layer can be covered with plastic wrap and work continued the next day. Properties will not be lost.
Limestone-cement mixture
The advantages are its strength and protection from moisture. Scope of application: facades and indoor spaces. Cement-lime plaster is made according to different proportions, it all depends on the type of solution:
- Spraying is carried out with a solution with proportions of 1: 0.4: 4, where 1 is cement, 0.4 is lime, 4 is sand.
- The primer is mixed in a ratio of 1:1:4.
- For covering, cement-lime plaster has a proportion of 1:1.5:1.5.
To simplify the task, you can buy a ready-made dry mixture. For example, Knauf UP 210 30 kg plaster. With its help you can create a water-repellent layer on any surface. Can be applied manually or mechanically. Color grey. The consumption will be 23.1 kg/m2 with a layer thickness of 15 mm.
Lime-gypsum mixture
The advantage of using gypsum is that it allows you to create a more flexible and smooth structure. It is smooth, durable and dries faster. Ideal for stone and wooden surfaces.
Such decorative lime plaster can be prepared with the following proportions:
- Spraying – 1:0.5:2, where 1 is lime, 0.5 is sand, 2 is gypsum.
- Primer – 1:1:2.
- As a decorative covering layer – 1:1.5:2.
It is more difficult for beginners to work with such plaster, as it dries faster and loses its shelf life. Therefore, the batch is made small. Also, gypsum is afraid of moisture, so it is used for dry rooms.
Lime-clay
Less popular option. The scope of use is limited to finishing mud huts, fireplaces and stoves. After all, the mixture is stable at high temperatures, does not crack or fall off. Options for how much lime to add to the plaster solution:
- To make a primer layer, the proportion is 2:1.5:2, where 2 is lime, 1.5 is clay, 2 is sand.
- Plaster for spraying is prepared in a ratio of 2:1:3.
- The coating has a ratio of 2:1:3.5.
Requirements for clay: medium fat content, no impurities. If you take thin clay, the plaster will not stick to the trowel, so its quantity needs to be increased. If you choose clay that is too oily, you will have to increase the sand content.
Making your own solution
First you need to slak the lime for the plaster so that it is suitable for work. This requires a metal container, since the reaction is accompanied by a large release of heat and an increase in volume by 3 times. The lime packaging indicates the slaking speed: slow (25 minutes or less), fast (8 to 10 minutes), medium, 15 to 20 minutes. It is better to mix the mixture with a shovel or oar. Slaking is carried out for at least a day, however, ideally use lime that has been standing for a month.
The note ! The sand also needs to be prepared before preparing the plaster: remove impurities, clean it by passing it through a sieve.
Instructions for creating a limestone-sand mortar:
- Sand is mixed with lime paste in the selected proportion. This is done dry and mixed thoroughly.
- After which water is gradually added to the container. There is no need to pour in the entire volume at once; it is poured in in a thin stream, and the solution is constantly stirred.
Now that the preparation is complete, you can begin plastering the surface.
Advantages and disadvantages
List of advantages that the mixture has:
- Versatile, can be applied to concrete, brick, plasterboard and wood.
- It is light in weight and will not load the structure like cement plaster.
- Plastic, easy to work with, long shelf life after mixing.
- It is vapor permeable, moisture passes through the walls, and the optimal microclimate inside is not disturbed.
- Lime mortar has good thermal insulation characteristics.
- If the application technology is followed, there will be no cracks.
- Alkali prevents the development of fungus and mold on the surface.
- Does not burn and does not support combustion.
As for the disadvantages, they are:
Insufficient strength
Before making a lime mortar for plaster, it is important to know the proportions and slak the lime in advance. This is a long process, taking approximately two weeks.
The material is afraid of moisture. It takes quite a long time to dry.
Scope of application of lime mortars
The classic construction material is used for rough and finishing finishing of residential premises, facades, and auxiliary buildings. With certain additives, lime mortar is used for finishing even wet rooms such as a bathroom.
Like other mineral plasters, lime plasters are not used in new buildings until the building has completely settled, as well as in areas with seismic properties and near railway tracks, since they are susceptible to cracking.
An improved dry lime-carbonate plaster mixture is also available on sale. Carbonate lime is obtained by grinding limestone (60-70%) with boiling water (30-40%) together. Due to this, compositions based on it harden in air and in a humid environment. Less water is required for preparation, and the drying time for the coating is reduced. Such mixtures are intended not only for preparing lime mortar for plaster, but also for masonry mortars. The difference is in the proportion of water added: for plastering, take 1 liter of water per 1 kg of dry mixture, for masonry - 0.5-0.7 liters of water.
Thanks to their improved qualities, lime-gypsum mortars quickly harden (they harden completely in half an hour) and are stronger. They are used more often for interior work. In regions with low humidity they are also used for external coatings.
For house facades, lime-sand colored plasters are popular, to which up to 20% cement is sometimes added. They are inexpensive and easy to apply manually or mechanically.
The lime mortar mixture contains hydrated lime – fluff lime – as a binder. Such mixtures are used for various purposes, even added to mortars for making floor screeds.
Plastering walls under tiles
After completing the preparatory work, you can proceed directly to the plaster. The required thickness of the plaster layer under the tile depends on the degree of unevenness of the wall.
If the base is uneven with differences of more than 10 mm, preference should be given to beacon plaster
In the future, this will allow you to save on tile adhesive, and will also guarantee smooth walls with the correct dimensions, which is important for further laying of tiles
We decided on the type of plaster mixture, applied the primer, now we need to stock up on the necessary tools. We will need:
- construction bucket;
- drill with mixer attachment;
- level;
- construction plumb line;
- plaster beacons;
- building code;
- set of spatulas;
- Master OK;
- falcon;
- grater;
- grater;
- trowel.
Basic tools for plastering
Plastering walls before laying tiles is done in the following sequence:
- Control cords are installed to form the future surface of the plaster. To do this, 3 dowels are mounted on each edge of the wall at equal distances in height, using a plumb line to control that the heads of the screws are strictly vertical.
- Beacons are placed along the entire height of the wall. The pitch of the beacons is selected based on the length of the rule - the width between the beacons should be 15-30 cm less than the length of the rule. This is due to the fact that when leveling the plaster, the master moves the rule along a zigzag path to the sides outside the beacons.
Metal beacons on the wall
- The plaster solution is being prepared. To do this, pour the finished mixture into a construction bucket, add the required amount of water according to the instructions, and then mix thoroughly with a mixer.
- The solution is applied from the bottom up using a spatula or ladle. Throwing is done evenly over the entire area of the wall. After the first layer has dried, a second layer of the mixture is applied. Then the last layer is aligned by the rule. The cut off excess plaster mixture can be used in local areas where unevenness still remains, after which we repeat the leveling procedure.
Leveling the solution using the rule
The dried plaster is rubbed with a construction float in a circular motion. If the plaster has dried too much, you can moisten it with water and then continue grouting.
The result should be an even and smooth plaster, ready for tiling.
Lime plastering technology
After all the preparatory work has been carried out and the mixture has been prepared, you can proceed to the first stage of plastering - spraying. Many people neglect this step, but it ensures tight contact of the plaster with the wall. For this operation, a solution is used whose consistency resembles jelly, that is, it should contain a little more liquid than usual. The plaster is picked up with a trowel and simply thrown onto the wall. Then use the same trowel to slightly stretch the material, but you should not achieve perfect evenness. Before applying the next layer you need to wait 1 day.
The first stage of plaster - “spraying” - promotes better adhesion of the solution to the surface
The next stage is soil preparation. This layer is the main one, so its thickness can reach 5 cm. First, the composition is drawn onto a wide spatula, then transferred to the surface and stretched with a trowel. You need to move from top to bottom, and you must ensure that the layer of plaster corresponds to the level of the beacons. After processing one fragment of the wall, you need to take the rule, press it to the wall from below and move it upward in a zigzag motion. Excess mortar will remain on the blade of the rule; it must be thrown upward until the wall is completely level. Then you need to go through the rule again over the entire surface, but now from bottom to top.
The second stage of wall plastering is the creation of a base layer called primer.
On a note! Each centimeter of plaster layer requires 1-2 days to dry, so it is recommended to leave the surface alone for a week.
The last stage is covering. To carry it out, prepare a solution of the same consistency as for spraying. The last layer will be no more than 3 mm, so not much solution will be required. The material is applied with spatulas and a trowel, after which it is leveled and allowed to set a little (usually 2-3 hours is enough). Then take a grater with coarse sandpaper and work it over the entire surface. At the end, repeat the procedure with fine-grained sandpaper.
Applying the last layer of plaster allows you to create a perfectly flat surface
The finished surface will be of high quality, so further finishing is not necessary. If you decide to lay tiles or wallpaper, you can do without covering.
Varieties
Plaster mixtures with lime can contain different bases:
- Cement;
- Gypsum;
- Clay;
- Sand.
For preparation, use lime fluff (hydrate) or dough. To obtain it, take lump lime, fill it with water and leave it for up to 2 weeks to obtain a stable, uniform solution.
When extinguishing there is a large release of heat and gas, therefore the container must not be closed, it should be placed in a ventilated area away from flammable objects.
Component ratios:
| What will happen | Water | Lump lime |
| Pushonka (lime milk) | 1 l | 1 kg |
| Dough | 0.5 l | 1 kg |
Application process
There are several technologies for plastering with cement-based compounds. Layers can be applied manually or by machine using injection screw pumps for cement mortars.
Preparation of the grounds
It is necessary to prepare the walls for plastering as follows:
- The old coating - paint, wallpaper, peeling plaster - is removed from the rough base and dirt is cleaned. The surface must be dust free.
- Minor defects are repaired.
- A receptive surface is then created.
- Brick, concrete or slag concrete surfaces will need to be roughened by making notches at least 10 mm deep using steel brushes or an ax.
Plastering
Working with leveling coatings on a cement binder includes three stages:
- Spraying - the mortar mixture is thrown in lumps onto the base base using a ladle. Then they take the rule and level out the spray spots.
- Soil layers (from 1 to 3). The formation of the soil is carried out using a trowel and a thick solution. The maximum layer thickness is 0.5 cm. The mixture is allowed to set for half an hour, after which, using the rule and, if necessary, adding the solution to problem areas, the surface is leveled.
- Front layer (covering) - the coating is moistened and a falcon is used to apply the mortar mixture. As soon as it begins to set, you can proceed to grouting using the same trowel or trowel.
Pros and cons of the mixture
The main advantages of cement-lime plaster include the following factors:
- thermal insulation - walls on which a layer of mortar is applied will require additional insulation only in cold areas;
- elasticity - thanks to this quality, the treated surface does not crack even if there is shrinkage at home;
- vapor permeability – due to good ventilation of the walls, the service life of the building increases;
- low price - it is 1.5 times lower than a similar gypsum mixture. And if you prepare it yourself, the solution will cost 2 times less;
- safety - under the influence of temperature, moisture or contact with various chemicals, the plaster does not become toxic;
- high adhesion rate – the mixture can be used on different surface materials;
- resistance to various temperatures, including fire;
- biological safety - the coating prevents the development of pathogenic bacteria and fungi, and also protects against the appearance of rodents in the house;
- low material consumption, which is very much appreciated by builders when finishing large premises.
Among the few disadvantages we should mention:
- low mechanical strength;
- reduced resistance to moisture, which somewhat limits the scope of application of the mixture.
Interior decoration.
When everything is ready, move on to spraying. In this case, the wall is covered with the smallest thickness of cement-lime plaster. It contains the maximum amount of sand and therefore promotes the adhesion of subsequent layers to the wall. The spray is not leveled, but only wait for the spray to dry, which has been distributed, and only then proceed to the next stage.
The main stage is priming. The thickest layer of cement-lime plaster is applied on top of the frozen spray. The process is carried out by throwing it on the wall. The thickness will be at least 5 mm. The thinner the layer, the better the quality of the work.
If it has already been applied to the surface limited by the beacons, the cement-lime plaster is leveled according to the rule. The remaining composition is removed from the instrument with a spatula and sent to a common container. The resulting voids are filled again, and the operation is repeated until a perfectly smooth coating is obtained.
Movement should generally be fast from top to bottom with a slight emphasis on the beacons. In this case, you can first apply it to the wall in the lower part, level it in a suitable way, and only then proceed to processing the wall in the upper part.
This section passes noticeably faster when using pneumatic tools. When it hardens, but is still alive, it’s time to check the verticality using a level. In this situation, you can still correct the errors. Particular attention is paid to the corners, because... This is where all the irregularities and bevels are first noticeable. This problem manifests itself especially clearly if you prepare lime plaster yourself.
After the 2nd layer has hardened, proceed to the last part of the processing. It is not required. Its necessity is evidenced by the difference in levels and subtle transitions between treated areas. At this stage, a more liquid solution is used. It is necessary to get a perfectly flat texture. This time the lime mortar plaster is applied in a circular rubbing motion using a trowel or trowel until a smooth, even surface is obtained.
Advantages and disadvantages
The benefits of lime plaster are due to a number of factors.
- High adhesion ability, and this property does not depend on the raw material from which the surface to be treated is made. The finishing is particularly successful on surfaces made of stone and wood. We can conclude that lime is a universal material for construction.
- After the mixture hardens, high plasticity appears, due to which there is no risk of cracks.
- The ability of the solution to “breathe” and high vapor permeability guarantee a favorable indoor climate.
Along with its undeniable advantages, lime has some disadvantages:
After carrying out repair work, after several days, you may notice that the surface has acquired unevenness. This disadvantage can be easily eliminated if you follow the advice: since the solution is applied in several layers, you need to wait some time after the first layer, and only then proceed to the second. Usually the time depends on the type of solution. For some options, it is enough to wait an hour, and for others – a day. The disadvantage is the lack of sufficient hardness of the applied composition
It is important to know that after some time, the plaster will acquire sufficient hardness and it will be possible to drive nails. Before starting work, there is a need for a primer or a simple spray. It is prepared as follows: cement and lime are mixed until a creamy consistency is formed.
But after spraying, you must wait up to 10 hours for the mixture to harden.
- The protective effect against the appearance of mold and mildew is achieved due to the bactericidal properties of the material. Even with high humidity in the room there is no risk of microorganisms appearing.
- Affordable price for plastering.
- High plasticity of the solution, as well as ease of application during work. This makes it possible to do repair work with your own hands in the absence of the necessary experience.
- Using lime plaster on a wooden surface will protect the wall from various rodents and insects.
Lime slaking
To carry out this operation you will need:
- plastic container;
- clean cold water;
- lime;
- stirring tool.
To prepare a lime mortar, you need to get slaked lime.
You need to immerse the quicklime in a container, then add a little water. The liquid should cover the lime, but not exceed 30% of the container volume. As soon as the water comes into contact with the lime, a violent exothermic reaction will begin, during which the hot liquid will splash in different directions, so you need to take care of protective equipment in advance: gloves, thick clothing and goggles.
After about 10 minutes, the first stage of quenching will end and you will need to add water again. This time the container with lime is covered and left to infuse for about 1 hour. After this time, you will need to pour the lime again and leave it alone for 14 days.
On a note! According to the technology, 36 hours are enough to completely extinguish the lime, but it is better to play it safe, since the solution prepared on the “under-extinguished” material will crack after drying.
A solution prepared with quicklime can lead to cracking of the plaster.
Expert advice
If you want to achieve good results and get a high-quality and durable coating, you need to take certain rules into account.
Keep the following points in mind:
- All utilities should be sorted out before using dry sheet plaster. Lay them out in advance.
- In rooms where there is a high risk of fire, use fire-resistant coatings.
- Do not install dry sheet plaster in very cold temperatures or the cardboard or paper will peel off from the drywall.
- Do not use regular sheet materials in rooms where there is very high humidity. Opt for sheets that have a moisture-resistant coating.