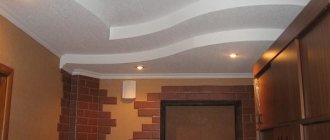
Pros and cons of plaster
When choosing a material for finishing the ceiling, you need to take into account its advantages and disadvantages.
Advantages:
- a strong coating will stay on the ceiling for a long time;
- environmentally friendly and safe material does not cause harm to health;
- components of plaster mixtures do not pollute indoor air;
- a thin layer of plaster slightly reduces the height of the ceiling.
Flaws:
- plaster is not suitable for finishing surfaces with differences greater than 5 cm;
- professional plasterers demand a high price for such work;
- Leveling the ceiling requires special skills.
Important! When plastering the ceiling, there is no need to install frames and fasteners.
The main advantage of plaster is the ability to repair the ceiling yourself
Instead of conclusions
- If you have a brick or panel new building and the shrinkage process has not yet been completed, choose a false ceiling or a suspended ceiling.
- If the ceiling height is small, every centimeter counts - the best option is plaster. When 3 cm does not play a big role, you can mount a suspended ceiling (there are options with a minimum drop of only 27 mm).
- Always remember about the “light-ceiling” connection. Plan the number and position of lamps in accordance with the ceiling leveling technology. The metal frame should not be in the place where the built-in lamp is installed. Holes in the suspended ceiling for light are planned in advance, as are the embeds.
- Diffused light, “floating” ceilings and other lighting structures require complex technical solutions. Stretch or plasterboard ceilings will help hide wires and lamp bases.
- It will not be possible to install a suspended ceiling in a room longer than 6 m. Choose other options.
- Stucco decoration cannot be glued to a stretched fabric - stop with plaster or drywall.
Have questions ? Call!
How to properly plaster ceilings - choosing a mixture
To get a good result, you need to choose a suitable plaster material.
Properties of a quality mixture:
- good adhesion of the solution to the ceiling;
- the mixture should not be too sticky to avoid inconvenience during application;
- The plastered surface should not be deformed before hardening.
You can buy a ready-made mixture or make it yourself.
Cement based
The cement mixture is the most budget-friendly. The strong solution lasts a long time and does not deform under the influence of moisture and low temperature. However, cement takes longer to gain strength and quickly breaks down under regular vibration loads. An incorrectly mixed solution often develops cracks.
Advantages:
- easy to mix on your own;
- adheres well to stone, concrete, brick and cinder blocks;
- high strength;
- affordable price.
Cement plaster for interior work
Flaws:
- does not adhere well to wood, paint and ceramics;
- takes longer to gain strength than other solutions;
- it is more difficult for inexperienced plasterers to apply cement-sand mortar;
- the surface requires high-quality grouting or applying a finishing layer;
- requires calculation of the load on the base;
- shrinks and often cracks.
Lime, liquid soap or special plasticizers are added to the main components so that the mixture adheres better to the surface. Cement plaster adheres well to a concrete base, but due to its heaviness, the maximum thickness of its layer is less than that of a gypsum mixture. Therefore, plasterers prefer a composition that is more expensive and easy to apply.
Gypsum based
The material dries quickly and gains strength.
Advantages:
- plastic;
- rapid strength gain;
- no shrinkage;
- the finishing layer is easy to remove;
- light solutions can be painted over immediately;
- light weight;
- the plastered surface allows oxygen to pass through;
- good thermal insulation.
Gypsum plaster is good in many ways, but requires skill in handling
Flaws:
- deformation due to moisture;
- low strength;
- relatively high price;
- making the solution yourself requires skills;
- It sets quickly, so it is mixed in small volumes.
Gypsum has low frost resistance and deforms when in contact with water.
Clay based
Suitable for finishing wooden ceilings. Apply in a thin layer up to 1 cm. Helps create a good microclimate in the rooms. Clay is very accessible and harmless. It is easy to make a plaster mixture yourself from this material.
It takes a long time to dry and gets wet quickly if the room is too damp. Once saturated with moisture, the material increases in volume and becomes heavier. As a result, shrinkage begins, but the plastic clay does not break. Serious surface defects occur after sudden drying. Therefore, special fillers are used to strengthen the layer.
Plaster can absorb harmful substances in the air. Under normal operating conditions, this material helps smooth out sudden changes in humidity.
Clay plaster has a specific brownish color
Modern compositions
Polymer materials are durable, elastic and last a long time. They have high adhesion and fit well on any base.
Peculiarities:
- easy to apply;
- dry quickly;
- do not shrink;
- vibration resistant.
For your information! Polymers are not afraid of water and caustic chemical mixtures.
Types of plaster for wooden ceilings
There is a wide range of compositions on sale, but you can make the mixture yourself.
The following types of mixtures are used:
- Plaster. Suitable for finishing in any room, adheres well to wood, fits comfortably and is leveled. There are different types of gypsum plasters for external and internal use and universal ones - the type is indicated on the packaging.
- Clay. Low cost, environmental friendliness are advantages. Long drying time is a minus. But such mixtures are flexible, easy to apply and can be used in any room.
With their own hands, craftsmen prepare mixtures based on cement and sand. For plasticity and strength, dry lime is added; for areas with a risk of fungus, copper sulfate and borax are added. Depending on the component composition, cement plasters can be used in areas with high humidity.
Tools and materials
It is necessary to use convenient tools and consumables to create a high-quality coating.
Tools:
- large plastic bucket for solution;
- mixer;
- trowel or spatula 150 mm wide;
- grater or piece of foam;
- corner leveler;
- roller for applying primer;
- 2 meter rule;
- polyurethane foam;
- lighthouses;
- reinforcing tape;
- level.
Tools for plastering work
Be sure to buy a primer mixture and putty if necessary. Polyurethane foam will be needed if there are large holes in the ceiling that need to be closed. Reinforcing tape is attached to the ceiling to help the plaster adhere better.
Methods for plastering a wooden ceiling
Before plastering a wooden ceiling, you need to understand the nuances of this process. It will not be possible to immediately plaster a ceiling surface lined with boards, consisting of beams or logs, because there will be many holes and cracks in the ceiling that will impair the adhesion of the mortar to the base. To facilitate plastering work, professionals attach a chain-link mesh, wooden shingles to the ceiling surface, or cover it with plywood. Then the solution is poured onto a smooth, even base without gaps.
To improve the adhesion of the plaster to the mortar, plasticizers are added to it and the mixture is made thicker.
Plastering is carried out in three stages:
- using a spatula, spread the solution onto individual sections of the ceiling surface and pre-level it;
- significant irregularities are eliminated during the leveling process with a wide spatula or rule;
- Finishing grouts are used to eliminate minor irregularities.
When plastering wooden ceilings, special attention is paid to the design of the interface between the ceiling and wall surfaces. To achieve a perfectly even joint, use perforated corners that hold their shape well and are lightweight
How to remove plaster from a ceiling
First you need to protect the flooring from damage. To do this, the entire area is covered with oilcloth. Then you need to prepare the tools:
- perforator with a blade;
- grinder with diamond grinding disc;
- hammer;
- axe;
- strong spatula.
An extension cord will be needed to operate the power tool. A stepladder or wooden scaffolding is needed to climb closer to the ceiling.
Manual method
If the old coating is weak on the ceiling, you can use a hammer, an ax or a regular spatula. The plaster is beaten by hand down to the concrete base. This process is labor intensive and takes longer.
Old coating can sometimes be removed with a spatula
Mechanical approach
Power tools allow you to speed up. However, to work with them you need protective clothing:
- gloves;
- glasses;
- respirator.
Advice! You can wear a cheap painting suit to prevent your work clothes from getting dusty.
Strong plaster is removed with a diamond grinding disc, which is placed on the grinder. The room becomes very dusty when the outdated coating is removed in this way. You will have to remove construction debris even in adjacent rooms. Therefore, it is better to open the window while working. If the old coating comes off easily, you can remove it with a hammer drill.
To get rid of old paint, you can use a sander. It is not necessary to completely remove the outdated enamel. It is enough to scrape off the top layer so that the deep penetration primer can be absorbed into the concrete.
If you do not plan to completely remove the old plaster, but there are cracks on it, you need to widen them with an ax or a diamond disc. Then prime all damaged areas and cover them with plaster or putty.
Mechanical removal of plaster from the ceiling
How to apply the solution correctly?
To prepare a solution for plastering, you need to add water to the finished mixture, as described in the manufacturer’s instructions. The mixture is added to the water, and not vice versa. For stirring you can use:
- special construction mixer (the most effective device);
- a regular drill with a mixer attachment.
If beacons are used in the work, the solution is applied to the space between them.
- The solution is applied with a spatula. The procedure is repeated as many times as necessary so that the surface is completely filled - so that there is a slight excess of leveling material. It is very good when it protrudes a little beyond the beacons.
- Excess is removed with a spatula. To do this, the tool must be moved along the surface in a zigzag manner, moving it towards you. You should not make a layer thicker than 2 cm.
- After treatment, you must wait some time, as the layer must dry completely, and then you can begin to reapply the solution.
To increase the strength of the coating, it is necessary to place a mesh between the layers. It is placed after applying the base layer of mortar and before it dries, and then it is slightly rubbed with a plaster composition.
How to do it without beacons?
Masters recommend plastering without beacons only if a person has not only extensive experience in finishing work, but also an excellent eye, developed over the years or given by nature. Beacons not only help create a more even surface, but also save significant time. If they are not used, repair work will take longer, since defects that arise during work will have to be eliminated.
Plastering without beacons requires small areas. When working with a large area, the error will be quite significant. Plastering is performed in a circular motion within one square. A small rule is best suited for this. The irregularities will be less noticeable than on the walls, so working with a ceiling without beacons is a little easier.
Attention
To plaster ceilings without beacons, experts advise using a thicker solution than for walls. It is not thrown onto the surface, but carefully rolled out with a spatula or a small rule.
To control the evenness of the application of layers, it is necessary to stretch the thread between the nails on the ceiling. A small lamp hanging on the wall near the ceiling will also help. Thanks to the play of light, you can see the slightest irregularities and correct them in time. The lamp should be located to the side of the space being treated. Any detected error must be corrected immediately.
How to determine the level of a new ceiling and the thickness of the plaster
Reinforced concrete floor slabs in one room can be at different heights from the floor. Therefore, you have to level the ceiling at the lowest point. However, the plastered surface does not always have to be parallel to the floor. Because finishing the ceiling, first of all, requires creating a flat plane without humps and depressions.
A laser level or string is used to locate the lowest point on the ceiling. When using metal beacons, the minimum thickness of the plaster layer will be 4 or 6 mm. This distance will have to be retreated from the lowest point to calculate the level of the future ceiling.
If concrete beacons are used, the level will correspond to the lowest point.
To place the beacons in one plane, it is better to stretch several threads along and across the room, and secure their edges with dowel nails. The distance between the threads at their intersections should be minimal. At the same time, the threads should not be allowed to press on each other. It will be easier to set beacons using a laser level if you have the skill to use such a tool.
Marking the ceiling with a laser level
With or without beacons
There are two technologies for ceiling plaster - with and without beacons. The right thing to do is to do it with beacons. Then the ceiling surface is in one plane. However, there are ceilings with very large height differences. Throwing a 5 cm thick layer of plaster on the ceiling is dangerous: it may fall. Even if you make several layers with a primer after each, there is still no guarantee that such a large layer will stick.
Incorrectly applied plaster can cause everything to collapse.
In general, if the ceilings have a large curvature, it is recommended to level them with suspended ceilings made of plasterboard, but not all rooms allow you to “steal” about 10 cm of height. In this case, you can do it wrong - plaster the ceiling without beacons.
The whole idea is to make the ceiling smooth in some area. It will not have noticeable differences and will visually look smooth. And the fact that in different corners the distance to the floor will differ by several centimeters cannot be determined by eye. With this technology, the main task is to make the junction of the ceiling and walls even. This line is very clearly traced and should be straight. If you choose this technology for plastering the ceiling, you need to start plastering from the walls, towards the center.
How to plaster a ceiling
To prevent the surface from becoming covered with cracks and stains, you need to follow simple rules. Let's figure out how to quickly plaster a ceiling without the help of specialists:
- first the surface is primed;
- the solution is mixed according to the instructions on the package;
- plastering work is being carried out;
- the surface dries out.
The maximum possible layer thickness depends on the type of plaster mixture chosen.
Surface preparation
At the first stage, you can cover up all the cracks and irregularities and cover large holes with foam. This is done to ensure that defects do not appear on a flat surface in the future. After the initial restoration, the entire surface is primed several times.
Before plastering, the ceiling must be prepared
Primer
A liquid intended for smooth surfaces is suitable for treating ceilings. It is better to use a deep penetration primer. The small granules in the liquid give the surface a rough feel when they dry. Antiseptics in the primer inhibit the growth of fungus and mold. You need to wait until the applied composition is completely dry.
How to seal slab joints
The main task is to prevent cracking of the ceiling at the junction of the floor slabs. The cut at the corner of a concrete slab is called rustication. When 2 rustics touch, a triangle-shaped depression is formed in the ceiling. Before plastering work, this recess must be thoroughly cleaned and all debris removed from the cracks.
After cleaning, the rust is primed and covered with Betonkontakt. Then it is filled with polyurethane foam so that 1 cm is left free to the edge of the slab. The next day the foam is trimmed a little and the rust is plastered. You can stick a painting mesh on top to prevent small cracks from appearing.
How to seal the joints of slabs on the ceiling
Preparation of plaster mixture
It is not advisable to plaster the ceiling in an apartment building with gypsum mortar. It is better to use a regular cement-sand mixture with the addition of a plasticizer. Gypsum plaster is suitable for use in buildings where humidity is low and the likelihood of leakage from above is minimal.
Often, cement-sand mixture is purchased ready-made. Therefore, there is no need to combine individual components in the correct ratio. To mix a good solution, just select the appropriate amount of water. And make the mixture convenient for application, leveling as a rule.
Ordinary cement-sand mortar does not adhere well to the concrete ceiling even after applying a primer. Therefore, it is necessary to add lime, liquid soap or another plasticizer to the mixture.
Attention! The lime must be poured with water in advance to extinguish it. Limestones should not be allowed to get into the solution, as they continue to be extinguished after the plaster has already been applied. Lime explodes in concrete, and as a result, “roses” appear on the ceiling, which will have to be covered separately.
How to slak lime
It is better to use liquid soap. But you only need to add a few drops to one bucket of water. If you pour too much plasticizer, the solution will increase in volume and literally begin to turn into foam. And it will be impossible to work with him.
A properly prepared solution will adhere well even to bare concrete.
Ceiling plaster without beacons not level
Applying plaster to a flat ceiling does not require the installation of beacons and the use of a building level. The amount of work will be reduced if the base is initially flat. To avoid pits and humps on the surface, you need to apply several thin layers. Each new layer is applied after the first has dried and smoothed out using the rule. The last one is overwritten.
Plastering the ceiling using plaster beacons
It is better to apply plaster on a curved ceiling along the beacons, when the plane of the future surface has already been marked.
Rules:
- first, parallel straight lines are drawn on the ceiling along a short wall at a distance of 1.25 m;
- along these lines, holes are drilled in the slab at equal distances so that the length of the rule overlaps 3 holes;
- dowels and screws are inserted there;
- the position of the screw heads is adjusted so that they are all in the same previously designated plane;
- then a solution is poured along each line;
- The mixture is pressed with the rectangular side of the rule. This tool should fit tightly onto the screws.
When the solution dries a little, you need to remove the excess on the sides of the beacons. You can plaster after the solution has completely dried. Such beacons will be quite strong if they are made from a mixture of cement and quarry sand.
After applying the plaster mortar, the rule must be applied to the 2 beacons perpendicularly. Then the tool is pulled along the beacons, and the solution located outside the established plane is removed.
Plaster ceiling with metal beacons
They are glued to the solution along a pre-determined plane. Metal elements are pressed only with a long rule. If you press on the beacons with your hands, they will bend and there will be a hole in the plaster.
Ceiling plaster on beacons
Finishing layer
The final result of finishing the ceiling should be a smooth or textured surface. Decorative plaster is used to create a pattern. The choice of application tool depends on what the pattern should be on the surface. Decorative plaster is coated with a special varnish after drying.
When the ceiling plaster has hardened for painting, you need to prime and putty the surface with a thick layer with your own hands. Then prime again and putty on the strip.
The dried putty is rubbed down so that there is not a single defect on the ceiling. To do this, you need to take a flashlight and shine it on the plane at an angle. This will allow you to see the smallest defects on the surface. Then the putty must be ground with a sanding block and an abrasive mesh. The result should be a perfectly smooth white base. After grouting, the surface is primed again and paint is applied.
Painting is the last stage of ceiling repair
Plastering a concrete ceiling with your own hands for a beginner
To carry out plastering work, a novice master needs to study as much information as possible. Don't expect the first result to be perfect. Any repair technique requires practice.
Preparation
Before you decide to plaster the ceiling with your own hands, you need to inspect it thoroughly. For invisible cracks, it is customary to use putty. Work on a flat surface is carried out without installing beacons. In more complex cases, they resort to multiple applications of the mixture and the use of special basic fasteners - meshes.
Work on a flat surface is carried out without installing beacons.
How to install beacons
Beacons are used to smooth out uneven areas. It’s easier to set them up by first studying the step-by-step information. The coating is marked before plastering the ceiling. When setting the guides, use a level. First, they find a landmark - the zero point, retreating down 10 mm, and fix the beacons. They are placed at a distance of 1.5 meters. After that, a horizontal line is determined into which it is necessary to drive nails, with tied threads. A little plaster is applied to the ceiling and the profile is pressed against the threads. It is installed at a distance not exceeding the length of the rule.
Professionals use the maximum length rule. An inexperienced master should practice on short variations.
After completing the preparatory work, plastering begins.
Beacons are used to smooth out uneven areas.
Plaster application procedure
The application procedure involves spreading the plaster evenly and thinly. It must be applied so that it extends beyond the level of the beacons. Anything unnecessary is immediately removed. Each new layer is applied after complete drying. If the base coat is even, then one coat is enough. In this case, a reinforced mesh is used, which is pressed between the beacons. The edges of its layers should overlap at least ten centimeters.
The application procedure involves spreading the plaster evenly and thinly.
Finishing layer
After the first layer of coating has dried, begin applying the second, final one. When the material has dried, you can begin the final stage of finishing - sanding. It is produced manually or using grinding equipment. The final stage is the dustiest, so you can’t do without protective equipment.
The final stage is the dustiest, so you can’t do without protective equipment.
Is mechanized ceiling plastering possible?
For ceilings you can use machine plaster. The mixture is quickly and easily applied to the surface using a special station. In this type of work, a special machine-applied plaster is used, which dries longer and does not get stuck in the device.
The ceiling is plastered in beacons, the mixture is applied to the entire area at one time and is equal to the rule. The amount of mortar is calculated so that after leveling, the excess can be loaded into the plastering station and applied again to the free surface.
Methods for leveling the ceiling
Main features of technology application:
- Wet and dry options for leveling ceilings are used. Wet materials include plaster and putty. The method is based on the use of different mixtures. Dry - this is the use of gypsum board sheets, but this option is used in extreme cases.
- Puttying is performed as a finishing touch before painting or wallpapering. Laying out a layer of no more than 3-4 mm. Features of putty when used on flat surfaces with subtle defects and height differences. Leveling ceilings for painting with putty is impossible if there are significant chips - the fine-grained composition will not repair the unevenness.
- Plaster screeding is allowed on surfaces with height differences of up to 4-5 cm. Particles of large fractions included in the mixture cover deep cracks and tile seams.
Important! If the height difference is more than 5 cm, it is not advisable to plaster the ceilings due to the large thickness of the applied material. Drying increases the risk of splitting and peeling. It is more profitable to install a frame and sew up the ceilings with gypsum plasterboard sheets, and make a tension structure.
How to level a ceiling with plaster
If the ceiling is crooked, it is necessary to install beacons. There is no need to use them to finish a flat surface. It is enough to perform the correct grinding using a rule and a grater. Instead of a grater, you can use regular penoplex. This material is ideal for grinding large areas. It is profitable to buy it, since polishes for plastering work are erased faster and are more expensive.
Relatively flat ceilings
Several layers of plaster are applied. The first layer can only cover large recesses. The final application is carried out over the entire area. If the layer thickness reaches 1 cm, you will have to secure the dowel with nails using a reinforcing mesh.
If the ceiling is flat, then beacons are not needed
Ceilings with large unevenness
A crooked ceiling lasts longer. Therefore, it is better to spend 1 day installing the beacons, and then quickly close all surface defects at once. You can try to level the ceiling by pressing the rule against one of the floor slabs. However, this does not always work out.
Preparing the ceiling for plastering
An important stage in plastering ceilings is preparing the ceiling for applying plaster. The work must be carried out carefully; the quality of the future plaster depends on this.
Before carrying out work, we recommend that you remove as much furniture as possible and cover windows and doors with polymer films (protection from flying fragments).
It is preferable to use special trestles (scaffolding) that allow free movement at elevated levels. If a stepladder is used, ensure that someone is holding it at all times. Make safety your top priority.
Construction goat
General preparation measures
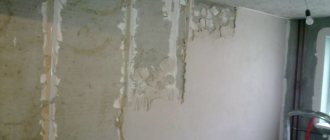
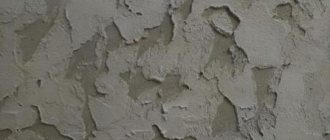
Check for the presence of peeling old plaster; if found, such peelings must be removed. If you apply the solution to such an unstable surface, the plaster will not last long. Such low-quality coating can be identified by a dull sound when tapped.
Removing old ceiling plaster
- If there are uneven areas on the ceiling, you need to sand them first. A grinder with a circle on concrete and stone is suitable.
- If the ceiling is made of smooth concrete, it is recommended to make notches using an ax, thereby increasing the surface roughness.
- If the old ceiling is painted with paint, it is better to remove it, thereby increasing adhesion. Water-based paint can be easily removed with a solution of iodine and water. After wetting with water, lime can be easily removed with a spatula.
- If there is fungus on the ceiling, it must be removed, for example, using a mixture of copper sulfate and water.
- If the ceiling has been exposed to oil vapors (for example, in the kitchen), it is necessary to clean the base using a degreaser.
After general preparation measures have been completed, it is necessary to remove dust from the surface by wiping with a soapy sponge, and then rinse the ceiling with clean water.
Washing the ceiling with a sponge
Sealing holes in the ceiling
If holes are found in the ceiling, it is necessary to fill them with plaster mortar, and then cover the hole with a piece of plastic mesh for reinforcement. You can use dowels to attach the mesh to the ceiling. Then you need to add another layer of plaster on top of the mesh.
When the plaster is completely dry, you need to cut off any exposed wire, then sand the edges of the sealed hole so that they are smooth and even. With proper sanding, the area where the hole is closed will become completely invisible.
Holes in the ceiling that need to be sealed
Sealing rust on the ceiling
Often in Soviet-built houses you can find worn-out or unusable joints of floor slabs - rusty joints. Over time, the seam seal wears out and some of it falls off (or may fall off in the future). Obviously, before applying plaster, such poor-quality areas of joints must be put in order, otherwise it can cause serious trouble in the future.
First you need to completely remove the old seam seal. For these purposes, you can use a hammer drill, hammer and chisel. Then they pass with a metal brush to remove traces of the solution. After traces of the seal have been removed, it is necessary to prime the space inside the seam and the external adjacent areas.
Next, the rustics are filled from the inside with foam or sealing cord (if the seam is narrow). The outer part of the seam is sealed with new cement mortar on top of the serpyanka laid on the seam.
Sealing rust on the ceilingAttaching the cable to the ceiling
The electrical cable is attached to the ceiling using dowel clamps, brackets and other devices. In the future, it is planned to apply the plaster mixture over the mounted cable. It is necessary to ensure that the edge of the cable insulation deviates from the surface of the future plaster by at least 5 mm.
Fixed cable on the ceiling
Some features of plastering other ceilings
Other solutions are used to treat surfaces made of wood or drywall.
Wooden ceilings
A different technology is used to finish wooden ceilings. The base is reinforced with shingles or chain-link. Thin wooden slats are stuffed crosswise. The heads of nails or screws should not stick out from the wood.
The finishing mixture can be made based on clay.
Peculiarities:
- environmental friendliness;
- affordable price;
- can be used in premises of any purpose;
- The mixture cooks quickly, but takes a long time to harden.
The thick solution is thrown onto the chain-link and well leveled. After the 1st layer has dried, you can apply the 2nd. The clay solution should harden at above-zero temperatures. The ceiling cracks when using heat guns and other heaters because they dry out the air.
Note! The corner between the wall and the ceiling may crack after the mixture dries. Therefore, such places are reinforced with metal perforated corners. They weigh little and hold their shape perfectly. A wooden surface can be plastered manually or using a station.
A special technology is used to finish the wooden surface.
How to plaster a plasterboard ceiling with your own hands
Only moisture-resistant coatings can be plastered.
Rules:
- the joints between the sheets of drywall are cut and covered with a painting mesh, covered with putty;
- the screw heads are also puttied;
- the surface is primed before finishing;
- The plaster mixture is applied after the putty has dried in a thin layer several times.
The material consumption for finishing plasterboard surfaces is minimal, since they are considered the smoothest.
Plasterboard ceilings are the easiest to plaster
Plaster on ceiling insulation
Ceilings are often sheathed with sheet insulation.
Finishing is carried out according to the following rules:
- the material is impregnated with a primer and dries;
- the insulation is coated with a liquid plaster solution, a painting mesh is placed on top of it;
- the mixture dries and is primed again;
- the surface is equal to the next plaster layer.
Important! This surface leaves marks from impacts or pressure, so it requires care.
How to choose putty and primer for the ceiling
In order to seal cracks or holes from fallen knots, the craftsman will need a special wood putty. When choosing a product in a store, you need to consult with a specialist and carefully study the information from the manufacturer on the packaging. In general, the material must satisfy the following requirements:
- Contain a polymer base to impart elasticity to the applied putty layer. After drying, the material should not shrink with subsequent cracking.
- The putty must have increased adhesion so as not to peel off from the wooden surface after gaining strength.
Rice. 2. Putty mixture for wood.
- This material tends to dry and harden quickly under favorable environmental conditions.
- Depending on the location of the surface to be treated, it is necessary to choose a putty for interior or exterior work. This is due to different hardening and operating conditions of the material. Interior putties do not tolerate humid environments and sudden temperature changes, while outdoor materials have increased resistance to aggressive environmental conditions, but are more expensive due to the presence of special additives.
- Any wood putty should be easily sanded with abrasives after gaining strength until a uniform, flat surface is achieved.
- The material can be either transparent or have a variety of shades to match the wood on which it is applied. As a rule, the manufacturer always indicates on the packaging what type of wood the product is combined with.
Rice. 3. Shades of putty depending on the type of wood
When choosing and purchasing a material, you should also pay attention to the quality of the composition - the thick mixture should not have large inclusions and be homogeneous, easy to mix, and not precipitate when fractions separate. Otherwise, poor quality will certainly affect the result in the near future.
Application of decorative plaster
To decorate ceilings with decorative plaster, a trowel, comb, spatula-brush, wood texture applicator, rollers, mittens and other tools are used. The solution is applied to the ceiling in a thin layer, then a pattern is created. In order for DIY decorative plaster on the ceiling to look good, you need to have special skills in working with tools.
Applying decorative plaster to the ceiling
Applying plaster
For further work, you need stable construction sawhorses, and the tools you need are a spatula and a platform with a handle (falcon). The selected plaster composition is diluted in accordance with the instructions. It is necessary that the solution is homogeneous, without lumps.
The putty is spread on the falcon and placed on the ceiling in small portions using a spatula. The solution is used to fill the distance between the beacons. First, the width of the strip is made from 50 to 60 centimeters, and there is no need to achieve a uniform surface.
Then they take the rule, rest it on the beacons and move it towards themselves, swinging it from one side to the other. As a result, a little solution remains on it. It is removed with a spatula and applied to the ceiling - to its unfilled part or where there are holes. Then the rule is moved again.
These steps are repeated until the surface area becomes level. Then they fill in the second lane and so on. The ceiling is allowed to dry for 5 – 8 hours. When the solution has set, but has not yet completely dried, you need to remove the beacons, otherwise they will rust and rusty stains may appear on the surface.
The rustics after the planks are filled with mortar and leveled with a wide spatula to the same level as the ceiling plane. It takes about 5 – 7 days for the plaster to dry completely.
Manufacturers and consumption
Experienced craftsmen recommend several types of materials suitable for finishing ceilings.
Consumption of mixtures for a layer of 1 cm:
- Volma canvas – 9-10 kg/1 sq. m;
- KNAUF Rotband – 8.5 kg/1 sq. m;
- KNAUF Sevener – 7-8 kg/1 sq. m;
- Bergauf Bau Interuer – 12-13 kg/1 sq. m.
The solution must be worked out before it hardens. Therefore, when choosing plaster, you need to consider how quickly it will harden. Volma canvas takes longer to harden than the other mixtures listed.
How to properly plaster a wooden ceiling: step-by-step instructions
In order to achieve a smooth surface of a wooden ceiling, it must be properly prepared for applying plaster. Experts advise adhering to the following regulations when carrying out work:
- Assess the quality of the rough wood surface. If there are large protrusions and irregularities, process them with a chisel, cleaver or plane.
- If there are elements of old finishing, it must be completely dismantled, and the resulting surface must be completely cleaned of dust and dirt.
- After the wood has been cleaned of foreign matter and old materials, it must be antiseptic. If this is not done, when moist air enters the pores of the material, the wood will begin to decompose, and this will negatively affect the quality of the entire finish.
Rice. 13. Treating wood with an antiseptic.
- Before applying plaster, wood treated against bacteria should be primed.
- After the preparatory stage of work is completed, the master applies the first layer of plaster mixture. This type of work requires an increased level of responsibility, since large cracks and cracks must be sealed to their full depth. The work is done using spatulas of different widths. Due to the fact that the second layer of plaster must be installed before the material of the first layer has lost its ductility, work should be carried out without interruption. In this case, you can achieve uniformity and good adhesion of the layers to each other.
- When the work on the installation of the second layer is completed, it is necessary to wait some time for the composition to dry.
- Depending on the chosen type of finishing, you should select the appropriate decorative composition of the plaster. For example, to create texture, you will need a mixture containing sand fractions.
- The third layer is applied provided that the rough finish is completed without any obvious defects, all seams in the wood are sealed, and the ceiling is a smooth and even surface.
Rice. 14. Applying textured plaster to the ceiling.
- After applying the finishing layer, you need to wait until the finish dries and the ceiling is ready for puttying.
If the elements of a wooden ceiling are loosely fixed in the plane, and the surface springs or vibrates under mechanical influence, over time there is a risk of destruction of part of the plaster. To avoid this, before applying the first layer, you need to attach a chain-link mesh to the ceiling over the entire area, after which you can carry out finishing work. Reinforced plaster has increased strength and does not peel off from the surface of the wooden ceiling during operation.
Rice. 15. Reinforcement of a wooden ceiling before plastering.
Not every home craftsman will be able to putty a wooden ceiling on his own the first time. This work requires certain skill and experience. Therefore, the best solution would be to turn to professionals. If the homeowner decides to carry out all the work himself, then before starting it you need to familiarize yourself with the regulations for their implementation, and the result will meet expectations.
Mistakes made at work
Lack of reinforcement, improper priming and other errors lead to swelling and cracks. The plaster quickly falls off if the work is not done in good faith.
Examples of errors:
- Too thin a solution may drain on a crooked base.
- The thick mixture does not adhere well to the surface, so the plaster bulges or falls off.
- The surface is not primed. In such cases, the plaster adheres less well to the surface. If you do not prime the putty before applying the 2nd layer, it is guaranteed to fall off during grouting.
- Many craftsmen believe that the primer is used only to moisten the surface, so they do not wait for it to dry or water the ceilings with ordinary water.
- Lack of reinforcing elements at the junctions of joints made of different materials.
- The absence of reinforcement often leads to the formation of cracks as a result of shrinkage.
- Some builders do not know that the reinforcement should be inside the plaster layer, and not under it. Because of this error, the solution is more easily deformed.
- Beacons cannot be left in the wall as they rust. Traces of corrosion appear on the surface after finishing.
- The solution hardens worse at temperatures below +5 degrees.
- Moisture evaporates from the mixture too quickly if the room is too hot.
When plastering, the thickness of the permissible layer must not be exceeded.
Before applying each new layer of finishing materials, you need to wait until the previous one has completely dried. Haste is one of the main mistakes of inexperienced builders.
Do-it-yourself ceiling plaster: subtleties and features of leveling technology
Categories :Articles
Modern technologies provide a lot of options for leveling the ceiling, however, in old buildings built in the last century, the most justified method is to use plaster. This is explained by the fact that most of these buildings have fairly low ceilings and curved floors, which does not allow the use of other leveling methods that take up part of the height of the room. So, let's look together at the intricacies of the ceiling plastering process.
When choosing a material for plastering, it is most advisable to use ready-made gypsum-based mixtures, such as Rotband, since the previously used cement and sand solution is more prone to crumbling due to its heaviness.
The main goal of the preparatory stage is to prevent possible falling off of parts of the solution. To do this, perform the following work:
1.Completely clean the floor slabs from materials previously applied to them.
- Thorough priming of the entire surface of the floors using Betonokontakt primer, the use of which will ensure high-quality adhesion of the plaster to the floors.
- It is necessary to glue a nylon mesh to the ceiling with PVA glue, which is used to reinforce the foam. You need to wait two days to wait for the glue to dry completely. After which you can proceed to the next stage.
- If the level difference between the floor slabs is up to 2 cm, then it is possible to perform leveling with plaster using beacons. For large differences, it is necessary to use other equalization methods, because with a larger layer thickness, the plaster will crumble after some time.
To set the beacons, a laser or hydraulic level is used, with the help of which the perimeter of the ceiling is marked with a tapping cord, after which the threads are stretched along which the beacons are aligned.
The beacons are fixed to the ceiling using alabaster so that they barely touch the stretched threads. You should wait for the alabaster to dry completely, which will take about 30-40 minutes.
Let's start plastering the ceiling. To apply plaster to the ceiling, experts use methods such as: throwing it with a ladle, spreading it with a spatula, pulling it along the beacons. To ensure maximum adhesion and filling of all cavities, we advise you to apply plaster, then it will fill all the micro cavities in the ceiling.
Leveling the plaster is carried out using a rule that is often moistened with water, which avoids cracking of the mixture. After the entire ceiling is covered with plaster, you must wait until it dries completely, and only after that can you proceed to the next stage of finishing work (puttying and painting or wallpapering).
Experienced craftsmen give the following recommendations to beginners in repair:
– choose a rule no more than one meter long, since the longer the rule, the more inconvenient it will be to work with.
– the more often you fix the beacons, the more even the ceiling will be as a result of the work.
Good luck with plastering the ceiling!
Coating repair and care
If the painted surface is damaged, you need to remove the paint around the crack or dent and cover the defect with putty. After drying, rub the surface, prime and paint.
Caring for decorative plaster is more difficult.
Rules:
- Venetian requires careful handling. Serious contamination should be avoided and wiped regularly with a dry cloth. Do not treat with household chemicals.
- Quartz-filled materials withstand friction better, so they can be wiped with a damp cloth and vacuumed.
- Relief decorative plaster can be wiped with a regular cloth or sponge and is not affected by household chemicals.
To properly care for the surface, you need to read the recommendations of the manufacturer of the facing materials.
The technology for plastering the ceiling is simple, but some stages of the work require special skills. The right choice of materials and tools allows you to do the finishing yourself. High-quality plaster will look no worse than a suspended ceiling.
Was this information useful to you? Share in the comments!
The main types of wood putty on the market
In a specialized store, a home craftsman can select a putty that is optimally suited for a specific type of room where finishing work is required. Among the range of these materials on the market, the following product categories are available:
- A gypsum mixture known for its versatility, ease of application, plasticity, decent appearance and practicality. This type of putty should be used in rooms with normal humidity, since gypsum is an airy binder and begins to deteriorate when exposed to water vapor or when condensation falls on the horizontal surface of the ceiling.
Rice. 4. Gypsum putty for the ceiling.
- Acrylic - the composition is similar to paint and varnish coating for interior work, but also does not tolerate conditions of high moisture content in the air, but, at the same time, the risk of cracks during shrinkage is minimized.
- Adhesive – based on epoxy natural and synthetic resins. Despite the complexity of the preparatory work and high cost, it is often used by professionals when there are large defects on the wooden surface. As a rule, two-component formulations are offered for sale, which must be mixed in the required proportions before use.
- Latex - the mixture contains an elastic polymer, which reduces the risk of cracks, including in “wet” rooms, or when using the material outdoors.
- Oily is the optimal product for working with wet rooms - in bathrooms, in the kitchen, in the dressing room during the construction and finishing of a private residential building.
Rice. 5. Oil finishing materials for wood.
For long and reliable operation, it is necessary to purchase two types of putty mixture - rough and finishing. Accordingly, the work is carried out in two main stages. As a rule, an experienced seller will always offer the client a set of finishing materials that are similar in quality and performance properties to achieve the best result.
Finishing a plastered ceiling
The plastered ceiling needs finishing decorative finishing. Traditional whitewashing is considered the most budget-friendly finishing option, but it is short-lived and does not have high aesthetic appeal.
Technology of ceiling insulation from the inside and outside of a wooden house with polystyrene foam
A smooth ceiling surface can be decorated with decorative Venetian plaster. A smooth, even base can also be painted or wallpapered. However, when painting or gluing thin paper wallpaper, the ceiling must be perfectly smooth and even. In this case, the covering layer is performed in compliance with the rules for manufacturing high-quality plaster. Before finishing, the surface is coated with a primer.
When to use putty
The putty mixture is used to better level the ceiling plane. Plaster is considered a rough composition, so if perfect smoothness is required, we putty the wooden ceiling in 2 layers. Then the surface is sanded with fine sandpaper, impregnated with a deep penetration primer, and then dried. After completing the work, you can glue wallpaper, paint or whitewash the surface.
On a note! The putty contains no coarse fractions, as in plaster, so ceiling putty is used to finely level the surface.
What to pay attention to
Plastering a ceiling is a renovation process consisting of a number of stages. If you do not want to be disappointed as a result of plastering work, then you must take into account all the nuances. Preparation is very important, and the plastering process itself must be carried out in strict accordance with technology.
Start by carefully inspecting the ceiling. You must choose the optimal repair method, taking into account the recommendations of specialists. Please pay attention to the following points.
- If the ceiling is uneven, the height differences at different points are more than 5 mm, then it is better to choose putty rather than plaster. The fact is that plastering such a surface will require large financial costs.
- If the height difference is more significant, for example, when the difference between two points reaches 5 cm, you should not choose plastering. The easiest way is to opt for a tension structure or install a suspended ceiling.
If you examine the ceilings in rooms, most often a small difference is recorded. It makes sense to use plaster if it is from 2 to 5 cm. Remember that plastering is a rather complex process. As the layer thickness increases, you will have to spend more time and effort on the work.
Required inventory
Plastering the ceiling with your own hands requires preliminary preparation of the appropriate tools.
- A square-shaped container with a capacity of at least 15-20 liters. It is desirable that its walls are straight, which will make it easier to collect the solution with a tool.
- Set of spatulas of different sizes. Options with rubberized handles are recommended.
- Rule.
- Paint brush.
- Several types of sandpaper with varying degrees of grit.
- Construction mixer. If this is not available, a drill with a similar attachment will do. Used for intensive mixing of dry facing mortar with water.
- Construction trowel.
- Serpyanka.
- Ladder.
- A ribbed primer tray with a roller matching its width.
It is advisable to find a roller with a long handle for painting high walls and ceilings.
- Building level.
- Latex gloves.
- To protect the face, a plastic mask with a respirator is advisable (in a dry state, the mixture can disperse into the air when poured into a container. Inhaling it will be harmful to health).
Before you get started, you should prepare the necessary tools
Preparing the surface for plastering
First of all, the horizontalness of the base is checked. The ceiling is inspected for defects and irregularities. The base is cleaned of the old finish and leveled. Protruding boards and logs are cut off, and the voids are filled with wooden planks. Otherwise, the plastered surface will turn out uneven.
We treat the base with antiseptic compounds. We use antifungal primers that are suitable for application to wooden surfaces. You can purchase universal formulations. We apply the primer in two or three layers, followed by drying each of them.
Solution application technology
Before starting work, the wooden base is coated with a primer or sprayed with water to improve adhesion to the plaster.
Since any wooden ceiling is not ideally even, the plaster mixture is applied in three stages. First of all, fill the voids and unevenness of the base with the solution. The first layer does not need to be carefully leveled because it is intended for rough leveling. It is enough to remove only large influxes. While the first layer has not dried, proceed to the next stage of plastering. To apply the second layer, you can use the throwing or spreading method manually, using a machine or a construction gun. This primer layer is well leveled, controlling the thickness by level or beacons. Sometimes it is necessary to apply a second leveling layer, which will be thinner and smoother than the previous one.
Important! The final result depends on the quality of the main leveling layer.
The third layer is applied after the previous layer has set. Features of the manufacture of the covering layer depend on the finish used:
- If you decide to make relief plaster, then the textured composition simultaneously serves as a covering and finishing layer. The relief pattern is formed immediately during the work process.
- Finishing made from piece materials (panels, tiles, stone) is attached to a well-leveled primer layer, that is, a covering layer is not needed.
- For pasting with thin wallpaper or painting, the covering layer must be of high quality. To do this, the applied solution is well leveled, smoothed and subsequently sanded.