In the II-III century BC. The peoples of the Cretan-Mycenaean civilization used lime plaster without any fillers or additives in the construction of palaces in Mycenae, Knossos, Tiryns and Phaistos. Nowadays, lime plaster (LP) contains fillers and various modifying additives that give the compositions new properties. Cement-lime plasters are more common than others.
Peculiarities
Lime has long been obtained by burning sedimentary rocks, such as chalk, shell rock, limestone, marble unsuitable for finishing, which contain a lot of calcium carbonate and partially contain magnesium carbonate (the proportion of which varies in different deposits). Therefore, the quality of lime obtained from different deposits varies. These rocks become lime after firing.
Depending on the clay content in the raw material, lime can be:
- airy, almost free of clay (<8%), hardening in air;
- hydraulic, containing 6-20% clay particles, hardening under water.
During the firing process, calcium and magnesium carbonates decompose, transforming into oxides, which become the main active substances of lime.
lime
Lime arrives at construction sites in different states:
- lump quicklime - a product directly obtained as a result of firing;
- quicklime ground – a product of lump grinding;
- fluff - the product of extinguishing the previous two in the form of powder;
- dough (IT) – a pasty mass, also a slaking product;
- milk is a suspension in which slaked lime is partially dissolved and partially suspended.
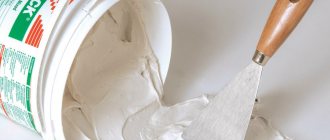
To prepare lime plaster, the pros and cons of which are outlined below, use fluff or lime dough, which is obtained by extinguishing boiling water. Kipelka is the name for ground and lump quicklime, due to the high temperature that is released during slaking. The composition of ready-made dry mixtures (SS) contains fluff.
Lime, especially lime lime, is a caustic substance, so when working with it, you need to take safety precautions. If lime gets on your skin or eyes, rinse them with plenty of water.
Due to its high reactivity, lime (in any form, except dough) is stored in a dry place, protected from water.
When solutions are prepared using ground quicklime, pouring it into a concrete mixer, they harden much faster, and the coatings made from them are much stronger. In addition, such solutions can be used at low temperatures, since they are heated by the heat generated by the lime and quickly harden.
Lime decorative plaster can be tinted using alkali-resistant pigments/dyes. The color of others is “eaten away” by lime. For tinting, no more than 5% (without the risk of reducing strength) pigments are added to the lime mortar, obtaining the following colors:
- green (chromium oxide);
- yellow (ochre);
- brown (umber);
- red-brown (iron lead);
- blue (ultramarine);
- black (soot).
The paints are not afraid of light, however, it will not be possible to obtain bright, saturated tones.
Clay for plaster
When choosing clay for plastering, you need to pay attention to fat content, plasticity, and the degree of contamination with foreign substances. Clay that is too thin is usually not used for plastering. Too heavy (with a ductility exceeding 0.27) is also undesirable for use, as it often cracks over time. Material with increased radioactivity is completely unsuitable for work, although such deposits are rare.
Fat content and its definition
Oily clay contains a significant proportion of clay and silt particles, while lean clay, on the contrary, contains more sand. The fat content indicator has to be determined in practice so as not to make mistakes when preparing the plaster. This is done this way:
- from each sample of material, roll a ball with a diameter of about 3 cm;
- throw each ball from a height of 1 meter so that it hits a hard base;
- assess the condition of the ball after falling: if the clay is fat, it flattens out greatly, if the clay is thin, it crumbles into pieces.
The clay that is best suited for making plaster is one in which the ball is not very flattened and almost does not fall apart - it has a normal (medium) fat content. There is another method for determining fat content. Similar clay balls are flattened with your fingers to ½ of the original height. If the material is suitable for plaster, small cracks appear along the edges of the ball. In oily clay they are completely absent, but in skinny clay they become deep.
You can also estimate the size and number of cracks by rolling balls into strips up to 20 cm long, which are wrapped around the handle of a garden tool. A small number of small cracks indicates that the clay is worth taking for making plaster. Specify the quality of the selected material in this way:
- moisten the trowel with water;
- combine clay with sand in the required proportion;
- pick up the solution on a trowel;
- turn the tool down to allow the solution to slide;
- a greasy solution will leave a lot of adhesion, a thin solution will slide off without a trace, and a normal solution will only appear as narrow stripes.
Fatty clay solution
Obtaining fine clay
Mineral material can be highly plastic, plastic, moderately plastic, low plastic and non-plastic. In addition to the exact mineral composition, a specific indicator is determined by the size of the fraction of particles that are present in it - the smaller they are, the higher the plasticity.
To obtain thin clay, they use this method: the finished material is laid out in a shaft up to 1 meter high on a flat surface, moistened, and left for the whole winter. After freezing and thawing, the clay becomes loose and is well suited for decorative purposes.
Fine clay for making crafts
Advantages and disadvantages
Lime plaster: its pros and cons.
It belongs to mineral mixtures, therefore it has their main advantages:
- environmentally friendly;
- fire resistant;
- has a low price;
- adheres well to mineral substrates, as well as wood and plasterboard;
- vapor permeable (allows walls to breathe);
- repairable;
- durable;
- sufficient strength for wallpapering is achieved with lime plaster for interior work in about a day;
- easy to stack;
- bactericidal (prevents the appearance of foci of fungus and mold).
The main disadvantages:
- long-term strength gain (the coating holds nails after 2 weeks);
- low resistance to water;
- unstable - vibrations cause cracks to appear;
- it is necessary to protect yourself as from a strong alkali;
- insufficiently high strength (inferior to others in this regard).
Advantages and disadvantages
Lime plaster used for interior work has the following advantages:
- lime adheres well to various substrates - plasterboard, wood, brickwork, concrete surfaces;
- moisture does not accumulate under the layer of plaster, because lime-based plaster material is capable of allowing steam to pass through;
- the material has good elasticity, which facilitates the work process;
- plaster has excellent thermal insulation properties; additional insulation of the room is not required;
- a correctly applied solution does not allow cracks to form under mechanical action;
- alkaline finishing material, which perfectly protects the surface from bacteria, mold and mildew;
- lime mass for plastering does not support the combustion process.
There are also some negative aspects:
- to create the solution, slaked lime is prepared, which takes up to two weeks;
- The plastered surface takes a long time to dry, the second layer is applied only after the first has completely dried, which delays the finishing process.
Scope of application of lime mortars
The classic construction material is used for rough and finishing finishing of residential premises, facades, and auxiliary buildings. With certain additives, lime mortar is used for finishing even wet rooms such as a bathroom.
Like other mineral plasters, lime plasters are not used in new buildings until the building has completely settled, as well as in areas with seismic properties and near railway tracks, since they are susceptible to cracking.
An improved dry lime-carbonate plaster mixture is also available on sale. Carbonate lime is obtained by grinding limestone (60-70%) with boiling water (30-40%) together. Due to this, compositions based on it harden in air and in a humid environment. Less water is required for preparation, and the drying time for the coating is reduced. Such mixtures are intended not only for preparing lime mortar for plaster, but also for masonry mortars. The difference is in the proportion of water added: for plastering, take 1 liter of water per 1 kg of dry mixture, for masonry - 0.5-0.7 liters of water.
Thanks to their improved qualities, lime-gypsum mortars quickly harden (they harden completely in half an hour) and are stronger. They are used more often for interior work. In regions with low humidity they are also used for external coatings.
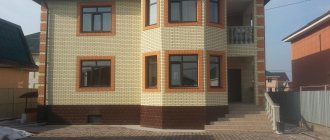
For house facades, lime-sand colored plasters are popular, to which up to 20% cement is sometimes added. They are inexpensive and easy to apply manually or mechanically.
The lime mortar mixture contains hydrated lime – fluff lime – as a binder. Such mixtures are used for various purposes, even added to mortars for making floor screeds.
Cement-lime plaster Knauf. Gypsum, lime or cement mixture?
Let's compare cement-sand, lime and gypsum mortar for plastering walls according to their characteristics:
- Vapor permeability. Cement-sand mortar has a vapor permeability of 0.09 mg/mhPa, gypsum - 0.11-0.14, and lime shell rock - 0.10-0.12. As a result, in terms of these indicators they are almost equal, so you do not have to worry about the accumulation of moisture inside.
- Price. Usually, when comparing this indicator, they take into account the cost of one package of the same weight, but this is not entirely true. Cement and gypsum dry mixtures for plastering walls have different specific gravity (gypsum is almost 2 times lighter), so their consumption per m2 will be different.
For example, the Rotband gypsum plaster mixture has a consumption of about 8.5-10 kg per square meter with a layer of 1 cm. Dry cement plaster mixtures will have a consumption of about 12-20 kg per layer of the same thickness. At the same time, the price of gypsum types is approximately 1.5 times higher than cement ones. As a result, the cash costs become almost the same.
- Gypsum and cement plaster have different working hours. When working with cement mortar, it hardens completely after 2 hours, and gypsum after 1.5. That is, the gypsum solution will need to be mixed more often in small portions and applied quickly.
- Working conditions. Cement hardens equally well both in water and in air, unlike gypsum and lime.
An important element when renovating a private home is heat capacity. If you apply a 1.5 centimeter layer of cement plaster to a wall of 200 square meters, its volume will be 3 cubic meters and the total weight will be about 5.4 tons. This will give a good increase in heat capacity, in contrast to leveling the walls with plasterboard or gypsum plaster.
- An additional advantage of gypsum plaster for indoor use is that if you work carefully, it is not necessary to putty it (depending on what the finishing coat will be). Sometimes it is simply enough to remove the unevenness with a spatula and continue finishing.
- Some gypsum plaster mixtures are not moisture-resistant, so they cannot be used in wet rooms. For example, when leveling walls in a bathroom, you should use only moisture-resistant cement plaster. These cement plaster mixtures are most often used for exterior work.
- Cement-lime plaster is warmer, unlike the usual cement composition, has bactericidal properties, but is not as durable. Also, its advantages include higher elasticity, so over time there will be fewer cracks on it. This type is universal, therefore it is used both in residential premises and for facades.
- Another material used for plastering is clay. It is used only for application to wood and stone under normal humidity conditions, so we will not consider this material in this article.
Lime slaking
To prepare a plaster mortar with lime slaking, you will need a metal container, since during the process of hydration (a violent ongoing chemical reaction with an increase in volume by 3 times), an increased release of steam and heat occurs (up to 180 ° C). The container must be taken with a reserve for increasing the volume.
lime slaking
The speed of slaking is indicated on the packaging of quicklime, which can be:
- slow (> 25 min);
- fast (8-10 min);
- average (15-20 min).
To mix the mass during the process, you will need a shovel or wooden paddle. Regardless of the reaction rate, quenching is carried out for at least 24 hours. The best lime is aged for about 1-1.5 months.
To protect against splashes, the use of protective clothing is recommended.
Quenching technology:
- Prepare a metal container into which lumpy or powdered boiling water is placed.
- Prepare the required volume of cold water (to prepare lime milk use 2 kg of ground boiling water + 2 liters of water, for dough for 1 kg of boiling water - 0.5 l of water).
- Slowly pour in water (in small portions) (this is especially necessary for lumpy boilers, so as not to “coke”).
- As soon as the amount of steam produced decreases, add a little more water and mix carefully.
- After the steaming stops, cover the container with a lid, leaving the mixture to sit for a day or a day and a half.
- Mix again. Leave in a cool, dark place for at least 2 weeks.
- After mixing, filter through a sieve.
Do not lean over boiling lime. It is better to carry out all work outside the living space.
Composition of clay plaster
Typically, plaster consists of clay and sand or includes sawdust, but with the exception of the sand component. Also, if desired, flax fibers, pine needles, dolomite, cellulose, quartz or other components are added to the finished mixture, which help improve the thermal insulation properties of the plaster.
Clay-sand mortar
The simplest type of solution is a mixture of clay and sand in a ratio of 1:2 - 1:5. The sand must be sifted and the clay cleaned of impurities. The order of work will be as follows:
- fill the clay with water for a day;
- the liquid is drained, the substance is broken up with a construction mixer until its consistency resembles sour cream;
- sifted sand is poured into the mass in portions, stirring regularly;
- add fillers and water in the required quantity;
- Beat the solution again with a construction mixer until it looks like a fairly thick paste.
The readiness of the plaster is checked by determining the fat content. Roll into a ball and flatten it. If the edges are severely cracked, there is too much sand in the plaster (more clay is added). When the ball spreads, excess water is added (you will have to flavor the mass with clay and sand). To improve the properties of plaster, urea, magnetite, calcite, and sodium gluconate are often added to it.
Solution with sawdust
Another type of clay mortar includes sawdust instead of sand. It is more difficult to work with, but when applied to walls it acts as reliable thermal insulation, and is also much stronger than clay-sand. The mass quickly loses its elasticity, and you will have to work more actively, but after drying it is not afraid of damage.
Before mixing the components, the sawdust is soaked in water - this way they will not draw moisture from the plaster. Then clay and sawdust are combined in the same proportions as for sand plaster. This composition is not used for finishing cladding due to the unevenness of the surface.
Clay with sawdust for plaster
How to prepare lime mortar for plaster
For the classic composition of lime mortar (with or without filler), a characteristic such as fat content is distinguished.
There are:
- very fatty (recommended composition: 1 part dough: 3.5-4 parts sand);
- fatty (1:2.5-3) are often used for a covering layer (1:1), putty-free plastering (sand fraction <0.5mm);
- medium fat content (used in compositions 1:2-2.5);
- skinny (1:1.5-2);
- very skinny (even less sand – 1:1-1.5).
For plastering work, use completely quenched lime, otherwise the coating will swell and peel off. It is introduced into the solution in the form of milk or dough diluted with water. Since lime plasters harden slowly, lime mortar can be prepared 2-3 days before work.
Lime-gypsum mortar
By adding gypsum to the plaster mixture, lime-gypsum plaster is made, the use of which greatly speeds up the finishing process.
For preparation, take prepared lime mortar (3-4 parts), gypsum (1 part). Place 2 liters of dough in a mixing container
Pour in a liter of gypsum, mix with a mixer, adding water. Then add another 2 liters of dough and mix everything.
To obtain a sand-free covering, add gypsum powder in small portions to the milk of lime, stirring. The maximum covering layer is 2 mm. Composition of the covering mortar (gypsum - IT) for plaster:
- dry – 1:1;
- slightly damp – 1:2;
- wet – 1:3.
The cover is smoothed with a rubber or metal trowel without wetting.
Setting begins 5 minutes after mixing, so all work is carried out quickly, complete processing of the layer is completed before setting begins, and the volume of the mixing is kept small.
To increase the life time, add 10 ml of PVA glue per 1 liter of plaster mixture.
Lime-clay mortar
Clay can be added to plaster as a filler to reduce lime consumption, and boiling water is added to clay to increase its resistance to water erosion. In both cases, the amount of additive can reach up to 35%. These materials are mixed in a metal container or in a tvoril (pit) before extinguishing, covering them in layers. Fill with water and leave for at least 10 days, after which it is mixed, filtered, and if necessary, filler is added to the composite dough in the required proportion.
Such compositions are usually used for interior decoration. Proportion (dough: filler):
- for spraying – 1:1 (for wooden walls the consistency of the solution is semi-thick, for concrete/stone walls it is more liquid);
- for soil (base layer) – 1:0.75:0.5 (last figure for sawdust or other fibrous additives);
- for covering – 1:1 (dough: sand).
Fiber fillers in plaster are used to increase the low strength of such solutions. Before adding, it is advisable to soak the fibrous fillers with copper sulfate (5% solution).
Another method is to prepare lime dough and clay dough separately. The latter is prepared in advance by filling it with water in a separate container and leaving it to sit for 2-3 days. After which, after draining the water that the clay did not absorb, knead the clay dough and mix it with the lime dough. After this, pouring in water and adding sand, prepare a plaster clay-lime mortar, controlling its fat content. If it does not stick to the tool, add lime.
Lime-cement mortar
For universal purposes, a durable, plastic cement-lime mortar for plaster (CIR) is prepared with your own hands, or you buy a ready-made dry mix (MS), which just needs to be diluted in the required proportion with water. However, SS are more expensive than self-prepared formulations. Therefore, we provide information for those who want to work with their own hands.
Depending on the purpose (area of application) of the solution, the composition and ratio of components may vary. Most often, grade 400-500 cement is used (white for decorative purposes), and washed sand (can be river, quarry or gully, quartz, etc.) of the middle fraction is used as a filler.
The compositions of cement-lime mortar for plaster under different operating conditions differ in the ratio of components:
- in bathrooms, basements, cellars, where there is increased moisture condensation, - 1: 2: 8 (volume of M400 cement powder - dough - sand);
- on smooth outer surfaces – 1: 1-3: 6-9;
- surfaces that are systematically moistened and exposed to frost (foundation, basement area) – 1: 0.5-1: 4.5-6.
The dry components (cement powder, sand) are mixed and then mixed with milk.
Lime-sand mortar
To prepare the starting lime-sand plaster, take 2.5 - 4 parts of sand for 1 part of the dough. The composition of the finishing layer is different. Its formula is 1: 1-2 (see above). Sand can be mixed with milk or added to dough diluted with water. The gray color of wet lime-sand plaster will change to snow-white as it dries.
Among other things, the strength of the coating depends on the shape of the sand particles. Gully sand (mined in a mountain quarry) has a crushed clastic form and adheres better to lime, resulting in higher coating strength. River and sea sand has a rounded surface, so it has less traction. Such sand can also be contaminated with silt-clay particles, which reduce strength, and therefore needs to be washed.
Clay-lime material
This mixture is prepared from lime and clay dough (1:3 or 1:6). Clay powder or quarry clay is diluted with water, and after a couple of days the mass is passed through a sieve, thereby obtaining a dough-like soft material.
The advantage of this type of plaster is its environmental friendliness and low price. In its pure form it is practically unsuitable with clay due to its low strength. To increase it, lime, gypsum and cement are added.
Additional components
An improved composition, for example, for decorative plaster, is obtained using other types of filler.
This:
- stone flour (Venetian plaster);
- perlite, expanded clay, expanded polystyrene (heat-insulating, noise-absorbing);
- chips of marble or other rocks (decorative compositions);
- artificial fibers (fiber) or natural (sawdust, wool, chaff), increasing strength and reducing heat transfer;
- barite sand (protective mixture used in X-ray rooms);
- crushed mica (increases weather resistance and water resistance, reduces static, protects against UV rays).
Plaster for external work on a reinforcing mesh is made reinforced using fibrous materials (wool waste, finely plucked felt, etc.). This composition fills the mesh cells better, and the coating is stronger. The volume of the additive is 0.5-1 parts per part of the dough.
Preparing the work surface
For long-term operation of the plaster finish while maintaining strength and appearance, proper preparation of the base is important.
We prepare surfaces for plastering walls with lime mortar in the following sequence:
- we remove the wallpaper, inspect the wall to identify defects and weak points, tap the old plaster coatings (if left), knock off the peeling areas;
- We neutralize areas affected by mold and fungus;
- remove oil stains, rusty deposits, efflorescence;
- remove or isolate metal objects;
- we repair punctures and cracks (for large ones we use reinforcing mesh);
- remove dust;
- prime with a composition appropriate to the base and finishing material;
- install beacons;
- dry.
Application technology
installation of beacons
primer
first layer of spray
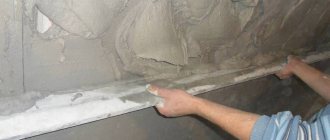
applying and leveling the second layer
third finishing layer of plaster
result of applying lime plaster
Lime mortar is applied in three layers, each of which has its own characteristics:
- We do not skip the work described in the paragraph on wall preparation
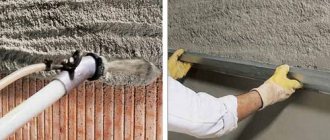
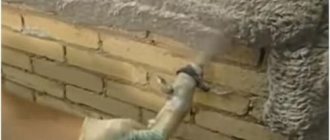
- The first, called spraying, is done to ensure reliable adhesion of the finish to the base. It has the consistency of liquid sour cream. Throw it on with a ladle or trowel. Doesn't smooth out.
- The soil (base layer thickness 10-30 mm) is made with a more viscous composition using a trowel between the beacons. If it is necessary to apply a thicker coating, the composition is applied in layers with daily drying of each layer. Align with beacons using the rule. After the setting begins, the installed beacons are dismantled, and the resulting grooves are filled with solution.
- The covering (the finishing layer, which usually has a different composition, the consistency of a spray) is applied with a spatula or a trowel several mm thick.
The coating and spray differ from the soil in composition. A concrete wall “asks” for a spray of lime-cement mortar. It is also used for covering when plastering facades. For indoor use, a covering made of lime-gypsum mortar is preferable.
Features of working with lime-containing materials
In order for all the positive properties of lime-based finishing materials to be fully preserved, the whole “pie” must be correct.
horryFORUMHOUSE member
Every day I read topics about cement-lime mixture - there is some confusion in my head. Please help me with any questions I have:
- If you take a ready-made CIS at RBU, is there a guarantee that they slaked the lime themselves and did not use hydrated lime?
- Is it possible to mechanize the application of CIS for internal plaster using a porotherm? What consistency is needed? Will using a pneumatic shovel be effective?
- What is the best way to putty walls after CIS plaster?
Please help me with these questions. The plaster is getting closer...
Company technical specialist
- We recommend using only industrial mixtures in packaging with the declared properties. This guarantees quality.
- Plasters can be applied manually or by machine. For machine application we recommend professional machine stations.
- To achieve sorption properties, you need to take cement-lime or lime-cement putty and vapor-permeable paint. In this way, an ideal indoor microclimate is achieved – the reference of the VIVA PARK study!
For those who like a textured surface, lime plasters are available with coarser grains that create a textured finish. All that remains is for them to be primed and painted with a vapor-permeable composition; as a rule, all materials are included in the same product line of the manufacturer.