This detailed instruction on the website remontlegco.ru is devoted to plastering walls with your own hands (rough leveling). You will learn how to properly plaster walls for a beginner, what methods there are, types of solutions, features of preparatory work for walls made of various materials, photo and video materials.
Related articles:
How to level a ceiling with your own hands.
Do-it-yourself self-leveling floor - detailed step-by-step instructions.
Why do you need to plaster walls?
Plastering the walls is a mandatory stage of rough finishing for any apartment renovation. It helps eliminate surface defects and level out the geometry of the room.
Regardless of what we end up covering the wall with - paint, tiles, wallpaper, plastic panels - all this will look beautiful and will last a long time only if the plaster layer is made durable and even.
We will look at the full technology for this in the article, namely how to plaster walls with your own hands.
For different types of finishing coating, different evenness of the walls is possible. So for paint and wallpaper you need a perfectly flat surface.
For decorative plaster and panels, small irregularities are possible; they will be hidden by the finishing material itself.
Irregularities up to 5 mm can be eliminated by leveling with putty, but if the size of the irregularities is larger, then a large amount of putty will be required and the use of this material will be too expensive.
Therefore, plaster is used first, and only then the wall is puttied.
Preparatory stage
All old finishing material, including plaster, must be removed from the wall. The surface is cleaned down to the brick. There should be no traces of cement mortar, adhesive or paint on the base.
After cleaning the wall, the seams between the bricks are cleared. For this, a hammer and chisel are used. The seams are deepened using a tool by 10 mm. This will increase the adhesion of the plaster to the surface. Next, the wall is treated with a brush with metal bristles and is well cleaned of dust particles.
Then a primer composition is applied to the wall. It reduces the extraction of moisture from the plaster, so the solution will set normally and its strength will not decrease. The primer also improves the adhesion of the plaster composition to the brick wall.
At the next stage, the reinforcing mesh is laid. To fix it, a 5 mm thick solution is sprayed onto the structure. It will serve as a mount for the mesh. It needs to be drowned in the solution and leveled with a trowel. Reinforcing mesh can also be secured using hooks fixed in the joints of the brickwork.
Advice! Metal or plastic mesh sheets must be overlapped. It must be at least 100 mm. The overlap on the adjacent wall must be at least 200 mm.
Required materials and tools
For any repair and finishing work, you need a special construction tool, some of which you may already have at home, but the missing ones will have to be rented or purchased.
So, we will need:
- Plaster – depends on the material used to make the walls; we will discuss which one to choose below.
- Primer – for pre-treatment.
- Lighthouses - if we plaster on lighthouses.
- Level – the best choice would be a laser level, but a bubble level with a length of at least 2 m is also suitable; with its help we will set beacons and corners, identify deviations from the vertical and horizontal, and at the final stage check the quality of the plastered wall.
- The rule is that you need several pieces of different lengths: 2.5; 1.5 and 1 meter, with its help the solution is leveled over the surface.
- Trowel - for throwing plaster on the wall, it can be of different shapes, depending on what is more convenient for you.
- Trowel and spatula - for applying and smoothing the material, the optimal length of the trowel is 30-35 cm.
- Construction float – for finishing cleaning of plaster.
- Bucket, brush and roller - for applying primer.
- Kneading container - a simple bucket will do, but it is too small, the best choice would be a capacity of about 40 liters.
- Construction mixer - to prepare the solution, it is very difficult to mix it by hand, you need at least a drill with a whisk.
- Scotch tape and covering film - to protect untreated surfaces from splashes.
- Plumb.
- Gloves.
- Hammer.
- Roulette.
- Screwdriver, screws and dowels.
If you have everything you need, then you can start repairing.
Tools
Without special devices, it is impossible to efficiently and quickly plaster a brick wall. Therefore, you need to prepare the following tools:
- stepladder or trestles, allowing you to lay plaster at a height of up to 3000 mm;
- a hammer drill, necessary for creating holes, filling cracks and increasing brick joints;
- a screwdriver or a Phillips-head screwdriver;
- tape measure for marking;
- plumb line to control the vertical plane;
- rule with a bubble level from 2000 to 2500 mm long;
- a mixer that simplifies the process of preparing the mixture;
- hammer;
- laser level;
- grinder (angle grinder) or metal scissors;
- chisel to widen the cracks and remove excess plaster material;
- flat container for primer;
- roller or brush to apply primer to brickwork;
- a scraper or brush with steel bristles to clean the wall from wallpaper or paint;
- a 10 liter bucket for mixing the solution;
- a wooden falcon with a handle in the middle, which is a board used for transferring plaster material to the wall and leveling it;
- a trowel in the form of a steel spatula with a curved handle, used for dosing plaster components while mixing the mortar, applying the mixture to the falcon and throwing the material onto the structure;
- a trowel used to level the layer of applied solution;
- malka, used to level the solution on the outer corners;
- a grater used for final leveling of the plaster layer;
- a trowel intended for smoothing the covering plaster layer;
- spatulas of different widths.
Attention! Professional finishers use the short and long rule in their work. The first type of tool up to 1500 mm is used to level the plaster, and the second device is used to check the quality of the applied layer.
Preparatory work
Before applying plaster, the wall must be prepared. The period of further operation and the quality of the work performed depend on this.
First of all, we clean the surface of old coatings.
We are deciding whether we will install beacons or whether we can do without them. To do this, you need to measure the curvature of the walls using a level.
The next stage is primer; the universal primer weber.prim.multi, suitable for both interior and exterior work, can help us with this. You can take any deep penetration.
It increases adhesion, removes dust from the surface and can prevent the appearance of mold; the strength of adhesion of the plaster to the wall depends on its quality. Apply the primer with a roller.
Brick plaster
There are two methods of plastering a brick wall - with and without preliminary installation of beacons. Let's take a closer look at all the nuances of do-it-yourself plaster.
Preparing the wall
Many beginners make mistakes in the initial preparation of the wall. After all, this is no less important than the plaster itself. Remember that the wall that will be treated with plaster must be cleaned down to the very base and a primer applied.
Before processing, be sure to carefully inspect the wall for any defects. If found, be sure to eliminate them. There should be no large cracks, crevices or irregularities on the wall. Any defects will significantly reduce the effect of the effort expended. They will significantly affect sound insulation and heat retention in the room. There may also be insects in the cracks, which can subsequently enter the apartment.
Next, you will need to saturate the walls with a special antiseptic. This will help prevent mold or mildew from growing on the bricks.
Then it will be necessary to treat the surface with a primer. This will not only strengthen the base, but also ensure good “adhesion” between the plaster and brick. For a wall made of porous bricks, it is better to use a deep penetration primer. The solution must be applied in two layers. Primer is a mandatory process; without it, the service life of a brick wall will be significantly reduced.
Sometimes there is also a need for reinforcement. This treatment is intended for uneven brick walls. You need to secure a special mesh using hooks and press them into the seams between the bricks. Please note that the mesh should not be subject to corrosion. When using metal, rust may form, which will then be visible on the plaster.
To understand the wall preparation process in more detail, watch this special video:
How to cook properly
To properly prepare the plaster, follow our recommendations:
- if you decide to use purchased material for processing, be sure to follow all the instructions written on the packaging;
- The mixture must be diluted at one time. It is not advisable to leave the mixture for a while and then dilute it with water, this will spoil the quality of the plaster;
- If you prepare the plaster yourself, be sure to take into account the humidity and temperature in the room.
Advice! Do not save on purchasing material, since the durability of the finish depends on the quality.
Plastering on beacons
In case of large unevenness or deviations of the wall, plastering is carried out using beacons (guides for the rule).
Beacons can be installed after a full cycle of preparatory work has been completed and the primer has dried.
Do-it-yourself installation of beacons before plastering walls is done using a metal profile, gypsum mortar and a building level.
Instead of gypsum mortar, you can install beacons on self-tapping screws.
Installation of beacons for plastering walls
We divide the wall into sections of 1-1.5 meters, depending on the length of your rule, and draw vertical lines using a plumb line or building level.
The distance between the beacons should be less than 20 cm of the length of the rule.
We drive a large nail at the top of one side of the wall and hang a plumb line on it. Along the plumb line, we drive another nail at the bottom and fasten the lower end of the plumb line to it, approximately at a distance of 8-9 cm from the wall.
We also install another plumb line on the other side of the wall. The plumb line should be well tensioned.
We stretch the thread between two installed plumb lines, simply tying its ends to them so that it easily moves along the plumb lines. We will set the height of the beacons along this thread.
We move the thread to the middle and find (using a ruler) the most protruding place on the wall, mark it (write down the distance from the thread to the wall).
We also find the most protruding place at the bottom and top.
We compare the marked points and find the most protruding place on the entire wall. Here we drill with a hammer drill and install the first 8x40 mm dowel with a screw or self-tapping screw and measure the distance from it to the cord; we will tighten all subsequent screws to this distance.
We screw in the screws on all previously drawn vertical lines in increments of approximately 50 cm.
Video instructions for installing beacons
Next, you can install the beacons on the solution or special fasteners.
Below we will look at mortar mounting.
We prepare the gypsum solution at the rate of 20-30 minutes of work, since then it will begin to set and apply it to the vertical lines between the screws.
We install the beacon on the solution and press it tightly against the screws along its entire length. We apply the rule to the lighthouse and make sure that there are no gaps between them. Remove excess solution.
So we install all the beacons for plastering the walls and let them dry completely.
If you are not sure about the quality of the material from which the beacons are made, then after drying you need to take them out and plaster the places where they are installed.
How to install beacons on walls
You can use a regular metal profile as a beacon; its price is quite reasonable and it won’t be difficult to find in hardware stores. The length of the profile is standard, so it will need to be “adjusted” to the height of the room in which the work will be carried out.
Installation on walls should begin from the corners of the room. Apply small lumps of plaster vertically to install the product there. Level them using a building level. Do not forget that the slats must be in the same plane.
Between the beacons you will need to stretch special strings. Intermediate beacons will be installed along them. The installation interval is determined by the length of the rule. It is better to use a spacing of more than 1.5 m, as problems may arise with marking the wall.
Preparation of plaster
After preparing the walls for applying plaster, you can proceed to preparing the solution.
In a hardware store for plastering walls with your own hands, there is a large selection of ready-made plaster mixtures for different surfaces and on different bases.
In the modern variety of ready-made dry mixes for plaster, it is easy to get confused. Read the instructions carefully!
This greatly simplifies the preparation, since you do not need to calculate the proportions of the various ingredients, but simply dilute the finished mixture with water in accordance with the instructions on the package.
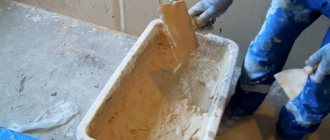
To prepare the plaster we will need:
- clean container (bucket or trough);
- construction mixer or drill with a special attachment for stirring;
- pure water.
Pour water into the container. While stirring with a mixer, add the dry mixture, the proportions are indicated on the package.
Proportions for weber.stuk.cement: 25 kg of dry mixture per 4.75-5.75 liters of water.
Mix everything well until smooth and let it brew for 3-5 minutes, then mix again.
The amount of finished plaster should be enough for 20-30 minutes of work, then it will begin to set.
Cement plaster
To prepare cement mortar for plastering walls, you need to mix 1 part cement and 3 parts sand. Then, constantly stirring, add water (approximately: 5-6 liters of water per 25 kg of dry mixture).
The consistency of the finished solution should be like thick sour cream.
Leave for 5 minutes and stir again.
Calculate the amount of prepared solution for 1 hour of work. After an hour, cement-based plaster begins to lose its plasticity and adheres poorly to the working surface.
Advantages of cement plaster:
- high strength;
- greatest durability;
- suitable for rooms with high humidity;
- Suitable for outdoor use, basements and garages.
Flaws:
- It is imperative to apply finishing putty to the top of cement-based plaster.
Gypsum plaster
Gypsum-based solutions are only suitable for indoor finishing. They have high ductility and are excellent for concrete surfaces.
Preparation: gypsum is poured into a container with water with constant stirring, milk of lime is added and everything is thoroughly mixed.
Gypsum plaster dries very quickly; after 15-30 minutes it can become unusable, incl. calculate the required quantity correctly.
Due to its increased plasticity, gypsum plaster is easily applied to any surface, even a beginner can handle it.
It has a very fine structure and does not require finishing putty.
Convenient to use in corners and on the ceiling.
Cannot be used in damp areas.
Types of plaster
At the first stage, all finishers decide how best to plaster the structure. For the work, it is possible to choose mineral or polymeric substances. The first type of plasters are bulk materials that contain minerals that bind the particles together and increase strength. Minerals are divided into the following groups:
- Cement mixtures resistant to humid environments. Therefore, they are used on the facades of houses and indoors. The cement-based mixture is an alkali that releases radical lime when dried. The substance contains fillers that reduce shrinkage of the material.
- Gypsum mixtures, which are non-acidic and non-alkaline materials, characterized by a neutral pH. This allows you to perform work without using gloves. However, the composition may include alkali as a filler. In this case, the skin often becomes red and itchy. Gypsum-based compositions dry quickly but break easily.
- Cement-gypsum mixtures with a short shelf life. The material loses its properties under the influence of the environment. Due to the presence of gypsum and other components, the substance reduces shrinkage.
Polymer mixtures work like glue. Shrinkage of the material continues until it hardens. The composition contains additives that reduce this deficiency. Polymer mixtures exhibit all their properties only after drying.
Important! For exterior work, lime or cement-sand compositions are used, and gypsum mortars are used on the walls inside the building, as they are destroyed by exposure to sunlight, wind and rain.
Plaster application technique
After installing the beacons and drying them completely, you can proceed directly to plastering the walls with your own hands, i.e. alignment with beacons.
Prepare the solution as described above.
Stages of applying plaster to the wall:
- For better further adhesion of the plaster to the wall, spread it over the surface in a thin layer.
- Using a trowel (trowel), from bottom to top, spread the plaster evenly onto the wall between two beacons to a height of about 1 meter.
- As a rule, using zigzag movements along the beacons, we pull the applied solution upward in small sections. There is no need to put pressure on the rule.
- Remove excess mortar from the rule with a spatula and pour it back into the voids or above. According to this scheme, we work to the very top, then apply plaster between the next two beacons. So we plaster the entire wall step by step.
- After drying, remove the beacons and fill the resulting voids, let them dry.
- Using a roller, we wet the wall and immediately apply a thin layer of thinner plaster using a trowel (35 cm wide spatula).
- As a rule, we remove the excess in different directions, making sure that there are no streaks left from the spatula.
- All remaining defects will be hidden by the third finishing layer - “covering”. Its thickness should not exceed 2 mm. The finishing layer should be applied to the second layer while it is still wet.
- Next, we grout the plastered surface until it is completely dry, rubbing it in a circular motion with a polyurethane float.
- The last stage in finishing will be the final sanding of the surface with felt or felt secured to a grater.
Decorative plaster
This material allows you to give the surface your own unique style. It contains synthetic resin, thanks to which the composition can be considered a complete and strong cladding.
Types of decorative plaster:
- limestone-sand;
- stone;
- terrazite.
This plaster is quite unpretentious in work. Before applying the very first thin layer, install the reinforcing mesh. let it dry, and then show your imagination.
Pixabay
It can be casually applied with a spatula, thus forming large strokes, or with a simple broom you can create roughness on the unhardened composition. You can also use a stamp that will create identical patterns. After drying, you can paint it or leave the original texture.
Plaster reinforcement
If the thickness of the applied plaster is more than 2 cm, the surface must be reinforced.
For reinforcement, meshes made of various materials are used:
- polymer;
- metal;
- nylon;
- galvanized;
- fiberglass, etc.
If the thickness of the leveling layer is large, a galvanized mounting mesh is installed.
Fastening is done using dowels with plastic washers. The thickness of the leveling layer can reach up to 6 cm.
After installing the mesh, it is covered with a sufficiently liquid solution to completely fill the voids. After drying, the main layer of plaster is applied.
Small 2-3 cm leveling layers can be reinforced with fiberglass mesh. Install it directly on the plaster or on a special adhesive for reinforcing mesh.
Depending on the material and type of reinforcing mesh, the thickness of the applied layer of plaster also varies. These standards are indicated on the packaging.
Rules and recommendations
- Everyone knows that the time for complete drying directly depends on the temperature. Accordingly, the higher it is, the faster the process will occur. And many are trying to speed up this process, namely, using thermal equipment. Because of this, the opposite effect occurs - the layer begins to collapse. This happens because the top area dries faster while the inside remains moist. That is, evaporation is disrupted.
- A simple layer of plaster cannot be more than 2 cm. If it is necessary to make it thicker, then use a reinforcing mesh. Then you can apply the composition up to five centimeters.
- It is worth paying close attention to outdoor work. Especially when a special brick is used (it is completely smooth). It is very difficult to plaster such a facade if you do not have the proper experience. Therefore, such work is entrusted to specialists who know the correct technology.
If you follow all the rules and tips for carrying out this event, then the question of how to properly plaster a brick wall will not arise. And all work will be completed independently and within a fairly reasonable time frame.
Plastering corners
The plaster of the walls looks smoother if you make even corners.
After placing the beacons, external corners are installed at the corners of the room.
The outer corners are set at the same height as the beacons and are used as additional beacons.
The best choice would be rigid painter perforated outer corners.
The internal corner is formed by leveling the adjacent walls using a rule, and then leveled with a polyurethane float at the grinding stage.
A few words about decor
Plaster of brick walls can also be used as a decorative finish. To do this, the surface is first prepared by applying a base base to the masonry, and then using special tools and application techniques, the room is decorated. This will look very unusual and attractive, and the walls in the room will have increased water-repellent and antiseptic properties. In addition, you can paint the walls with special emulsion paint and create a unique room interior. Nowadays the market offers a wide selection of paints and varnishes of various colors and modifications, which will allow you to bring the most extraordinary design idea to life.
How to plaster in the bathroom
When plastering walls in the bathroom, you need to take into account increased humidity and temperature changes. Only cement mortar meets these conditions and gypsum is not suitable in any case.
The main steps when leveling the walls in the bathroom are the same as when plastering the room. You just have to take into account the peculiarities of leveling the walls for decorative tiles.
Under the tiles it is necessary:
- plastering should be carried out according to the beacons;
- strict adherence to the geometry of the room;
- Pay special attention to the installation location of the bathtub or shower.
The angles should be 900 even if this means increasing the thickness of the plaster layer.
If the geometry of the room is violated, square decorative tiles will show all its irregularities when laid.
Selection of materials
Before starting work, you need to decide how to plaster the brick wall. The choice of material depends on the location of the finishing. It can be carried out outdoors or indoors. If the walls of a brick house are being leveled from the outside, then it is necessary to use cement-sand mortar. When the process is performed indoors with normal humidity, gypsum plaster is used, since the material is hygroscopic.
It is not recommended to use gypsum-based plaster to level structures that are subject to vibration loads. Otherwise, cracks will quickly appear on the material used.
You can reduce the likelihood of cracks using a reinforcing metal mesh with large cells. It is used when there are significant protrusions or depressions on the surface. Most often, the material is used for facade work in new houses.
For interior work, reinforcing plastic mesh is better suited. It is resistant to corrosion. This eliminates the possibility of rust stains appearing on the walls in an apartment or private house. The plastic mesh is also not affected by the aggressive environment of the plaster.
Apply the plaster layer inside the house with a thickness of 10-20 mm. If more material needs to be laid, then reinforcement must be used. Otherwise, the plaster will quickly fall off.
Beacons help to achieve a good result. This option is especially relevant for inexperienced finishers who do not know exactly how to properly plaster a brick wall themselves. Beacons are a special metal profile. Its height can be 6 or 10 mm. The first type of metal lath is used when unevenness on a brick wall structure is a maximum of 5 mm, and the second type of material is used for large differences.
You must remember to prepare a deep penetration primer. The composition increases the adhesion of the plaster mortar to a brick wall. As a result, the mixture will adhere better to the structure. After applying the primer, subsequent work is carried out only after it has completely dried.
Types of finishing
The main stages of leveling walls with plaster are the same, regardless of the material and finish. But there are some features that we will look at below.
Plaster for wallpaper
Plastering walls under wallpaper does not need to be perfectly even. It will be enough to properly level the wall with gypsum plaster. Small irregularities will be hidden under the wallpaper.
Before gluing wallpaper, be sure to prime the wall well.
Plaster under tiles
Tiles are used as decorative wall decoration in bathrooms and kitchens.
Choose cement plaster, as tiles glued with cement-based adhesive will adhere better to it.
The surface under the tiles does not need to be perfectly flat; it will be more important to create 90-degree angles.
Before gluing the tiles, prime the wall well.
Plaster for painting
The wall to be painted must be perfectly flat, otherwise all the irregularities will be clearly visible.
Before painting the wall you will have to not only plaster, but also putty.
We plaster it in the same way as for any other coating, but after that you must putty the wall with finishing putty and rub it with a felt float.
Useful tips
Plastering brick walls is not a very complicated process, but it requires, however, care and competent execution. You can do the work yourself, but violating the basic rules can lead to the fact that after some time the plaster will crack and crumble, and accordingly, you will have to change the decoration of the room or the facade of the building. To avoid such a problem, in addition to describing the work technology, experts give recommendations, based on which you can reduce work time, get a good result and extend the service life of the surface. Let's look at the main ones.
It should be noted that the range of materials for exterior finishing is quite wide. There is decorative brick, siding, ceramics and much more. Plaster occupies one of the main places. Connoisseurs of unusual design and new technologies will love the façade decorative plaster called “bark beetle.” It is used quite often and has become popular due to its appearance, which imitates wood damaged by bark beetles.
If plastering brick walls is carried out in rooms with high humidity, experts recommend adding lime to the mixture. This option will be appropriate when carrying out work in the basements of buildings. To increase plasticity, you can add a small amount of liquid soap to it. It must be taken into account that plastering should not be carried out at temperatures below 7 degrees.
If it is not possible to use cement mortar, experts recommend making a gypsum mixture. In cases where it is necessary to treat a wall with insulation, but it is impossible to use special materials, the situation will be saved by adding pumice. To check readiness, you should carry out a test application of the mixture. To do this, it is laid out pointwise with a thickness of 2-3 centimeters and must adhere firmly to the surface. If the layer is more than 7 centimeters thick, the mixture should drain.
It must be taken into account that if the building was built recently, it is necessary to allow time for its shrinkage. Any monolithic brick house is subject to this process. If a thick coating is required, a reinforcing mesh should be selected. This condition is especially relevant when carrying out outdoor work.
For information on plastering brick walls indoors, see the following video.
How to repair a crack in a wall
A crack in the wall can be repaired using plaster, no matter whether the defect is in the wall itself or in the old layer of plaster.
Depending on the size, you need to do the following:
If the crack is deep, then we widen it with a hatchet; you can widen a small gap and remove loose parts with a spatula.
To remove dust, apply a primer and wait for it to dry completely.
When the surface of the crack is cleaned, primed and completely dry, you can cover it with a solution.
After complete drying, apply a thin layer of mortar again to the place where the crack was, as the plaster shrinks.
To obtain a smooth surface, it must be rubbed with a polyurethane float.
Video instructions on how to plaster a wall with your own hands
Installation of beacons without laser
How to insulate a brick house from the outside under plaster
Plaster for external work on brick is different. The most suitable materials for insulation and external thermal insulation are:
- Mineral wool. Has high rates of water absorption and thermal insulation. However, the material is best used for interior work.
- Expanded polystyrene is a moisture-resistant material with high thermal insulation properties. The main disadvantage is flammability.
- Due to its strength, extruded polystyrene foam is an excellent material for exterior finishing of brick walls.
- Warm plaster has high sound insulation, vapor permeability, fire resistance, and low moisture absorption. However, the mass of the object after the work will increase, which necessitates the need to strengthen the foundation of the building.
What tools are needed?
To perform plastering work, the master must have special equipment, the necessary tools, and devices:
- Putty, primer, gypsum board;
- Dowels, painting beacons, wood;
- Hammer, grinder, circle;
- Perforator apparatus with mixer, hopper plaster gun;
- Wooden or laser building level, tape measure, timber;
- Thread, cotton wool, marker, glue;
- Mineral wool, wide spatula, paint brushes, textured and regular roller.
Also, when performing work, a specialist must have appropriate clothing, a hat, and gloves.
Preparing a brick wall for plastering internal surfaces and plastering the facade
Even when planning the work, you will need to decide how to properly plaster a brick wall. The durability of the finish depends on the preparation of the surface for applying the mixture.
The reasons for plaster lag are:
- layer of old coating;
- oil stains from paint;
- surface poorly cleaned of wallpaper residues.
Before applying the composition, the wall will need to be repaired. Assessing the evenness and inspecting the object allows you to determine how to properly plaster, outline the treatment area and calculate the need for materials.
Preparatory stages include:
- Completion of construction and installation of the wall.
- Cleaning of old coating, wallpaper and paint.
- Sealing cracks that serve as a source of condensation reduces sound insulation and increases heat loss.
- Expansion of masonry joints for strong adhesion of the plaster to the surface.
- Applying notches to create adhesion.
- Penetrating primer coating.
New wall
A brick wall, even a new one, needs a preparatory process before leveling and plastering the surface. The main task of the finishing mixture is to ensure high-quality adhesion and create conditions for masonry.
Preparatory work includes:
- expansion of masonry joints (1 cm deepening);
- scratching with a wire brush;
- treatment with bioprotection agents;
- removing residual grease and old grease.
old wall
Brickwork deteriorates over time and is partially stained. Chips and cracks form on the old surface, and the bricks become loose. During operation, the walls inside the premises become covered with stains; nails are often hammered into them, screws and other fasteners are screwed in. Before starting finishing work, you will need to prepare the old masonry.
Before applying new plaster coating:
- the wall is cleaned of old finishing;
- weak mortar and brick crumbs are removed from the seams;
- large gaps are filled with cement mixture;
- wobbly bricks are replaced or pulled out, and after cleaning they are inserted back, seated on the DSP;
- clean large chips and cracks from dust, and then fill them with a solution using a reinforcing mesh;
- stains are washed and treated with special products;
- foreign objects are removed, and metal parts are coated with oil paint.
After the work is done, the surface to be treated is cleaned of dust, covered with a layer of primer and dried. The preparatory stage ends with measurement, installation of beacons, and, if necessary, reinforcing mesh.
Plastering with cement mortar
Cement is suitable for plastering an external brick wall. When efflorescence is noticeable on the masonry, sanitizing plaster is used.
When preparing the solution yourself, mix M400 cement and sand in a 1:2 ratio. Add water to make a paste-like mass for spraying and covering, dough-like for the soil.
To plaster a brick wall with cement without any problems, follow the following rules:
- a canopy is made over the leveled brick surface from ultraviolet radiation and precipitation;
- work is carried out in calm weather;
- on a hot day, the plastered brickwork is covered with polyethylene to reduce moisture evaporation;
- if you plan to plaster the wall with a thick layer, then reinforcement must be used;
- internal and protruding corners are covered with perforated mesh plastic corners;
- Before applying the coating, the dried soil is treated with a primer in 2 approaches;
- the base is plastered so that the coating extends 5 cm below the ground surface.
The maximum possible thickness of cement plaster is 20 mm, the minimum is 10 mm. When reinforcing the wall, the thickness is increased to 50 mm.
For large work areas, it is better to use a ladle instead of a trowel. The advantage of the cement composition is that it does not require fast working speed. The worker can interrupt plastering at any time in order to evaluate the intermediate result and correct shortcomings.
The nuances of plastering brick walls from the outside
The surface to be treated is covered with a canopy to protect it from precipitation and sunlight. When plastering external walls with cement mortar, choose weather without wind. To prevent increased evaporation of moisture in the heat, the surface is covered with a film and, if necessary, regularly moistened. For carrying out plastering work, the acceptable ambient temperature is +5...+35 °C, and humidity ≤ 65%.
Before plastering begins, the electrical wiring is de-energized, and the trims and places for attaching switches and sockets are sealed with masking tape.
Exterior decoration has the following features:
- in mixtures prepared independently, it is recommended to include quicklime;
- the addition of porous substances (pumice, sawdust) increases the thermal insulation properties of the composition;
- Drying the plaster layer with a hairdryer or other methods is prohibited because it may promote cracking.
How to plaster walls with your own hands for a beginner: video and features of application to various surfaces
Modern production offers a wide variety of plaster mixtures. Before plastering walls with your own hands, you should familiarize yourself with the characteristics, composition and recommendations for use. Different surfaces require different approaches.
Brickwork works
Plastering brick walls can be done with either cement mortar or gypsum mixture. For exterior work, only a cement mixture is suitable. Since this type of work is carried out on the initial masonry, it must be completed flawlessly, avoiding swelling and defects. It is important to consider the time it takes to complete the brickwork. If the construction work was carried out not very long ago, the walls should be allowed to shrink for some time to prevent cracking.
Repair work on brick foundation
If you need to plaster brick walls with a previously applied finish, it should be completely removed. And only after complete cleansing of dust and dirt should you begin repair work. A brick base requires the installation of beacons, since the walls have quite large defects and deviations. All the following works are similar.
To help you learn how to plaster a brick wall with your own hands, you can familiarize yourself with the step-by-step process in the review, watch this video tutorial:
Work on concrete surfaces
For concrete walls, plastering work should be carried out more carefully. For better adhesion to the previous layer, the plaster should be rubbed in with some force for a more durable connection. Otherwise, the entire application process is no different from performing work on beacons.
Notched wall
Wooden wall plaster
The process of plastering wooden walls inside a house is somewhat different from the previous ones. The main difference is that plaster does not adhere to a clean wooden surface. First, you should make a frame from the lathing, which can be made of wooden slats or metal mesh.
When installing wooden sheathing or shingles, thin slats with dimensions from 3x15 to 5x20 mm are used. When purchasing, it is important to pay attention to the quality of the wood; it should have a light color. When fastening, the nails are not driven in completely, but to the middle, so that the head can be bent and additionally press the rail.
Advice! To prevent deformation of the shingles, all ends of the planks should be well secured.
Lathing a wooden surface
Under the sheathing, you can install additional thermal insulation from felt, after pre-impregnating it with an antiseptic. The metal mesh is attached in a similar way.
Before plastering a wooden wall, carefully watch the instructional videos. The process is not complicated, but you should know many nuances of the technological sequence. The mixture is applied as usual. You need to be careful when pouring the mortar onto the sheathing; there may be voids behind it. Therefore, work should be performed at an angle of 45° alternately on one side and the other.
Foundation plaster
Before plastering the foundation of a house with your own hands, you must completely clean all surfaces of dirt, dust and greasy deposits. If the concrete base is more than a year old, you can apply notches for better adhesion of the mortar. On a brick foundation, use a spatula to clean all the seams from the old mortar.
In the second stage, all surfaces are generously primed, then deep defects are leveled with cement mortar. The same mixture should be used to fill previously cleaned joints in the brickwork.
To ensure reliable adhesion of the mortar to the foundation, you can pre-tension and secure the metal mesh. After which you can begin the technological sequence of applying cement mortar. All work must be carried out in warm, dry weather.
Good to know! To improve the quality of the cement mortar, you can add PVA glue, thanks to which the mortar will acquire some plasticity and will be easier to work with.
Metal mesh on the foundation