Features of bathroom renovation
The bathroom belongs to premises with difficult operating conditions.
There are constantly significant changes in temperature and humidity. Not every building material can withstand such exposure. One of them is ceramic cladding. It will last a very long time provided that it is laid on a properly prepared base. Therefore, it is important to know how to plaster the walls under the tiles in the bathroom
The first mixture you come across in the store is unlikely to work. After all, it must meet a number of requirements:
- Resistance to prolonged exposure to moisture and its vapors.
- Lack of conditions for the development of mold and mildew.
- Environmentally friendly, that is, safe for human health.
- Resistance to regular temperature changes.
A good mixture combines all these properties. In addition, high adhesion to the base material is important. Otherwise, the composition simply will not stay on the wall.
Selection of composition for leveling
The specifics of the bathroom determine certain requirements for plaster compositions:
- increased resistance to moisture, including prolonged contact with water;
- resistance to fungi;
- no shrinkage;
- environmental Safety;
- resistance to temperature changes.
The plaster mixture must withstand high humidity well and resist mold
Leveling plaster mixtures that are commercially available are made from cement or gypsum. Cement plasters are initially waterproof and are widely used in rooms with high humidity and for outdoor use. But gypsum compositions, due to the hygroscopicity of the main component, were used for a very long time only in dry rooms. Nowadays, special additives and modifiers are added to gypsum plasters, which significantly increase their moisture resistance, so in some cases they can be used in bathrooms and toilets. Let's take a closer look at their characteristics.
Silicone plaster in the bathroom
Silicone mixture is good as a decorative cladding. It is hydrophobic, durable, adheres well to any type of coating, and is “long-lasting” (operation lasts up to 60 years). The silicone composition is not favored by bioaggressors (mold, fungi). The silicone-based plaster coating is easy to clean. Ready-made mixtures are easy to tint, and the choice of colors for the compositions offered by manufacturers is varied. Disadvantage: high cost, unsuitable for leveling.
Sanitation mixtures
Vapor-permeable, but low-porous sanitizing compounds are capable of retaining salts that easily come out of wall materials along with water moving through the capillaries. Thus, they protect wall materials from leaching and prevent the appearance of efflorescence on the surface. They also make a good waterproof plaster for bathroom walls.
They are applied for leveling and sanitizing walls. Sanitation mixtures are elastic. If you apply this material in a thick layer, it will not crack when it dries. The downside is that it takes a long time to gain strength. The finishing coat can be applied to the sanitizing coating only 7 days after plastering.
Most popular mixtures
Manufacturers offer different materials that can be used as bathroom plaster. For example, waterproof plaster mixtures from the companies Ceresit and Knauf have deservedly become popular. The Ceresit line includes not only ready-made waterproofing mixture CR 65, but also other compositions used for the bathroom. For example, a cement-based mixture - CT 24, decorative acrylic, silicone and cement-polymer compositions.
Knauf has established itself as a manufacturer of high-quality materials. For bathrooms and bathrooms, she offers modified Rotband gypsum mixture, Unterputz cement mixture, and Sevener universal plaster-adhesive mixture.
Kreps Master, Caparol Streichputz and others are also popular.
The choice is always yours.
After reading this article, you learned the best way to plaster a bathroom, what plaster to choose, and how to plaster uneven walls. We hope that the use of this information will be useful to you many times.
Is it possible to level the walls in the bathroom with a rotband?
Sergey KiryanovDo I need to remove old plaster before plastering walls? If it bunches and peels off, then definitely remove all of it, without a doubt. If it holds well, see how thick it is - because of the extra 2-3 cm, it’s better not to start folding. And first figure out how you will level... Leveling walls and ceilings begins with removing old wallpaper, old putty, if necessary, then old, poorly adhering plaster and old ceramic tiles to a solid base. If this is not done,
Vladimir Zhelezov
Tell. who knows. Is it necessary to level the wall itself under the tiles on the wall Level it if the wall is too littered If you use a little mortar on the tile to level it Level it with anything - the simplest thing is a cement-sand mixture - 1 part cement + 3 parts sand Leveling is a must! I recommend not a rod band, but a CPS (cement-sand mixture) since the rod band is not moisture resistant. It is advisable to make a notch or attach a plaster mesh.
Larisa Antusheva
Curved walls after finishing The maximum layer for finishing putty is up to 1 mm, and it has a smooth surface, not suitable for further leveling. If possible, remove the putty layer or make frequent notches, then treat the wall with high-quality concrete contact. We can only guess - 1. what curvature 2. what brand of your plaster. The algorithm of actions is as follows: 1. READ INSTRUCTIONS FOR DRY CONSTRUCTION MIXTURES. They are printed directly on the bags. Then question No. 2 will disappear by itself 2. Read Nikolai Zaitsev’s response.
Oksana Strelkova
Help, we bought an apartment and need to do some renovations, where to start, how to finish the flow in the rooms, the walls in the bathroom, etc. etc. If the walls allow it, level it with a rotband along the beacons, putty-painting, gluing Bathroom-sand concrete M300, tiles You can’t tell such things so easily, there are a lot of work involved and you need to look at your walls, ceiling, floor, whether you need to do electrical work , plumbing. In short, there is no such thing as cheap and good. only one thing.
Lyubov Bedanova
Question for the pros? Rothband. golband or figenfühler. Rotband is of course better, but no more than 5cm in one layer. Only the one listed earlier has errors, and this is a correction: Only for holband, you need a special mixing apparatus, something like a concrete mixer. And figenfühler is a putty, and... How to level the walls And here a person asked about plaster and putty, they answered him. The article “We plaster quickly”, or better yet, go to the PoRemont website. RU and see for yourself.
Andrey Kontsevoy
How to smooth a bathroom wall and remove paint from the wall? I did not apply anything under the tiles to the brick wall. Cement mortar, added bustylate. I laid the tiles myself, leveling the wall with the level of the mortar applied under the tiles. Trouble, but without preliminary manipulations. The main thing... If the size of the bathroom allows, then it is better to make everything from plasterboard brand GVLV (10mm) 1.2 * 2.5m with a profile, of course (it withstands moisture well, even leveling the floor is permissible, so you can quickly level the walls and tiles...
Petr Metalnikov
ABOUT PREPARING THE SURFACE FOR LAYING TILES. The surface is always leveled and beacons are made. Centimeter dips are better to be leveled with plaster, otherwise a lot of glue will be wasted, and to prevent the walls from being “sucked off”, they are primed before applying the glue. There is rough plaster, it is much cheaper than rotband - just right for a bath. But you can also use glue, although the glue will cost an order of magnitude more. And the fact that you have to wait until the bottom layer dries is complete crap.
Yulia Krotova
Processing a brick wall in an old house Everything is correct, you only have point 3, exclude in its place caulk with mortar with pieces of brick if you need it according to point 8 it will be very expensive considering the thickness of the layer, maybe it’s better to use cement plasters and not gypsum, ACRYLIC putty... Ohhh what a textured wall I would leave It will be easier this way: Tear off everything that comes off Vacuum clean Primer Make wiring Level the walls with Knauf start Primer Finish putty (Knauf finish) Primer Paint or glue wallpaper
Kristina Lokhotskaya
Need advice on finishing the inside of the house (SEE PHOTO) Sew up the “shingles” with plasterboard. Plaster the adobe, before attaching a reinforcing mesh to the wall, preferably metal. If the floors are good, just cover them with plywood, and then even laminate or linoleum. For plaster - “Rotband”, for... Judging by the questions, you need to hire specialists. Pipes. batteries. The electrical wiring needs to be replaced. level the walls. We are sure. what can you handle? I read it in the answer. It’s not true that laminate flooring can be laid on a screed in less than a week. Poured...
Galina Potkina
What wall unevenness is allowed when laying tiles on the wall? A wall slope of 0.2% is allowed. Best regards. It’s best to stretch the wall with the Rotband mixture, but you’ll have to stretch it from the floor to the ceiling. And the wall will be smooth, and there will be no problems with the tiles. It’s better to compensate with plaster, otherwise it will be more difficult to compensate for the slope with tile adhesive. Work calmly with glue. Depends on who will do the work. I know a case when the customer, when accepting the work, put a dollar on the wall and forced everything to be redone.
Veronica Zhuravleva
What is the best way to level walls? Who has any experience? Generally rotbant. But my wall was sooooo crooked, when I figured out how much I needed, I made do with drywall. Cheap and cheerful Ideally, cover it with plasterboard, level it with plaster - everything else depends on the specialists and on laziness - and you can always drive over your ears - if you don’t know how. Drywall Drywall is good, of course, but if you later decide to hang something on this wall, difficulties may arise
Vadim Okunev
How to level the wall? with a depth difference of 5 cm. Rotband, along lighthouses Plaster in one layer! It will be stronger Knauf warns that plastering with a second layer is not good! And the second layer can be applied ONLY after the first has COMPLETELY dried. Be sure to prime with Tiefengrund and apply furrows... Either cement-sand mortar or gypsum plaster. There is a wide choice in construction stores. Drywall
Irina Lopatkina
Is it possible to level upholstered fiberboard panels with putty? There is a special adhesive primer based on alkyd resins “OTEX (Tikkurila)”. Return 8-10 m2 / 1 l In a day you can even plaster with “Rotband”. Tested by time and many years of experience. Theoretically, if it’s a small area, it’s possible, but there’s no wall – if the humidity changes, the fiberboard will bring unpleasant surprises. Yes, level as much as you want, just take the appropriate putty! There is a special agent for this based on ketones and plastic or acrylic
Gleb Zubkov
How to build a straight brick wall in an apartment? Do you accidentally lay brick on brick? in the same place with a shift of half a brick it is necessary. How do you install the brick? Not edgewise? In short - the best - bars. smooth. put one on the level - the end of the wall. the second block - on the side of the brick - next to the first - it looks like the letter G. In short, this is how the letter looks and you put it. The ends of the bars rest against the floor and ceiling. if you cut it...
Daria Vashutkina
How to properly level the walls in the bathroom? So, it needs to be cut off in at least an hour if the sand-lime brick is red, then after half an hour. I plaster the Basinovsky concrete bowls - I put it on in the morning - in the evening you cut it off at about 5 hours. Plus, before that, the fur coat needs to be put on with liquid and it will be off for a day... Sheathe it with waterproof gypsum, between insulate the walls and gypsum with polystyrene foam, and then whatever your heart desires, tiles, painting, etc.
Valeria Fatieva
Kitchen renovation in Khrushchev. How to scrape off old tile adhesive from walls (+) Hammer and spatula – attachment. Low power and forward. Filmed with a Varyag hammer drill. It has a dust cap. The process was not tedious. Bale with a hatchet with a hammer drill. Rip off the paint with a grinder and a metal brush. Dust will require a respirator and glasses. There is no need to compare anything with Rothband. Ordinary plaster costs 90 rubles and rotband costs 5 times more.
Tatiana Kuznetsova
About plastering the wall Don’t listen to these clever theorists, your plan is absolutely correct. And these craftsmen with axes would like to remind people of the basic rule of repair - We remove everything that does not hold well. We leave everything that holds tightly. The paint softens when it is heated, for example with an iron through a newspaper. Smart girl! -Learn to plaster so as not to sand and, accordingly, not to prime, you will save time and effort in 2 operations
Yaroslav Apraksin
Liquid glass Nonsense What kind of waterproofing can be made from silicate (office) glue? Think about something else - so that the tiles don’t fall off later from this mixture. The PCB mixture sets so quickly. Wait half an hour after applying it and cut it to dry... Cement-sand mixture = 1 hour of cement+ 3 hours of sand and for 1 bucket of cement 1 ladle (plaster) of gypsum. A good plaster mixture hardens quickly, but only on brick walls. Plaster mixtures are applied to a concrete wall
Semyon Gorbatykh
Which plaster to choose? It is better to ask the sellers about such things. They know for sure. The cheapest cement + sand - for the lazy, a ready-made mixture is sold called “gartsovka”, marked M150) Hello. In the bathroom (wet room) exclusively cement compositions are used, this can be a CPS solution mixed independently or a cement-based plaster mixture with plasticizers, which is the most durable,
Fedor Egorov
Is it possible to put one layer of rotbanton 8 cm thick? It’s possible, if it’s not putty. It’s better to glue the gypsum board sheets with glue for them from Knauf. This is how I leveled the wall at home. Glue broken bricks there on the same rotband and put it on top. You can even foam it or glue polystyrene under the finishing layer 10mm
Instructions for plastering bathroom walls
Technologically, the process of leveling walls in a bathroom is no different from plastering in other rooms. The main feature is to correctly determine which plaster is best for the bathroom for tiling and painting.
The material must be moisture resistant and durable. The best option is to use cement-based mixtures. In some cases, when providing additional waterproofing, the use of compositions based on gypsum binders is allowed.
Plastering walls with cement-sand mixtures is carried out in several successive stages:
- completely remove the old finishing coating, if any;
- repair existing cracks, chips, individual depressions and other defects using “cement laitance” or liquid cement mortar;
- treat the concrete surface with a special liquid “concrete contact”; for bricks and remnants of old plaster, 2 layers of deeply penetrating soil or primer are sufficient;
- using a laser level or an ordinary plumb line, determine the location of the maximum deviation of the wall surface from the vertical;
- in the most protruding places, add 30 mm (minimum layer of plaster) and draw chalk lines on the floor and adjacent walls corresponding to these distances;
- when preparing a wall for painting, it is recommended to install beacons that can be fixed vertically using an ordinary building level and focusing on the drawn lines;
- when plastering under tiles, the small wall area makes it possible to avoid installing beacons; leveling is ensured by the tile material;
- After determining the thickness of the plaster layer, you can go and buy the necessary material, since you will be able to calculate its quantity.
Preparation of gypsum mortar.
After purchasing the components for preparing a plaster mortar or a ready-made dry mixture, you can begin applying plaster to the surface. This is done in the following sequence:
- the first layer is called spray and is made with a thin layer of liquid mortar with a 1:1 ratio of sand and cement;
- after the spray layer has set, which serves to improve the adhesion of the plaster layer to the wall, apply a leveling layer of average thickness 30 mm, minimum layer 10 mm, maximum 50 mm;
- if 50 mm of plaster is not enough to obtain a flat surface, then the second layer can be applied only after the previous one has set;
- when finishing with ceramic tiles, plastering work ends here;
- Painting the wall requires additional putty and sanding of the top layer.
Plastering walls for laying tiles or painting is an important technological part of the work, which will ensure the strength and durability of the finish.
https://youtube.com/watch?v=4iITYn15c9k
How to properly plaster bathroom walls
The process of plastering walls in the bathroom is no different from classical technologies. It consists of several stages (let’s look at the example of a cement-sand mixture).
- Old finishing is removed (in newly built houses such a technological operation is not necessary).
- The wall is being repaired: loose bricks are removed, cracks, chips and potholes are sealed with repair mortar (“cement laitance”).
- The surface is degreased and then primed with a deep penetration primer (for concrete it is necessary to use “Betonokontakt”).
For reference: using “Betonokontakt” on other wall materials gives almost the same effect, but is much more expensive.
- The most protruding point on each wall is determined by hanging.
- 3 cm is added to the found convexity, after which the plane of the plaster layer is constructed. The boundaries of the plaster can be fixed with beacons, which is very difficult (this technology is discussed in detail in the work “Plastering walls using beacons with your own hands”) or with chalk on the floor, ceiling and adjacent walls (a contour is applied), which can be read in detail in the material “How to level walls without do-it-yourself beacons." Note that the small area of the walls allows even an inexperienced finisher to perform plastering work without beacons quite skillfully.
- The necessary building materials are purchased, tools and devices are prepared (the types and purpose of each tool can be seen in the work “How to properly plaster a brick wall?”).
- A spray solution is mixed with an equal ratio of cement and sand (proportion 1:1).
- The first layer of plaster, several millimeters thick (3-5), is applied (its task is to ensure good adhesion of the leveling layer of mortar to the wall).
- After the first layer has set, a leveling layer is applied (among plasterers it is called “primer”) with a solution with different proportions: Portland cement M500 (1 part) and sand (3 parts).
- The wall is first plastered in a small area in the corner. Then successively in small sections around the entire perimeter. The level and the rule control the plane of the plaster horizontally and vertically. The landmark is a contour drawn on the floor and walls. After the first row is looped, everything continues in the same sequence.
- For tiles, plastering work ends here. The final stages are carried out before painting: a finishing layer of plaster (2-3 mm), called “covering”, is applied, and then grouting is carried out.
- The process is completed by filling the surface with polymer compounds (they are not afraid of water), after which the wall is sanded with fine sandpaper (P100).
Preparing to plaster the walls in the bathroom
Before plastering a bathroom wall under tiles, you should be sure to remove all traces of the previous coating: paint, wallpaper or old tiles (for more information on preparing the wall for laying tiles, see here). During the preparation process, you need to remove any stains (for example, from rust or mold). The fastest way to get rid of them is with a blowtorch.
After the work surface has been cleaned, it is necessary to apply small notches on it (strokes up to 0.5 cm deep and up to 1.5 cm long). This will increase the adhesion of the plaster to the walls. It is not necessary to apply notches to brick enclosing structures with unfilled seams. Next, place the beacons along which the plaster layer will be leveled. The distance between these guides should be about 700 mm. The last stage of preparation is applying the solution in three layers.
If the bathroom walls are made of wood (this is common in wooden houses), there is no need to plaster them. Before laying the tiles, a metal mesh and thin slats should be secured to the working surface, which will provide a rough surface. On such a frame, ceramics hold up no worse than on brick or concrete walls with notches.
Technology for applying plaster to bathroom walls
The final stage of plastering the walls in the bathroom includes several stages:
- applying a starting solution (“spray”), it is needed to fill openings and cracks in enclosing structures. To do this, the wall must be moistened with water (with a brush or from a spray bottle), and then a solution is applied to it (which does not need to be leveled);
- the device of the rough layer, which needs to be leveled with a spatula, should be 0.5 mm thick;
- applying a finishing layer no more than 0.2 cm thick (must be done only after the rough finish has completely dried).
The last layer must be leveled with a spatula or a rule. In this case, the instrument is held at an angle of 20 degrees. Then the surface is additionally rubbed with a float. After the material has completely hardened (after about 24 hours), they begin laying tiles on the walls. It is undesirable for the last layer of plaster to dry ahead of schedule. In order to prolong the process, which is carried out in the summer (when drying occurs much faster due to the heat), the wall is periodically moistened with water.
Features of plastering walls in the bathroom
When plastering walls in a bathroom under tiles, it is recommended to follow certain rules:
- if there are unfilled seams on a brick, they are not only not sealed, but even specially expanded;
- the density of each layer is selected according to its thickness. The consistency is adjusted by diluting the solution with water. The first layer should be the most liquid, and the plaster that is applied last should be the densest;
- when choosing gypsum-based materials as a plaster mortar, it is necessary to install a plastic mesh on the walls.
Another important nuance is that the temperature of the water with which the dry mixture for plaster is diluted should be within 15–20 degrees. It should also be taken into account that the solution production time should not exceed 20 minutes; after this period, a new portion should be prepared. Compliance with all requirements for applying the plaster layer leads to obtaining a high-quality result even when the work is performed by a not very experienced performer.
How to level the walls in the bathroom to match the tiles, is it necessary to plaster the walls?
Homeowners can only dream about perfectly smooth walls.
Upon careful inspection, it is easy to determine the presence of irregularities; each of them will ultimately be noticeable after installation of the finishing trim, in our case, tiles.
Experts recommend taking the issue of preparation with the utmost seriousness; this work is not very difficult, but it will require care and time.
An important point is that the reliability of fixing tiles on an uneven surface is always reduced.
There are two options for leveling the walls in the bathroom with tiles:
- wet, implying the use of plaster;
- dry, when an ideal surface is created by covering with plasterboard.
To decide on an option, you need to determine the scale of the unevenness. A plumb line, with which it is easy to see the vertical curvature, and a horizontal level will help with this. You can also use a cord stretched along the entire wall to measure horizontal curvature.
If the differences do not exceed 3-5 cm, building mixtures can be used to eliminate defects. Their advantage is the ability to save space.
But before applying fresh plaster, the surface will need to be thoroughly cleaned. Sometimes they resort to plastering even when the walls have a large curvature, but the work will become much more complicated and its cost will increase.
Usually in such cases a decision is made to install drywall.
The disadvantages of this method are usually noted:
- loss of the already small bathroom space;
- inability of the plasterboard base to withstand significant loads.
But installation of drywall is done quickly; in the voids formed between the wall and the layer of drywall, it is easy to hide all the necessary pipes and electrical wires.
However, upon completion of installation of the sheets, you will need to putty the surfaces and prime them. If upon inspection it is discovered that the surface of the walls has virtually no unevenness, then leveling can be abandoned. Minor cracks and holes, the dimensions of which are much smaller than the size of the tiles, do not need to be sealed.
Calculation of area and necessary materials
To finish a bathroom tile, on average you need to lay a mixture 20 mm thick on the surface. This value is effective, it will protect the walls from moisture, the load-bearing layer will be strong and stable, which will allow you to attach various bath accessories if necessary.
The calculation is carried out taking into account the thickness of the application layer. Differences in vertical planes are measured by applying a flat rod. If the layer thickness is 20 mm, at least 16 kg will be required, so one 25 kg bag will not be enough for 2 sq.m. If the layer thickness is 10 mm, then it will be enough to lay the solution on 3-4 sq.m.
For example, a room is 6 sq.m., and the ceilings are 3 m high, then 10-20 bags will be required, based on the thickness of the layer.
Aligning the walls in the bathroom according to beacons
To avoid possible mistakes when leveling walls, beacons are installed.
This is the name for profiles that can be purchased at any construction market. If you have no experience, you should not try to create lighthouses yourself using cement mortar or gypsum. It is unlikely that you will be able to create even stripes on your own, but the joints will create an area of increased risk of detachment of the main mortar. Beacons are installed starting from the corners, the distance between them should not exceed 10 cm. Using screws screwed into the wall up to the head, along the line of placement of the beacons, will help maintain the correct installation level.
A plumb line is attached to the top screw, the heads of the others are aligned along its line. This procedure is carried out along each of the profile installation lines. You will also need to draw right angles between the surfaces: the leveled one and other walls in the room.
After this, the installation of the profiles themselves begins. They are laid in such a way that the base is located on the heads of the screws and is slightly recessed into the solution tubercles pre-applied along the profile placement line.
Let's watch a video on how to set up beacons:
Applying the plaster begins after the solution has dried. If the thickness of the plaster layer exceeds 10 - 15 mm, then the process will need to be carried out in two stages, in the first, the layer applied should not exceed 5-10 mm, after it dries, the thickness of the layer is added to the required one.
The solution is applied in excess, then leveled using the rule, its ends should rest against the beacon profile. The best option is to create a flat surface from the first approach.
Craftsmen recommend starting to remove the corners after the applied solution has stuck, but is still quite wet. To simplify the work, you can use a trowel to create internal corners.
After the surface has dried, the beacons should be removed, the remaining strips should be sealed with a solution, the finished areas will serve as a level. If you plan to lay tiles, the profiles can be left in the walls.
Mixture application technology
Let's consider the main aspects of applying the material in the correct sequence:
- The first task should be to prepare the surface. This stage involves removing old layers, protrusions and cracks. The surface is treated with special compounds and a primer; In general, working with plaster is not particularly difficult even for a non-professional
- If the walls were previously covered with oil paint, then the owner has only two options. The first involves removing the paint, and the second is covering it with a special primer with a high adhesion rate. Despite the fact that the first option looks more reliable, some difficulties may arise with removing the paint. The fact is that the plaster in old houses was often additionally treated with drying oil. And such impregnation does not allow the new leveling mixture to adhere tightly. However, it is better to tinker with it than to lose money on expensive tiles later;
- When applying waterproof material, it is necessary to calculate the layer thickness within 2-3 cm;
Plaster can be a good base for future tiling
Criteria for choosing plaster
Which plaster is most suitable for a bathroom? Of the huge number of tips, the main one should be taken into account - when plastering surfaces in rooms with high humidity, you should not use gypsum mortar. It is not moisture resistant, so it will quickly crack and peel off from the base. Despite the strong recommendations of sellers, it would be a mistake to choose this particular type and agree with their opinions. To make sure you are right, you can read about the properties of gypsum.
The best option would be to choose cement mortar. Cement plaster with the addition of lime will add one advantage - it will provide plasticity. Thanks to this inherent property, the laying of tiles will be better. Plasticity will make it possible for the mortar mixture to lie flat on the surface under the influence of force.
Plaster should not be cheap - this is another important argument when choosing. It is best to buy a mixture from a trusted manufacturer, after reading customer reviews on the website or consulting with friends or builders. This will ensure a guarantee of reliability and quality of choice.
Gypsum plasticizers
The use of additives in the composition helps improve the quality of the finished mass. Industrially produced material does not require the introduction of additional components. The additive can disrupt the structure of the finished solution and impair strength and elasticity.
Plasticizers are introduced into the composition, if the mixture is prepared independently at home, then plasticizers are needed to improve the quality and uniformity of the mixture.
What to add to the gypsum solution:
- wood glue 1% by volume – improves the structure of the finished mass and makes it more elastic;
- lime 5% of the total mass - reduces the setting time of the coating with the base;
- tartaric or citric acid 10 g per 1 liter of water - increases the drying time, which makes it possible to straighten the surface.
Wood glue
You don’t need to add all the components, just dilute one thing in water and this will help create a working solution that is convenient for use.
Construction stores sell complex plasticizers for gypsum mixtures, which regulate the setting moment and facilitate the application of plaster to the surface. Add chemicals during mixing according to the manufacturer's instructions.
Characteristics of moisture-resistant plaster
Any moisture-resistant plaster must have high technical and operational characteristics. But the following parameters deserve special attention:
- compressive strength grade;
- adhesion to the base;
- the maximum possible layer thickness is usually 10-30 mm;
- the viability of the solution is at least 90 minutes.
Photo 1. Moisture-resistant plaster mixture from the manufacturer Volma
If the mixture will be used for exterior finishing, it is additionally required to take into account frost resistance, which must be at least F35. When choosing based on the above characteristics, you are guaranteed to buy a high-quality composition that will be convenient to use and will last for decades.
When do walls need to be plastered?
Master finishers know for sure that the base for the tiles should be level, without significant differences. Whereas to non-specialists any surface without noticeable defects may seem like this. You must understand that even if the walls are plastered or made of outwardly smooth concrete slabs, this does not mean that they are ready for cladding.
Mass construction with machine plastering does not involve leveling the surface. Beacons are not used here, which means that height differences can reach several tens of millimeters. This is a lot and will be very noticeable, for example, in corners where the cladding simply “does not fit” or at the junction of the edge of the bathtub and the wall.
Concrete slabs are rarely aligned strictly vertically. Often they are “filled up” by at least 10-20 mm. According to building regulations, this is a completely acceptable error, but for finishers it is too much. Thus, it turns out that alignment is necessary. To verify this, it is enough to take measurements by attaching a long rule to the base. If the differences are more than 2-3 mm per linear meter, you will have to level the surface before gluing tiles onto it.
Instagram shtukaturkarostov ru Machine plastering does not require perfect leveling, so the wall needs to be prepared for the tiles
Sometimes you can hear that unevenness in the base can be leveled out using tile adhesive. Indeed, by adjusting the thickness of the solution layer, you can level the base. But this should only be done for very minor differences. Firstly, leveling with glue increases its consumption, and this is not cheap. Secondly, the cladding laid on a thick layer of tile mixture will “float” and will not hold firmly enough. There is a high probability that it will fall off quickly.
Disadvantages and advantages of gypsum-based mixtures
The low density of gypsum stone is a feature from which its positive qualities flow. Therefore, the only disadvantage can be considered the lack of moisture resistance. Indeed, the subtle internal bonds of the material structure dissolve in water or are eroded by it with sufficiently long exposure. This factor is the reason for the ongoing debate about plastering bathroom walls with gypsum plasters. However, almost no one doubts the admissibility of using, for example, gypsum fiber in wet rooms. But it is made from the same gypsum.
But nothing prevents you from protecting the gypsum mixture applied to the wall. Moreover, the positive aspects of the material will then appear fully. Among the advantages of gypsum, the following are noted:
- Application speed;
- Easy to form smooth surfaces;
- Almost complete absence of shrinkage and low weight;
- Comfortable elasticity;
- High adhesive properties;
- Possibility of using reinforcing materials - fiberglass, mesh;
- Ease of application of protective and finishing coatings.
One of the main advantages of the material is its drying speed. It is often the decisive criterion when choosing a leveling mixture. Even when there are doubts about whether it is possible to level the walls in the bathroom with gypsum plaster. The setting of such a solution occurs within an hour, and only then it can be processed or the next layer can be applied.
Mixtures for leveling walls in the bathroom
If we consider the question of how to level the walls in the bathroom under tiles, while creating a surface with ideal characteristics, then we should discuss the option of using polymer-modified mixtures.
They are divided into two types:
- based on gypsum, intended for use in indoor premises, the humidity and temperature conditions in which are considered normal. When using such mixtures in damp rooms, treatment with a primer with waterproofing properties will be required;
- cement-based, durable, waterproof, resistant to low temperatures, with a long service life. Mixtures are available for sale for applying a thick layer (within 5o mm) or thin (within 20 mm). The presence of high-quality binder components and fillers in the mixture allows you to refuse to use a plaster mesh when applying a thick layer. If the mesh is still used, then the distance between the wall and the mesh should be approximately 1-2 mm.
Is additional waterproofing necessary?
Answering the question whether it is possible to lay tiles directly on a layer of leveling mixture, experts still advise first protecting it from water. If a shower stall is installed, it is useful to apply a waterproofing layer to the layer of plaster in the area where the shower head is located. It is possible to use coating materials rather than rolls – the most modern and effective type of waterproofing. Before laying the tiles, coating materials are applied to the walls using a roller or brush. They do not allow moisture to pass through, but allow the walls to “breathe”. This property prevents the appearance of layered bubbles, which become the culprits of tile peeling. After applying a layer of waterproofing, the plastered wall becomes flexible and ductile.
About Rotband plaster
Dry mixture Rotband is a type of gypsum plaster mixture intended for leveling the surfaces of walls and ceilings.
According to the instructions and if you have experience working with gypsum mixtures, Rotband quality allows you to skip the puttying process and immediately paint or wallpaper the plastered surfaces.
The mirror-smooth surface of Rotband is achieved by rubbing and smoothing the surface. However, such a smoothed surface is not needed for laying tiles; it is enough to bring the walls of the bathroom or toilet into the correct geometry according to the levels.
Aligning walls in the bathroom with Rotband
Although in bathroom conditions it is recommended to use cement-sand compositions for plastering, the use of high-quality gypsum mixtures, for example, Rotband, is not prohibited.
This putty can withstand high humidity. Rotband can be applied to the following surfaces:
- plastered, concrete;
- brick;
- polystyrene foam.
It is not difficult to calculate the amount of dry mixture; when applying a 10 mm layer to each square meter of wall and ceiling surface, 8.5 kg of mixture will be required. Those. a bag weighing 30 kg is enough for about 3.5 sq.m. surfaces.
Don't forget that a primer will be required.
Surface preparation consists of cleaning it from dust, exfoliation, dirt; it must be dry. It is recommended to treat metal parts with anti-corrosion agents. Work should be carried out at temperatures above + 5 C.
The solution should be prepared strictly according to the instructions:
- for 30 kg of dry mixture take 18 liters of water;
- the mixture is poured into water, and not vice versa;
- use a mixer to obtain a homogeneous mass;
- the resulting mixture is kept for 5 minutes and mixed again;
- the mixture remains in working condition for half an hour;
- It is not allowed to add dry mixture or water to the prepared solution.
Which plaster to choose for the bathroom
When purchasing a building mixture for finishing, several factors should be taken into account:
- base (what the walls are made of);
- finishing stage (painting, tiling, whitewashing, etc.).
For rooms with high humidity, you can use the following types of finishing materials:
- Moisture resistant. The surface does not allow moisture in the air to pass through.
- Hydrophobic. They create a protective layer on the surface that repels water.
- Sanitizing. The porous structure of the finishing material facilitates the rapid release of moisture into the atmosphere.
In addition to water-repellent properties, when choosing plaster for a bathroom or toilet, you should evaluate other qualities of the finishing material.
What else is important to take into account:
- durability;
- plastic;
- environmental friendliness;
- suitability for partial repair;
- vapor permeability;
- resistance to fungus;
- decorative properties (if the plaster is finishing), etc.
Cement
Due to their reasonable cost and high technical characteristics, cement mixtures have become widely popular. This bathroom plaster is waterproof, but in most cases it is used to level the surface. Its composition is based on cement and sand. Polymer or lime impurities may also be present.
You can prepare cement-based plaster yourself or purchase ready-made products. The finishing coat can be paint or tiling.
Can I use gypsum plaster?
Gypsum-based plasters are popular because... They are distinguished by ease of application, durability and quick setting (hardening time). The disadvantage of this composition is that it absorbs water well. For this reason, experts do not recommend finishing with gypsum mixtures if the room has high humidity.
But the possibility of using this building material for plaster should not be completely ruled out. If you take a gypsum mixture containing modifying additives, and then additionally apply a hydrophobic coating, the finishing material will be suitable for use in a bathroom or toilet.
Silicone
When choosing what to plaster the walls in the bathroom with, you can pay attention to silicone products. Its advantages include:
Its advantages include:
- durability (service life about 60 years);
- high decorative properties;
- breathability;
- hydrophobicity;
- strength;
- good adhesion.
Silicone bathroom plaster is sold as a ready-made mixture. After opening the package and thoroughly mixing, the composition can be immediately used for plastering the surface. The color of the mixture can be basic (white) or colored. In the first option, the consumer is given the opportunity to tint the putty independently. An additional advantage of the building mixture is its resistance to the appearance of fungal microflora.
The disadvantages of the material include high cost. But if you take into account the durability of the coating, the repair costs will be justified.
Silicone waterproof plaster for the bathroom will allow you to perform wet cleaning, i.e. the surface can be washed without the risk of damage. If the walls in the bathroom will be plastered with a silicone compound, then the areas must first be leveled. This product can only hide minor surface defects.
Sanitizing mixture
You can plaster the walls or ceiling in the bathroom with sanitizing compounds. Finishing with such material will allow you to level the surface, because... Thick layers are allowed. When dry, the putty does not crack.
The advantage of the mixture is that it:
- elastic;
- prevents the deposition of salts and their release to the surface;
- has a high level of vapor permeability;
- environmentally friendly;
- is a waterproofing material, etc.
The disadvantages include a long setting period. Before continuing construction work, the sanitizing plaster in the bathroom must sit for a week.
Suitable types of decorative plaster for baths and toilets
Moisture-resistant plaster for a bathroom or toilet can be based on:
- cement;
- acrylic;
- silicone;
- silicate;
- polymers.
Due to the high humidity in the room, when choosing a design, it is recommended to abandon the relief finish. If you neglect this advice, then you will have difficulties with cleaning in the future.
Dirt will accumulate in the recesses, which is difficult to wash out. It is good to decorate rooms with high humidity with smooth plaster, for example, Venetian or Moroccan.
How to plaster bathroom walls
The time for plastering work is during preparation for cosmetic repairs or immediately upon completion of construction. This work is not very difficult, but it will not be easy for an inexperienced person to cope with it.
Typically, a cement-sand mortar is used as a plaster mixture; the use of such a material requires knowledge of the exact recipe for preparing the mortar and adherence to the technology for mixing it.
Somewhat more expensive, but much more reliable, will be the use of a ready-made mixture produced by an industrial method - waterproof putty for the bathroom.
As a budget option, we can note the use of prawning, a mixture consisting of cement, lime and sand. Gartsovka can be applied in a thick layer, up to 5 cm, but be sure to use a plaster mesh. A thick layer of the mixture will take about a month to dry completely, but it should be taken into account that the solution acquires sufficient strength only after 25-27 days.
Among the disadvantages of cement-sand plaster, one should note the tendency to shrinkage, as a result of which significant cracks may appear, and sometimes peeling may occur.
To eliminate the possibility of negative phenomena, it is recommended to systematically moisten the plastered surface and also observe the temperature regime.
We invite you to watch a video about how to plaster walls in a bathroom:
Preparing concrete walls for plastering
The process of preparing interior concrete walls for plastering consists of the following steps:
- The old coating in the form of fragile plaster, whitewash, paint is removed (in which cases it is possible to apply plaster over old paint, we recommend reading here);
- Defects in concrete walls are determined. If there are nodules, they are cut down using a hammer and chisel. Massive chips and deep cavities are sealed with cement-sand mortar in a ratio of 1:3; if necessary, steel mesh is used for reinforcement;
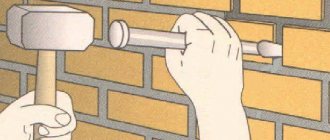
- On smooth walls, notches are made using a hammer and chisel, the maximum notch spacing is 10 cm;
- If it is necessary to install hidden wiring, grooves are made for the wires;
- The concrete surface is cleaned. A brush and water are used to remove dust and dirt. The wall can be treated using compressed air or a strong jet of water, which will significantly speed up the cleaning process;
- A primer is applied to the wall surface.
Notches on a concrete wall
We'll talk more about the types of primers for concrete walls below.
Priming concrete walls before plastering
Priming of concrete walls is necessary for the following purposes:
- Reducing the absorption of water from the solution into the concrete base;
- Protecting a concrete wall from the formation of fungus and mold;
- Increasing the strength of the protective (surface) layer of concrete;
- Dust removal from the concrete surface. The primer binds dust particles and makes the base clean;
- Improving the adhesion of plaster mortar to a concrete base.
Applying primer to a concrete wall
Next, we will look at how to prime concrete walls before plastering:
- For smooth concrete surfaces, concrete contact primers are ideal. After application, the composition fills the pores in the concrete, and a rough layer with high adhesion is formed on the surface, facilitating good adhesion to future plaster. We recommend compositions from the following manufacturers: Feidel Betokontakt, Knauf Betokontakt, Prospector Beton-Kontakt.
- Old concrete surfaces can be strengthened using a deep penetration primer designed specifically for impregnating weak substrates. Such soil impregnates the top layer of concrete, thereby strengthening it and giving it the necessary strength. Among the manufacturers we recommend: Prospectors “Deep Penetration”, AquaNova “Nova”, Acrylic Optimist “Deep Penetration”.
Primer Prospectors "Deep Penetration"
To prepare porous concrete surfaces (aerated concrete, foam concrete), primers are needed that reduce the absorbency of the base, thereby preventing uneven setting of the solution. The following primers are perfect: Knauf Mittelgrund, Knauf Rotband Grund (for gypsum plasters), Ceresit ST 17, Toiler TR10.
When applying primer to the substrate, be sure to follow the manufacturer's instructions. As a rule, the primer must be shaken before application, and the application process itself must be carried out in several layers.
Installation of beacons and reinforcing mesh
If the old wall has differences of more than 10 mm, then it is necessary to install beacons before applying plaster. Beacons are needed for even application of plaster with an equal layer of thickness. It is better to use metal profiles as beacons.
Lighthouses on a concrete wall
If the thickness of the planned plaster is more than 20 mm, then it is necessary to additionally install a reinforcing mesh. The mesh is fastened to the wall using dowel nails.
Next, you need to prepare the solution in accordance with the manufacturer's instructions. To avoid the formation of lumps, add water to the dry mixture, and not vice versa.
Preparing a gypsum surface for laying large ceramics
If you plan to lay porcelain stoneware or glue other heavy tiles on the rotband, then the surface preparation is carried out more thoroughly. In addition to the above-described priming with two types of primer, the load-bearing capacity of the plaster can be increased significantly in another way.
Holes with a diameter of 5 mm are drilled over the entire surface of the walls in a checkerboard pattern in increments of 15-20 cm using a concrete drill.
The depth of the holes should be 2-3 cm greater than the thickness of the rotband.
Snipes of the appropriate size are inserted into the holes until they stop, to which a fiberglass or galvanized steel mesh with a mesh size of 2x2 or 3x3 cm is attached with screws with wide heads.
For cement-sand plaster, it is initially better to fill the mesh and plaster
Plastering is done over the stretched mesh with a thin layer of cement-sand mortar; finishing grouting of the plaster is not necessary. Now most of the future load from the weight of the tiles will be borne not by the rotband, but by the main material of the wall. At the same time, the bonding strength of the ceramics will be increased due to changes in the base material.
The plaster is allowed time to harden and dry by wetting it with water for the first few days after application.
Then wetting is stopped, and the plaster, after complete drying, is primed with one layer of Ceresit ST-17 waterproofing primer. A day after priming, the tiles are laid using moisture-resistant tile adhesive “Unis Plus”, “Unis Pool”, “Litokol K 80” or “Ceresit SM 11”, after which the tile joints are filled with moisture-resistant grout Ceresit CE 40 aquastatic.
Waterproof plaster. What is this
Waterproof waterproofing plaster is a finishing material intended for use in conditions of high humidity.
High moisture resistance is ensured by polymer hydrophobic additives contained in mortar mixtures.
The main advantage of moisture-resistant plasters is their vapor permeability, allowing the walls to “breathe”.
This property allows you to create a comfortable indoor microclimate and prevents the formation of mold on the walls and the development of microorganisms.
In rooms with moisture-resistant decorative finishes, glass and mirrors do not fog up.
Decorative plasters for wet rooms perform the function of a finishing finish that does not require additional coatings.
Plaster mixture for wet rooms
Plastering walls in a bathroom or any other room with high humidity is done with cement-based plaster. This plaster, after application and smoothing, has a porous and rough surface, which will ensure better adhesion of tiles and porcelain tiles to the wall. We must not forget about the weight of the porcelain tiles with which the bathroom will be faced; under the weight, gypsum plaster can move away from the walls in conditions of high humidity and with a large layer of plaster.
Is it possible to use gypsum-based plaster in the bathroom? Subject to certain rules and technologies, it is quite possible:
- The bathroom will be completely tiled, the seams will be grouted. The thickness of the plaster layer will not exceed 2 cm.
- After applying gypsum plaster there is no need to smooth it, the surface should be rough. Before applying tiles or porcelain stoneware, the surface must be thoroughly primed with Aquastop primer.
Technical characteristics and composition of gypsum plaster
Physical properties depend on the components added during production. They allow you to adjust the setting time with the base, the ability to use the composition in wet rooms, the level of whiteness of the finish and resistance to the formation of mold and mildew.
Gypsum
Gypsum is the main mineral component, which makes up 90% of the total volume of the mixture. During production, it goes through a grinding stage, which determines the smoothness of the finished coating. The type of finish that is obtained as a result depends on the fraction of the mineral. Rough or starting leveling of surfaces or a finishing layer that does not require puttying.
Fillers
To improve the adhesion of the plaster to the base, quartz or perlite sand and limestone are added to the composition. Mineral fillers increase strength and setting time with the base, which ensures quiet operation and even application.
Supplements
To improve the properties of the mixture, plasticizers are used. The additive makes the solution viscous, improves fluidity for use by machine application and reduces the consumption of dry matter during dilution. Additionally, polymers are used that improve the elasticity of the coating after drying, eliminate the formation of cracks, peeling from the base and reduce hygroscopicity. The composition also contains antibacterial and antifungal components, which prevent the formation of mold when using plaster in rooms with high humidity.
Water
Water is used as a tool for diluting, regulating the consistency and fat content of the finished solution. The amount of water added depends on the application method and the composition of the mixture. More liquid solutions are used for finishing coatings, 5-50 mm thick. Thick mixtures are used for rough finishing, filling cracks and potholes; the application thickness can reach 80 mm.
The mechanical properties of the finished solution depend on the type of plasticizers, polymers and additional components. Acceptable application parameters are indicated by the manufacturer on the packaging of gypsum plaster.
Average technical characteristics of the mixture:
- operating temperature +5-30 degrees;
- surface humidity 60-70%;
- permissible layer thickness, without the use of reinforcement, 50-80 mm;
- proportions of adding liters of water per kg of dry mixture 1/2;
- density of hardened plaster 930-980 kg/m3;
- thermal conductivity of the dried surface is 0.23 W/m*C;
- the lifetime of the finished solution is 30-60 minutes;
- setting with the base and hardening 1-3 hours;
- full strength gain 7 days;
- consumption of the finished solution is 8-12 kg per 1m2.
Mechanical properties can be improved by adding original additives from the manufacturer, which can increase the time of hardening and strength gain, which is convenient to use. Reduce thermal conductivity and increase the thickness of the coating without the use of reinforcing mesh. Improve sound insulation properties and reduce dry matter consumption during dilution.
Do I need to plaster concrete walls?
Concrete walls are characterized by high strength and durability. However, quite often they have the following disadvantages:
- Curvature of the wall surface. Concrete walls are almost never level;
- Porosity. The concrete surface is heterogeneous, porous in structure, which can subsequently cause the development of fungi and mold;
- The presence of shells, chips, potholes.
These defects can be eliminated in various ways, but the most popular, reliable and inexpensive method is plastering concrete walls.
Defects on a concrete wall
Using plaster provides the following advantages:
- allows you to create a perfectly flat surface;
- protects the concrete wall from moisture, mold and mildew;
- You can mount household appliances, shelves, etc. on top of the plaster;
- reduces the thermal conductivity of walls, thereby “insulating” them;
- increases sound insulation properties.
