It is necessary to ensure that the plaster has a strong adhesion to the surface to be plastered and does not peel off from it. Individual layers of the mantling should not delaminate, and the places where the old plaster joins the new one should not stand out. The adhesion strength of individual layers of the mantling to each other, as well as the adhesion of the mantling to the plastered surface, is checked by lightly tapping the plaster. A dull sound indicates a lack of clutch; in these places the plaster layer must be cut out and replaced with a new one. The texture of the plaster, with the exception of its special types, should be fine-grained and smooth. The following are not allowed on the plaster surface: cracks, bumps, sinkholes, dummies, rough texture, gaps (unplastered places in window sills, baseboards, heating appliances, sanitary fixtures, etc.). The rubbed plaster should not have traces of old paint that has not been removed from the surface, wallpaper residues, rough traces of grout in the form of grooves, spirals, stripes or residues of coarse sand on the surface, cracks, or peeling of the covering layer. When plastering “to the rule” (improved), the verticality and horizontality of slopes, pilasters, etc. must be maintained. When plastering “beaconwise” (high-quality), in addition, the verticality of the walls and the horizontality of the ceilings must be maintained. The rods must have the correct lines and surfaces, the angles of intersection of the rods must be accurately delineated.
Permissible quality deviations of surfaces depending on the type of plaster
Permissible deviations in the quality of plaster
Surface irregularities (detected when applying a rule or template 2 m long)
No more than three irregularities with a depth or height of up to 5 mm
No more than two irregularities up to 3 mm
Depth or height up to 2 mm
Deviation of the surface from the vertical
15 mm to room height
2 mm per 1 m height, but not more than 10 mm over the entire height of the room
1 mm per 1 m height, but not more than 5 mm over the entire height of the room
The same, from horizontal
15 mm for the entire room
2 mm per 1 m of length, but not more than 10 mm for the entire length of the room or its part limited by purlins, beams, etc.
1 mm per 1 m of length, but not more than 7 mm for the entire length of the room or its part limited by purlins, beams, etc.
Deviations of husks, usenki, window and door slopes, pilasters, pillars, etc. from vertical and horizontal
How to check the evenness of walls and the quality of plastering work in residential premises
Before starting work on plastering walls, you need to understand that there is simple plaster and high-quality plaster. To enable high-quality further finishing of the walls, high-quality wall plaster is used. Therefore, when ordering work, please pay attention to this. How to check the evenness of walls after plastering work. To do this, you will need a rule-level, preferably a new one 2.5 meters high, a new building level.
1.Check deviations vertically and horizontally. Differences in the plane of the walls from the vertical by 1 meter of their length by 1 millimeter are allowed. The entire height of the room is no more than 5 millimeters. The planes of the walls are 1 millimeter from the horizontal, per 1 meter of their length. Check this using a two-meter building level. Advice! Be sure to check every two meters of the wall surface.
2. Check the evenness of the walls. The surface can have no more than two irregularities of smooth outlines per 4 square meters with a depth or height of no more than 2 millimeters. The evenness of the walls is checked using the new rule - a level with a height of 2 or better 2.5 meters. It is applied to the plane first vertically, then horizontally, and the distance between it and the plastered surface is determined; it should not exceed 2 mm. Check the evenness of the surface under the radiators, on the walls where there are windows, in the area of sockets and switches, behind heating risers, in places where it is difficult to reach. Attention! Non-genuine builders believe that the ideal level should be at eye level, and will show you exactly these places, so be vigilant in this matter and check everywhere.
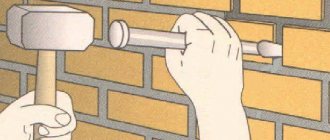
3. Check the strength of the plastered surface. Inspect the surface. There shouldn't be any cracks. Hit the surface with an open palm in several places at your discretion; if you hear a booming sound from the impact and feel peeling, then the work must be redone. Attention: Make sure that all metal beacons are removed from the walls.
4. Checking the corners If you have agreed with the performers to align the corners at 90 degrees, this is especially true in places where furniture and equipment are installed, then you can check the work as follows. The corners are checked not for evenness, since evenness will be ensured by the metal corners that are installed before the putty, but for deviations in degrees horizontally. For example, an angle of 89.9 degrees gives a wall 5 meters long, a deviation of about 1 cm. A 90 degree angle between the walls in a rectangular room is easier to check with a tape measure. You need to measure two diagonals of the room and compare them. If they are equal, then the walls form a rectangle, with right angles and parallel walls. You can also check the right angles of the walls using a long construction square at least 50 cm long; check the entire angle from floor to ceiling.
5. Check the parallelism of the walls. If you have agreed in advance on the walls, which should be strictly parallel to each other, then use a tape measure to measure the distance between them, at the beginning and at the end, it should be the same.
6. Checking areas of special attention. We do this in the same way using a building level rule. Important! Door trims, ceiling and floor plinths are smooth, so the junction areas of the plinths and platbands must be perfectly smooth so as not to get a gap in this place. Deviations of door and window slopes, arches, pillars, pilasters from the horizontal and vertical should not be more than 1 millimeter. The radii of curved elements, for example arches, should not deviate from the design value by more than 5 millimeters. This can be checked using the template pattern. The width of the slopes should not deviate by more than 2 millimeters from the design value. Check the entire perimeter of the slopes.
Attention! Check that the walls are plastered to the very edge of the doorway, as the trim may not hide the remaining surface.
Attention! Check that the plaster on the window slopes does not interfere with the free movement of the window sashes. To do this, you need to open the window all the way and see if the window opens completely.
Attention! Make sure that all metal corners, especially those above doorways, are pre-primed so that later, when painting, stains from metal corrosion do not appear.
We plaster the walls with our own hands, materials and sequence of work
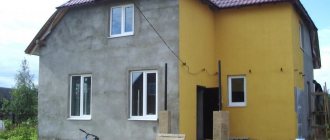
After signing the acceptance certificate for the apartment and receiving the keys, the question almost always arises of where to start the repair correctly. In modern multi-storey buildings, which are handed over without finishing and in which all the rough finishing has yet to be done, one of the main and, perhaps, the most expensive is plaster.
Before carrying out plastering work, you should think about installing a reliable metal door in order to be sure that the delivered material will not be stolen and taken out of the apartment the next night, and that our equipment will remain safe and sound. This is one of the conditions for starting any work at your site. At the same time, we can estimate the cost of the work performed, the degree of curvature of the walls, carry out all the necessary preparatory work on site (calculate and order the required amount of material, prime the walls, set up beacons) before installing the door in order to reduce the time required for completing the work.
The second thing you should think about before plastering is hidden engineering communications (as a rule, these are electrical and plumbing, less often low-current networks). In the case of electrics, everything is much simpler - according to the current regulatory documents, all internal wiring must be completed in the completed house, and sockets must be installed every 4 meters, and if the Customer does not have a desire to move some consumers to another location, install additional lighting or If you move the power shield, you can safely begin plastering work.
With plumbing in this regard, it is a little more complicated - the developer leaves a connection point from the riser (cold water supply - cold water supply, hot water supply - hot water supply and sewerage). Therefore, first of all, it is necessary to determine the installation location of plumbing fixtures (sink, bathtub, toilet, washing machine), and determine the method of laying pipes. There are two ways to lay pipes: hidden - when the pipes are recessed into the wall, or open - when the pipes go on top of the walls and are later covered with plasterboard.
In the first case, you can immediately groove and lay all communications, or perform this work after plastering the walls; anyway, these communications will be hidden behind ceramic tiles or they can always be plastered manually, which will not be a violation of technology.
In the second case, the wiring is carried out on top of the plastered wall and is carried out after plastering work. In the kitchen, very often the pipes remain open; in the future, you can always change the sink connection points, add some additional points - a dishwasher or washing machine. If you don’t know how the kitchen will stand, you can always move communications at the lowest cost.
In any case, no matter which method of laying utility networks you choose, we can always help you complete this work.
After completing all the above procedures, you can begin leveling the walls for wallpapering.
The process of plastering ceilings and plastering slopes is described in other sections of our website.
Before you start leveling the walls with plaster, you must first prime the walls. Only a professional can correctly determine the wall surface and select the necessary primer. Indeed, in modern houses there are various combinations of walls made of different materials, and incorrectly primed walls will lead in the future to cracking of the plaster or even its peeling. In old houses, it is necessary to additionally tap the old plaster and beat it off where there are voids.
Depending on the material from which the wall is made, various primers are used. For highly absorbent (hygroscopic) substrates, one type of primer is required - Knauf Grundiermittel (Knauf Grundiermittel), and for not highly absorbent (non-hygroscopic) substrates, another type is used - Knauf Betokontakt (Knauf Betokontakt).
Photo by Knauf Grundiermittel and Knauf Betokontakt
Highly absorbent (hygroscopic) substrates include the following surfaces:
- Cellular concrete is an artificially created porous concrete, which includes foam concrete and aerated concrete. This material is distinguished by its thermal insulation and strength characteristics, and therefore is widely used for insulating external walls, made, for example, of monolithic reinforced concrete, as well as for constructing partitions. Nowadays, aerated concrete is especially widely used, since, despite its similar properties to foam concrete, its characteristics are much better.
- Tongue-and-groove gypsum boards (GGP) are an environmentally friendly material used for constructing partitions and for heat and sound insulation of walls. Most often, if this material is used for heat and sound insulation, then a technological gap is created at the junction with concrete walls for the subsequent laying of mineral wool slabs. This gap can also be used to hide communications.
- Brick is a well-known artificial stone, widely used in construction. They are used both for making external walls and for installing partitions.
Non-absorbent or weakly absorbent (non-hygroscopic) substrates include the following surfaces:
- Reinforced concrete (monolith). Reinforced concrete is a material produced on a metal frame and filled with concrete. Monolithic reinforced concrete - poured directly on the site, using pre-installed formwork.
- Reinforced concrete (monolithic) floor slabs
- Panels (reinforced concrete)
Methods for installing plaster beacons and corner protection profiles
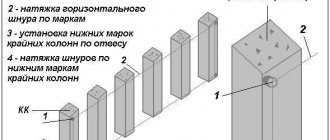
Before placing beacons, it is necessary to determine the unevenness of the walls (horizontally, vertically, diagonally) and the maximum deviations. For these purposes, a level and plumb line, or a laser level are used. Determining the maximum and minimum deviations will allow you to obtain the average thickness of the applied plaster layer. Once the unevenness of the walls has been determined, you can begin placing the beacons. When the beacons are set, we check whether the horizontal and vertical levels are met, and stretch the cord diagonally from the bottom corner to the opposite upper corner of the wall to once again make sure that the beacons are level.
Quality requirements for various types of plastering work
These requirements are contained in GOST No. 28013/98 “Building Mortars” and in Appendix No. 8 of SNiP No. 3.04.01/87. According to these documents, the plaster mixture must meet the following criteria:
- the mixture used for spraying or priming is sifted through a sieve with cells no larger than 3 mm;
- mixture for covering or single-layer plaster - through a sieve with cells no larger than 1.5 mm;
- solution mobility - from 5 to 12 cm;
- delamination level – up to 15%;
- the water retention rate of the mixture is at least 90%;
- the strength of the coating is determined by the values included in the design.
Attention If the plaster mixture is purchased at the factory, then documents confirming its quality must be attached to it.
These papers contain the following information:
- date, exact time of preparation of the solution;
- brand of plaster mixture;
- type of binder used;
- overall volume;
- mobility indicator;
- name of GOST to which the mixture corresponds;
- price per cubic meter of purchased batch.
Checking the quality of plastering work in apartment renovation
Checking the quality of plastering work is done on the basis of an open source: Requirements SNiP 3.04.01-87 “Insulating and finishing coatings”. To achieve high-quality plastering work, during the plastering process it is necessary to comply with the following requirements and standards for plastering work.
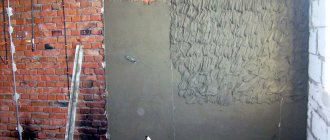
Protruding architectural details, as well as joints between plastered structures made of different materials, must be plastered over a metal mesh or woven wire attached to the surface of the base.
Wooden surfaces are plastered over shingled panels. Note: This check of the quality of plastering work applies to plastering work performed with classic cement-sand mortars, as well as modern gypsum plaster mixtures with polymer additives.
Carrying out work in accordance with the regulatory document
Scope of work for different types of plastering.
Requirements for the implementation of high-quality plastering work are stated in paragraphs No. 3.1/3.17 of SNiP No. 3.04.01/87.
Surface preparation
Before plastering begins, the following operations must be carried out.
- The premises to be finished must be protected from weather influences and precipitation.
- There is hydro-, heat- and sound-insulation of surfaces, as well as leveling floor screed.
- The joints and seams between the panels and blocks are sealed.
- The junction areas of door and window units, as well as balcony blocks, have been sealed and carefully insulated.
- Windows installed.
- Embedded elements have been installed.
- Test runs of the heating and water supply systems were carried out.
Main works
External work should be carried out at positive temperatures and dry weather.
- Plastering should be carried out at a temperature of air and the surface being treated not lower than +10°. Air humidity should be no more than 60%. This temperature must be maintained in the premises at all times, no less than two days before the start and twelve days after completion of the work.
- Plastering should be carried out on the basis of the PPR - the work plan for the construction of a building or structure.
Note! Applying plaster finishes to surfaces that have areas with efflorescence, rust, bitumen and grease stains is strictly prohibited. It is necessary to remove dust from the base before laying each layer of plaster.
- The strength of the treated surfaces should not be less than the same finishing value.
- Architectural elements protruding beyond the plane of the base, areas where wooden surfaces meet stone, brick and concrete structures, must be plastered using the reinforcing mesh fixed on them. Entirely wooden bases must be finished over shingled panels.
- Brick, concrete and stone walls constructed using the freezing method must be plastered only after they have been thawed from the inside, no less than half their thickness.
- When working on brick walls, if the air temperature is +24° or more, their surface should be moistened before plastering.
- When covering the surface with single-layer plaster, it must be smoothed immediately after application. When using troweling units - after the mixture has set.
- When laying a multi-layer coating, apply each layer only after preliminary hardening of the previous one. The soil must be leveled before it begins to set.
Evaluation of the surface after plastering
Deviations that are permissible for high-quality plastering work are contained in Appendix No. 9 and 10 of SNiP No. 3.04.01/87:
- surface deviation horizontally and vertically – 1 mm per 1 meter, along the entire wall in the room – no more than 5 mm;
- for 4 sq. meter there should be no more than two irregularities with smooth outlines, the depth of which is up to 2 mm;
- deviation from the plane of slopes, arches and pillars must be within 1 mm vertically and horizontally;
- permissible error of curved elements from a given design – no more than 5 mm;
- the width of plastered slopes may differ from the design by no more than 2 mm;
- the error in the deviation of the rods from the straight axis between the angles of their intersection and bracing does not exceed 2 mm.
Advice
It is more convenient to carry out all types of checks regarding the quality of plastering work using a pattern and a laser level.
Flatness
The evenness of the wall after plastering is checked using a rule and a laser level. How to measure:
- Applying the rule horizontally to the wall, check that there is no gap between it and the surface. To measure the size of the existing gap, it is convenient to use a laser level.
- To determine vertical evenness, you must turn on the vertical axis construction mode on the level. First, a vertical line is drawn on the surface. Then the device is applied at an angle of 45 degrees to the surface. If the laser line is straight, then the surface itself is smooth. When the laser deviates from the drawn one towards the level, there is an influx of plaster on the wall; when it deviates to the side from the device, there is a concavity. The size of the irregularity corresponds to the distance between the drawn line and the laser line.
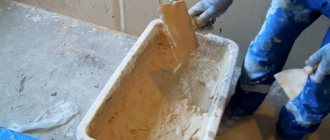
The quality of the solution and the correct application of layers
Quality control of the plaster solution is carried out at three stages:
- preparatory;
- at the time of application;
- during acceptance of completed work.
At the preparatory stage, attention is paid to:
- the quality of the prepared solution;
- wall humidity, room temperature;
- cleanliness of the surfaces on which the plaster will be applied;
- priming walls, selecting a solution for priming.
Any type of plaster mortar (cement or lime-cement) can be applied in one or several layers. The permissible quantity is specified by the manufacturer in the instructions for the solution.
Attention
It is necessary to observe the rule of completely drying the previous layer before applying the next one.
Each subsequent layer when using multi-layer solutions should be less durable than the previous one.
The need and choice of plaster mesh is regulated by the project and SP 71.13330.2017. When working with gypsum mixtures, it is allowed to work without a plaster mesh.
We offer you to watch a video on the topic “Minimum and maximum layers of plaster”:
Adhesion
Requirements for plaster adhesion are contained in GOST 31356-2007. You can measure the adhesion strength of the layer to the base using a special device - an adhesive meter. It can calculate the clamping forces in the range from 0 to 10 kN. This indicator means the force that must be applied to tear off or separate the layer in a direction perpendicular to the base.
Thickness of decorative plaster
Decorative compositions intended for decorating interiors and facades also have their maximums and minimums.
Existing types of finishing decorative mixtures are divided into:
- textured;
- structural;
- Venetian;
- pebble.
The Venetian can boast the most minimal layer of plaster. This is due to the fraction of the components included in the composition (the filler is stone flour). The finish with the effect of crinkled silk and Moroccan is also distinguished by its thin layers.
Structural compositions produce a layer no less than the size of filler granules. For example, the popular finishing of bark beetles, performed with roller compounds. By the way, for the bark beetle, the grain size dictates the maximum thickness. Indoors, compositions with filler of a smaller fraction are used than on facades. The same can be said about travertine plaster.
The thickest decorations are textured finishes and stone coatings. The thickness of the former can have a wide range - up to 5 cm. For example, imitation of brickwork, wooden surface or wave relief. The size of the layer of pebble plaster, for example, mosaic, depends on the size of the stone grains.
No primer
Applying a primer to the base is an important procedure before plastering. The composition is selected depending on the type of plaster and base. Porous surfaces are treated with deep penetration soils. Concrete contact is used to adhere gypsum plaster to concrete walls. Concrete contact cannot be used for cement-sand mixtures.
Read more about primers in the article “When to use a primer?”
Soils with a dry residue partially saturate the base and partially remain on the surface, leaving a protective film that prevents moisture from leaving the solution.
Recommendations from the experts
The work performed does not indicate its high quality. They have been completed, which means a certain stage has been completed. We talked about checking the results earlier. But it’s worth spending extra time not only on walls and slopes, but also on problem areas:
- Carry out quality control of work in the areas of passage and junction of utility pipes, installation of mortgages under the canopy of heavy furniture and equipment, as well as near openings for switches, sockets, thermostats;
- Check the plane of the walls along the installation line of the suspended or stretch ceiling system, as well as the installation of the baseboard. As for doorways, plane control along the perimeter at the top and sides is necessary. These zones must be in the same plane;
- Check the corners, and not only their alignment, but also the direct connection of adjacent walls. The joint line must be smooth and vertical, which is controlled by the building rule, which can be laid in a corner;
- Seal the interpanel joints, seams and chamfers of the drywall with putty, using a sickle or a special plaster tape. It is also important to putty all small cracks, which are places of tension in finishing finishing materials - decorative plasters and thin wallpaper;
- Remember to use a primer between layers of the same material, as well as plaster and putty layers, to increase adhesion;
- Use a high-quality tool for work that contributes to the implementation of the stage rather than aggravating problems;
- Produce the plaster and putty mixture mixed with water in a timely manner, normalizing its portions;
- Don't end your workday by completing half a wall. Try to properly distribute the time so that the layer of plaster or putty is laid strictly from corner to corner;
- To improve the quality of the surface for expensive decorative plasters or painting, grout in several stages, using abrasives with different grains, and also check the result using a light bulb, illuminating differences in the plane and leveling defects indicated by shadow distortions;
- Try to correctly mark the fasteners for installing ceilings, mortgages, equipment and interior decoration, avoiding seams between slabs and cracks to avoid their opening under dynamic loads!
Leveling walls and removing corners are quite complex repair stages that take time and increase costs. But they are necessary to greatly facilitate the decorative finishing of premises, the correct arrangement of furniture and interior design. Therefore, I recommend not to ignore the advice given in this article!
Deviations of plastered surfaces
Deviations of plastered surfaces from the vertical (by 1 meter):
- for simple plaster – no more than 3 mm (no more than 15 mm for the entire height of the room)
- with high-quality plaster - no more than 1 mm (no more than 5 mm for the entire height of the room)
- Horizontal deviations of plastered surfaces (by 1 meter):
- for simple plaster – no more than 3 mm
- with improved plaster – no more than 2 mm
- with high-quality plaster - no more than 1 mm.
with improved plaster - no more than 2 mm (no more than 10 mm for the entire height of the room)
Related article: How to seal the joint between the bathtub and the wall
Methods for checking work performed indoors
The work performed is checked according to the following points and methods of their control:
- Deviation from the vertical is no more than 1 mm per 1 m. It is measured using a rule of at least 2 meters in length by applying it to the wall every 2 meters.
- The angle between the walls in a rectangular room should be 90 degrees. Measured using a tape measure. The length of the two diagonals of the room must be the same - this means that the corners of the room are equal to 90 degrees, and the walls are parallel. Another measurement option is with a construction square with a shoulder of at least 50 cm. It is applied to the corner over the entire distance from floor to ceiling.
- Parallelism of walls. Measured with a tape measure. The distance between the walls along their entire length should be the same.
- Deviation of slopes, pilasters, pillars vertically and horizontally - no more than 1 mm per 1 m. Measured using a building level.
- Surface evenness. Measured using a two-meter rule applied to the wall vertically and horizontally.
Attention
If the wall unevenness exceeds 1 mm, this may cause the seams of thin wallpaper to diverge.
We offer you to watch a video on the topic “How well is the surface of the walls plastered”:
In separate publications, our experts give recommendations to beginners on how to properly plaster, including walls made of aerated concrete, aerated concrete and foam block.
Rules for accepting results
When accepting completed plastering work, you should adhere to the following rules and requirements:
Acceptance of plastering work is an important stage in repairs. The final result, pleasant appearance, and service life of the repairs depend on the quality of their execution.
Bringing out corners
Quite a difficult job, especially when it comes to rooms with poor geometry in old houses. Quite expensive, and this stops many customers who have found another way out of the situation - aligning only functional corners in which furniture, appliances, and decorative items will be installed.
All factory furniture - cabinets, racks and shelves - has a base with right angles. Therefore, it is important to bring the corners together at 90 degrees to eliminate gaps, and in general, to be able to squeeze the desired item into the corner!
Check: The geometry and exact dimensions of the walls, as well as the angles between them, can be checked in two ways. The first is to measure the diagonals in the room with a tape measure between opposite corners, which must coincide, or check with a square with a shoulder of 500 mm, which is applied in the corner between the walls 3-5 times vertically, from top to bottom!
This stage is also implemented using plasterboard sheets, which are installed on a galvanized steel frame or special glue. The work is somewhat simplified, although, in this case, you will not get monolithic, but hollow walls with minimal rigidity and strength!
What is a beacon for plastering work?
Plastering on beacons allows you to create a smoother surface. Beacons are narrow vertical metal projections that are attached to the wall using dowels or plaster mortar. Their installation is a very important undertaking and requires scrupulousness and attention. The time spent on installing beacons pays off when performing plastering work. The purpose of installing beacons is to create an ideal surface plane. Before starting finishing work, it is recommended to check the deviations of the walls from a flat plane. After finishing the walls, the beacons are removed.
Areas of special attention
It is worth carefully inspecting the areas around sockets, switches, the places where door frames adjoin the wall, ceiling and floor skirting boards. If the walls there are uneven, then the baseboard will not fit tightly and a gap will form.
Experts recommend checking the quality of putty in the dark using a flashlight. The light is directed parallel to the plane being tested and, if there are irregularities on it, they will immediately give a shadow. In daylight, it is more difficult to identify such defects, since diffused light will not provide shadows.
Lack of reinforcement in new buildings
Reinforcement is a necessary procedure in new houses. This is due to the fact that after construction the building undergoes shrinkage, a process that usually takes 1-2 years. Shrinkage leads to the formation of microcracks on plaster without reinforcement, which extend to the finishing layer.
Such defects are especially critical if painting is chosen as the final finish. Small cracks will not be noticeable under the wallpaper, but on a painted wall they will ruin the appearance of the room.
How do different plasters differ from each other?
When choosing plaster, first of all, its suitability for use under the original operating conditions is assessed. Then there are such important characteristics as strength, maximum and minimum layer thickness, drying speed. Consumption, cost, ease of application are considered last. But most of these criteria are directly related to the composition of the material.
Composition and purpose
Any plaster consists of a filler, the role of which is usually played by sand, various additives that give the mixture certain properties, and a binder. It is by the type of binder that these materials are distinguished; it is this that primarily determines which plaster is best for plastering the walls.
The following types of binders are distinguished:
- cement;
- gypsum;
- clay;
- lime;
- polymer resins;
- combinations of these materials.
Previously, clay plaster was mainly used due to the availability of the material, its positive properties for residential premises and the possibility of self-preparation. It still remains in demand in rural areas.
Clay serves as a preservative for wooden and thatched walls Source pajaconstruction.com
Today, when more convenient and high-quality materials have appeared, clay mixtures are rarely used, mostly for plastering brick ovens and various wooden utility rooms. Although recently, with the growing popularity of eco-style in decoration, interesting options for decorative clay plaster have appeared. But only professionals can work with them.
Exquisite finish with clay plaster Source etstur.com
Lime plaster is also used infrequently, mainly for rough leveling of walls in wet or unheated rooms where there is a risk of mold. It has low strength.
More often, lime is added to solutions with another main binder. It makes clay mortar stronger, and cement mortar more flexible.
When choosing which plaster is best for leveling walls, they usually choose gypsum or cement. These are the most practical and inexpensive compositions with a long service life.
- Cement plaster has high strength and is not afraid of moisture, so its main area of application is facades and plinths of buildings, walls in rooms with high or unstable humidity.
- A gypsum mixture, if there is no “moisture resistant” marker on the packaging, can only be used inside dry heated rooms, as it easily absorbs moisture from the air, swells, peels off, and loses strength.
Peeling a gypsum coating from a wall Source homemasters.ru
Polymer plaster is universal, suitable for surfaces made of any materials, external and internal work. But it is not suitable for rough leveling, as it is applied in a very thin layer. Therefore, it is used primarily as a finishing or decorative layer.
Readiness degree
According to the degree of readiness for work, plaster is divided into 3 main types.
- Homemade compositions are prepared independently from individual components mixed in a certain proportion.
- Dry mixture - sold packaged in paper bags, requires dilution with water immediately before use.
- Paste is ready-to-use plaster in plastic buckets.
Gypsum plaster that does not require mixing Source dfarb.by
See also: Catalog of companies that specialize in finishing materials and related work
Which plaster to choose for leveling walls depends on the experience of the contractor and the financial capabilities of the customer. It is easiest to work with paste, but it will cost more. It is also not difficult to prepare a working solution from a dry mixture - you need to strictly follow the instructions on the package. Homemade plaster is the cheapest, but preparing it is a labor-intensive process. In addition, non-compliance with proportions, lack of additives, improper mixing and other factors are a risk of obtaining low-quality material.
Note! There is another type - the so-called dry plaster. These are various sheet materials, mainly made of gypsum in a cardboard shell. They are ideal for leveling very uneven walls with large differences in level and allow you not to interrupt finishing work while the “wet” compounds dry out.
Plasterboard can only be used to level internal walls of heated rooms Source bitrix24.ru
Ease of application
It makes no difference to professional plasterers what material they work with. But for beginners it will be easier to work with a plastic solution, which adheres well to any surface and is easily smoothed. Polymer plasters have these properties to the maximum extent, but due to their high cost they are not recommended for use with insufficient experience.
Gypsum plaster also has good plasticity. However, when working with it, you should take into account the quick setting of the solution - after half an hour it begins to thicken and becomes unsuitable for application. Therefore, it needs to be prepared in small portions, which reduces the speed of repair. But this plaster dries very quickly, allowing you to take a short technological break between finishing stages.
The most difficult thing to apply is cement plaster. It is heavy, non-plastic, and difficult to smooth out. To increase elasticity, lime is added to it. On the other hand, cement-based mixtures remain fluid for up to 1.5-2 hours, which gives additional time for leveling and allows you not to rush to have time to work out the prepared portion.
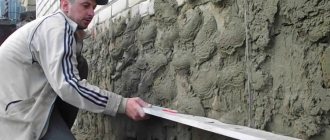
What is a rule and how to choose it?
The rule is a long, straight ruler to help identify flaws when inspecting a plastered surface. Previously, the rule was made of wood. The modern rule is aluminum profile. It is lightweight and durable, almost not subject to deformation. The length of the rule is usually from 1 to 2 meters or more. The most convenient is the 2-meter rule.
Some modern models are equipped with a built-in hydraulic level in the form of ampoules with liquid. When choosing this rule, you need to pay attention to the tightness of the housing.
What tools are needed for plastering walls?
The quality of work depends on the availability of tools and materials. To plaster the walls you will need:
- Master OK;
- rule with level;
- grater and grater;
- lighthouses;
- net;
- plaster corners;
- steel smoother;
- construction mixer;
- solution;
- bucket for solution.
putty knife;
You will also need several pairs of rubberized gloves, since the plaster solution is very caustic. All these materials and tools will help create a completely flat surface.
( 2 ratings, average 5 out of 5 )