Selecting materials
There are several types of concrete plasters:
- Cement-sand mixture. Durable and durable plaster is suitable for rooms with high humidity. It has good thermal conductivity and vapor permeability. Provides reliable sound insulation.
- Gypsum mixture. It is also used for finishing on concrete walls, but it is not suitable for bathrooms, toilets, kitchens, and other rooms with high humidity. Gypsum is more susceptible to mechanical damage.
- Polymer mixtures. These materials are used when it is necessary to eliminate minor defects on a concrete surface. They are not afraid of moisture, have waterproofing and antiseptic properties. Such mixtures are suitable for interior decoration and exterior work. However, such mixtures are used only on an already leveled concrete surface.
Sometimes plastering is carried out with tile adhesive. Its properties are approximately the same as those of cement mortar, but adhesion is higher. However, the composition exhibits noticeable shrinkage, and cracks appear on its surface. It is suitable in cases where the depth of unevenness does not exceed 8 mm. Apply in two layers. The first is up to 6 mm. Then the second one. While the plaster has not set, processing is carried out for leveling. This material can also be used to putty the façade of a building.
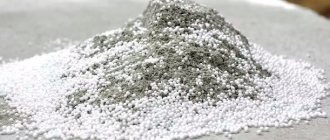
Rice. 2. Materials for plastering concrete walls
Another option is gluing using a notched trowel. Applicable only to block concrete surfaces to improve adhesion with subsequent materials.
What are the features of the composition
I have already told you about different mixtures. These include mineral plasters, as well as interesting terrasite and non-standard vapor-permeable plastering compositions.
Now it’s time to find out what gypsum plaster for exterior use is.
The mixture is prepared on the basis of gypsum. This is a natural material that can provide high strength and hardening rates. The composition is strong and durable. But, when compared with cement plaster, gypsum is afraid of moisture. This is their main difference.
Previously, gypsum compositions were allowed to be used indoors. They must be dry and have a stable microclimate.
Everything has changed thanks to modern supplements. This made it possible to increase moisture resistance as well as water resistance. Thus, current gypsum-based plaster mixtures are not inferior to their cement counterparts. I'll say even more. High elasticity greatly simplifies the application of gypsum. Cement mixtures adhere worse.
So now it is not only decorative, but also moisture resistant.
Advantages and disadvantages
Now we need to look at the advantages and disadvantages of gypsum plaster for exterior use.
I'll start, as usual, with the advantages. You know me. I always climb with my advantages. They are here as follows:
- ease of application;
- high elasticity of solutions;
- ease of grouting;
- resistance to cracks;
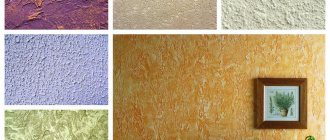
- different texture options;
- no shrinkage;
- a variety of pigments to give different colors.
It is easy to work with such mixtures with your own hands using ordinary painting tools.
Unlike cement compositions, gypsum compositions are easier for beginners to handle.
But take your time. Gypsum plaster for exterior use also has disadvantages. There are only 2 of them:
- High price
. Buying such a composition will be more expensive than cement analogues. In general the price does not seem high. But in comparison the difference is noticeable; - Rigorous technology
. To get an excellent result, you need to competently approach the preparation, preparation of the composition and application.
It must be applied literally within 30 minutes after mixing. Therefore, it is impossible to prepare the plaster mixture in large portions.
What you absolutely cannot do is add water and a dry ingredient to an already mixed portion. More on how to use it a little later.
How to plaster concrete walls
If you are interested in plastering concrete walls with your own hands, you will need to select the appropriate composition, follow the technology and purchase the following tools:
- spatula, square for applying the solution, ladle;
- bucket and mixer for mixing;
- mesh for reinforcement;
- guide rails used as beacons;
- falcon - a tray with a handle for laying out the solution;
- the rule is a wooden or metal strip for leveling;
- building level;
- float for texture or smoothness.
Is it necessary to install beacons?
You can plaster without beacons. But you can’t do without them if you need to get the ideal geometry of surfaces in a living space and make partitions smooth and even. They are especially important if there are noticeable vertical differences. If the work is carried out in a garage, utility room or other non-residential premises, where aesthetics are secondary, it is enough to disguise noticeable defects, then beacons do not need to be installed.
Lighthouses are:
- plaster;
- from concrete mortar.
A wooden sheathing or a metal profile can be installed. It does not need to be removed once the plaster application is complete.
Preparatory procedures
Preparing the walls begins with removing the old finish - tiles, whitewash, paint or wallpaper. Then the bumps and other bulges are eliminated. Using a suitable tool, you need to roughen the wall. If you plan to lay a cable, channels are made. To do this, use a wall chaser or grinder.
Dust is removed with a jet of water or a damp sponge, then the wall is dried. Once this part of the work surface preparation is completed, a coat of primer is applied. Let it dry and repeat the procedure. Lay the cables in the punched channels. Secure the mesh with dowels.
How to plaster concrete
Rice.
3. Applying a cement-sand mixture to concrete. Concrete should be plastered in this order:
- Preparatory cement spray is the first layer applied with a ladle or trowel. Apply to a damp wall. Recommended thickness – up to 5 mm. The consistency of the mixture is liquid. Excess is removed and the surface is dried. No alignment required.
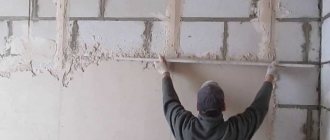
- Applying a base layer 10 mm thick. You can sprinkle the solution or spread it on. The base is aligned from bottom to top according to the beacons using the rule.
- Covering – front third layer of plaster (2 mm). It fills small pores and scratches left by tools. It is important to achieve a creamy consistency of the mixture. After applying it, the corners are treated, the beacons are removed, and the traces left by them are filled with putty. Alignment is performed by a rule.
- Grouting is the final step necessary to achieve smoothness or texture. It is performed with a grater at the moment when the surface has already set, but has not dried. Movements - circular or running, vertical or horizontal swings.
Before starting work, be sure to sift the sand used to mix the solution. A sieve with cells up to 1.5 mm is used. If you don’t want to make notches on the surface for better adhesion, buy concrete contact primer. It will help save time.
How long does it take for plaster to dry?
Drying time depends on the material and layer thickness. If the plaster of concrete walls is cement-sand 10 mm, after 10 days it gains strength. Cement-lime compositions used when laying the second layer are applied 7 hours after applying the first. Complete hardening occurs within a month. Parameters change with changes in temperature and humidity. The finish will dry fastest in a warm, dry room.
Advantages of gypsum-based plaster mixture
Answering the question “is it possible to work with gypsum plaster outdoors?”, we confidently declare that finishing with this material is a real godsend for a novice craftsman. When working with such a mixture, you don’t have to worry about any mistakes made, because all the shortcomings are subsequently eliminated. The explanation is simple: the plaster mixture is easy to work with and can be easily ground off with a sharp spatula blade.
Modern gypsum-based plaster material ensures ideal evenness of the wall surface; additional application of starting and finishing material is not required.
The main advantages of this finishing material are:
- environmental cleanliness ensured by the natural origin of the main raw material (gypsum);
- absence of toxic components that emit specific odors;
- high rates of vapor and gas permeability;
- complete absence of such a phenomenon as shrinkage.
Features of outdoor work
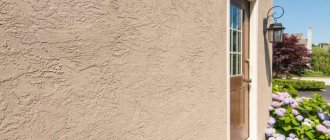
Is there a difference in how to plaster a concrete wall inside and outside? Plastering of residential premises inside can be done with gypsum mortar. It is not suitable for the street, as it will not withstand exposure to rain and snow. In the bedroom, living room, and dining room, plaster does an excellent job of leveling. It can be used to finish the ceiling. External work is carried out using heavy cement mixtures that are more resistant to high humidity.
Components are often added to façade mortars to increase plasticity, moisture resistance, and protect against cracking.
Rice. 4. Applying a cement-sand mixture to a concrete façade
Insulation of concrete walls outside
Having decided to plaster the facade, owners often think about its additional protection and insulation. It is important to provide protection from the cold from the outside. It is also important to calculate where the dew point will be. Mineral wool will not work. It absorbs moisture, losing its thermal insulation properties. It is better to use foam boards. If greater strength and durability are required, use extruded polystyrene foam.
Plastering begins with applying glue to the back of the slabs. This is done pointwise around the perimeter. Then the sheet is glued to the wall, starting from the bottom corner. Secure it with umbrella dowels. Install the remaining slabs. Cover the seams between them with polyurethane foam, secure the fiberglass reinforcement mesh, and apply a layer of glue. After it dries, you can plaster it. All that remains is to prime and paint it. Or, as an option, install a ventilated siding facade.
External insulation is carried out only with the installation of slabs in a checkerboard pattern. Seam matching is prohibited.
Wall plastering technology
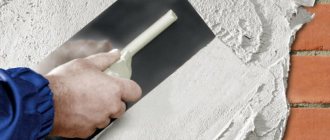
Thin layers of plaster are applied with a trowel, and the surface is smoothed with a wooden trowel. Thicker finishes in several layers require
Plastering with a thin layer
installation of reinforced covering of the base of the wall.
Installation of reinforcement mesh
If it is necessary to apply plaster in a thick layer of 40 mm or more, then metal or polymer mesh is attached to the wall. Then proceed as follows:
- The walls are treated with a primer.
- The mesh is cut into separate small fragments. The reinforcement is secured with dowels. The canvases are secured with an overlap.
- The grids are installed starting from one of the upper corners of the wall.
- They try to fix the reinforcement layer in such a way that there is a gap of 3-5 mm between the wall and the metal mesh. This is done so that the reinforcement is located in the middle of the plaster layer.
Stretched meshes must have no deflections. This will prevent the appearance of air pockets in the thickness of the plaster layer. Otherwise, the finish may sag and peel.
Installing guide posts for the rule
After reinforcing the walls, I install beacons (guide posts). For this purpose, metal profiles for drywall are used. The racks are placed so that the distance from the wall to the outer surface of the profile is equal to the thickness of the plaster layer.
The racks are installed in increments of 1-1.5 m. The rule can be made from a light metal channel.
Applying plaster using the rule
Plastering walls with gypsum mortar
Prepared walls are usually plastered in 2 layers:
- The first layer of solution is thrown onto the mesh. The mixture is scooped up with a trowel and thrown onto the mesh with a sharp movement. This layer is made from a more liquid solution, similar in consistency to sour cream.
- Take a short break to allow the mixture to harden slightly. The second layer is pulled out from the bottom up. A thick layer of plaster is poured from below.
- Then, pressing the rule tightly against the guide posts, the solution is “pulled” upward.
- When moving vertically, the rules produce oscillatory movements from side to side. This ensures uniform distribution of the plaster coating and a smooth surface.
- After 40–60 minutes, all excess solution is cut off. All irregularities are filled with mortar and smoothed with a wide spatula.
- No more than a day later, the entire surface is generously moistened with water and finally smoothed with a spatula, achieving a perfectly flat wall plane.
The entire process of plastering walls can be seen in this video:
In the case when the walls are prepared for a light color, it is best to cover them with white plaster. This will avoid darkening the paint layer.
Plastering ceilings
The specificity of this work is that the gypsum mixture has to be applied from the bottom up. To avoid the finish falling off, the mortar is applied with sharp movements of a trowel, although for such work the industry produces special gypsum mixtures for mechanical application using a construction spray gun.
The homeowner himself should not undertake such work. High-quality plastering of ceilings can be performed by professional plasterers.
Carrying out work manually and mechanically
Plastering walls and ceilings in an apartment by hand is possible, and some craftsmen prefer this method. They believe that this makes it easier to control the process. The mixture used also hardens faster.
However, the duration of work increases significantly. Also, layers often dry unevenly, and creating a solution for different areas of the room with the same consistency is problematic. The task becomes more complicated if the wall area is large.
The machine method allows finishing surfaces of several tens of meters. Also, you don’t have to waste time on mixing and achieving the desired consistency of the solution. All you need to do is throw the components into the plastering station. The method eliminates significant differences in the density of the plaster that you use for concrete surfaces.
Rice. 5. Mechanical plaster
There are other advantages of the mechanized method of applying plaster for concrete bases:
- Versatility. It is suitable for walls and ceilings in residential, office, commercial and industrial areas.
- Affordable price. The price per square meter of mechanical finishing is cheaper than manual finishing.
- No tension in the inner layer. Accordingly, there will be no settlement or cracks.
The mechanized plastering procedure is performed by two performers in the following way. The installation is connected to the network and water supply. It automatically mixes the dry solution with water. Next, beacons are installed and plaster for concrete walls is supplied under pressure through a hose. The second worker levels the surface using a wide rule. After the mixture has dried, final leveling is carried out.
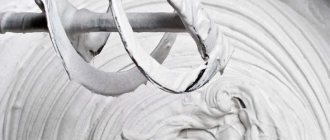
Mixing the solution
Before starting work, the dry mass is mixed with water in the proportions specified by the manufacturer on the packaging material.
Then the entire volume is thoroughly mixed, for which they use a manual or mechanical method. After bringing the contents of the container to a homogeneous state, it is recommended to wait three to five minutes and re-mix the composition.
Adding ingredients to the composition at your own discretion is an undesirable action, because gypsum plaster must be elastic and uniform. Lumps are not allowed.
Before kneading, it is recommended to sift the dry mass through a sieve, and then add water to it. This way you will remove lumps and add looseness to the gypsum plaster mixture.
